 Stack on FreeBSD 10.1")
Introduction
Nginx, MySQL, and PHP can be combined together easily as a powerful solution for serving dynamic content on the web. These three pieces of software can be installed and configured on a FreeBSD machine to create what is known as a FEMP stack.
In this guide, we will demonstrate how to install a FEMP stack on a FreeBSD 10.1 server. We will be installing the software using packages in order to get up and running more quickly. These packages provide reasonable defaults that work well for most servers.
Note: As of July 1, 2022, DigitalOcean no longer supports the creation of new FreeBSD Droplets through the Control Panel or API. However, you can still spin up FreeBSD Droplets using a custom image. Learn how to import a custom image to DigitalOcean by following our product documentation.
Install the Components
To begin, we will install all of the software we need using FreeBSD packages system. The “install” command will update our local copy of the available packages and then install the packages we have requested:
sudo pkg install nginx mysql56-server php56 php56-mysql
This will download and install an Nginx web server to serve our content, a MySQL database server used to store information, and the PHP processing language to process dynamic content.
Once the installation is complete, make sure to run the rehash command if you are running the default tcsh shell. This makes the shell aware of the new applications you installed:
rehash
When you are finished, you can move on to begin enabling and configuring your components.
Enable All of the Services
In the last section, we downloaded three separate services that will need to run on our server.
In order for FreeBSD to start these as conventional services, we need to tell FreeBSD that we want to enable them. This will allow us to handle them as services instead of one-time applications and it will also configure FreeBSD to automatically start them at boot.
First, we need to know the correct rc parameter to set for each service. The service scripts, which are located in the /usr/local/etc/rc.d directory, define the parameter that should be used to enable each server using the rcvar variable. We can see what each service’s rcvar is set to by typing:
grep rcvar /usr/local/etc/rc.d/*
You should get a listing like this:
/usr/local/etc/rc.d/avahi-daemon:rcvar=avahi_daemon_enable
/usr/local/etc/rc.d/avahi-dnsconfd:rcvar=avahi_dnsconfd_enable
/usr/local/etc/rc.d/dbus:rcvar=dbus_enable
/usr/local/etc/rc.d/mysql-server:rcvar=mysql_enable
/usr/local/etc/rc.d/nginx:rcvar=nginx_enable
/usr/local/etc/rc.d/php-fpm:rcvar=php_fpm_enable
/usr/local/etc/rc.d/rsyncd:rcvar=rsyncd_enable
As you can see, this allows us to easily output the parameter that we need to set for each of our services. The name of the script itself (the last component of the path until the colon character) is also notable as it tells us the actual name that FreeBSD uses for the service.
To enable these services, we will edit the /etc/rc.conf file with sudo privileges:
sudo vi /etc/rc.conf
Inside, we will add a line for each of the services that we wish to start. We can use the rcvar parameter we discovered for each service and set it to “YES” to enable each one:
mysql_enable="YES"
nginx_enable="YES"
php_fpm_enable="YES"
Save and close the file when you are finished.
Configure PHP
Next, we will configure our PHP-FPM service, which will be responsible for processing PHP requests sent from our web server.
To start, change to the /usr/local/etc directory, where configuration files for our optional programs are stored:
cd /usr/local/etc
There are a number of PHP configuration files in this directory that we will want to modify. We will start with the PHP-FPM configuration file itself. Open this with sudo privileges:
sudo vi php-fpm.conf
Inside, we want to adjust a few different options. First, we want to configure PHP-FPM to use a Unix socket instead of a network port for communication. This is more secure for services communicating within a single server.
Find the line that looks like this:
listen = 127.0.0.1:9000
Change this to use a socket within the /var/run directory:
listen = /var/run/php-fpm.sock
Next, we will configure the owner, group, and permissions set of the socket that will be created. There is a commented-out group of options that handle this configuration that looks like this:
;listen.owner = www
;listen.group = www
;listen.mode = 0660
Enable these by removing the comment marker at the beginning:
listen.owner = www
listen.group = www
listen.mode = 0660
Save and close the file when you are finished.
Next, we need to create a php.ini file that will configure the general behavior of PHP. Two sample files were included that we can choose to copy to the php.ini file that PHP reads.
The php.ini-production file will be closer to what we need, so we will use that one. Copy the production version over to the file PHP checks for:
sudo cp php.ini-production php.ini
Open the file for editing with sudo privileges:
sudo vi php.ini
Inside, we need to find a section that configures the cgi.fix_pathinfo behavior. It will be commented out and set to “1” by default. We need to uncomment this and set it to “0”. This will prevent PHP from trying to execute parts of the path if the file that was passed in to process is not found. This could be used by malicious users to execute arbitrary code if we do not prevent this behavior.
Uncomment the cig.fix_pathinfo line and set it to “0”:
cgi.fix_pathinfo=0
Save and close the file when you are finished.
Now that we have PHP-FPM completely configured, we can start the service by typing:
sudo service php-fpm start
We can now move on to configuring our MySQL instance.
Configure MySQL
To get started configuring MySQL, we need to start the MySQL service:
sudo service mysql-server start
The first time you run this command, it will create the required directory structure in the filesystem and install the database files it needs. It will then start the MySQL server process.
After the service is started, we need to secure the installation. This can be accomplished through a script called mysql_secure_installation. Run this with sudo privileges to lock down some insecure defaults:
sudo mysql_secure_installation
. . .

Enter current password for root (enter for none):
The script will start by asking you for the current password for the MySQL root account. Since we have not set a password for this user yet, we can press “ENTER” to bypass this prompt.
Set root password? [Y/n]
Next, it will ask you if you would like to set the MySQL root account’s password. Press “ENTER” to accept this suggestion. Choose and confirm an administrative password.
The script will then proceed with additional suggestions that will help reverse some insecure conditions in the default MySQL installation. Simply press “ENTER” through all of these prompts to complete all of the suggested actions.
We can restart the MySQL service to ensure that our instance immediately implements the security changes:
sudo service mysql-server restart
Our MySQL instance is now up and running how we want it, so we can move on.
Configure Nginx
Our next task is to set up Nginx. To get started, we need to start the web server:
sudo service nginx start
Now, we can begin configuring Nginx by going to the nginx directory in the /usr/local/etc directory:
cd /usr/local/etc/nginx
Here, we need to open the main Nginx configuration file with sudo privileges:
sudo vi nginx.conf
Inside, we can begin to make changes so that our Nginx instance can work with our other components.
To start, uncomment and modify the user directive at the top of the file. We need the web server to operate as the www user, since that is what our PHP-FPM instance is looking for:
user www;
We should also set the worker_processes to the number of CPUs or cores that your system has. (To find out how many CPUs your server has, type sysctl hw.ncpu from the command line):
worker_processes 2;
Next, we will set the error verbosity and location using the error_log directive. We will log to a location at /var/log/nginx/error.log at the info log level:
error_log /var/log/nginx/error.log info;
In the http block, we will also set up an access log. This will be located at /var/log/nginx/access.log:
access_log /var/log/nginx/access.log;
In the server block, we need to modify the server_name directive to use the domain name or IP address of our server. We can make our server respond to the www hostname as well by adding that after the main domain:
server {
    listen          80;
    server_name     example.com www.example.com;

    . . .
Configure the root and index directives in the main server block. Our document root will be /usr/local/www/nginx and our index directive should attempt to serve index.php files before falling back on index.html or index.htm files.
Since we defined these directives within the server context, we do not need them within the location / block. In this block, we will instead configure a try_files directive to try to serve user requests as a file and then a directory before falling back with a 404 error:
server {

    . . .

    root /usr/local/www/nginx;
    index index.php index.html index.htm;

    location / {
        try_files $uri $uri/ =404;
    }

    . . .
Finally, we need to configure a location block that will handle PHP files. This block will match any request ending in .php. It will only process the files themselves, throwing back a 404 error if the file cannot be found.
We will use the socket we configured in the php-fpm.conf file earlier. We will configure some other FastCGI proxying options as well, partly by reading in parameters from the fastcgi_params file. We need to explicitly set the SCRIPT_FILENAME parameter so that PHP knows what files to execute:
server {

    . . .

    location ~ \.php$ {
        try_files $uri =404;
        fastcgi_split_path_info ^(.+\.php)(/.+)$;
        fastcgi_pass unix:/var/run/php-fpm.sock;
        fastcgi_index index.php;
        fastcgi_param SCRIPT_FILENAME $request_filename;
        include fastcgi_params;
    }
All together, with comments removed, the file should look something like this:
user  www;
worker_processes  2;
error_log /var/log/nginx/error.log info;

events {
    worker_connections  1024;
}

http {
    include       mime.types;
    default_type  application/octet-stream;

    access_log /var/log/nginx/access.log;

    sendfile        on;
    keepalive_timeout  65;

    server {
        listen       80;
        server_name  example.com www.example.com;
        root /usr/local/www/nginx;
        index index.php index.html index.htm;

        location / {
            try_files $uri $uri/ =404;
        }

        error_page      500 502 503 504  /50x.html;
        location = /50x.html {
            root /usr/local/www/nginx-dist;
        }

        location ~ \.php$ {
                try_files $uri =404;
                fastcgi_split_path_info ^(.+\.php)(/.+)$;
                fastcgi_pass unix:/var/run/php-fpm.sock;
                fastcgi_index index.php;
                fastcgi_param SCRIPT_FILENAME $request_filename;
                include fastcgi_params;
        }
    }
}
Save and close the file when you are finished.
We now need to create the log directory and files that we referenced in our file. First, create the /var/log/nginx directory:
sudo mkdir -p /var/log/nginx
Next, we can create the empty log files:
sudo touch /var/log/nginx/access.log
sudo touch /var/log/nginx/error.log
Now, we are ready to configure our document root. We have configured our root to be /usr/local/www/nginx, but currently, this is a symbolic link to the /usr/local/www/nginx-dist directory which could be updated by a package operation in the future.
We should destroy the link and create the unlinked directory again:
sudo rm /usr/local/www/nginx
sudo mkdir /usr/local/www/nginx
Since we still need to test our web server, we can copy the index.html file into our new web root:
sudo cp /usr/local/www/nginx-dist/index.html /usr/local/www/nginx
While we are here, we should also create a temporary info.php file that we can use to test Nginx’s ability to pass requests to PHP-FPM. Create the file within the document root with sudo privileges:
sudo vi /usr/local/www/nginx/info.php
In the file, type the following contents. This will generate an HTML page with information about our PHP configuration:
<?php phpinfo(); ?>
Save and close the file when you are finished.
We are now ready to restart Nginx to take advantage of our new configuration. First, test your configuration file for syntax errors by typing:
sudo nginx -t
If your configuration file has no detectable syntax errors, you should see something that looks like this:
nginx: the configuration file /usr/local/etc/nginx/nginx.conf syntax is ok
nginx: configuration file /usr/local/etc/nginx/nginx.conf test is successful
If the above command returns with errors, re-open the Nginx configuration file to the location where the error was found and try to fix the problem.
When your configuration checks out correctly, we can restart Nginx:
sudo service nginx restart
Testing the Results
Our web stack is now complete. All that we have left to do is test it out.
In your web browser, begin by going to your base domain name or the server’s IP address:
http://example.com
You should see the contents of the index.html file we copied over. It will look something like this:
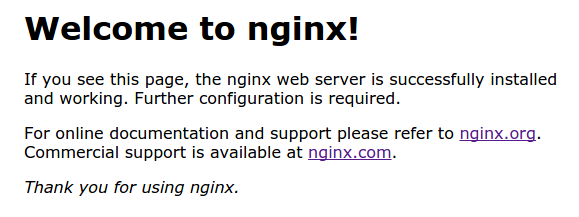
This indicates that Nginx is up and running and capable of serving simple HTML pages.
Next, we should check out the info.php file we created. In your browser, visit your domain name or server IP address, followed by /info.php:
http://example.com/info.php
You should see a generated PHP information page that looks something like this:
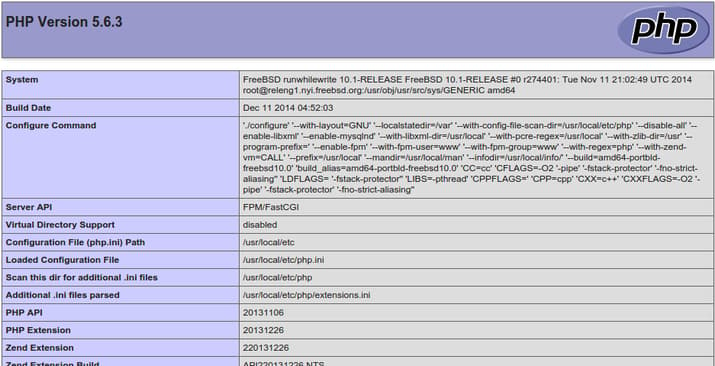
If you can see this page, you have successfully configured a FEMP stack on your FreeBSD server.
After testing your configuration, it is a good idea to remove the info.php file from your document root since it can give away some sensitive information about your installation:
sudo rm /usr/local/www/nginx/info.php
You can always recreate this file easily at a later time.
Conclusion
You should now have a fully functional web server powered by Nginx which can process dynamic PHP content and use MySQL to store data. This configuration can be used as a base for a variety of other configurations and web applications.
Thanks for learning with the DigitalOcean Community. Check out our offerings for compute, storage, networking, and managed databases.
About the author
Former Senior Technical Writer at DigitalOcean, specializing in DevOps topics across multiple Linux distributions, including Ubuntu 18.04, 20.04, 22.04, as well as Debian 10 and 11.
Still looking for an answer?
This textbox defaults to using Markdown to format your answer.
You can type !ref in this text area to quickly search our full set of tutorials, documentation & marketplace offerings and insert the link!
Great tutorial, i finish this but one question… how to install PhpMyAdmin on this configuration?
Thank you for the tuto, what i can’t understand why (what-for) “www.example.com” is used for here in nginx.conf, because I get “Server not found” if i try to access index.html or info.php, but everything works fine if replace “www.example.com” by “localhost” or “127.0.0.1”
I found this to be a useful resource to set up ssl: http://www.bsdnow.tv/tutorials/nginx .
Although the further configuration of nginx is more or less OS-agnostic I liked the clear explanation and the fact that it’s written by BSD users.
Thanks for the tutorial. I am new to running my own web server, this would have taken me much longer if I had to do it myself.
For all having problems with initial pkg use (nothing found, can’t install anything). There’s no info in this or other of the Digitalocean’s tutorial, but you should update with these commands:
pkg update -f
pkg check -Ba
In order to get the latest repo listings.
Great tutorial. One thing that I found to be helpful is to use
grep rcvar /usr/local/etc/rc.d/* | cut -d"=" -f2
You can paste the output directly to the end of /etc/rc.conf, delete the lines that you don’t need, and append ="YES" to the end of each line.
Thanks for this great guide! I am new to BSD (I do have some linux experience) but overall new to web server admin. I have followed your guide but clearly did something wrong, because when I try to load the php.info that I created I get a 404 error.
Is there a log or some other command that might give more details so that I can narrow this down? Also, can you recommend any control panels (I am used to using vesta) that you could recommend?
Thanks Rodolfo
 This work is licensed under a Creative Commons Attribution-NonCommercial- ShareAlike 4.0 International License.
Become a contributor for community
Get paid to write technical tutorials and select a tech-focused charity to receive a matching donation.

DigitalOcean Documentation
Full documentation for every DigitalOcean product.

Resources for startups and AI-native businesses
The Wave has everything you need to know about building a business, from raising funding to marketing your product.
The developer cloud
Scale up as you grow — whether you're running one virtual machine or ten thousand.

Start building today
From GPU-powered inference and Kubernetes to managed databases and storage, get everything you need to build, scale, and deploy intelligent applications.
