
Introduction
GoCD is a powerful continuous integration and delivery platform designed to automate testing and release processes. With many advanced features like the ability to compare builds, visualize complex workflows, and automate build version tracking, GoCD is a flexible tool that can help teams deliver well-tested software to production environments.
In this guide, we will demonstrate how to set up a GoCD server on Ubuntu 16.04. We will install the server and an agent to complete CI/CD work using packages provided by the project. Afterwards, we will configure authentication and modify some basic options to set up our server.
Prerequisites
Based on recommendations from the GoCD project, you will need an Ubuntu 16.04 server with at least 2G of RAM and 2 CPU cores to complete this guide. Additionally, in order to handle build artifacts without corrupting data, your server will need a dedicated partition or disk to serve as the artifact storage location. We will use /mnt/artifact-storage as the mount point for artifact storage in this guide:
- If you are using DigitalOcean as your server host, you can use a block storage volume as the artifact storage location. Follow this guide to learn how to provision, format, and mount a DigitalOcean block storage volume.
- If you are not using DigitalOcean, follow this guide to learn how to partition, format, and mount devices on generic hosts.
Once your server is configured with additional storage mounted at /mnt/artifact-storage, follow our Ubuntu 16.04 initial server setup guide to set up a non-root user with sudo privileges and enable a basic firewall. When you have completed these steps, continue on with this guide.
Installing the GoCD Server and Agent
We will begin by downloading and installing the server and agent packages from a dedicated repository provided by the GoCD project.
First, we add the new repository definition to the APT sources configuration directory by typing:
- echo "deb https://download.gocd.org /" | sudo tee /etc/apt/sources.list.d/gocd.list
We also need to add the GoCD GPG key to APT so that the signatures on the GoCD packages can be verified. You can download the key and add it to your system by typing:
- curl https://download.gocd.org/GOCD-GPG-KEY.asc | sudo apt-key add -
Now we can update the local package index to pull down a list of new packages and install the software. GoCD requires Java 8 to run, so we will install the default-jre package along with the CI server and agent. We will also install the apache2-utils package, which we will use to generate an authentication file:
- sudo apt-get update
- sudo apt-get install default-jre go-server go-agent apache2-utils
The dependencies and the continuous integration software will be downloaded and installed on the server.
Preparing GoCD for First Use
Before we start the GoCD server, we will complete a few tasks on the command line to get ready.
First, we need to make sure that the GoCD process will have access to the artifacts mount point so that it can store assets there. The CI server will run as the go user and group, so we can assign ownership of the /mnt/artifact-storage mount point accordingly:
- sudo chown -R go:go /mnt/artifact-storage
Next, we will create and populate a password file for authentication information. GoCD’s file-based authentication plugin uses the user authentication format created by the htpasswd utility.
The -B option in the command below selects the bcrypt encryption algorithm. The -c option tells htpasswd to create a new authentication file at the path specified. The command ends with the username that we want to create a password for. This username is entirely separate from the operating system’s users, so you can use whatever you’d like for this value:
- sudo htpasswd -B -c /etc/go/authentication sammy
You will be prompted to enter and confirm a password for the new user. The username and an encrypted version of the password will be written to the file:
OutputNew password:
Re-type new password:
Adding password for user sammy
Note: You can add multiple username and password combinations to the file to allow additional logins. However, after the first user is added, you will need to call the htpasswd command without the -c option:
- sudo htpasswd -B /etc/go/authentication next_user
Using the -c option after the first user will cause htpasswd to replace all of the existing credentials instead of adding to them.
Once you have an authentication file, we can start the GoCD server and agent processes. This can take awhile to complete:
- sudo systemctl start go-server go-agent
Even after the command exits, the process will not be fully up and running. First, check that the services were started successfully:
- sudo systemctl status go-*
If your output looks similar to this, both processes were initialized by systemd:
Output● go-agent.service - LSB: Go Agent
   Loaded: loaded (/etc/init.d/go-agent; bad; vendor preset: enabled)
   Active: active (exited) since Thu 2017-07-27 19:39:18 UTC; 1min 36s ago
     Docs: man:systemd-sysv-generator(8)
  Process: 8911 ExecStart=/etc/init.d/go-agent start (code=exited, status=0/SUCCESS)

. . .
Jul 27 19:39:18 go5 systemd[1]: Started LSB: Go Agent.

● go-server.service - LSB: Go Server
   Loaded: loaded (/etc/init.d/go-server; bad; vendor preset: enabled)
   Active: active (exited) since Thu 2017-07-27 19:39:33 UTC; 1min 21s ago
     Docs: man:systemd-sysv-generator(8)
  Process: 8867 ExecStop=/etc/init.d/go-server stop (code=exited, status=0/SUCCESS)
  Process: 8907 ExecStart=/etc/init.d/go-server start (code=exited, status=0/SUCCESS)

. . .
Jul 27 19:39:33 go5 systemd[1]: Started LSB: Go Server.
Next, we should wait for the service to bind to ports 8153 and 8154. GoCD listens on the first port for HTTP traffic and the second for HTTPS-protected traffic. While the processes have completed, they may not have started accepting web traffic yet.
Keep an eye on which ports are currently being listened on by typing:
- sudo watch netstat -plnt
This will check the listening TCP ports and update the screen every 2 seconds. When GoCD starts listening to ports 8153 and 8154, the screen should look like this:
OutputEvery 2.0s: netstat -plnt                                                    Thu Jul 27 20:16:20 2017

Active Internet connections (only servers)
Proto Recv-Q Send-Q Local Address           Foreign Address         State       PID/Program name
tcp        0      0 0.0.0.0:22              0.0.0.0:*               LISTEN      1736/sshd
tcp6       0      0 :::22                   :::*                    LISTEN      1736/sshd
tcp6       0      0 :::8153                 :::*                    LISTEN      8942/java
tcp6       0      0 :::8154                 :::*                    LISTEN      8942/java
Once those listening ports are displayed, hit CTRL-C to exit the process monitor.
Now that the software is completely up and running, we can open GoCD’s HTTPS port (port 8154) in the UFW firewall. We don’t need to open the HTTP port because we want all connections to be secure:
- sudo ufw allow 8154
Warning: Once port 8154 is opened, the GoCD web interface will be accessible on all interfaces. While we’ve prepared to lock down the interface by creating the /etc/go/authentication file with the htpasswd command, password authentication is not currently enabled in GoCD. This is the first item we will configure in the next section and you should complete that step as soon as possible to secure your CI/CD server.
Our server is now up and running. We will connect to the web interface to continue our configuration.
Setting Up Password Authentication
With the GoCD server component initialized and listening for connections, and our firewall allowing connections, we can connect to the service in a web browser.
In your browser, specify the https:// protocol followed by your server’s domain name or IP address and ending with the :8154 port specification:
https://server_domain_or_IP:8154
Your browser will likely display a warning indicating that the service’s SSL certificate was not signed by a trusted certificate authority:
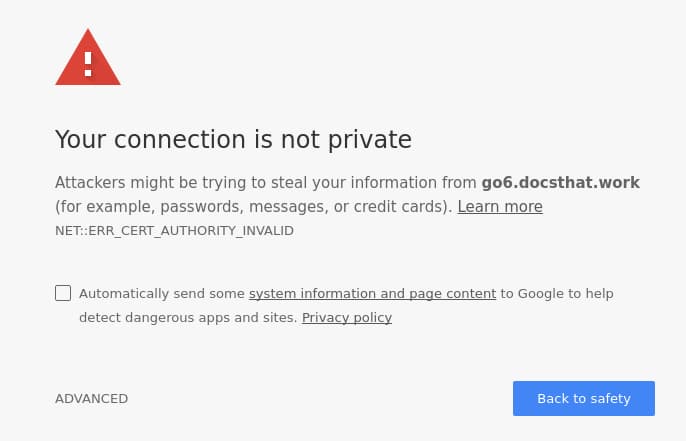
Since GoCD self-signs its certificates, this is expected behavior. Click on ADVANCED or whatever similar option is available in your browser and then choose to proceed with the request anyways.
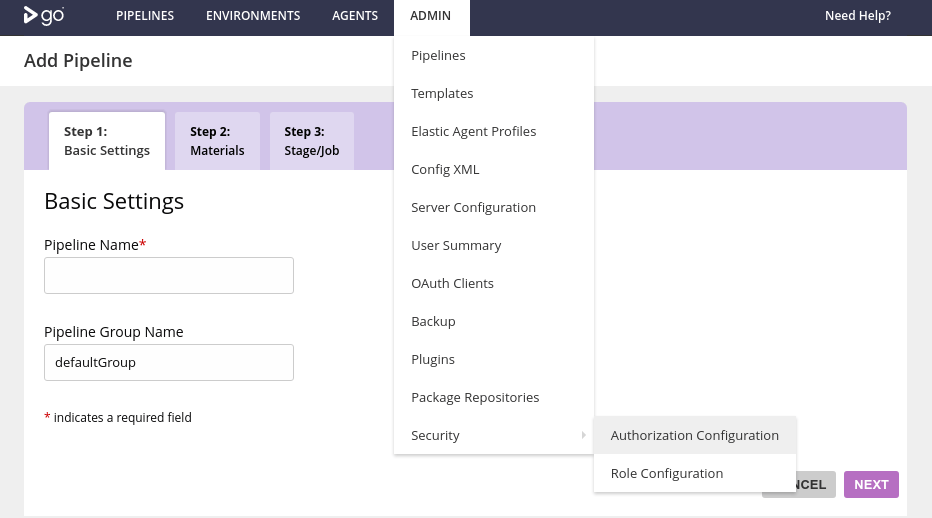
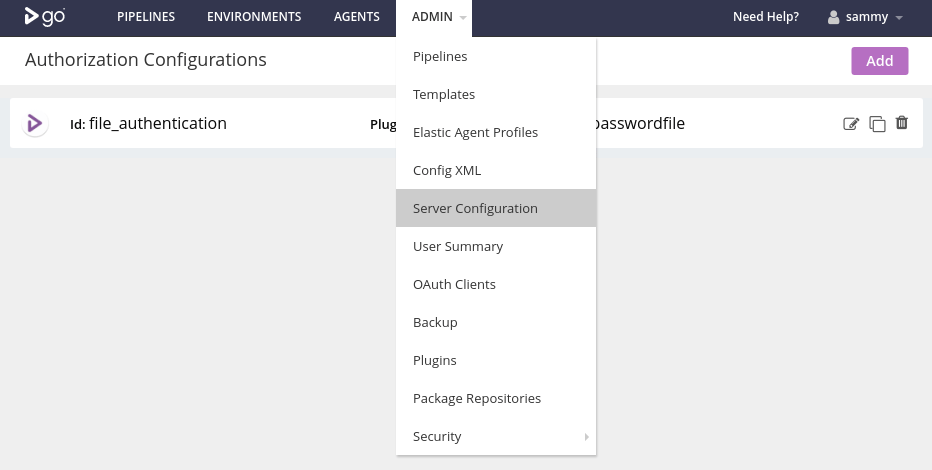
When you connect with GoCD initially, you will be taken to the pipeline definition screen. Rather than define a pipeline right away, we should prioritize enabling authentication using the password file we created earlier with htpasswd. Click ADMIN in the top navigation menu, and then in the Security submenu select Authorization Configuration:
On the page that follows, click the Add button in the upper-right corner. A screen will appear where you can fill out the details of your authentication provider.
First, enter an arbitrary name for the new authorization method in the Id field. Leave the Plugin Id selection set to “Password File Authentication Plugin for GoCD”. Finally, in the Password file path box, type /etc/go/authentication, the file we created with htpasswd. When you are finished, click Check connection to make sure that GoCD can access the file correctly:
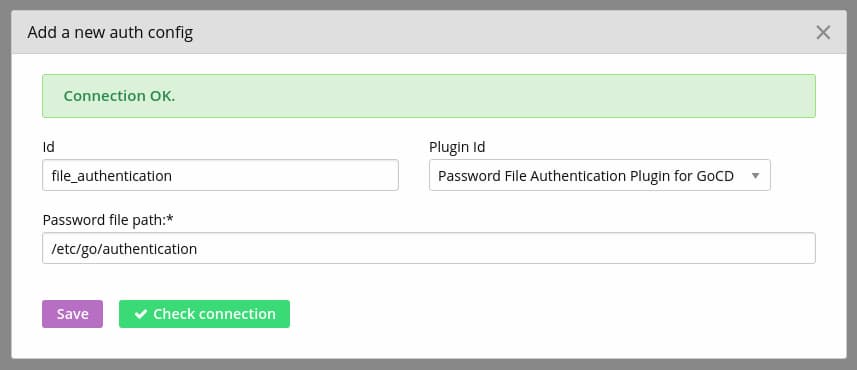
If GoCD displays a “Connection OK” message, click Save to implement the new authentication.
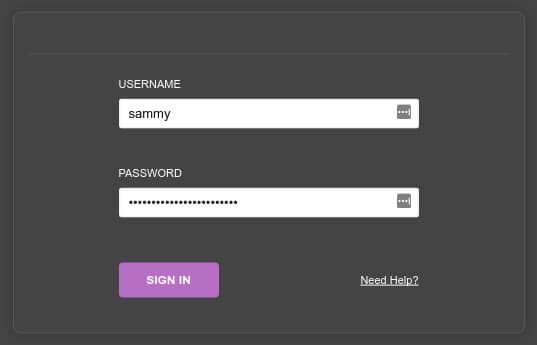
You will be asked to authenticate using the new scheme. This may be presented as a standard browser login box the first time or you may be redirected to the GoCD login page. Log in using the username and password you configured:
Your GoCD installation is now password protected to prevent unauthorized access.
Setting The Site URL and Artifacts Location
Now that the web interface is properly secured, we can finish our CI server’s configuration through the web UI.
After logging back into the web interface, click ADMIN in the top menu and select Server Configuration from the drop down menu:
You will be taken to the main configuration page where we can adjust some settings.
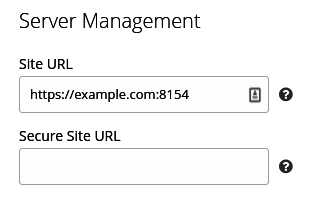
The first item we should look at is the Site URL within the Server Management section of the page. GoCD provides two settings that determine the CI server URL: the “Site URL” and the “Secure Site URL”. The “Site URL” is the default site URL used in most circumstances. The “Secure Site URL” is used when the regular “Site URL” is configured to use HTTP and GoCD needs to transmit sensitive data. If “Site URL” uses an HTTPS address, all connections are encrypted and “Secure Site URL” does not need to be set.
Since we’ve only allowed access to the HTTPS port through the firewall, we will fill out Site URL with the https:// protocol specifier, followed by our server’s domain or IP address, followed by :8154. We will leave Secure Site URL blank since our normal URL is already secure:
Next, scroll down to the Pipeline Management section of the page. Set the Artifacts Directory Location to the /mnt/artifact-storage mount point we created earlier. You can optionally adjust the artifact deletion policy if you’d like GoCD to automatically manage artifact retention. Leave it as “Never” to manage artifacts manually:
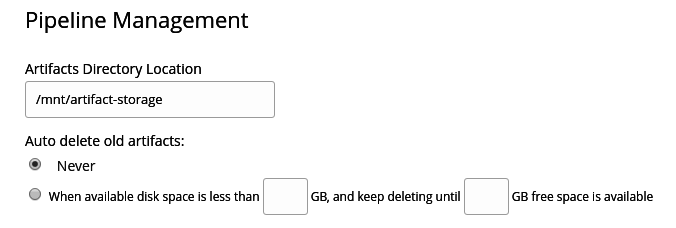
When you are finished, click the SAVE button at the bottom of the page to implement your changes.
You may notice a warning in the top menu bar:

Clicking on the warning indicator will show you the full warning message which tells us that GoCD will not use the /mnt/artifact-storage location until it is restarted.
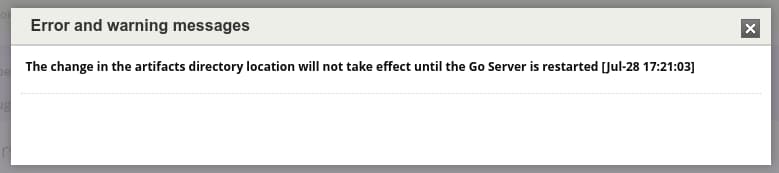
Click on the X to exit the warning message.
Before we restart the server, let’s check that our agent was successfully registered with the server. Click on the AGENTS item in the top menu. You will be taken to the list of agents:
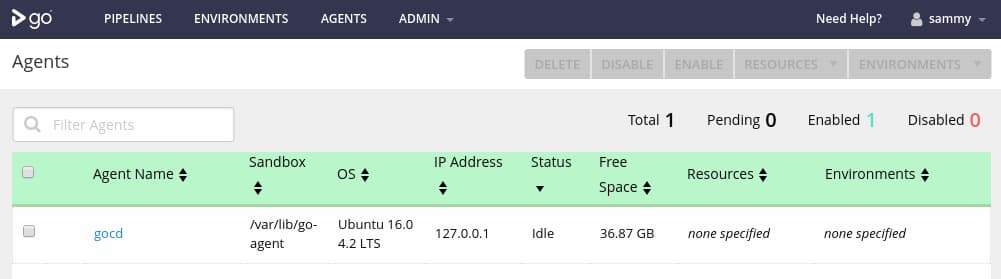
The agent process that we started has successfully registered with the server and its status is set to “Idle”. This means that the agent is enabled, but no work is assigned, which is what we expect.
Now that we’ve confirmed our agent is present, we can restart the GoCD server process to complete the artifact location change. Back on the command line, restart the service by typing:
- sudo systemctl restart go-server
Once the service restarts and resumes listening for connections on port 8154, you will be able to reconnect to the web UI.
Conclusion
In this guide, we’ve installed and configured a GoCD server and agent running on Ubuntu 16.04. We set up a dedicated artifact storage space on a separate partition to handle generated build assets and configured authentication to secure the web interface.
Once GoCD is up and running, a good next step is to secure your installation with a trusted SSL certificate. Follow our guide on how to configure GoCD with Let’s Encrypt SSL certificates to learn how to set this up.
Thanks for learning with the DigitalOcean Community. Check out our offerings for compute, storage, networking, and managed databases.
About the author
Former Senior Technical Writer at DigitalOcean, specializing in DevOps topics across multiple Linux distributions, including Ubuntu 18.04, 20.04, 22.04, as well as Debian 10 and 11.
Still looking for an answer?
This textbox defaults to using Markdown to format your answer.
You can type !ref in this text area to quickly search our full set of tutorials, documentation & marketplace offerings and insert the link!
Fantastic tutorial! Unfortunately, when I did the restart at the end everything stopped working. The ports aren’t open, the server stops when I try to start it, and I get “site can’t be reached” when I try to go to the web UI. Any ideas what went wrong?
Yep the tutorial is great. So much has changed though since then. Could we get an updated tutorial? For example GOCD no longer exposes the port 8154.
 This work is licensed under a Creative Commons Attribution-NonCommercial- ShareAlike 4.0 International License.
Become a contributor for community
Get paid to write technical tutorials and select a tech-focused charity to receive a matching donation.

DigitalOcean Documentation
Full documentation for every DigitalOcean product.

Resources for startups and AI-native businesses
The Wave has everything you need to know about building a business, from raising funding to marketing your product.
The developer cloud
Scale up as you grow — whether you're running one virtual machine or ten thousand.

Start building today
From GPU-powered inference and Kubernetes to managed databases and storage, get everything you need to build, scale, and deploy intelligent applications.
