
Introduction
Lightweight Directory Access Protocol (LDAP) is a standard protocol designed to manage and access hierarchical directory information over a network. It can be used to store any kind of information, though it is most often used as a centralized authentication system or for corporate email and phone directories.
In this guide, we will discuss how to install and configure the OpenLDAP server on Ubuntu 16.04. We will then install phpLDAPadmin, a web interface for viewing and manipulating LDAP information. We will secure the web interface and the LDAP service with SSL certificates from Let’s Encrypt, a provider of free and automated certificates.
Prerequisites
Before starting this tutorial, you should have an Ubuntu 16.04 server set up with Apache and PHP. You can follow our tutorial How To Install Linux, Apache, MySQL, PHP (LAMP) stack on Ubuntu 16.04, skipping Step 2 as we will not need the MySQL database server.
Additionally, since we will be entering passwords into the web interface, we should secure Apache with SSL encryption. Read How To Secure Apache with Let’s Encrypt on Ubuntu 16.04 to download and configure free SSL certificates. You will need a domain name to complete this step. We will use these same certificates to provide secure LDAP connections as well.
Note: the Let’s Encrypt tutorial assumes that your server is accessible to the public internet. If that’s not the case, you’ll have to use a different certificate provider or perhaps your organization’s own certificate authority. Either way, you should be able to complete the tutorial with minimal changes, mostly regarding the paths or filenames of the certificates.
Step 1 — Installing and Configuring the LDAP Server
Our first step is to install the LDAP server and some associated utilities. Luckily, the packages we need are all available in Ubuntu’s default repositories.
Log into your server. Since this is our first time using apt-get in this session, we’ll refresh our local package index, then install the packages we want:
- sudo apt-get update
- sudo apt-get install slapd ldap-utils
During the installation, you will be asked to select and confirm an administrator password for LDAP. You can enter anything here, because you’ll have the opportunity to update it in just a moment.
Even though we just installed the package, we’re going to go right ahead and reconfigure it. The slapd package has the ability to ask a lot of important configuration questions, but by default they are skipped over in the installation process. We gain access to all of the prompts by telling our system to reconfigure the package:
- sudo dpkg-reconfigure slapd
There are quite a few new questions to answer in this process. We will be accepting most of the defaults. Let’s go through the questions:
- Omit OpenLDAP server configuration? No
- DNS domain name?
- This option will determine the base structure of your directory path. Read the message to understand exactly how this will be implemented. You can actually select whatever value you’d like, even if you don’t own the actual domain. However, this tutorial assumes you have a proper domain name for the server, so you should use that. We’ll use example.com throughout the tutorial.
- Organization name?
- For this guide, we will be using example as the name of our organization. You may choose anything you feel is appropriate.
- Administrator password? enter a secure password twice
- Database backend? MDB
- Remove the database when slapd is purged? No
- Move old database? Yes
- Allow LDAPv2 protocol? No
At this point, your LDAP server is configured and running. Open up the LDAP port on your firewall so external clients can connect:
- sudo ufw allow ldap
Let’s test our LDAP connection with ldapwhoami, which should return the username we’re connected as:
- ldapwhoami -H ldap:// -x
Outputanonymous
anonymous is the result we’re expecting, since we ran ldapwhoami without logging in to the LDAP server. This means the server is running and answering queries. Next we’ll set up a web interface to manage LDAP data.
Step 2 — Installing and Configuring the phpLDAPadmin Web Interface
Although it is very possible to administer LDAP through the command line, most users will find it easier to use a web interface. We’re going to install phpLDAPadmin, a PHP application which provides this functionality.
The Ubuntu repositories contain a phpLDAPadmin package. You can install it with apt-get:
- sudo apt-get install phpldapadmin
This will install the application, enable the necessary Apache configurations, and reload Apache.
The web server is now configured to serve the application, but we need to make some additional changes. We need to configure phpLDAPadmin to use our domain, and to not autofill the LDAP login information.
Begin by opening the main configuration file with root privileges in your text editor:
- sudo nano /etc/phpldapadmin/config.php
Look for the line that starts with $servers->setValue('server','name'. In nano you can search for a string by typing CTRL-W, then the string, then ENTER. Your cursor will be placed on the correct line.
This line is a display name for your LDAP server, which the web interface uses for headers and messages about the server. Choose anything appropriate here:
$servers->setValue('server','name','Example LDAP');
Next, move down to the $servers->setValue('server','base' line. This config tells phpLDAPadmin what the root of the LDAP hierarchy is. This is based on the value we typed in when reconfiguring the slapd package. In our example we selected example.com and we need to translate this into LDAP syntax by putting each domain component (everything not a dot) into a dc= notation:
$servers->setValue('server','base', array('dc=example,dc=com'));
Now find the login bind_id configuration line and comment it out with a # at the beginning of the line:
#$servers->setValue('login','bind_id','cn=admin,dc=example,dc=com');
This option pre-populates the admin login details in the web interface. This is information we shouldn’t share if our phpLDAPadmin page is publicly accessible.
The last thing that we need to adjust is a setting that controls the visibility of some phpLDAPadmin warning messages. By default the application will show quite a few warning messages about template files. These have no impact on our current use of the software. We can hide them by searching for the hide_template_warning parameter, uncommenting the line that contains it, and setting it to true:
$config->custom->appearance['hide_template_warning'] = true;
This is the last thing that we need to adjust. Save and close the file to finish. We don’t need to restart anything for the changes to take effect.
Next we’ll log into phpLDAPadmin.
Step 3 — Logging into the phpLDAPadmin Web Interface
Having made the necessary configuration changes to phpLDAPadmin, we can now begin to use it. Navigate to the application in your web browser. Be sure to substitute your domain for the highlighted area below:
https://example.com/phpldapadmin
The phpLDAPadmin landing page will load. Click on the login link in the left-hand menu on the page. A login form will be presented:
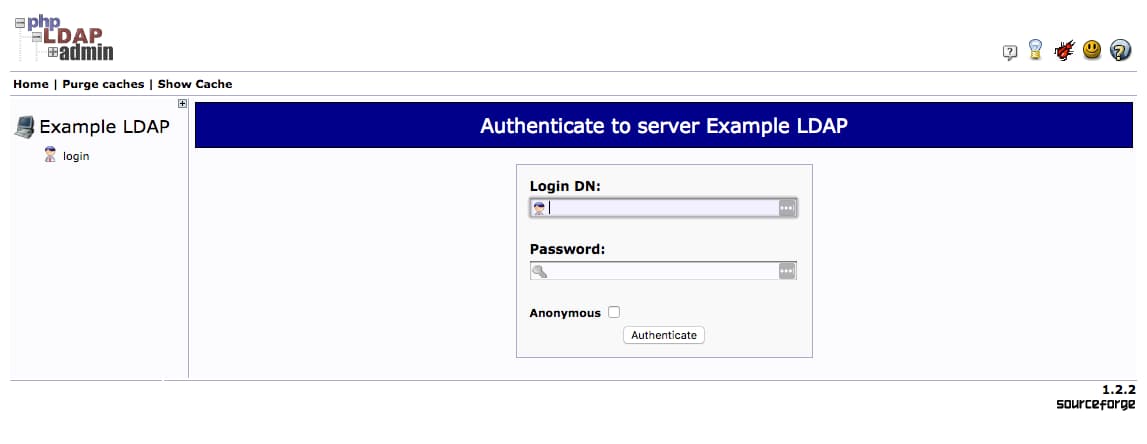
The Login DN is the username that you will be using. It contains the account name as a cn= section, and the domain name you selected for the server broken into dc= sections as described in previous steps. The default admin account that we set up during install is called admin, so for our example we would type in the following:
cn=admin,dc=example,dc=com
After entering the appropriate string for your domain, type in the admin password you created during configuration, then click the Authenticate button.
You will be taken to the main interface:

At this point, you are logged into the phpLDAPadmin interface. You have the ability to add users, organizational units, groups, and relationships.
LDAP is flexible in how you can structure your data and directory hierarchies. You can create whatever kind of structure you’d like and also create rules for how they interact.
Since this process is the same on Ubuntu 16.04 as it was on previous versions, you can follow the steps laid out in the Add Organizational Units, Groups, and Users section of the LDAP installation article for Ubuntu 12.04.
Those steps will work well on this installation of phpLDAPadmin, so follow along to get some practice working with the interface and learning how to structure your data.
Now that we’ve logged in and familiarized ourselves with the web interface, let’s take a moment to provide more security to our LDAP server.
Step 4 – Configuring StartTLS LDAP Encryption
Although we’ve encrypted our web interface, external LDAP clients are still connecting to the server and passing information around in plain text. Let’s use our Let’s Encrypt SSL certificates to add encryption to our LDAP server.
Copying the Let’s Encrypt Certificates
Because the slapd daemon runs as the user openldap, and Let’s Encrypt certificates can only be read by the root user, we’ll need make a few adjustments to allow slapd access to the certificates. We’ll create a short script that will copy the certificates to /etc/ssl/, the standard system directory for SSL certificates and keys. The reason we’re making a script to do this, instead of just entering the commands manually, is that we’ll need to repeat this process automatically whenever the Let’s Encrypt certificates are renewed. We’ll update the certbot cron job later to enable this.
First, open a new text file for the shell script:
- sudo nano /usr/local/bin/renew.sh
This will open a blank text file. Paste in the following script. Be sure to update the SITE=example.com portion to reflect where your Let’s Encrypt certificates are stored. You can find the correct value by listing out the certificate directory with sudo ls /etc/letsencrypt/live.
#!/bin/sh

SITE=example.com

# move to the correct let's encrypt directory
cd /etc/letsencrypt/live/$SITE

# copy the files
cp cert.pem /etc/ssl/certs/$SITE.cert.pem
cp fullchain.pem /etc/ssl/certs/$SITE.fullchain.pem
cp privkey.pem /etc/ssl/private/$SITE.privkey.pem

# adjust permissions of the private key
chown :ssl-cert /etc/ssl/private/$SITE.privkey.pem
chmod 640 /etc/ssl/private/$SITE.privkey.pem

# restart slapd to load new certificates
systemctl restart slapd
This script moves into the Let’s Encrypt certificate directory, copies files over to /etc/ssl, then updates the private key’s permissions to make it readable by the system’s ssl-cert group. It also restarts slapd, which will ensure that new certificates are loaded when this script is run from our certbot renewal cron job.
Save and close the file, then make it executable:
- sudo chmod u+x /usr/local/bin/renew.sh
Then run the script with sudo:
- sudo /usr/local/bin/renew.sh
Verify that the script worked by listing out the new files in /etc/ssl:
- sudo su -c 'ls -al /etc/ssl/{certs,private}/example.com*'
The sudo command above is a little different than normal. The su -c '. . .' portion wraps the whole ls command in a root shell before executing it. If we didn’t do this, the * wildcard filename expansion would run with your non-sudo user’s permissions, and it would fail because /etc/ssl/private is not readable by your user.
ls will print details about the three files. Verify that the ownership and permissions look correct:
Output-rw-r--r-- 1 root root     1793 May 31 13:58 /etc/ssl/certs/example.com.cert.pem
-rw-r--r-- 1 root root     3440 May 31 13:58 /etc/ssl/certs/example.com.fullchain.pem
-rw-r----- 1 root ssl-cert 1704 May 31 13:58 /etc/ssl/private/example.com.privkey.pem
Next we’ll automate this with certbot.
Updating the Certbot Renewal Cron Job
We need to update our certbot cron job to run this script whenever the certificates are updated:
- sudo crontab -e
You should already have a certbot renew line. Add the highlighted portion below:
15 3 * * * /usr/bin/certbot renew --quiet --renew-hook /usr/local/bin/renew.sh
Save and close the crontab. Now, whenever certbot renews the certificates, our script will be run to copy the files, adjust permissions, and restart the slapd server.
Configuring slapd to Offer Secure Connections
We need to add the openldap user to the ssl-cert group so slapd can read the private key:
- sudo usermod -aG ssl-cert openldap
Restart slapd so it picks up the new group:
- sudo systemctl restart slapd
Finally, we need to configure slapd to actually use these certificates and keys. To do this we put all of our config changes in an LDIF file — which stands for LDAP data interchange format — and then load the changes into our LDAP server with the ldapmodify command.
Open up a new LDIF file:
- cd ~
- nano ssl.ldif
This will open a blank file. Paste the following into the file, updating the filenames to reflect your domain:
dn: cn=config
changetype: modify
add: olcTLSCACertificateFile
olcTLSCACertificateFile: /etc/ssl/certs/example.com.fullchain.pem
-
add: olcTLSCertificateFile
olcTLSCertificateFile: /etc/ssl/certs/example.com.cert.pem
-
add: olcTLSCertificateKeyFile
olcTLSCertificateKeyFile: /etc/ssl/private/example.com.privkey.pem
Save and close the file, then apply the changes with ldapmodify:
- sudo ldapmodify -H ldapi:// -Y EXTERNAL -f ssl.ldif
OutputSASL/EXTERNAL authentication started
SASL username: gidNumber=0+uidNumber=0,cn=peercred,cn=external,cn=auth
SASL SSF: 0
modifying entry "cn=config"
We don’t need to reload slapd to load the new certificates, this happened automatically when we updated the config with ldapmodify. Run the ldapwhoami command one more time, to verify. This time we need to use the proper hostname and add the -ZZ option to force a secure connection:
- ldapwhoami -H ldap://example.com -x -ZZ
We need the full hostname when using a secure connection because the client will check to make sure that the hostname matches the hostname on the certificate. This prevents man-in-the-middle attacks where an attacker could intercept your connection and impersonate your server.
The ldapwhoami command should return anonymous, with no errors. We’ve successfully encrypted our LDAP connection.
Conclusion
In this tutorial we installed and configured the OpenLDAP slapd server, and the LDAP web interface phpLDAPadmin. We also set up encryption on both servers, and updated certbot to automatically handle slapd’s Let’s Encrypt certificate renewal process.
The system that we have set up is quite flexible and you will be able to design your own organizational schema and manage groups of resources as your needs demand. For further information on managing LDAP, including more command line tools and techniques, read our tutorial How To Manage and Use LDAP Servers with OpenLDAP Utilities. For more in-depth information about securing an LDAP server, including how to force all clients to use secure connections, read How To Encrypt OpenLDAP Connections Using STARTTLS.
Thanks for learning with the DigitalOcean Community. Check out our offerings for compute, storage, networking, and managed databases.
About the author
Senior Technical Writer at DigitalOcean
Still looking for an answer?
This textbox defaults to using Markdown to format your answer.
You can type !ref in this text area to quickly search our full set of tutorials, documentation & marketplace offerings and insert the link!
Hi,
This article really helped me a lot. Can someone please tell me, how to join the windows clients to this Ubuntu LDAP server? I want the windows clients needs to authenticated using this LDAP server… Please help me!
Hi, Thanks for this tutorial.
I want to install LDAP+phpldapadmin on my LAMP vps but my server is already configured to host 2 websites with a letsencrypt certificate, and there is no main domain pointing at my server:
- a.mydomain.com --> goes to website n°1
- b.mydomain.com --> goes to website n°2
Virtualhost is set up to serve both subdomains through SSL connection (redirection to https).
As a result, what you say in step 3 does not work for me : when I type
https://example.com/phpldapadmin
in my web browser, i get an error.
How can I do to get it working to host 2 websites + a LDAP server on the same VPS? Do I need to change my virtualhost configuration? Do I need to use a third subdomain for phpldapadmin (setting up my dns and my virtualhost) ?
Thank you
If you get error:
sudo /usr/local/bin/renew.sh chown: invalid group: ‘:ssl-cert’
then run:
sudo apt-get install ssl-cert
Hi, thanks for this detailed tutorial. For some reason, I cannot move further when setting up STARTTLS. When I import .ldif file, I got the following:
ldapmodify -H ldapi:// -Y EXTERNAL -f ssl.ldif
SASL/EXTERNAL authentication started SASL username: gidNumber=1000+uidNumber=0,cn=peercred,cn=external,cn=auth SASL SSF: 0 modifying entry “cn=config” ldap_modify: Insufficient access (50)
looks like I need some other account within LDAP to auth for this.
I am running windows 7 Home Premium edition on my laptop. I have two questions for you guys.
- Can I upgrade it to Professional without loosing my information?
- My disk is not partitioned for another OS. How do I install the Ubuntu 16.04 on my system that is running Windows 7 without affecting my windows OS? This is one of the prerequisites for this tutorial
Hi, I’d like to share a little CLI utility to deal with LDAP databases, that I’ve been developing recently. It’s called ldap-attributes-selector and, as its name suggest, it allows you to retrieve whatever LDAP attributes you want, and display them in CSV format (exporting results to a file is optional!). It’s written in Python 3 and is available on pypi, via pip. More details about it, in the following repo:
https://github.com/tuxedoar/ldap-attributes-selector
Hope you like it!. Cheers.
I just can’t get the tls-upgrade to work. Everything else seems to work fine.
$ ldapwhoami -H ldap://mydomain.here -x anonymous
$ ldapwhoami -H ldap:// -x anonymous
$ ldapwhoami -H ldap:// -x -ZZ ldap_start_tls: Connect error (-11)
$ ldapwhoami -H ldap://mydomain.here -x -ZZ ldap_start_tls: Connect error (-11)
I can login fine using the web ui, which is on forced https, but I found that it’s not possible to enable the TLS setting in the config. If I do, it breaks the web ui too, so I assume that the weblogin is actually not using the TLS-upgrade?
$servers->setValue(‘server’,‘tls’,true);
If I do that and then I try to login I get errors. The password is of course correct.
error Could not start TLS. (myhost) Error: Could not start TLS. Please check your LDAP server configuration. error Unable to connect to LDAP server myhost Error: Can’t contact LDAP server (-1) for user error Failed to Authenticate to server Invalid Username or Password.
I can connect to the ldap from a different host with LDAPBrowser, so the actual ldap config seems to be working just fine.
Ubuntu Server 18.04.3 LTS nginx version: nginx/1.14.0 (Ubuntu)
Other than that thanks for this great guide!
 This work is licensed under a Creative Commons Attribution-NonCommercial- ShareAlike 4.0 International License.
Become a contributor for community
Get paid to write technical tutorials and select a tech-focused charity to receive a matching donation.

DigitalOcean Documentation
Full documentation for every DigitalOcean product.

Resources for startups and AI-native businesses
The Wave has everything you need to know about building a business, from raising funding to marketing your product.
The developer cloud
Scale up as you grow — whether you're running one virtual machine or ten thousand.

Start building today
From GPU-powered inference and Kubernetes to managed databases and storage, get everything you need to build, scale, and deploy intelligent applications.
