
Introduction
There are many programs capable of keeping files in sync between different computers. Syncthing is a compelling new option that is cross platform, completely open source, very flexible, and easy to use.
In this guide, we will show you how to get started using Syncthing to synchronize data between two Ubuntu 14.04 server instances. This will allow you to seamlessly sync files between these servers based on configured “watch” directories.
Prerequisites and Goals
To complete this guide, you will need access to two Ubuntu 14.04 server instances.
For the purposes of this guide, we will call these servers:
- serverone
- servertwo
These will be equal partners, so there is not a primary/secondary relationship. You should have a regular user account configured on each of these (you can find out how by following steps 1-4 in our initial server setup guide for Ubuntu 14.04 here).
The regular user account in this guide will be called demouser, but you should use whatever username you would like. This does not have to be separate from your regular non-root account.
We will install and configure Syncthing on each of these machines so that files can be shared between them. After you have completed the procedures outlined in this guide, you should have two servers, each with a directory that will mirror changes to the other computer.
We will install Syncthing as a system-level application and create an Upstart script. This will allow our Syncthing instances to start at boot and restart correctly, instead of spawning new instances each time as it does by default.
Initial Download and Installation
The first thing we need to do to get started is download the Syncthing binary onto each of our servers.
To find the latest packaged version, you can go to the releases page on GitHub. There are buttons for each of the operating system types towards the bottom.
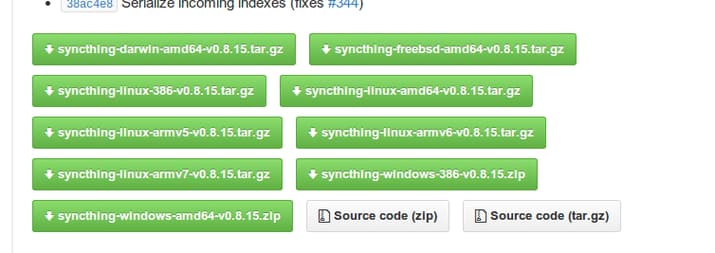
If your Linux systems are 32-bits, choose the selection that begins with “syncthing-linux-386-...”. If the servers you are using are 64-bits, choose the one labeled “syncthing-linux-amd64-...”. Do not download the file onto your local computer. Instead, right-click the appropriate file and select “Copy link address” or whatever similar option you have.
We will download these files using the wget command on each of our servers. On your servers, type wget followed by a space, then paste the link that you copied. The version and system architecture may be different for you:
cd ~
wget https://github.com/calmh/syncthing/releases/download/v0.8.15/syncthing-linux-amd64-v0.8.15.tar.gz
Now, we can unpack the tarball by typing:
tar xzvf syncthing*.tar.gz
Move into the newly created directory:
cd syncthing*
Here, we have an executable file called syncthing that we can use to start the service. We want to copy this to a location in our PATH so that we can call it like a normal application.
Do this with sudo privileges by typing:
sudo cp syncthing /usr/local/bin
Now, we can go back to our home directory and safely remove all of the Syncthing files and directories left over.
cd ~
rm -rf syncthing*
Complete all of the above steps on both of your servers.
The application is now installed, but there are a few more things we need to do before it will be ready to use.
Change the GUI Options to Allow Remote Viewing
By default, the Syncthing web interface is only available to connections from the same computer. This will not work for our purposes since we are working with remote servers.
To fix this, we need to edit a line in the Syncthing configuration file. However, the configuration file has not been created yet.
To create the file automatically, we can start up the service briefly. Type the syncthing command to get this up and running:
syncthing
The syncthing process is not a daemon, which means that it runs in the current shell session (we will get around this by implementing an Upstart script momentarily). It will start the process and create some necessary files.
After a moment, you will see an informational message about your Node ID that looks like this:
[2EQK3] 15:47:15 OK: Ready to synchronize default (read-write)
[2EQK3] 15:47:15 INFO: Node 2EQK3ZR77PTBQGM44KE7VQIQG7ICXJDEOK34TO3SWOVMUL4QFBHA is "server1" at [dynamic]
When you see this, it means that the process has initialized correctly. We can now stop the process by typing:
CTRL-C
This will stop the process and give us control over the terminal again.
We can now edit the configuration file that was created. Open the file in your text editor:
nano ~/.config/syncthing/config.xml
Look for a section that deals with the GUI. It should look like this:
<gui enabled="true" tls="false">
    <address>127.0.0.1:8080</address>
</gui>
The only change that we need to make is to replace the localhost address (127.0.0.1) with 0.0.0.0, which represents all network interfaces. This section will look like this when you are finished:
<gui enabled="true" tls="false">
    <address>0.0.0.0:8080</address>
</gui>
Save and close the file when you are finished. We will do more extensive configuration later on through the web interface.
Again, complete these procedures on both of the servers you are configuring.
Create an Upstart Script to Handle Service States
Next, we will implement an Upstart script to manage our process. This will allow us to automatically start the Syncthing process when the server boots. It will also let us run it as a service, without taking control of our session.
The Upstart script that we will use is taken from a post on the Syncthing discussion boards. Create and open the Upstart file with root privileges in your editor by typing:
sudo nano /etc/init/syncthing.conf
Inside, we will use the following lines to control our Upstart process:
description "Syncthing P2P sync service"

start on (local-filesystems and net-device-up IFACE!=lo)
stop on runlevel [!2345]

env STNORESTART=yes
env HOME=/home/demouser
setuid "demouser"
setgid "demouser"

exec /usr/local/bin/syncthing

respawn
Let’s go over what this means.
We start with a general description of the service. Next, we define when the service should start and stop. Here, we are telling the system that it should be started after the filesystem and the non-local networking interfaces are brought up. It will be stopped whenever the system leaves one of the normal runlevels.
Next, we will set an environmental variable that tells Syncthing not to restart using its own mechanisms. This is because it actually spawns a new process each time without cleaning up the old one. To avoid this, we will implement the ability to restart within this Upstart script later on.
The next environmental variable sets the home directory that will be used by Syncthing. This will be used to find the correct configuration files and pre-populate fields in the GUI. We will also specify the user and group using the setuid and setgid parameters respectively. Modify all three of these values to point to your user’s information.
Next, we set the path to the actual command that we are going to execute. Finally, we use respawn to tell Upstart to automatically restart the process if it is stopped prematurely. This is used to automatically restart the process (cleanly) when the Syncthing process tries to restart itself internally.
When you are finished, save and close the file.
You can now start the service by typing:
sudo initctl start syncthing
Complete the above steps on both of your servers.
Setting Up Security in the Web UI
We are finally ready to configure our instances through the web user interface.
Log into each of your servers’ Syncthing interfaces by visiting their public IP addresses and port 8080:
http://server1_public_IP:8080
http://server2_public_IP:8080
You will see the main Syncthing screen:

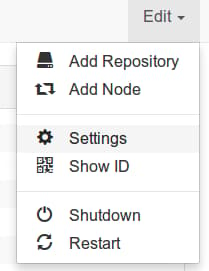
The first thing that we need to do is add some security to our interface. Go to the “Edit” menu in the upper right-hand corner and click on the “Settings” selection:
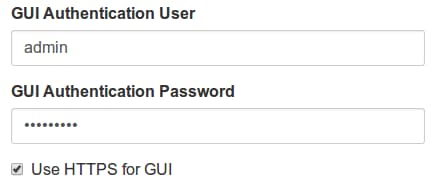
On the right side, we need to set up a username and password for the web interface. We also want to enable TLS encryption for our sessions so that our traffic cannot be intercepted in transit by checking the “HTTPS” box:
When you are finished, click the “Save” button at the bottom.
You will see a message that prompts you to restart the service for the changes to take affect:

Click on the “Restart” button.
You will probably need to refresh the page for the changes to reload properly. When you do so, you will most likely encounter an SSL warning that looks like this:
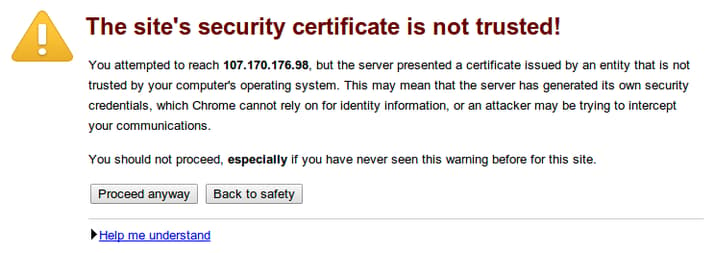
This is just letting you know that the entity that signed the SSL certificate is not in your browser’s list of trusted certificate authorities. This is expected since the certificates are self-signed. It is safe to click on “Proceed anyway” to continue.
You will then get an authentication prompt for the username and password that you configured:
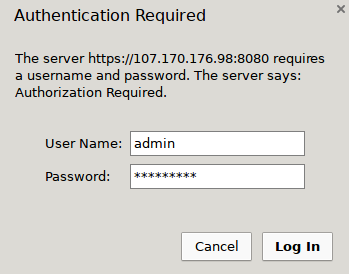
Fill out the appropriate values and log in. Your interface is now more secure from outside traffic.
Complete these steps on both servers.
Connecting the Two Servers and Sharing Directories
In order to share content, Syncthing requires both ends of the connection to add the other server to their list of nodes. Then, both sides must also add a repository (directory) to synchronize.
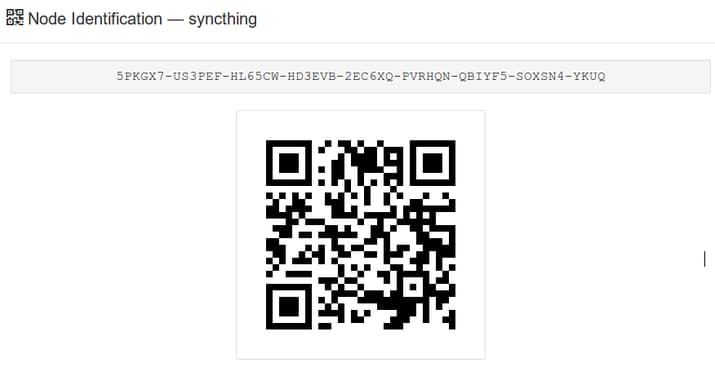
To add a node, you will need the companion node’s ID. You can get this ID by going to the “Edit” menu in the upper-right corner and selecting the “Show ID” option.
This will bring up an overlay with a long ID that you can copy. It will also give you a QR code in case you are configuring smart phone application. Copy the ID of the first node.
On the second server, click on the “Edit” menu and select “Add Node”.
An overlay will appear with fields that you must configure to add the other server. In the “Node ID” field, paste the ID that you copied from the first server. In the “Node Name” field, select any descriptive name that you would like to use for your other server. Leave the “Addresses” as “dynamic”:
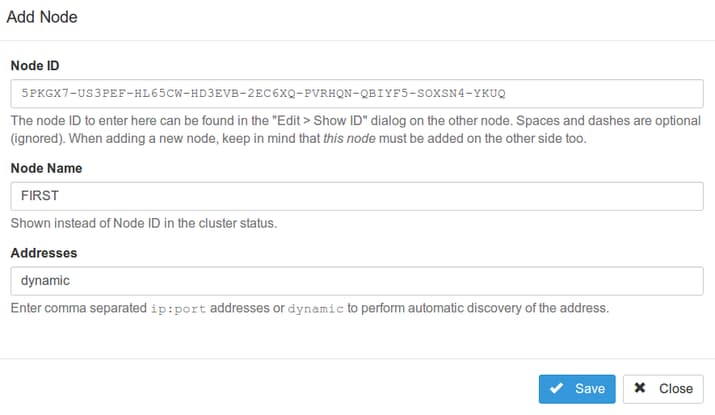
When you are finished, click “Save” to add the new node.
Run through this same process in the reverse order so that both of the servers have the opposite server in their configuration. For the moment, ignore any requests to restart the service, because we will be making a few more additional changes first.
In the web interface, the nodes that you are connected to are shown on the right side. The repositories you are sharing are listed on the left. By default, a folder called Sync will be created in your home directory to act as the default repository. If the menu is compressed, click the name to expand the listing:

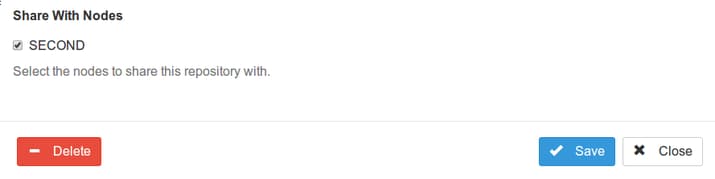
Click on the “Edit” button to configure the repo. Towards the bottom, you will have the option to share this repository with any of the nodes that you have configured. Check the box associated with the opposite node and then click the “Save” button:
Now, you can click on the “Restart” button to implement your changes:
Now, any changes made in the ~/Sync directory will be mirrored to the opposite server. By default, this will sync every 60 seconds, but this can be changed in the “Settings” menu.
You can add additional directories that you wish to mirror by choosing the “Add Repository” option from the “Edit” menu. The “Repository ID” must be the same on each of the servers for the directories to be associated.
Conclusion
At this point, you should have two servers connected and syncing a single directory’s contents. You can easily expand this by either adding additional repositories (directories), or by adding additional nodes to also sync with.
If you plan on syncing system files to directories that a normal user would not have write access to, you will probably need to modify the Upstart file to use the root account or whatever other user account necessary to perform the required actions.
Thanks for learning with the DigitalOcean Community. Check out our offerings for compute, storage, networking, and managed databases.
About the author
Former Senior Technical Writer at DigitalOcean, specializing in DevOps topics across multiple Linux distributions, including Ubuntu 18.04, 20.04, 22.04, as well as Debian 10 and 11.
Still looking for an answer?
This textbox defaults to using Markdown to format your answer.
You can type !ref in this text area to quickly search our full set of tutorials, documentation & marketplace offerings and insert the link!
Syncthing was installed perfectly. Thank you.
The only information missing here is how to do a version upgrade following the initial installation. Syncthing is still in beta, and they seem to push out updates every few days.
Anyone know?
Hi iminj,
If you install it using this guide, then you’ll be able to update the application using the internal update procedures. Since we moved it to a system location, we will need to use <code>sudo</code>.
The command you need to use is:
<pre> sudo syncthing -upgrade </pre>
This will check with the servers and upgrade your application to the newest release. It will rename the previous version to an application that specifies the release information.
So, if you are upgrading from v.0.8.14 to v.0.8.15, you will see a file called <code>syncthing.v0.8.14</code> in your <code>/usr/local/bin</code> directory.
After you have thoroughly tested the new version, you can safely remove the older version by typing:
<pre> sudo rm /usr/local/bin/syncthing.v0.8.14 </pre>
Remember to change the release information to reference the backup file you have in your <code>/usr/local/bin</code> file.
Let me know if you have any more questions or issues.
Justin,
Thank you for taking the time to post this additional information. As soon as the next version of Syncthing is released, I will be ready to go.
Hi Justin, Great Tutorial! Worked fine on Ubuntu 14.04. But I have problem on Centos 6.5 with the creating Upstart Script to Handle Service States. Any Help?
Thank You
Beginning with Syncthing version upgrade from 0.9.18 to 0.9.19, the upstart script described in the tutorial interferes with the upgrade command.
Below is a set of terminal commands that enabled me to execute a version upgrade. It stops the Syncthing executable on the DigitalOcean VPS while the upgrade process finishes, cleans up the old version, and then restarts Syncthing:
sudo initctl stop syncthing sudo syncthing -upgrade sudo rm /usr/local/bin/syncthing.old sudo initctl start syncthing
It appears that Syncthing’s upgrade routine is still under development - so this workaround may not be necessary (or even work) in the future.
I followed this guide and all was well until I tried to start it.
After “sudo initctl start syncthing” I receive:
“initctl: Unknown job: syncthing”
I can’t figure out what I’ve done wrong.
I had the same problem: syncthing won’t start when using the “setuid” and “setgid” commands in the init file. When you just delete it, syncthing runs as root and all your shared files belong to root on the server. Here’s how I solved it, my syncthing.conf file now looks as follows:
description "Syncthing P2P sync service"

start on (local-filesystems and net-device-up IFACE!=lo)
stop on runlevel [!2345]

env STNORESTART=yes
env HOME=/home/yourusername

exec start-stop-daemon --start -c yourusername --exec /usr/local/bin/syncthing

respawn
Make sure the config file ~/.config/syncthing/config.xml is owned by the user who starts syncthing. In my case, it was owned by root, even though it was in the user’s home folder, and I had to manually change back the owner.
What should be in the article as well is to open the ports if you have a firewall.
More information can be found here: https://github.com/syncthing/syncthing/wiki/Firewalls-and-Port-Forwards
 This work is licensed under a Creative Commons Attribution-NonCommercial- ShareAlike 4.0 International License.
Become a contributor for community
Get paid to write technical tutorials and select a tech-focused charity to receive a matching donation.

DigitalOcean Documentation
Full documentation for every DigitalOcean product.

Resources for startups and AI-native businesses
The Wave has everything you need to know about building a business, from raising funding to marketing your product.
The developer cloud
Scale up as you grow — whether you're running one virtual machine or ten thousand.

Start building today
From GPU-powered inference and Kubernetes to managed databases and storage, get everything you need to build, scale, and deploy intelligent applications.
