Not using CentOS 7?
Choose a different version or distribution.
Introduction
Docker is an application that makes it simple and easy to run application processes in a container, which are like virtual machines, only more portable, more resource-friendly, and more dependent on the host operating system. For a detailed introduction to the different components of a Docker container, check out The Docker Ecosystem: An Introduction to Common Components.
There are two methods for installing Docker on CentOS 7. One method involves installing it on an existing installation of the operating system. The other involves spinning up a server with a tool called Docker Machine that auto-installs Docker on it.
In this tutorial, you’ll learn how to install and use it on an existing installation of CentOS 7.
Prerequisites
- 64-bit CentOS 7 Droplet
- Non-root user with sudo privileges. A CentOS 7 server set up using Initial Setup Guide for CentOS 7 explains how to set this up.
Note: Docker requires a 64-bit version of CentOS 7 as well as a kernel version equal to or greater than 3.10. The default 64-bit CentOS 7 Droplet meets these requirements.
All the commands in this tutorial should be run as a non-root user. If root access is required for the command, it will be preceded by sudo. Initial Setup Guide for CentOS 7 explains how to add users and give them sudo access.
Step 1 — Installing Docker
The Docker installation package available in the official CentOS 7 repository may not be the latest version. To get the latest and greatest version, install Docker from the official Docker repository. This section shows you how to do just that.
But first, let’s update the package database:
- sudo yum check-update
Now run this command. It will add the official Docker repository, download the latest version of Docker, and install it:
- curl -fsSL https://get.docker.com/ | sh
After installation has completed, start the Docker daemon:
- sudo systemctl start docker
Verify that it’s running:
- sudo systemctl status docker
The output should be similar to the following, showing that the service is active and running:
Output● docker.service - Docker Application Container Engine
   Loaded: loaded (/lib/systemd/system/docker.service; enabled; vendor preset: enabled)
   Active: active (running) since Sun 2016-05-01 06:53:52 CDT; 1 weeks 3 days ago
     Docs: https://docs.docker.com
 Main PID: 749 (docker)
Lastly, make sure it starts at every server reboot:
- sudo systemctl enable docker
Installing Docker now gives you not just the Docker service (daemon) but also the docker command line utility, or the Docker client. We’ll explore how to use the docker command later in this tutorial.
Step 2 — Executing Docker Command Without Sudo (Optional)
By default, running the docker command requires root privileges — that is, you have to prefix the command with sudo. It can also be run by a user in the docker group, which is automatically created during the installation of Docker. If you attempt to run the docker command without prefixing it with sudo or without being in the docker group, you’ll get an output like this:
Outputdocker: Cannot connect to the Docker daemon. Is the docker daemon running on this host?.
See 'docker run --help'.
If you want to avoid typing sudo whenever you run the docker command, add your username to the docker group:
- sudo usermod -aG docker $(whoami)
You will need to log out of the Droplet and back in as the same user to enable this change.
If you need to add a user to the docker group that you’re not logged in as, declare that username explicitly using:
- sudo usermod -aG docker username
The rest of this article assumes you are running the docker command as a user in the docker user group. If you choose not to, please prepend the commands with sudo.
Step 3 — Using the Docker Command
With Docker installed and working, now’s the time to become familiar with the command line utility. Using docker consists of passing it a chain of options and subcommands followed by arguments. The syntax takes this form:
- docker [option] [command] [arguments]
To view all available subcommands, type:
- docker
As of Docker 1.11.1, the complete list of available subcommands includes:
Output
    attach    Attach to a running container
    build     Build an image from a Dockerfile
    commit    Create a new image from a container's changes
    cp        Copy files/folders between a container and the local filesystem
    create    Create a new container
    diff      Inspect changes on a container's filesystem
    events    Get real time events from the server
    exec      Run a command in a running container
    export    Export a container's filesystem as a tar archive
    history   Show the history of an image
    images    List images
    import    Import the contents from a tarball to create a filesystem image
    info      Display system-wide information
    inspect   Return low-level information on a container or image
    kill      Kill a running container
    load      Load an image from a tar archive or STDIN
    login     Log in to a Docker registry
    logout    Log out from a Docker registry
    logs      Fetch the logs of a container
    network   Manage Docker networks
    pause     Pause all processes within a container
    port      List port mappings or a specific mapping for the CONTAINER
    ps        List containers
    pull      Pull an image or a repository from a registry
    push      Push an image or a repository to a registry
    rename    Rename a container
    restart   Restart a container
    rm        Remove one or more containers
    rmi       Remove one or more images
    run       Run a command in a new container
    save      Save one or more images to a tar archive
    search    Search the Docker Hub for images
    start     Start one or more stopped containers
    stats     Display a live stream of container(s) resource usage statistics
    stop      Stop a running container
    tag       Tag an image into a repository
    top       Display the running processes of a container
    unpause   Unpause all processes within a container
    update    Update configuration of one or more containers
    version   Show the Docker version information
    volume    Manage Docker volumes
    wait      Block until a container stops, then print its exit code
To view the switches available to a specific command, type:
- docker docker-subcommand --help
To view system-wide information, use:
- docker info
Step 4 — Working with Docker Images
Docker containers are run from Docker images. By default, it pulls these images from Docker Hub, a Docker registry managed by Docker, the company behind the Docker project. Anybody can build and host their Docker images on Docker Hub, so most applications and Linux distributions you’ll need to run Docker containers have images that are hosted on Docker Hub.
To check whether you can access and download images from Docker Hub, type:
- docker run hello-world
The output, which should include the following, should indicate that Docker in working correctly:
OutputHello from Docker.
This message shows that your installation appears to be working correctly.
...
You can search for images available on Docker Hub by using the docker command with the search subcommand. For example, to search for the CentOS image, type:
- docker search centos
The script will crawl Docker Hub and return a listing of all images whose name match the search string. In this case, the output will be similar to this:
OutputNAME                            DESCRIPTION                                     STARS     OFFICIAL   AUTOMATED
centos                          The official build of CentOS.                   2224      [OK]
jdeathe/centos-ssh              CentOS-6 6.7 x86_64 / CentOS-7 7.2.1511 x8...   22                   [OK]
jdeathe/centos-ssh-apache-php   CentOS-6 6.7 x86_64 / Apache / PHP / PHP M...   17                   [OK]
million12/centos-supervisor     Base CentOS-7 with supervisord launcher, h...   11                   [OK]
nimmis/java-centos              This is docker images of CentOS 7 with dif...   10                   [OK]
torusware/speedus-centos        Always updated official CentOS docker imag...   8                    [OK]
nickistre/centos-lamp           LAMP on centos setup                            3                    [OK]

...
In the OFFICIAL column, OK indicates an image built and supported by the company behind the project. Once you’ve identifed the image that you would like to use, you can download it to your computer using the pull subcommand, like so:
- docker pull centos
After an image has been downloaded, you may then run a container using the downloaded image with the run subcommand. If an image has not been downloaded when docker is executed with the run subcommand, the Docker client will first download the image, then run a container using it:
- docker run centos
To see the images that have been downloaded to your computer, type:
- docker images
The output should look similar to the following:
[secondary_lable Output]
REPOSITORY          TAG                 IMAGE ID            CREATED             SIZE
centos              latest              778a53015523        5 weeks ago         196.7 MB
hello-world         latest              94df4f0ce8a4        2 weeks ago         967 B
As you’ll see later in this tutorial, images that you use to run containers can be modified and used to generate new images, which may then be uploaded (pushed is the technical term) to Docker Hub or other Docker registries.
Step 5 — Running a Docker Container
The hello-world container you ran in the previous step is an example of a container that runs and exits, after emitting a test message. Containers, however, can be much more useful than that, and they can be interactive. After all, they are similar to virtual machines, only more resource-friendly.
As an example, let’s run a container using the latest image of CentOS. The combination of the -i and -t switches gives you interactive shell access into the container:
- docker run -it centos
Your command prompt should change to reflect the fact that you’re now working inside the container and should take this form:
Output[root@59839a1b7de2 /]#
Important: Note the container id in the command prompt. In the above example, it is 59839a1b7de2.
Now you may run any command inside the container. For example, let’s install MariaDB server in the running container. No need to prefix any command with sudo, because you’re operating inside the container with root privileges:
- yum install mariadb-server
Step 6 — Committing Changes in a Container to a Docker Image
When you start up a Docker image, you can create, modify, and delete files just like you can with a virtual machine. The changes that you make will only apply to that container. You can start and stop it, but once you destroy it with the docker rm command, the changes will be lost for good.
This section shows you how to save the state of a container as a new Docker image.
After installing MariaDB server inside the CentOS container, you now have a container running off an image, but the container is different from the image you used to create it.
To save the state of the container as a new image, first exit from it:
- exit
Then commit the changes to a new Docker image instance using the following command. The -m switch is for the commit message that helps you and others know what changes you made, while -a is used to specify the author. The container ID is the one you noted earlier in the tutorial when you started the interactive docker session. Unless you created additional repositories on Docker Hub, the repository is usually your Docker Hub username:
- docker commit -m "What did you do to the image" -a "Author Name" container-id repository/new_image_name
For example:
- docker commit -m "added mariadb-server" -a "Sunday Ogwu-Chinuwa" 59839a1b7de2 finid/centos-mariadb
Note: When you commit an image, the new image is saved locally, that is, on your computer. Later in this tutorial, you’ll learn how to push an image to a Docker registry like Docker Hub so that it may be assessed and used by you and others.
After that operation has completed, listing the Docker images now on your computer should show the new image, as well as the old one that it was derived from:
- docker images
The output should be of this sort:
OutputREPOSITORY             TAG                 IMAGE ID            CREATED             SIZE
finid/centos-mariadb   latest              23390430ec73        6 seconds ago       424.6 MB
centos                 latest              778a53015523        5 weeks ago         196.7 MB
hello-world            latest              94df4f0ce8a4        2 weeks ago         967 B
In the above example, centos-mariadb is the new image, which was derived from the existing CentOS image from Docker Hub. The size difference reflects the changes that were made. And in this example, the change was that MariaDB server was installed. So next time you need to run a container using CentOS with MariaDB server pre-installed, you can just use the new image. Images may also be built from what’s called a Dockerfile. But that’s a very involved process that’s well outside the scope of this article. We’ll explore that in a future article.
Step 7 — Listing Docker Containers
After using Docker for a while, you’ll have many active (running) and inactive containers on your computer. To view the active ones, use:
- docker ps
You will see output similar to the following:
OutputCONTAINER ID        IMAGE               COMMAND             CREATED             STATUS              PORTS               NAMES
f7c79cc556dd        centos              "/bin/bash"         3 hours ago         Up 3 hours                              silly_spence
To view all containers — active and inactive, pass it the -a switch:
- docker ps -a
To view the latest container you created, pass it the -l switch:
- docker ps -l
Stopping a running or active container is as simple as typing:
- docker stop container-id
The container-id can be found in the output from the docker ps command.
Step 8 — Pushing Docker Images to a Docker Repository
The next logical step after creating a new image from an existing image is to share it with a select few of your friends, the whole world on Docker Hub, or other Docker registry that you have access to. To push an image to Docker Hub or any other Docker registry, you must have an account there.
This section shows you how to push a Docker image to Docker Hub.
To create an account on Docker Hub, register at Docker Hub. Afterwards, to push your image, first log into Docker Hub. You’ll be prompted to authenticate:
- docker login -u docker-registry-username
If you specified the correct password, authentication should succeed. Then you may push your own image using:
- docker push docker-registry-username/docker-image-name
It will take sometime to complete, and when completed, the output will be of this sort:
OutputThe push refers to a repository [docker.io/finid/centos-mariadb]
670194edfaf5: Pushed
5f70bf18a086: Mounted from library/centos
6a6c96337be1: Mounted from library/centos

...
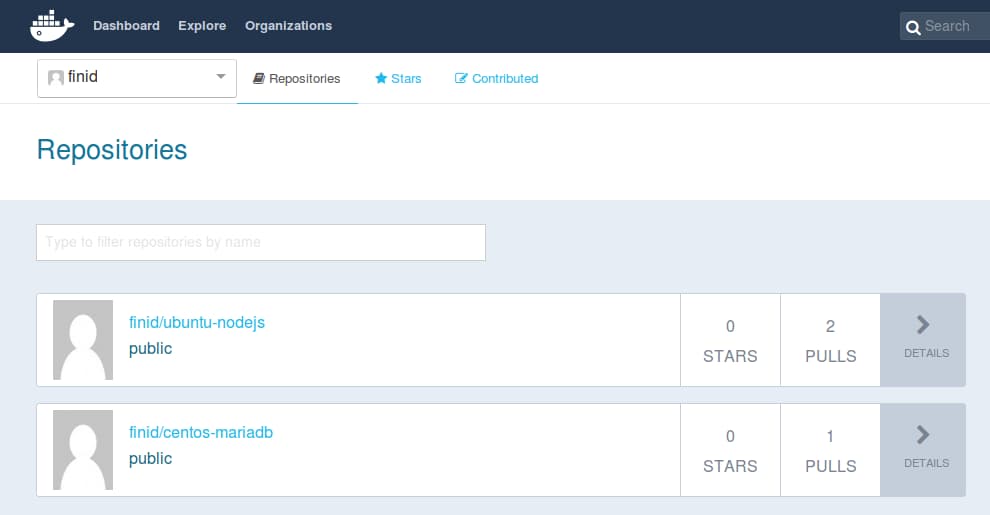
After pushing an image to a registry, it should be listed on your account’s dashboard, like that show in the image below.
If a push attempt results in an error of this sort, then you likely did not log in:
OutputThe push refers to a repository [docker.io/finid/centos-mariadb]
e3fbbfb44187: Preparing
5f70bf18a086: Preparing
a3b5c80a4eba: Preparing
7f18b442972b: Preparing
3ce512daaf78: Preparing
7aae4540b42d: Waiting
unauthorized: authentication required
Log in, then repeat the push attempt.
Conclusion
There’s a whole lot more to Docker than has been given in this article, but this should be enough to getting you started working with it on CentOS 7. Like most open source projects, Docker is built from a fast-developing codebase, so make a habit of visiting the project’s blog page for the latest information.
Also check out the other Docker tutorials in the DO Community.
Thanks for learning with the DigitalOcean Community. Check out our offerings for compute, storage, networking, and managed databases.
About the author(s)
Jack of all trades, master of a few
Technical Editor, DigitalOcean
Still looking for an answer?
This textbox defaults to using Markdown to format your answer.
You can type !ref in this text area to quickly search our full set of tutorials, documentation & marketplace offerings and insert the link!
when I use docker info, the output is Got permission denied while trying to connect to the Docker daemon socket at unix:///var/run/docker.sock: Get http://%2Fvar%2Frun%2Fdocker.sock/v1.26/info: dial unix /var/run/docker.sock: connect: permission denied
Can you help me?
After installing docker, the service and “vendor preset” parameters were “disabled”. I had to search elsewhere to find out how to enable them. Finally figured out that I need to run the systemctl enable docker.service to enable docker service. Checking with my VM team to know how to enable vendor preset. Would help if you can include those steps as well.
 This work is licensed under a Creative Commons Attribution-NonCommercial- ShareAlike 4.0 International License.
Become a contributor for community
Get paid to write technical tutorials and select a tech-focused charity to receive a matching donation.

DigitalOcean Documentation
Full documentation for every DigitalOcean product.

Resources for startups and AI-native businesses
The Wave has everything you need to know about building a business, from raising funding to marketing your product.
The developer cloud
Scale up as you grow — whether you're running one virtual machine or ten thousand.

Start building today
From GPU-powered inference and Kubernetes to managed databases and storage, get everything you need to build, scale, and deploy intelligent applications.
