By finid and Caitlin Postal

The author selected the Free and Open Source Fund to receive a donation as part of the Write for DOnations program.
Introduction
Apache Cassandra is an open-source, masterless, and distributed NoSQL database system. Cassandra is considered highly suited for mission-critical applications and multi-node setups because it’s scalable, elastic, and fault-tolerant. Cassandra database management works through a node system, and nodes are held within a cluster.
In this tutorial, you’ll install and use Cassandra to run a single-node cluster on Ubuntu 22.04.
Prerequisites
To complete this tutorial, you will need the following:
- One Ubuntu 22.04 server set up using the Ubuntu 22.04 initial server setup guide with a sudo non-root user, firewall, and at least 2 GB of RAM. Cassandra will not run if deployed on a server with only 1 GB of RAM. See the official hardware requirements guide for Cassandra for more information.
- Java runtime installed on your machine. You can install one of OpenJDK 8, OpenJDK 11, Oracle Java Standard Edition 8, or Oracle Java Standard Edition 11 runtimes using Step 1 of How To Install Java with Apt on Ubuntu 22.04.
Note: If you update the package database and upgrade the server with the commands sudo apt update and sudo apt upgrade, rebooting your server before starting Step 1 in this article will stop the prompt encountered in Step 1 from popping up again.
Step 1 — Installing Cassandra
You’ll install Cassandra using packages from the official Apache Software Foundation repositories. You will start by adding the repo so the packages are available to your system.
To begin, log in to your server:
- ssh sammy@your-server-ip
Update the package database:
- sudo apt update
Then update the system:
- sudo apt upgrade
Confirm the installation with y.
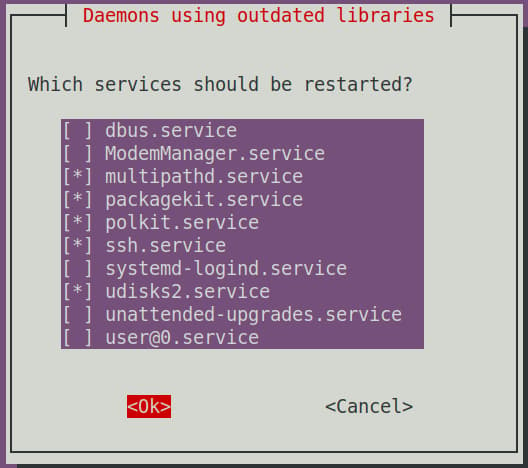
During the upgrade process, you may receive a prompt in your terminal (see the image below) requesting input about the kernel version installed and prompting you to reboot the server. You will not see these prompts if you upgraded and rebooted the server in the initial setup phase:

Press Enter to close the prompt, but make a note to reboot the server after completing this tutorial.
You may also receive the prompt shown below. If you do, press Enter to accept the default option.
When the update has completed, use the following command to add the official Cassandra repository to the system:
- echo "deb http://www.apache.org/dist/cassandra/debian 40x main" | sudo tee -a /etc/apt/sources.list.d/cassandra.sources.list
The echo command will write the string in quotation marks to a standard output, which is piped (|) to the tee command. The tee command writes it to the cassandra.sources.list file. The -a flag instructs tee to append the line to the end of the file. Otherwise, it would overwrite existing content, if any.
At the time of writing, the latest version of Cassandra is 4.0.4.The command references 40x because you are adding the repository for the 4.0 series of Cassandra.
If successfully added, the output should be:
Outputdeb http://www.apache.org/dist/cassandra/debian 40x main
Then, using the wget and tee commands, add the repository’s keys to the list of trusted keys in the system:
- wget -q -O - https://www.apache.org/dist/cassandra/KEYS | sudo tee /etc/apt/trusted.gpg.d/cassandra.asc
In this piped command, wget downloads the KEYS file, which is then piped (|) to the tee command. The tee command writes the input it received to the cassandra.asc file. The q option instructs the wget command to suppress its normal output, and the O option instructs wget to write the file it downloaded to standard output (-). This option is the uppercase letter O, not the number zero.
Refresh the package database once again:
- sudo apt update
Finally, install Cassandra:
- sudo apt install cassandra
If prompted, confirm the installation with y.
With that, Cassandra should now be installed on the server. In the next section, you’ll confirm that the Cassandra daemon is running.
Step 2 — Confirming the Cassandra Daemon Is Running
With the package installed, the Cassandra daemon should have started automatically.
To confirm that it is running, use this command:
- sudo systemctl status cassandra
The output should be similar to the following:
Output● cassandra.service - LSB: distributed storage system for structured data
     Loaded: loaded (/etc/init.d/cassandra; generated)
     Active: active (running) since Tue 2022-06-28 03:25:52 UTC; 1min 32s ago
       Docs: man:systemd-sysv-generator(8)
    Process: 4606 ExecStart=/etc/init.d/cassandra start (code=exited, status=0/SUCCESS)
      Tasks: 52 (limit: 9495)
     Memory: 2.2G
        CPU: 17.401s
     CGroup: /system.slice/cassandra.service
             └─4723 /usr/bin/java -ea -da:net.openhft... -XX:+UseThreadPriorities -XX:+HeapDumpOnOutOfMemoryError -Xss256k -XX:+AlwaysPreTouch -XX>

Jun 28 03:25:52 ubuntu-cass systemd[1]: Starting LSB: distributed storage system for structured data...
Jun 28 03:25:52 ubuntu-cass systemd[1]: Started LSB: distributed storage system for structured data.
If the output indicates that the daemon failed to start with an oom-kill error, the daemon could not start because the system ran out of memory. To resolve the issue, add more RAM to your server. If you are using a DigitalOcean Droplet, you can resize the Droplet from the Console or using the API.
Now that you’ve confirmed that the Cassandra daemon is running, you’ll next check the status of the cluster and connect to it.
Step 3 — Connecting to the Cluster
To connect to the cluster, you will use the nodetool utility.
To check the cluster’s status, type:
- sudo nodetool status
In the output, UN means it’s Up and Normal:
OutputDatacenter: datacenter1
=======================
Status=Up/Down
|/ State=Normal/Leaving/Joining/Moving
--  Address    Load       Tokens  Owns (effective)  Host ID                               Rack
UN  127.0.0.1  69.08 KiB  16      100.0%            d9618485-4c16-4feb-8a2a-632192c0d587  rack1
Then connect to the cluster using its interactive command line interface cqlsh:
- cqlsh
You will see it connect:
OutputConnected to Test Cluster at 127.0.0.1:9042
[cqlsh 6.0.0 | Cassandra 4.0.4 | CQL spec 3.4.5 | Native protocol v5]
Use HELP for help.
Type exit to quit:
- exit
Conclusion
Congratulations! You now have a single-node Cassandra cluster running on Ubuntu 22.04. You can set up a multi-node cluster with How To Install Cassandra and Run a Multi-Node Cluster. More information about Cassandra is available at the project’s website.
Thanks for learning with the DigitalOcean Community. Check out our offerings for compute, storage, networking, and managed databases.
About the author(s)
Jack of all trades, master of a few
Still looking for an answer?
 This work is licensed under a Creative Commons Attribution-NonCommercial- ShareAlike 4.0 International License.
Become a contributor for community
Get paid to write technical tutorials and select a tech-focused charity to receive a matching donation.

DigitalOcean Documentation
Full documentation for every DigitalOcean product.

Resources for startups and AI-native businesses
The Wave has everything you need to know about building a business, from raising funding to marketing your product.
The developer cloud
Scale up as you grow — whether you're running one virtual machine or ten thousand.

Start building today
From GPU-powered inference and Kubernetes to managed databases and storage, get everything you need to build, scale, and deploy intelligent applications.
