By Jim Reardon

Status: Deprecated
This article covers a version of CentOS that is no longer supported. If you are currently operating a server running CentOS 6, we highly recommend upgrading or migrating to a supported version of CentOS.
Reason: CentOS 6 reached end of life (EOL) on November 30th, 2020 and no longer receives security patches or updates. For this reason, this guide is no longer maintained.
See Instead: This guide might still be useful as a reference, but may not work on other CentOS releases. If available, we strongly recommend using a guide written for the version of CentOS you are using.
The following DigitalOcean tutorial may be of immediate interest, as it outlines installing Diaspora on a CentOS 7 server:
Installing Diaspora on a CentOS 6 x86 VPS
Diaspora is an open-source, distributed social network. Instead of a single company controlling and taking ownership of users’ content, Diaspora ‘pods’ can be hosted by anyone. Pods are typically configured so that users can interact with users on other public pods.
Step 1: OS Configuration
Add Swap Space
If you’re running a VPS (droplet) with less than 2 GB of RAM, you’ll need to enable swap on your VPS. If you do not do so, some build steps are likely to fail.
This tutorial has instructions on enabling swap for CentOS 6. For smaller VPS, add at least 1 GB of swap space.
Create a local, non-root user
Most steps will be run as a non-root user with sudo access. This tutorial will run you through creating a user account and granting it sudo power.
Add the EPEL repository
EPEL stands for Extra Packages for Enterprise Linux, and it has some packages we’ll need to install that are not part of the base CentOS repositories.
Log in as your local user and run:
sudo su -c 'rpm -Uvh http://dl.fedoraproject.org/pub/epel/6/x86_64/epel-release-6-8.noarch.rpm'
Install Prerequisite Packages
Next you will need to install the packages Diaspora requires to build and run.
sudo yum install tar make automake gcc gcc-c++ git net-tools libcurl-devel libxml2-devel libffi-devel libxslt-devel tcl ImageMagick npm mysql-server mysql-devel nginx libyaml libyaml-devel patch readline-devel libtool bison
Install Redis
Redis is an open-source key value data store Diaspora requires. Install it and configure it to start at boot:
sudo yum install redis.x86_64
sudo chkconfig --add redis
sudo chkconfig --level 345 redis on
sudo /etc/init.d/redis start
Add a Dedicated Diaspora User
This is the user account that will run Diaspora. You can name this account whatever you like, but this tutorial will assume that this user is called diaspora.
sudo useradd diaspora
Step 2: Start and Configure MySQL
Next up is getting MySQL configured for Diaspora.
Start MySQL
MySQL was installed earlier, but won’t yet be running. Start up the MySQL server.
sudo /etc/init.d/mysqld start
Create a Diaspora Database and MySQL User
First, open up MySQL as root.
sudo mysql
Now create a diaspora user and the database we’ll be using.
CREATE USER 'diaspora'@'localhost' IDENTIFIED BY 'password';
CREATE DATABASE diaspora_production;
Now grant the user that was created access to the new database:
GRANT ALL PRIVILEGES ON diaspora_production.* TO 'diaspora'@'localhost';
FLUSH PRIVILEGES;
Type exit to quit MySQL.
Set MySQL to Start on Boot
Set CentOS to start up the MySQL daemon when the server reboots.
sudo chkconfig --level 345 mysqld on
Step 3: Install and Configure Diaspora
The next step is to grab the Diaspora source and get it configured to run on your VPS. These commands should be run as the Diaspora user you created earlier.
sudo su - diaspora
Fix Permissions on the Diaspora Home Directory
In order to serve some of the files Diaspora needs, the Diaspora home directory permissions will need to be relaxed to allow open read and execute access:
chmod ugo+rx ~diaspora
Install rvm
Make sure you are still logged in as your Diaspora user and install the stable branch of rvm:
\curl -s -S -L https://get.rvm.io | bash -s stable
rvm will add some environment setup to the login scripts for the diaspora user; to make sure these are set it’s easiest to log out then back in.
exit
sudo su - diaspora
Install Ruby
Use rvm to install the version of Ruby required by Diaspora. Newer versions of Ruby may not be fully supported.
rvm autolibs read-only
rvm install 1.9.3-p448
Fetch the Diaspora Source Code
Now clone the source code for Diaspora.
git clone git://github.com/diaspora/diaspora.git
Enter the diaspora folder that git created.
cd diaspora
You’ll see a warning notice once you change to the diaspora directory:
********************************************************************************
* NOTICE                                                                       *
********************************************************************************
* RVM has encountered a new or modified .rvmrc file in the current directory,  *
* this is a shell script and therefore may contain any shell commands.         *
*                                                                              *
* Examine the contents of this file carefully to be sure the contents are      *
* safe before trusting it!                                                     *
* Do you wish to trust '/home/diaspora/diaspora/.rvmrc'?                       *
* Choose v[iew] below to view the contents                                     *
********************************************************************************
y[es], n[o], v[iew], c[ancel]>
Type y to confirm you want to trust the .rvmrc.
Configure the Diaspora Database
Copy the example database configuration file to where Diaspora expects it to be.
cp config/database.yml.example config/database.yml
Tweak the settings in database.yml to match the database you created earlier.
emacs config/database.yml
The first several lines show the MySQL configuration. Change the username and password to that of the MySQL account you created earlier when setting up the MySQL database. The block should end up looking something like this, with the password set to what you chose earlier:
mysql: &mysql
  adapter: mysql2
  host: "localhost"
  port: 3306
  username: "diaspora"
  password: "password"
  charset: utf8
  collation: utf8_bin
Configure Diaspora Options
Copy the example configuration file so Diaspora will find it.
cp config/diaspora.yml.example config/diaspora.yml
Open this file up in a text editor to edit some of the settings.
emacs config/diaspora.yml
You will need to update a few things:
- Find a line starting
url:and update this with your server’s hostname, and uncomment the line by removing any leading # symbols. - A few lines lower, find a line that reads
#certificate_authorities: '/etc/pki/tls/certs/ca-bundle.crt'and remove the leading # to uncomment it. - A few lines further down, find a line beginning
require_ssl. Remove this line’s leading # and set the value to false.
Install Required Gems and Setup Database
Ruby will need to fetch and install several gems Diaspora needs.
RAILS_ENV=production bundle install --without test development
Next build the database schema.
RAILS_ENV=production bundle exec rake db:schema:load
Finally, pre-compile Diaspora.
RAILS_ENV=production bundle exec rake assets:precompile
Step 4: Start Diaspora
Create an init script that will make it easy to start up Diaspora:
sudo emacs /etc/init.d/diaspora
Paste in the following content:
#! /bin/sh
# chkconfig: - 86 30
# Author: FABIAN Tamas Laszlo <giganetom@gmail.com>
# Source: https://github.com/netom/diaspora-init/blob/master/init/diaspora

PATH=/sbin:/usr/sbin:/bin:/usr/bin
DESC="Diaspora application server"
NAME=diaspora
DIASPORA_HOME="/home/diaspora/diaspora"
STARTSCRIPT="RAILS_ENV=production ./script/server"
LOGFILE=$DIASPORA_HOME/log/startscript.log
SCRIPTNAME=$0
USER=diaspora
STARTUP_TIMEOUT=100

check_unicorn() {
    pgrep -f "unicorn_rails master"
}

check_sidekiq() {
    pgrep -f "sidekiq 2"
}

do_start()
{
    if ! touch $LOGFILE; then
        echo "Could not touch logfile"
        return 2
    fi

    if ! chown $USER $LOGFILE; then
        echo "Could not chown logfile"
        return 2
    fi

    if check_unicorn && check_sidekiq; then
        echo "Diaspora is already running"
        return 1
    fi

    if ! su -l $USER -c "cd $DIASPORA_HOME; $STARTSCRIPT >> $LOGFILE 2>&1 &"; then
        echo "Could not run start script"
        return 2
    fi

    [ "$VERBOSE" != no ] && echo "Waiting for Diaspora processes... "
    c=0
    while ! check_unicorn > /dev/null || ! check_sidekiq > /dev/null; do
        if [ $c -gt $STARTUP_TIMEOUT ]; then
            echo "Timeout waiting for Diaspora processes"
            return 2
        fi
        c=`expr $c + 1`
        sleep 1
        [ "$VERBOSE" != no ] && echo -n "."
    done
    [ "$VERBOSE" != no ] && echo 0
}

do_stop()
{
    for i in `check_unicorn`; do
        [ "$VERBOSE" != no ] && echo "Killing unicorn master with PID $i"
        kill -TERM $i
        [ "$VERBOSE" != no ] && echo $?
    done

    for i in `check_sidekiq`; do
        [ "$VERBOSE" != no ] && echo "Killing sidekiq with PID $i"
        kill -TERM $i
        [ "$VERBOSE" != no ] && echo $?
    done

    return 0
}

case "$1" in
  start)
    [ "$VERBOSE" != no ] && echo "Starting $DESC" "$NAME"
    do_start
    case "$?" in
        0|1) [ "$VERBOSE" != no ] && echo 0 ;;
        *) [ "$VERBOSE" != no ] && echo 1 ;;
    esac
    ;;
  stop)
    [ "$VERBOSE" != no ] && echo "Stopping $DESC" "$NAME"
    do_stop
    case "$?" in
        0|1) [ "$VERBOSE" != no ] && echo 0 ;;
        2) [ "$VERBOSE" != no ] && echo 1 ;;
    esac
    ;;
  status)
    echo 'Checking for running Diaspora processes'

    unicorn_running=false
    for i in `check_unicorn`; do
        echo "Found unicorn master qith PID $i"
        unicorn_running=true
    done

    sidekiq_running=false
    for i in `check_sidekiq`; do
        echo "Found sidekiq with PID $i"
        sidekiq_running=true
    done

    if $unicorn_running && $sidekiq_running; then
        echo "Diaspora health is OK"
        echo 0
    else
        if $unicorn_running; then
            echo "Unicorn is RUNNING, but sidekiq is DOWN!"
            echo 1
            return 1
        fi
        if $sidekiq_running; then
            echo "Sidekiq is RUNNING, but unicorn is DOWN!"
            echo 1
            return 1
        fi
        echo "All Diaspora processes are DOWN"
        echo 0
    fi
    ;;
  restart|force-reload)
    [ "$VERBOSE" != no ] && echo "Restarting $DESC" "$NAME"
    do_stop
    case "$?" in
      0|1)
        do_start
        case "$?" in
            0) [ "$VERBOSE" != no ] && echo 0 ;;
            1) [ "$VERBOSE" != no ] && echo "old process is still running" && echo 1 ;;
            *) [ "$VERBOSE" != no ] && echo "failed to start" && echo 1 ;;
        esac
        ;;
      *)
        [ "$VERBOSE" != no ] && echo "failed to stop"
        [ "$VERBOSE" != no ] && echo 1
        ;;
    esac
    ;;
  *)
    echo "Usage: $SCRIPTNAME {start|stop|status|restart|force-reload}" >&2
    exit 3
    ;;
esac

:
And grant exec permissions:
sudo chmod u+x /etc/init.d/diaspora
Now configure CentOS to start this on boot, and run it to start up our VPS.
sudo chkconfig --add diaspora
sudo chkconfig --level 345 diaspora on
sudo /etc/init.d/diaspora start
This will start up a Diaspora server listening on your VPS’ IP on port 3000, and leave it running in the background.
Step 5: Configure nginx
nginx will reverse proxy connections from the web to the Diaspora server.
Tweak Main nginx Configuration
sudo emacs /etc/nginx/nginx.conf
Under the http section, add a line:
server_names_hash_bucket_size 128;
Create a Diaspora nginx Configuration
Now open up a new file to create an nginx configuration for Diaspora.
sudo emacs /etc/nginx/conf.d/diaspora.conf
Paste in the following content. You will need to update the server_name path to your hostname.
upstream diaspora {
  server          localhost:3000;
}


server {
  server_name YOURSERVER.COM;
  listen 80;
  gzip on;
  gzip_min_length 1000;
  gzip_types application/json text/css application/x-javascript;

  root /home/diaspora/diaspora/public;
  try_files $uri @diaspora;
  location @diaspora {
    proxy_set_header X-Real-IP $remote_addr;
    proxy_set_header X-Forwarded-For $proxy_add_x_forwarded_for;
    proxy_set_header X-Forwarded-Proto https;
    proxy_set_header Host $http_host;
    proxy_redirect off;
    proxy_pass http://diaspora;
  }
}
Restart nginx
Now that the configuration file has been created, restart nginx to pick up the changes.
sudo /etc/init.d/nginx stop
sudo /etc/init.d/nginx start
The stop command may fail if ngnix wasn’t currently running, but the start command should succeed.
Set nginx to Start on Boot
Set CentOS to start up the nginx daemon when the VPS reboots.
sudo chkconfig --level 345 nginx on
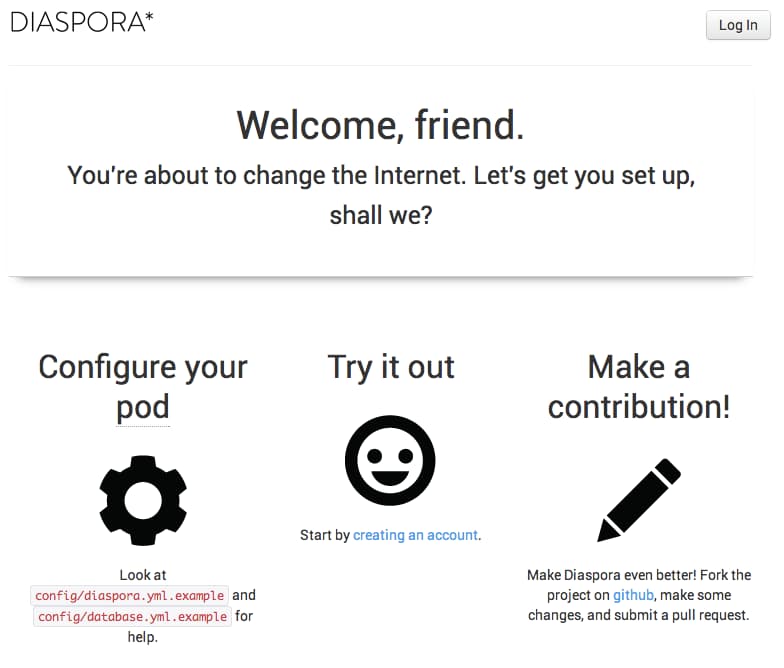
Step 6: Use Diaspora!
Now that nginx and Diaspora are both up and running, you can navigate to your Diaspora instance and start using it. You can access it by navigating to your hostname with your web browser. You’ll be greater with the Diaspora welcome page where you can create your first local Diaspora account.
 <br/>
<div class=“author”>Submitted by: <a href=“http://jimreardon.us/”>Jim Reardon</a></div>
<br/>
<div class=“author”>Submitted by: <a href=“http://jimreardon.us/”>Jim Reardon</a></div>
Thanks for learning with the DigitalOcean Community. Check out our offerings for compute, storage, networking, and managed databases.
About the author
Still looking for an answer?
This textbox defaults to using Markdown to format your answer.
You can type !ref in this text area to quickly search our full set of tutorials, documentation & marketplace offerings and insert the link!
I used this tutorial step by step. When I got finished, it did not display on my home page. I tried over and over creating new droplets. How do I install Diaspora so there are no problems.
@josephcapers: Please do not duplicate your questions. (<a href=“https://www.digitalocean.com/community/articles/how-to-set-up-nginx-virtual-hosts-server-blocks-on-centos-6”>https://www.digitalocean.com/community/articles/how-to-set-up-nginx-virtual-hosts-server-blocks-on-centos-6</a>)
Please create a community question: <a href=“https://www.digitalocean.com/community/questions/new”>https://www.digitalocean.com/community/questions/new</a>
I followed this tutorial fine and my initial splash page showed up fine. However when I went to try to sign up, I got errors, mainly, the diaspora server wasn’t working.
Actually, when I tried to start up the script for diaspora, I got this error:
“Timeout waiting for Diaspora processes”
I did some testing, and as it turns out, the command ‘pgrep -f “sidekiq 2”’ returns no PID (but ‘pgrep -f “sidekiq”’ does!).
Removing the ‘2’ and rebooting the server does no good, as then the main splash page won’t show.
After replacing the ‘2’ again, I tried to remove the https:// from the url (i.e. no secure http), and I was able to browse a bit on my login.
I had previously had diaspora set up on a different host, but I couldn’t get the https:// to work properly. Any thoughts on how to handle this on DO?
Thanks.
 This work is licensed under a Creative Commons Attribution-NonCommercial- ShareAlike 4.0 International License.
Become a contributor for community
Get paid to write technical tutorials and select a tech-focused charity to receive a matching donation.

DigitalOcean Documentation
Full documentation for every DigitalOcean product.

Resources for startups and AI-native businesses
The Wave has everything you need to know about building a business, from raising funding to marketing your product.
The developer cloud
Scale up as you grow — whether you're running one virtual machine or ten thousand.

Start building today
From GPU-powered inference and Kubernetes to managed databases and storage, get everything you need to build, scale, and deploy intelligent applications.
