By Apoorv Pal and Caitlin Postal
Not using Ubuntu 22.04?
Choose a different version or distribution. on Ubuntu 22.04")
The author selected the Free and Open Source Fund to receive a donation as part of the Write for DOnations program.
Introduction
The LOMP stack is an acronym for Linux, OpenLiteSpeed, MariaDB, and PHP. OpenLiteSpeed is the open-source option for LiteSpeed web servers. LiteSpeed servers are known for their speedy performance, especially with languages such as PHP that integrate well with their LiteSpeed Server Application Programming Interface (LSAPI). The LiteSpeed PHP (LSPHP) interpreter functions much faster to serve dynamic PHP pages via their proprietary LS-API. The API integrates with the HTTP server, thereby reducing the overall time taken for the server’s response to a request. OpenLiteSpeed is becoming the preferred choice for WordPress, Joomla, and other PHP-based applications that serve dynamic content.
In this tutorial, you will set up a LOMP server running on Ubuntu 22.04. At the time of writing, the current versions are PHP 8.1, MariaDB 10.7, and OpenLiteSpeed 1.7.
Prerequisites
Before you begin this guide, you will need the following:
- One Ubuntu 22.04 server with a sudo non-root user, a firewall, and at least 1GB of RAM, which you can set up by following the Ubuntu 22.04 initial server setup guide
- A fully-qualified domain name (required for SSL configuration and recommended for public websites). You can get a domain name on Namecheap, Freenom, or the domain registrar of your choice. Follow the DNS Quickstart to point the domain name to your server.
- SSL certificates and keys for your domain. Follow How To Use Certbot Standalone Mode to Retrieve Let’s Encrypt SSL Certificates on Ubuntu 22.04 to obtain the certificate-key pair for your domain. In Step 2, open port
80alongside port443.
Step 1 — Installing OpenLiteSpeed
In this step, you will install the OpenLiteSpeed web server after importing the required package repositories to your server. If it is your first time using sudo in the SSH session, you may need to enter the password for your non-root user.
Begin by updating the package manager cache:
- sudo apt update
Then, upgrade the required packages by running the following command:
- sudo apt upgrade -y
Note: If prompted to update the kernel, type y to continue. If prompted to reboot, run the command sudo reboot to reboot the system.
Unlike Apache and Nginx, OpenLiteSpeed hosts its code on its own repository. Add this repository to the apt package manager’s sources list with the following command:
- sudo wget -O - https://repo.litespeed.sh | sudo bash
wget fetches the shell script for the remote repository located on OpenLiteSpeed’s server, and the -O flag prints the file’s content to the terminal. The | pipe passes the content to a new bash shell, launched by the sudo bash command. This bash terminal executes the commands mentioned in the contents of the .sh file (bash script) fetched from the repository and installs the repository on the local APT repository list.
You will see an output like this:
OutputRedirecting output to ‘wget-log’.
--2022-09-08 08:27:42--  http://rpms.litespeedtech.com/debian/lst_debian_repo.gpg
Resolving rpms.litespeedtech.com (rpms.litespeedtech.com)... 52.55.120.73
Connecting to rpms.litespeedtech.com (rpms.litespeedtech.com)|52.55.120.73|:80... connected.
HTTP request sent, awaiting response... 200 OK
Length: 1198 (1.2K) [application/octet-stream]
Saving to: ‘/etc/apt/trusted.gpg.d/lst_debian_repo.gpg’

/etc/apt/trusted.gpg.d/l 100%[==================================>]   1.17K  --.-KB/s    in 0s

2022-09-08 08:27:42 (139 MB/s) - ‘/etc/apt/trusted.gpg.d/lst_debian_repo.gpg’ saved [1198/1198]

--2022-09-08 08:27:42--  http://rpms.litespeedtech.com/debian/lst_repo.gpg
Resolving rpms.litespeedtech.com (rpms.litespeedtech.com)... 52.55.120.73
Connecting to rpms.litespeedtech.com (rpms.litespeedtech.com)|52.55.120.73|:80... connected.
HTTP request sent, awaiting response... 200 OK
Length: 2336 (2.3K) [application/octet-stream]
Saving to: ‘/etc/apt/trusted.gpg.d/lst_repo.gpg’

/etc/apt/trusted.gpg.d/l 100%[==================================>]   2.28K  --.-KB/s    in 0s

2022-09-08 08:27:42 (226 MB/s) - ‘/etc/apt/trusted.gpg.d/lst_repo.gpg’ saved [2336/2336]

LiteSpeed repository has been setup!
Update the list of repositories to ensure that the newly added repository is scanned by the apt package manager:
- sudo apt update
Next, install the openlitespeed package:
- sudo apt install openlitespeed
If prompted, enter your password, then confirm the installation with Y.
Once the installation is complete, verify that OpenLiteSpeed is installed and working correctly by checking its status with the service command:
- sudo systemctl status lsws
The systemctl status command obtains the status of a service identified by its keyword. The keyword for the OpenLiteSpeed Web Server service is lsws. The systemctl command can enable or disable automatic start for services and manually start or stop a service.
You will receive the following output:
Output● lshttpd.service - OpenLiteSpeed HTTP Server
     Loaded: loaded (/etc/systemd/system/lshttpd.service; enabled; vendor preset: enabled)
     Active: active (running) since Wed 2022-03-16 08:59:09 UTC; 2min 26s ago
    Process: 32997 ExecStart=/usr/local/lsws/bin/lswsctrl start (code=exited, status=0/SUCCESS)
   Main PID: 33035 (litespeed)
     CGroup: /system.slice/lshttpd.service
             ├─33035 openlitespeed (lshttpd - main)
             ├─33044 openlitespeed (lscgid)
             └─33073 openlitespeed (lshttpd - #01)
You now have an OpenLiteSpeed web server running with its default configuration. You may not be able to access the GUI-based Admin Panel and example website yet, as the firewall blocks traffic to these ports.
With your OpenLiteSpeed web server running, you can update the firewall and open the necessary ports to allow users to access the website.
Step 2 — Updating the Firewall
In this step, you will configure the firewall for your server. You will allow traffic over TCP to selected ports for the GUI-based admin panel and example website, as well as ports 80 and 443 for HTTP and HTTPS sites.
The OpenLiteSpeed server bundles a GUI-based admin panel and an example website with the server. The admin panel is an easy-to-use interface for configuring Listeners, Virtual Hosts, SSL, and monitoring logs. The example website features a sample CGI Script, PHP Script, Error Page, and a Password Protected Page. This website can demonstrate the capabilities of the web server.
The GUI-based Admin Panel listens on port 7080 in the default configuration, while the example website listens on port 8088. You need to allow TCP traffic to these ports via the ufw firewall to access these sites.
To provide access, run the following command:
- sudo ufw allow 7080,80,443,8088/tcp
Then, check the status of the firewall rules:
- sudo ufw status
Your output will look like this:
OutputStatus: active

To                                Action      From
--                                ------      ----
OpenSSH                           ALLOW       Anywhere
80,443,7080,8088/tcp              ALLOW       Anywhere
OpenSSH (v6)                      ALLOW       Anywhere (v6)
80,443,7080,8088/tcp (v6)         ALLOW       Anywhere (v6)
You can view the example website through port 8088:
http://your_server_ip:8088
It should appear like the screencapture below:
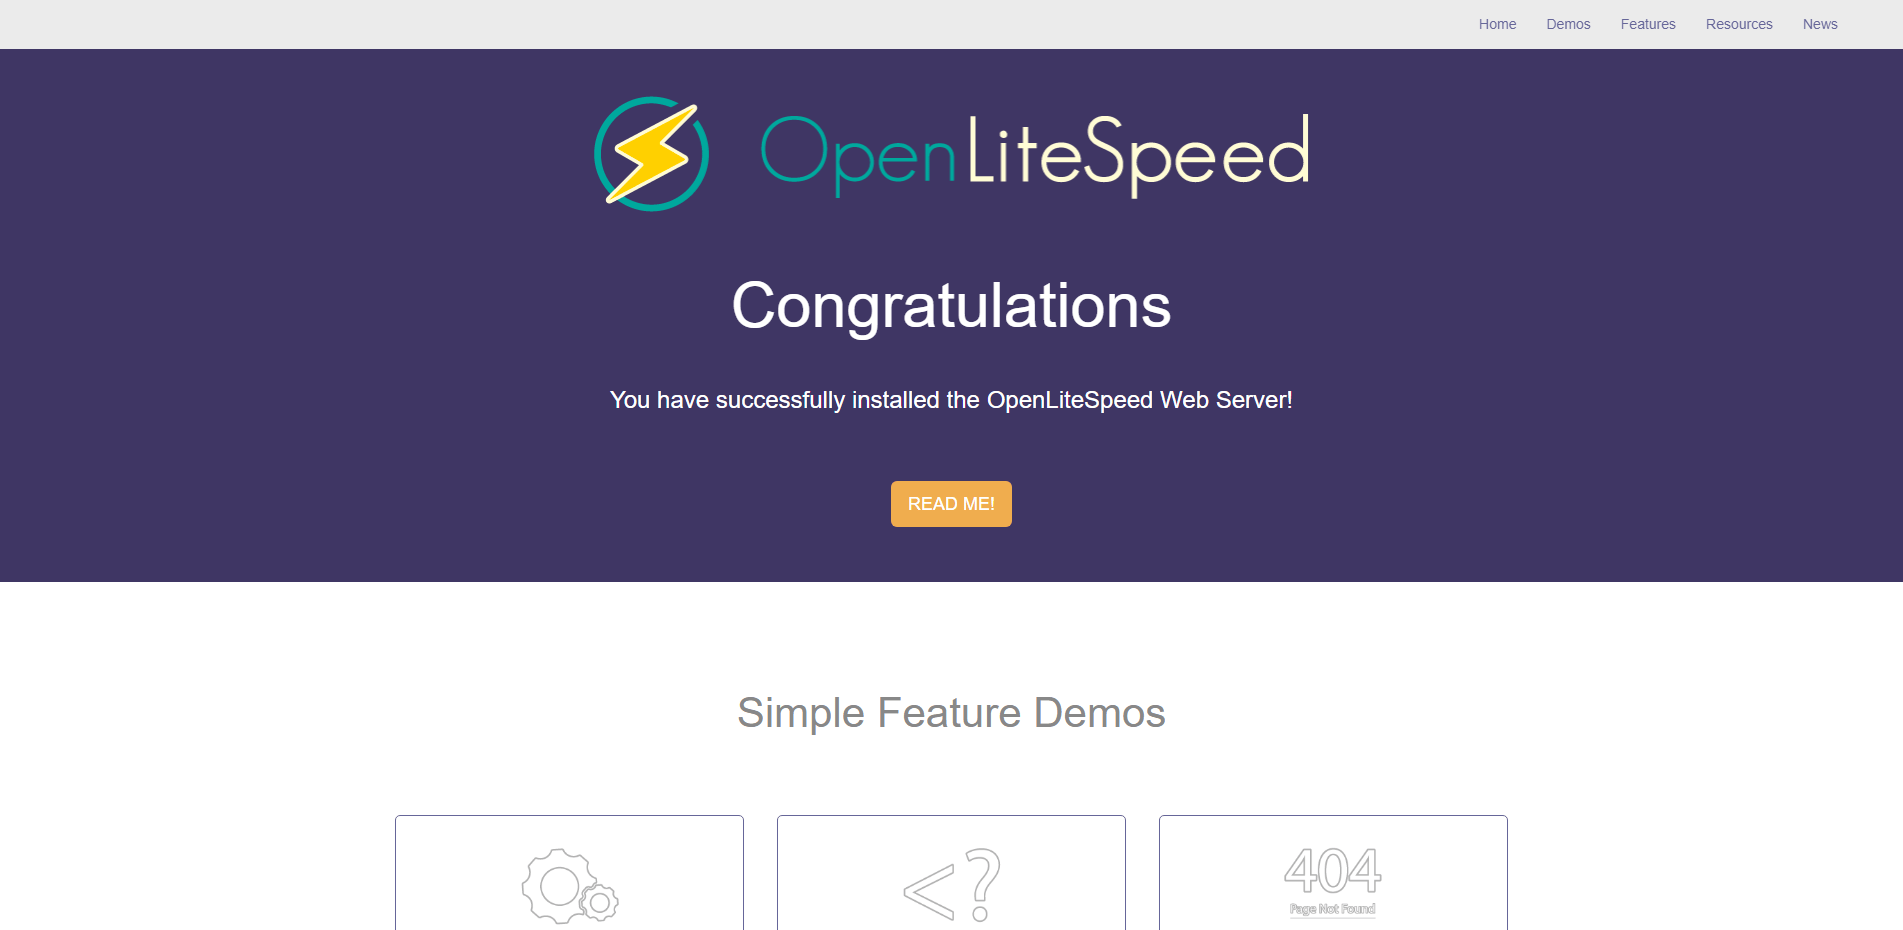
You can look around the example website to explore the features offered by the web server.
To see the GUI-based Admin Panel, access port 7080:
http://your_server_ip:7080
Later in this tutorial, you will use the OpenLiteSpeed GUI Admin Panel to configure your web server.
You have now set up the OpenLiteSpeed server on your Ubuntu instance, which will allow you to serve a variety of web applications based on different back-end languages and frameworks. In the next step, you will set up other services of the LOMP stack.
Step 3 — Installing MariaDB
With the OpenLiteSpeed server running on Linux, you can now set up the MariaDB Database Server. The database server will allow you to store, retrieve, and manage data on your website. MariaDB is a popular database engine because it offers SQL and NoSQL functionalities and can incorporate multiple database engines such as MyISAM and InnoDB.
Install the MariaDB server with the following command:
- sudo apt install mariadb-server
When prompted for confirmation, type Y to confirm.
After the installation has finished, complete the initial server setup with the following command:
- sudo mysql_secure_installation
The default installation has no root password, so you can press Enter when prompted.
You will receive an output like this after the installation setup:
Output
NOTE: RUNNING ALL PARTS OF THIS SCRIPT IS RECOMMENDED FOR ALL MariaDB
      SERVERS IN PRODUCTION USE! PLEASE READ EACH STEP CAREFULLY!

In order to log into MariaDB to secure it, we'll need the current
password for the root user. If you've just installed MariaDB, and
you haven't set the root password yet, the password will be blank,
so you should just press enter here.

Enter current password for root (enter for none):
OK, successfully used password, moving on...
You will then be prompted to enable socket authentication. When asked whether you would like to Switch to unix_socket authentication, type Y:
OutputSetting the root password or using the unix_socket ensures that nobody
can log into the MariaDB root user without the proper authorisation.

You already have your root account protected, so you can safely answer 'n'.

Switch to unix_socket authentication [Y/n] y
Enabled successfully!
Reloading privilege tables..
 ... Success!
When the next prompt asks if you want to set the root password, type Y and enter your preferred root password twice:
OutputYou already have your root account protected, so you can safely answer 'n'.

Change the root password? [Y/n] y
New password:
Re-enter new password:
Password updated successfully!
Reloading privilege tables..
 ... Success!
The next prompt asks if you would like to remove the anonymous users. Answer Y to this prompt:
OutputBy default, a MariaDB installation has an anonymous user, allowing anyone
to log into MariaDB without having to have a user account created for
them.  This is intended only for testing, and to make the installation
go a bit smoother.  You should remove them before moving into a
production environment.

Remove anonymous users? [Y/n] y
 ... Success!
Unless you plan on accessing the database as a root user from other servers or your local machine, you should also disallow root login remotely. To disable root logins from remote machines, answer Y to the prompt:
OutputNormally, root should only be allowed to connect from 'localhost'.  This
ensures that someone cannot guess at the root password from the network.

Disallow root login remotely? [Y/n] y
 ... Success!
You can also remove the test database and related privileges by typing Y for the following prompt:
OutputBy default, MariaDB comes with a database named 'test' that anyone can
access.  This is also intended only for testing, and should be removed
before moving into a production environment:

Remove test database and access to it? [Y/n] y
 - Dropping test database...
 ... Success!
 - Removing privileges on test database...
 ... Success!
Finally, you will confirm to reload the privilege tables so that all the changes above are applied to the server:
OutputReloading the privilege tables will ensure that all changes made so far
will take effect immediately.

Reload privilege tables now? [Y/n] y
 ... Success!

Cleaning up...

All done!  If you've completed all of the above steps, your MariaDB
installation should now be secure.

Thanks for using MariaDB!
You have now installed, configured, and secured a MariaDB database server on your Ubuntu instance. The database will listen for MySQL connections on port 3306 in its default configuration. Since the database will be accessed internally (on the same server in most cases), you will not open this port to external traffic in the firewall.
Next, you will install PHP for use with OpenLiteSpeed.
Step 4 — Installing a Specific Version of PHP
The OpenLiteSpeed web server comes bundled with one PHP version, which may not be the latest stable version of PHP. You can use the pre-installed version of PHP, or you can install a specific instance. In this step, you will check the version of your PHP installation, update it if necessary, and install the requisite packages.
To know which version of PHP was pre-installed with your OpenLiteSpeed server, click the button in the Test PHP section of the example website or visit the following URL:
http://your_server_ip:8088/phpinfo.php
The PHP version will be displayed on the info page.
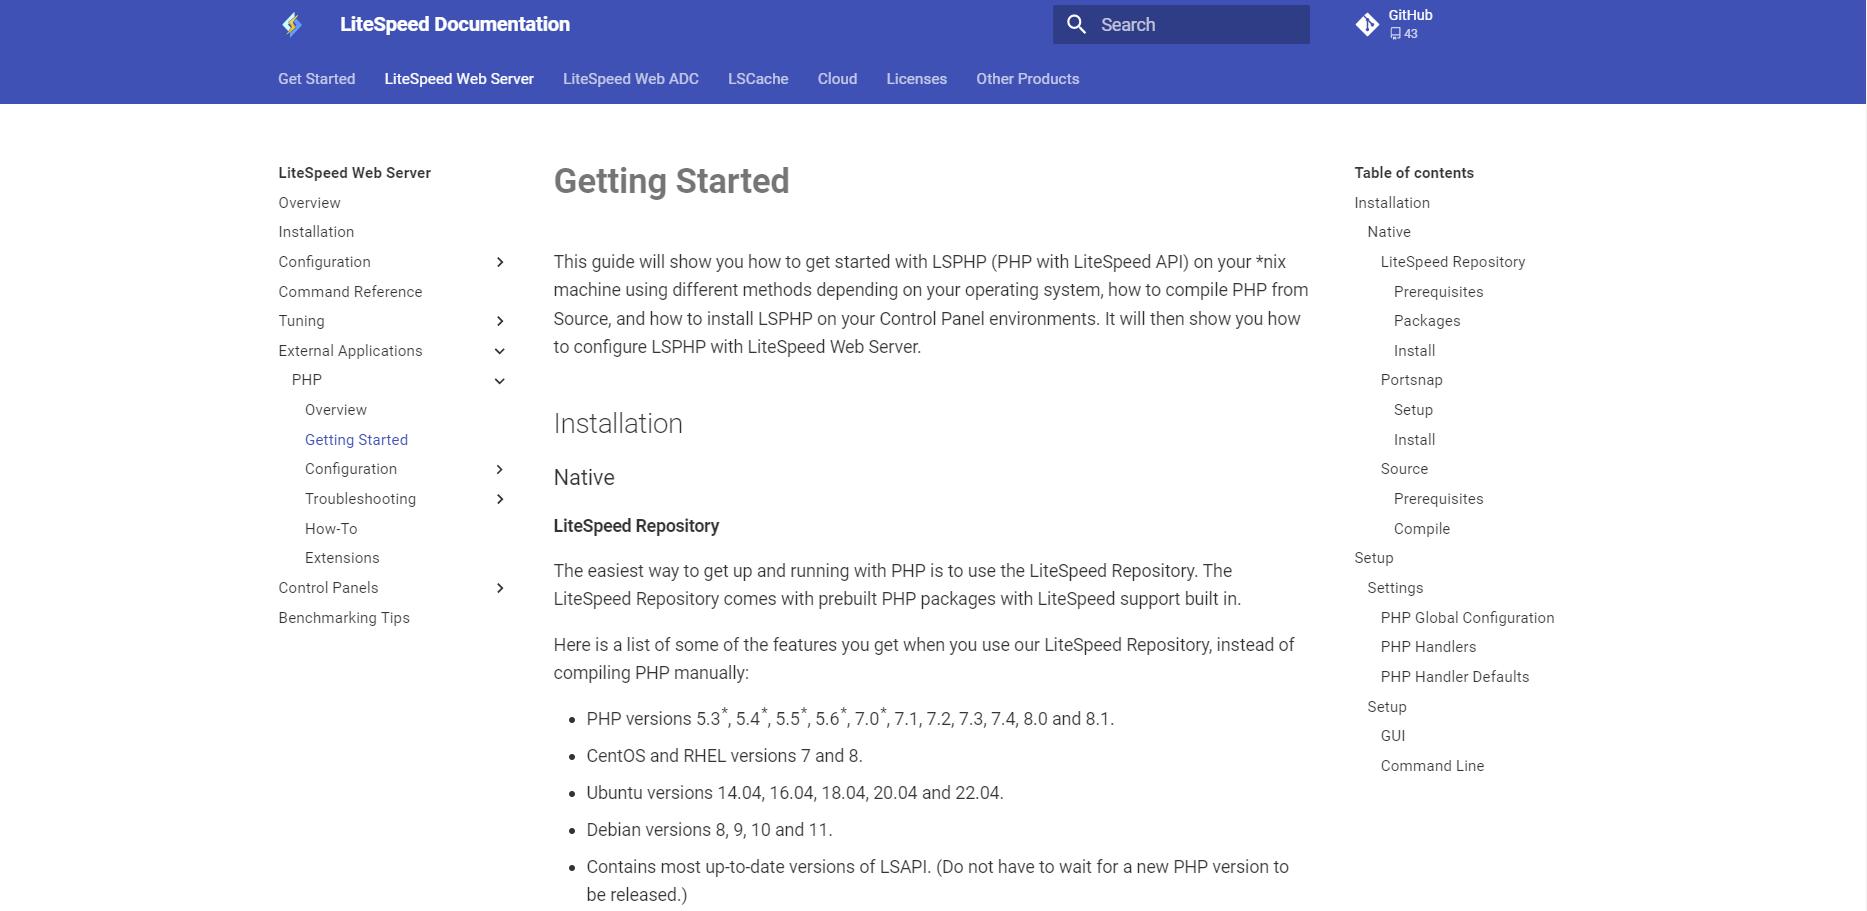
To install a specific version of PHP on the OpenLiteSpeed web server, check the list of available versions along with their compatibility at the Getting Started page of the official OpenLiteSpeed website. The list of available versions is displayed in the LiteSpeed Repository section under the Installation header:
You can also check the LSPHP (LiteSpeed PHP) packages available for Ubuntu with the following command:
- sudo apt-cache search lsphp
From the package list, you can identify the php versions using the suffix of the package names. You will see a package list like this:
Output...
lsphp81 - server-side, HTML-embedded scripting language (LSAPI binary)
...
In this example, lsphp81 states that this is PHP v8.1, whereas lsphp74 would mean PHP v7.4.
To install a specific lsphp package, use the following command (replacing 81 with the suffix for your preferred version):
- sudo apt install lsphp81 lsphp81-{common,mysql}
Type Y to confirm the installation.
You have only installed the lsphp package, but you have not configured OpenLiteSpeed to use this version of PHP. The example website will continue to show the default PHP version until you configure it to use the new version. In the next step, you will configure OpenLiteSpeed to use this version of PHP.
Step 5 — Configuring OpenLiteSpeed
In this step, you will configure the credentials for the GUI-based Admin Panel for the OpenLiteSpeed web server and configure the web server to use the PHP version of your choice.
To configure the OpenLiteSpeed web server, access the GUI Admin Panel at port 7080:
http://your_server_ip:7080
In your terminal, set the administrator account credentials with the following command:
- sudo /usr/local/lsws/admin/misc/admpass.sh
These login credentials will be different from what you set in earlier steps, and they will work only for the GUI Admin Panel of the OpenLiteSpeed server.
You will see the following output, which will prompt you to enter a username and password:
OutputPlease specify the user name of administrator.
This is the user name required to login the administration Web interface.

User name [admin]: sammy

Please specify the administrators password.
This is the password required to login the administration Web interface.

Password:
Retype password:
Administrators username/password is updated successfully!
After you set the credentials, you can configure the server to use the specified version.
Via http://your_server_ip:7080, log in to the Admin Panel (using the credentials you just set up) and navigate to the Server Configuration section. Then, click the External App tab.
You will see the following screen:
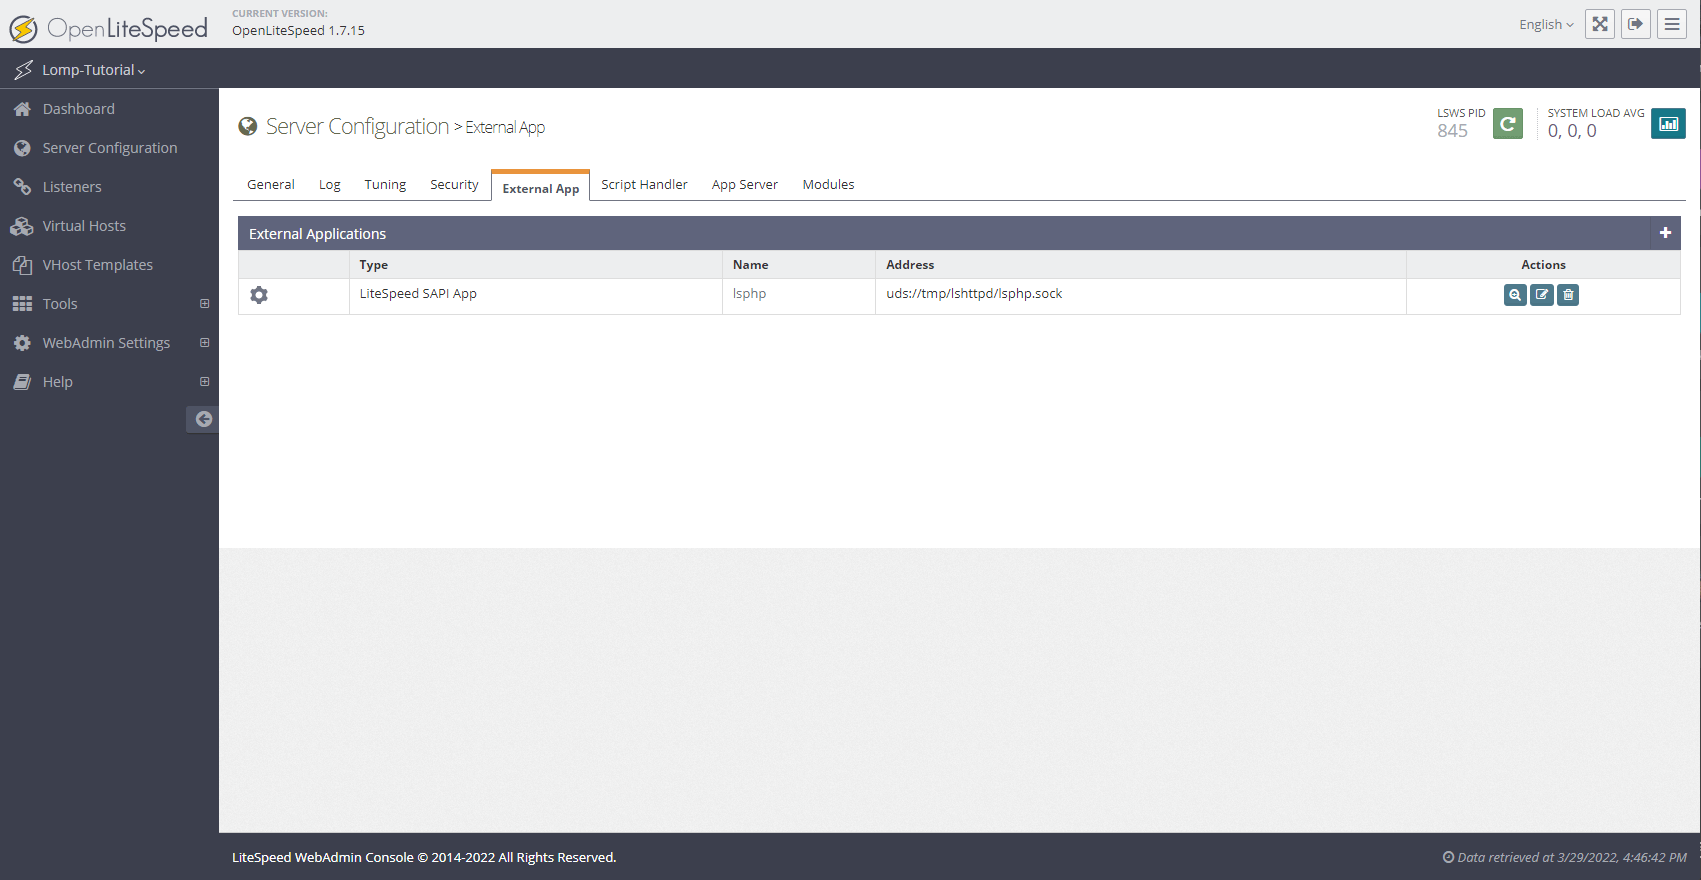
Click the edit button in the Actions column of the first row for LiteSpeed SAPI App, which will open an app with the name lsphp. Scroll to the Command field to change its value to lsphp81/bin/lsphp (following the naming convention in Step 4). After configuring this value, scroll to the LiteSpeed SAPI App heading and click the Save button on the right.
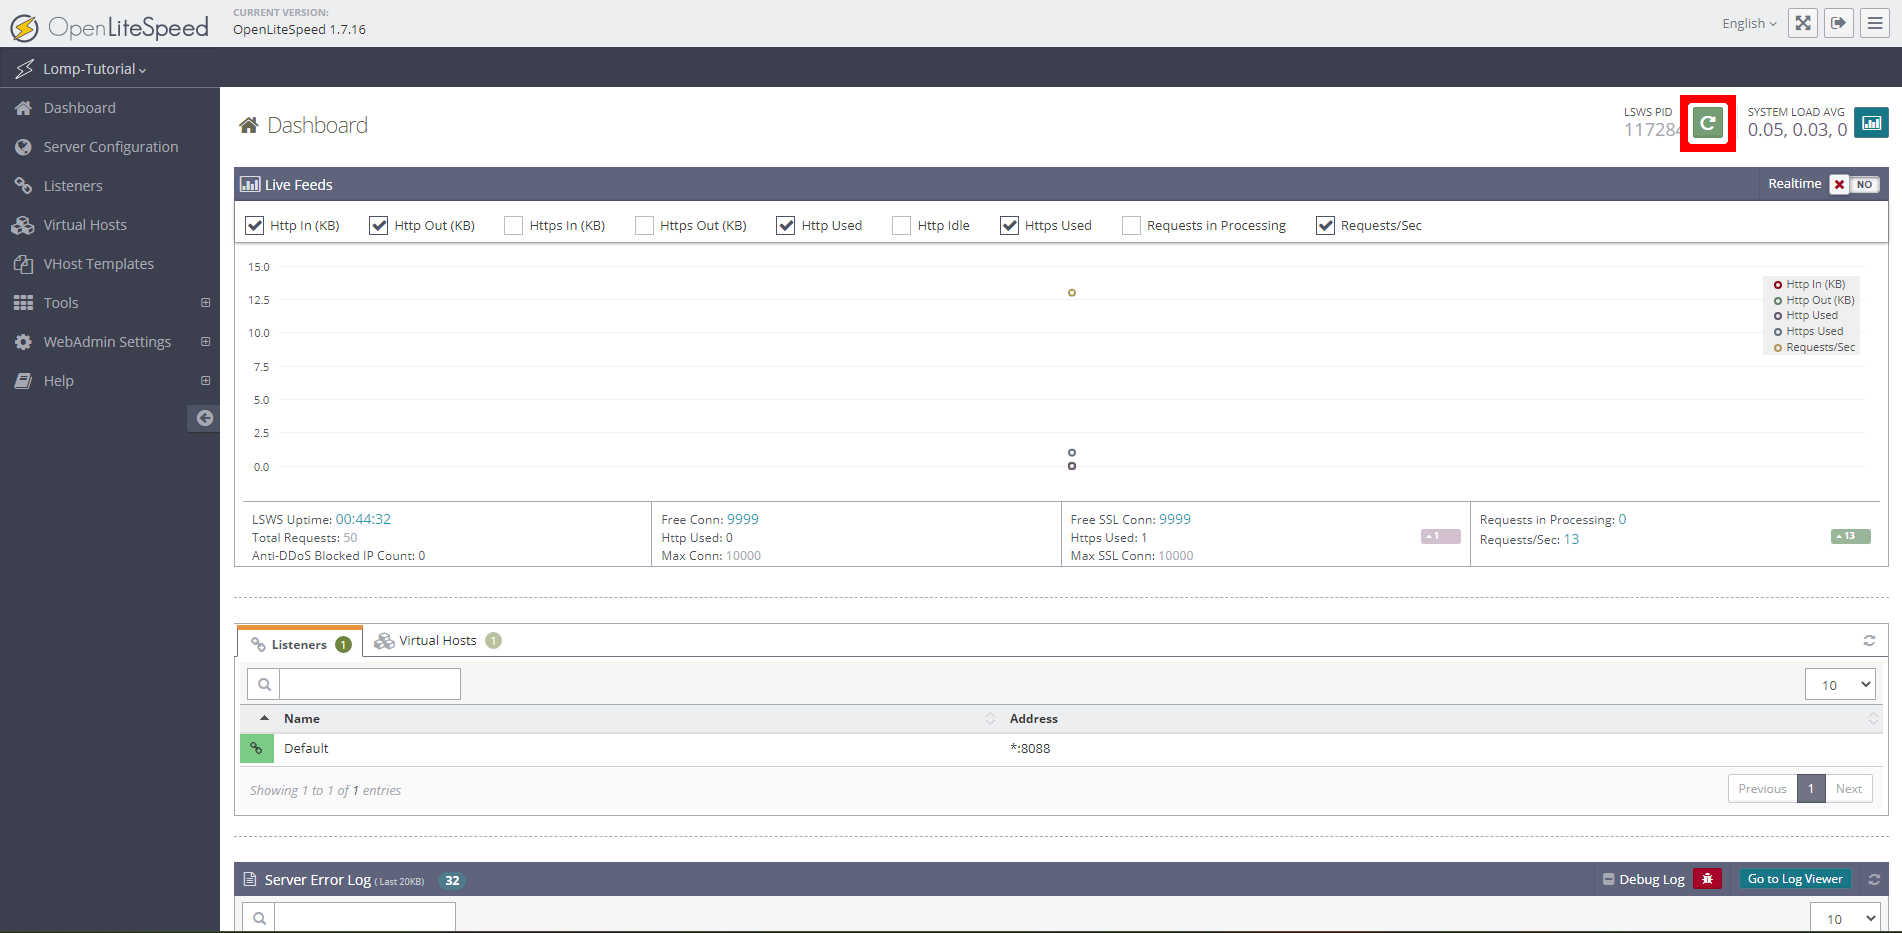
Use the Graceful Restart button in the top right to restart the web server. The Graceful Restart button is highlighted in the upper right of the following screencapture:
Verify that your server is now using the specified PHP version by visiting the informational page at port 8088:
http://your_server_ip:8088/phpinfo.php
The page will now display the specified version number.
In this step, you configured the credentials for the admin panel and set it to use the desired version of PHP. Next, you will set up Virtual Hosts for the different websites that you plan to host on this web server.
Step 6 — Setting Up a Virtual Host
In this step, you will set up the Virtual Hosts for your web server and configure TLS encryption for all traffic to your website.
Virtual Hosts allow you to serve multiple websites, identified by unique hostnames, via a single web server. OpenLiteSpeed can serve multiple Virtual Hosts, which are then mapped to Listeners; the Listeners are then mapped to specific ports. OpenLiteSpeed allows Virtual Hosts to have customized redirection rules, and a different PHP version can also be configured for each Virtual Host. Virtual Hosts can be configured to serve as reverse proxy connections for other web servers such as Node.JS.
Still in the GUI Admin Panel, navigate to the Virtual Hosts section. On the top right corner of the table that appears, click the plus (+) button to add a new Virtual Host.
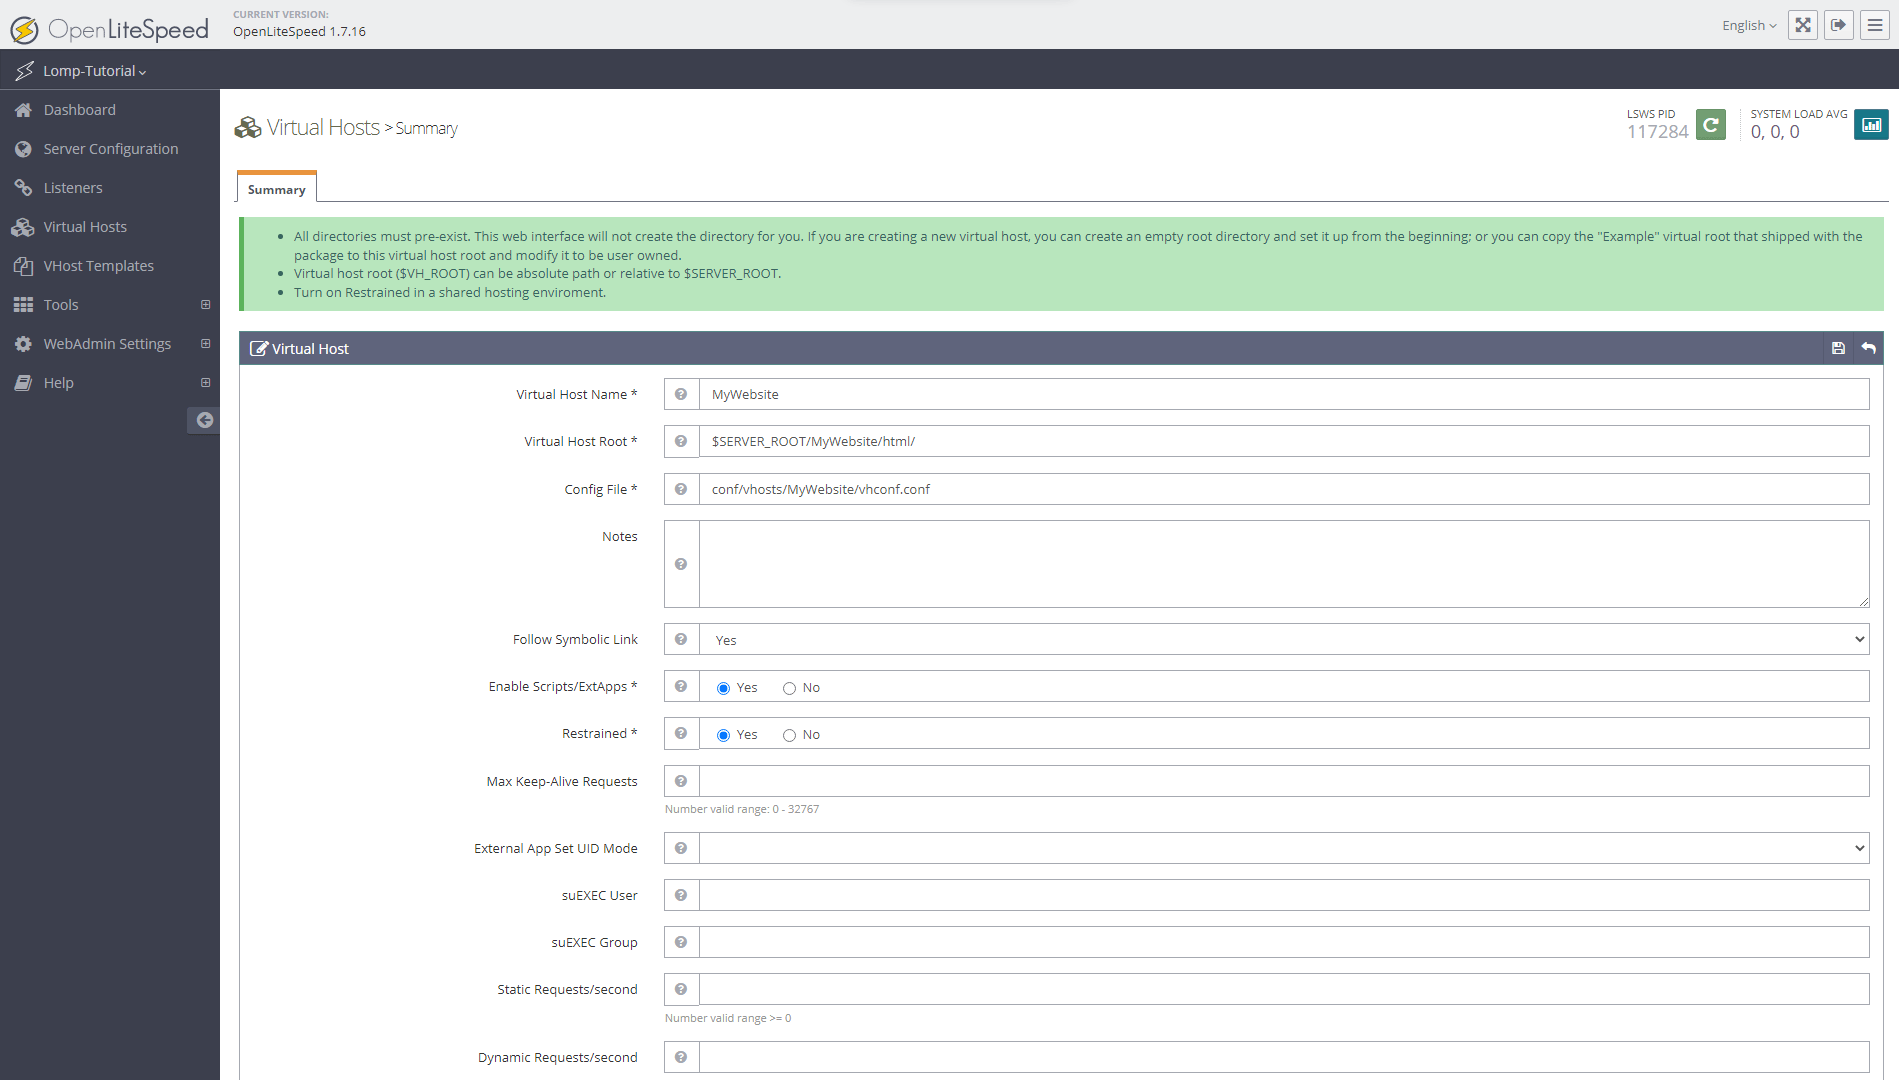
You can then add a Virtual Host name of your choice to set up the Virtual Host Root and the path for the configuration file of the Virtual Host, using variables such as $SERVER_ROOT (for referring to the root directory of the OpenLiteSpeed Web Server) or $VH_ROOT (for referring to the root directory of the Virtual Host). Click Yes on Enable Scripts/ExtApps to ensure PHP works on the Virtual Host.
When setting up the Virtual Host, complete the following fields with your desired values (the values shown below are examples):
- Virtual Host Name:
MyWebsite - Virtual Host Root:
$SERVER_ROOT/MyWebsite/html/ - Config File:
conf/vhosts/MyWebsite/vhconf.conf - Enable Scripts/ExtApps:
Yes - Restrained:
Yes
You can replace MyWebsite with the domain name you created during the Prerequisites.
Note: You may receive an error if the configuration file does not exist at the specified path. Click the link mentioned in the error message to create the file automatically.
Yes on Enable Scripts/ExtApps allows you to specify a custom PHP interpreter version in the External Apps section of the configuration. It can be turned off if you do not intend to configure a custom PHP version.
Yes on Restrained prevents the users from accessing files in directories other than the ones contained in the Virtual Host Root directory, even if symbolic links are pointing to files outside the Virtual Host root directory. For security purposes, enable this feature.
After completing the configuration, click the Save button on the right side of the Virtual Hosts row.
The Admin Panel may display a prompt to perform a Graceful Restart to apply the changes to the configuration. You can perform a Graceful Restart at this point as it will not affect the configuration steps. You can also wait to perform the Graceful Restart after you complete the changes to the Listener configuration.
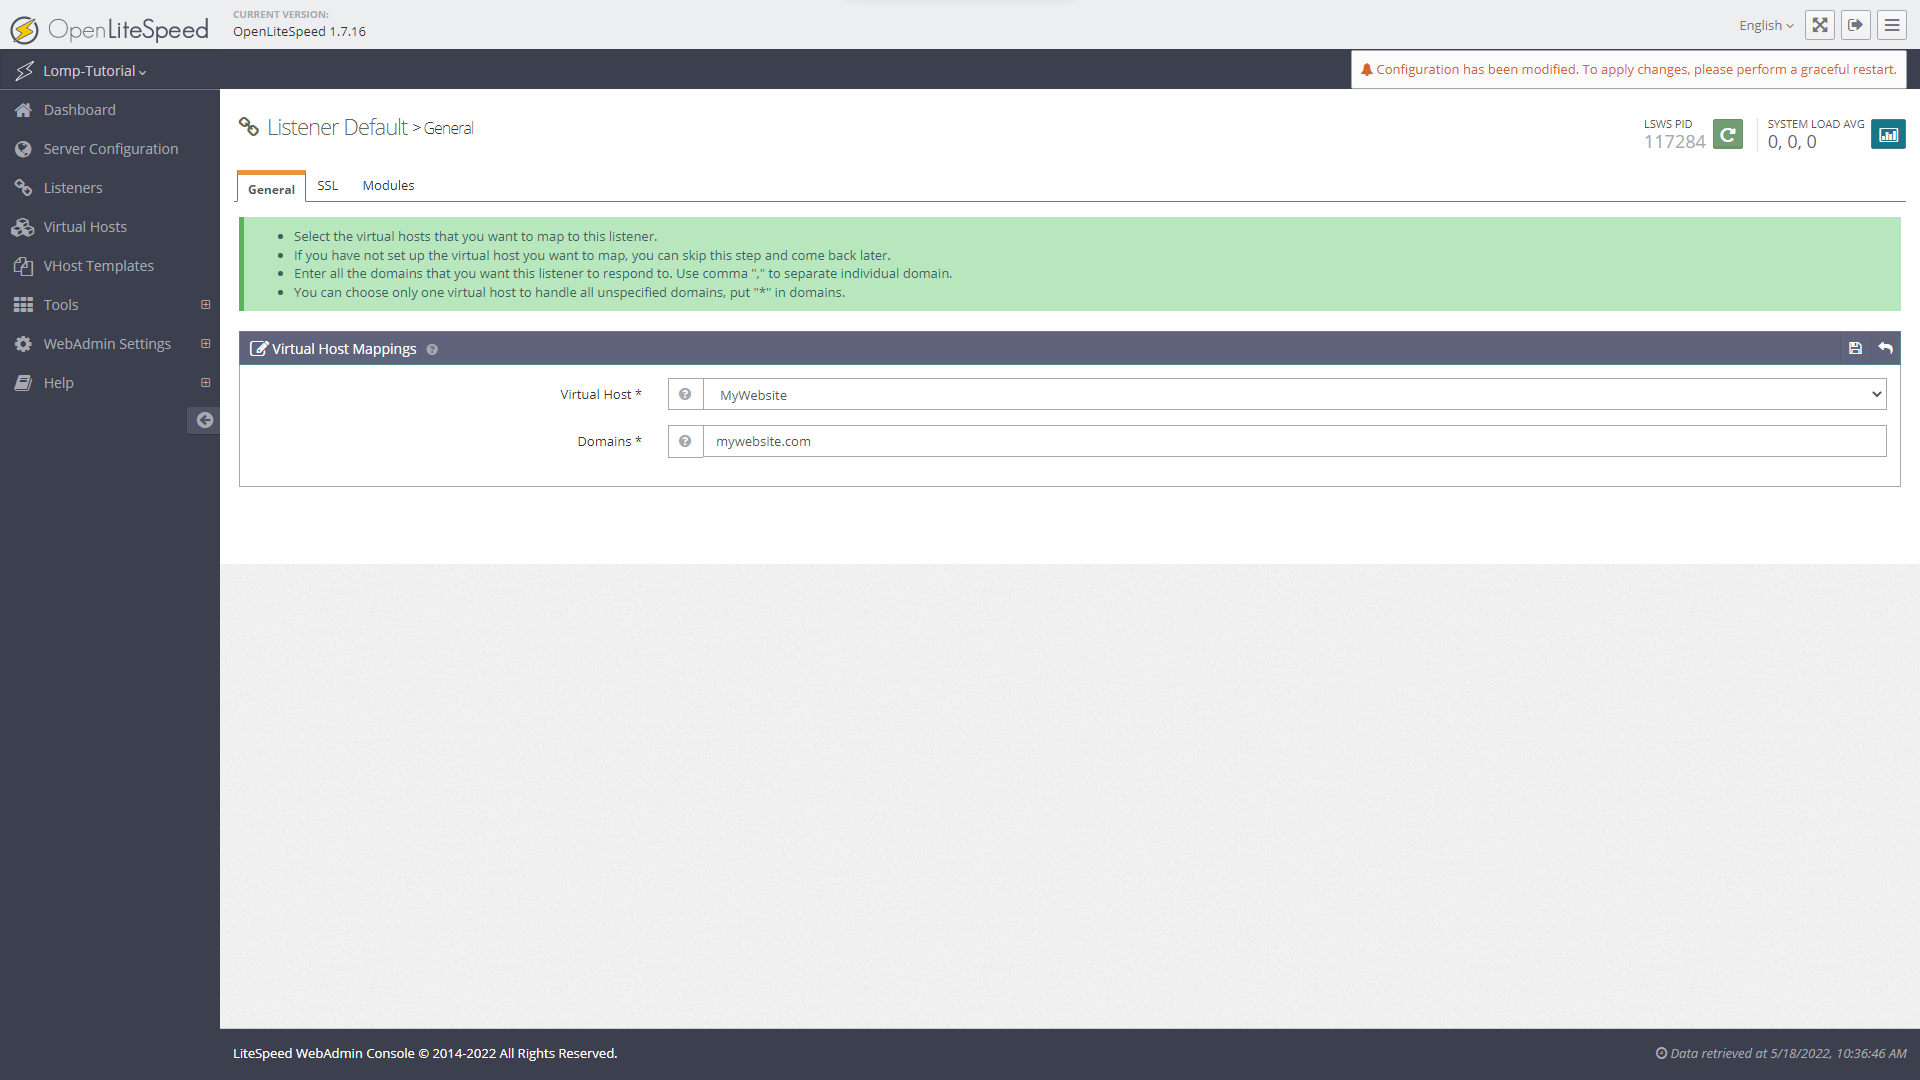
After configuring the Virtual Host, you will configure the Listener. Navigate to the Listeners section of the Admin Panel. Click the Default listener, then click the plus (+) button in the top right corner of the Virtual Host Mappings table.
From the dropdown corresponding to Virtual Host, select the Virtual Host Name that you assigned in the Virtual Host Configuration. In the example shown, the selected Virtual Host is MyWebsite.
In the text box for a domain name, enter the fully qualified and registered domain name that you will use to serve the Virtual Host that you configured. In the screencapture below, the sample value is set to mywebsite.com, but update it with the value you have used for your_domain.
Note: The default listener is configured to listen on port 8088. The port used for HTTP traffic to your site is 80 and, if SSL/TLS encryption is enabled, then your HTTPS website would be expected to listen on port 443. You will need to change the port in the Address Settings of the Listener Configuration to change the port at which the listener listens.
Click Save on the top right of the Virtual Hosts Mapping row.
It is strongly recommended that you enable TLS security for your website. Under the General settings for the Listener, update the Secure option to Yes and change the port from 8088 to 443 for the Listeners that serve HTTPS pages. 443 is the default port for HTTPS. Save the updated address settings.
Because you generated a certificate and key file from a certificate authority during the prerequisites, you can now add them to your OpenLiteSpeed setup. Add the certificate and key file paths in the SSL section of the Listener’s configuration by clicking the Edit icon in the SSL Private Key & Certificate row.
If you followed the guides mentioned in the prerequisite, the certificate and key files generated by Let’s Encrypt will be at the following locations:
- Private Key File:
/etc/letsencrypt/live/your_domain.privkey.pem - Certificate File:
/etc/letsencrypt/live/your_domain.fullchain.pem
For certificates generated by Let’s Encrypt, you must set the Chained Certificate option to Yes, as recommended by the official documentation for configuring Let’s Encrypt SSL on OpenLiteSpeed.
A sample configuration for the TLS certificate and key files in the SSL section of the Listener Configuration is shown below (be sure to update the file paths to match your domain):
If you run into any issues, you can review the guide to Configure OpenLiteSpeed for SSL in the OpenLiteSpeed documentation.
After configuring and saving these settings, click the Graceful Restart button on the top right corner of the screen to apply the changes.
You have now configured a Virtual Host with a Listener and set up TLS encryption for all traffic to your website. After configuring your DNS to map to the public IP address of your server, your website will be accessible at the domain you specify.
Enable HTTP/3 over QUIC
Note: OpenLiteSpeed is one of the first open-source servers to incorporate the HTTP3 protocol over Quick UDP Internet Connections (QUIC) Protocol.
To enable HTTP3/QUIC, you must set up SSL for your domain and configure the certificate and key via the Admin Panel. Return to Step 6 for direction.
If you’d like to use HTTP3, you must also allow UDP traffic to port 443 of your server. To do this, run the command:
- sudo ufw allow 443/udp
Conclusion
In this tutorial, you set up a MariaDB database server and an OpenLiteSpeed web server capable of serving PHP applications with the specified PHP version. You can now host a variety of PHP applications and frameworks such as WordPress, Laravel, and Joomla on your server.
If you haven’t yet, you can set up TLS security on your web server and enable HTTP/3 over QUIC to make the best use of the OpenLiteSpeed web server. Check out the guide for setting up Let’s Encrypt SSL on OpenLiteSpeed and then refer to the Enable HTTP/3 over QUIC section in Step 6 of this guide.
Thanks for learning with the DigitalOcean Community. Check out our offerings for compute, storage, networking, and managed databases.
About the author(s)
Still looking for an answer?
This textbox defaults to using Markdown to format your answer.
You can type !ref in this text area to quickly search our full set of tutorials, documentation & marketplace offerings and insert the link!
 This work is licensed under a Creative Commons Attribution-NonCommercial- ShareAlike 4.0 International License.
Become a contributor for community
Get paid to write technical tutorials and select a tech-focused charity to receive a matching donation.

DigitalOcean Documentation
Full documentation for every DigitalOcean product.

Resources for startups and AI-native businesses
The Wave has everything you need to know about building a business, from raising funding to marketing your product.
The developer cloud
Scale up as you grow — whether you're running one virtual machine or ten thousand.

Start building today
From GPU-powered inference and Kubernetes to managed databases and storage, get everything you need to build, scale, and deploy intelligent applications.
