
Introduction
ProcessWire is a flexible, open-source PHP Content Management System. It is easy to update for clients and a pleasure to work with for developers.
System requirements
You will need a standard LAMP stack to run ProcessWire. When creating your droplet, under Applications, choose LAMP on Ubuntu.
A full list of requirements is available here.
Update Ubuntu
To ensure that all of your modules install correctly, be sure to run the following command before installing any additional modules:
apt-get update
Enable mod_rewrite
ProcessWire requires that the mod_rewrite PHP module be enabled. If you use Digital Ocean’s LAMP Application droplet configuration, it should already be installed and will only need to be enabled. To enable it and restart Apache, run the following commands:
a2enmod rewrite
service apache2 restart
Enable htaccess
To use mod_rewrite, htaccess overrides have to be enabled. You will need to modify the default host configuration file. This can be found at:
/etc/apache2/sites-available/default
Open it in either vim or nano. Look for the following section (it starts with Directory /var/www):
<Directory /var/www/>
  Options Indexes FollowSymLinks MultiViews
  AllowOverride None
  Order allow,deny
  allow from all
</Directory>
Where it says AllowOverride None change it to AllowOverride All.
Enable GD
ProcessWire requires GD to be installed in order to resize and crop images uploaded through the CMS. To install GD and run it, use the following commands.
apt-get install php5-gd
service apache2 restart
Enable sending email
If you wish to have a contact form on your website, you will also need to ensure that sendmail is installed and configured so that you can use features that send email including password recovery and contact forms.
apt-get install sendmail
sendmailconfig
service sendmail restart
service apache2 restart
To speed up PHP mail, add the following line to your host file, which can be found at /etc/hosts, replacing yourhostnamehere with your host name.
127.0.0.1 localhost localhost.localdomain yourhostnamehere
Check that all modules were installed correctly
Visit your site URL’s PHP Info page to see that all modules have been installed correctly at http://yourhostname/info.php where you replace yourhostname with your actual host name.
-
GD
-
sendmail
-
mod_rewrite
Once those are there, we are ready to download and install ProcessWire.
Download ProcessWire
Navigate to your web root folder:
cd /var/www
The easiest way to download ProcessWire is using wget to fetch one of the stable ProcessWire releases:
wget https://github.com/ryancramerdesign/ProcessWire/archive/2.4.0.tar.gz
The above link refers to the latest release at the time this article was written but you can see and choose from all available releases here.
The above command downloaded the file 2.4.0.tar.gz. To extract these files and move them to your web root, use the following commands.
tar -zxf 2.4.0.tar.gz
cd ProcessWire-2.4.0
mv * ..
cd .. # go back to /var/www
rm -r ProcessWire-2.4.0 # deletes unneeded directory
rm index.html # the default index.html needs to be removed to use ProcessWire
Please note that the version number specified here may be different from the one you downloaded.
Install ProcessWire in your browser
Navigate to your website in your browser. From there, you should see the installation screen:

You may be prompted to rename site-default to site. You can do this by running the following command:
mv site-default site
Reload the page and that warning bar should go away. Click “Get Started.”
Checking requirements
In order to make sure that ProcessWire will install and run smoothly, you need to make sure that all of the items in the compatibility check show up green:
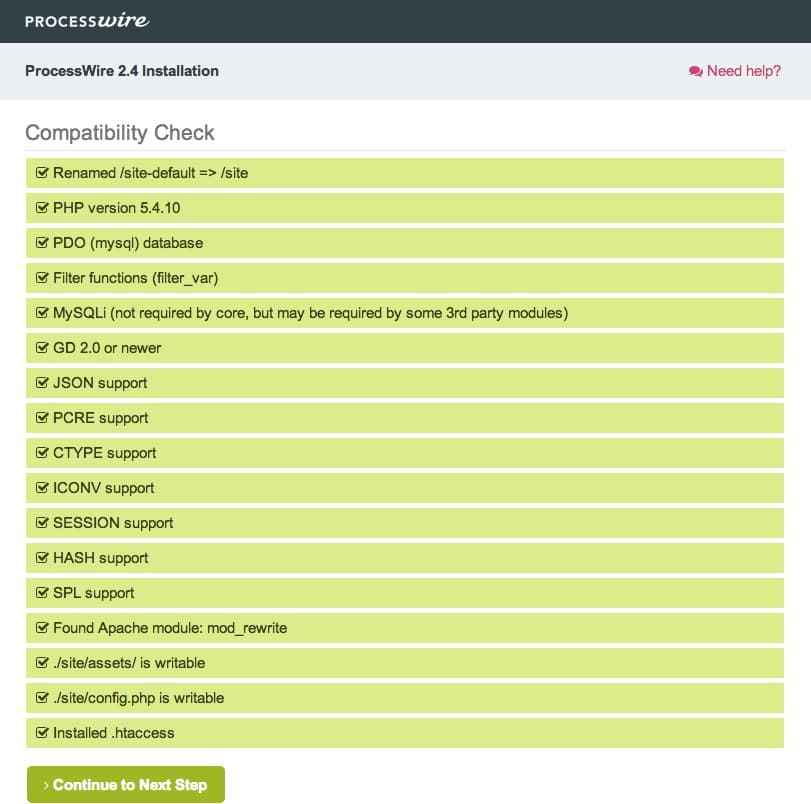
If you get some error messages, make sure that the site folder is writeable by the application. One way of doing this is with the following commands, which we will make secure after the installation.
chmod -R 777 site/assets
chmod 666 site/config.php
Also rename the htaccess.txt to .htaccess:
mv htaccess.txt .htaccess
If everything is green, it’s safe to continue.
Input your database credentials and modify file permissions
The next screen will ask you for your database credentials and the database you would like to use.
You also have the option to set the file permissions if you would like to change the defaults—by default, directories are 755 and files are 644. This can be changed later in the site/config.php file.
You will need to create a user and a database in MySQL and give permissions to that user.
Create a database
Assuming you already have a MySQL username and password created, you will need to login to MySQL and create a database:
mysql -u username -ppassword
Upon successful login, you should see mysql >.
CREATE USER 'username'@'localhost' IDENTIFIED BY 'password';
create database pwtest;
grant all privileges on pwtest.* to username@localhost identified by 'password';
If your database was accessed successfully and the permissions applied to your files and directories, the following page should show all green.
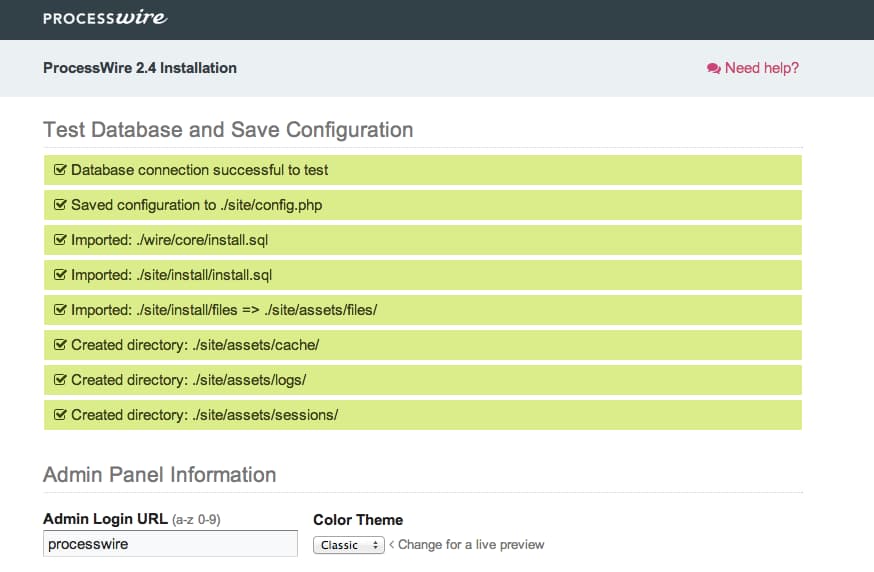
On this page you can also select which admin theme you would like to use and what you would like your login URL to be. The default is http://yourdomain.com/processwire.
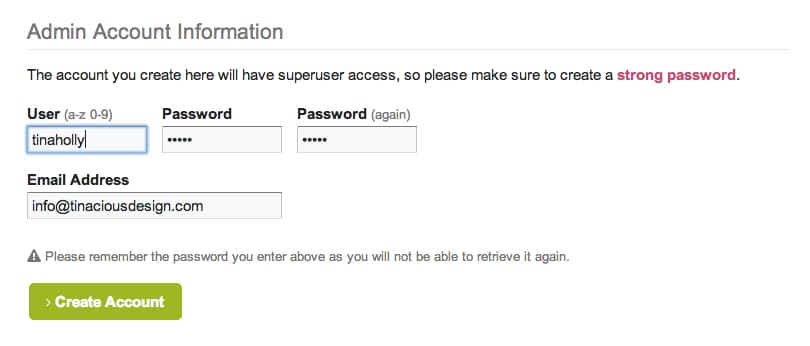
Choose your username and password
At this time, you also have the chance to create a username and password. The default username is admin but it is advised to use a username other than the default. Your password must be at least 6 characters long.
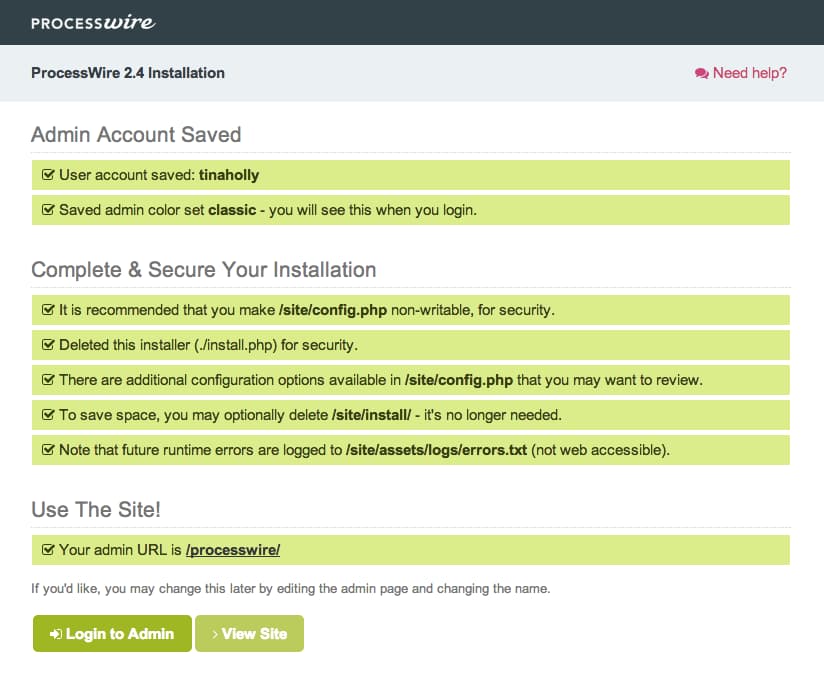
Finishing Up
If everything has been done correctly, the next screen should give you some information about what ProcessWire did to secure your installation.
Remove the installation script:
rm install.php
Remove the installation files:
rm -r /var/www/site/install/
Make the config file read only:
chmod 444 /var/www/html/site/config.php
At this point, you can view your installation or login to your website!
Further reading
If you have any questions about ProcessWire, you can reach out to the friendly ProcessWire community in the forums.
<div class=“author”>Submitted by: <a href=“http://tinaciousdesign.com”>Tina Holly </a></div>
Thanks for learning with the DigitalOcean Community. Check out our offerings for compute, storage, networking, and managed databases.
About the author
Still looking for an answer?
This textbox defaults to using Markdown to format your answer.
You can type !ref in this text area to quickly search our full set of tutorials, documentation & marketplace offerings and insert the link!
Hi,
I tried to install ProcessWire 2.7 on Nginx, following this tutorial and https://processwire.com/talk/topic/275-processwire-on-nginx/page-2 too.
I managed to process the installation (ignoring a warning on mod_rewrite), and got my HOME page running and all my tables in DB setup automatically. But I couldn’t get my admin, about, sitemap and maybe other pages running. It always says 404 not found.
Can anybody help to point me into a fully working ProcessWire step by step installation for Nginx? (I haven’t implemented in DO yet, still try to make it work in my local VM)
Thank you.
Hi,
I just tried following this tutorial on my DigitalOcean droplet (2-3 times now) and am unable to get ProcessWire 2.7 to respond to any URLs but the home page. (Not the Admin login, not Site Map, not the About page.)I opened a question on ProcessWire support, but perhaps the problems are at a lower level than their app code. Ideas? Any way I can test what’s wrong here? I’d love to just get on with ProcessWire.
My droplet is running Ubuntu 14.04, and the web root is /var/www/html/, not /var/www/ as in some, but not all, the code samples.
 This work is licensed under a Creative Commons Attribution-NonCommercial- ShareAlike 4.0 International License.
Become a contributor for community
Get paid to write technical tutorials and select a tech-focused charity to receive a matching donation.

DigitalOcean Documentation
Full documentation for every DigitalOcean product.

Resources for startups and AI-native businesses
The Wave has everything you need to know about building a business, from raising funding to marketing your product.
The developer cloud
Scale up as you grow — whether you're running one virtual machine or ten thousand.

Start building today
From GPU-powered inference and Kubernetes to managed databases and storage, get everything you need to build, scale, and deploy intelligent applications.
