
Introduction
Munin is a system, network, and infrastructure monitoring application that provides information in graphs through a web browser. It is designed around a client-server architecture and can be configured to monitor the machine it’s installed on (the Munin master) and any number of client machines, which in Munin parlance, are called Munin nodes.
In this article, we’ll install and configure Munin to monitor the server it’s installed on and one node. To install Munin on multiple nodes, just follow the instructions for creating a node on each system.
Prerequisites
- Two Debian 8.1 Droplets
- For each Droplet, a non-root user with sudo privileges
Except otherwise noted, all of the commands in this tutorial should be run as a non-root user with sudo privileges. To learn how to create users and grant them sudo privileges, check out Initial Server Setup with Debian 8.
Step 1 — Installing Required Packages
We will start working on the Munin master first. Before installing Munin, a few dependencies need to be installed.
Though Munin can function with most popular Web servers like Nginx and Lighttpd, it is, by default, designed to work with the Apache Web server. So be sure that Apache is installed and configured on the Munin master. If it’s not already installed, do so using:
- sudo apt-get update
- sudo apt-get install -y apache2
- To ensure that the dynazoom functionality responsible for zooming into the generated graphs works properly on click, install the following:
- sudo apt-get install -y libcgi-fast-perl libapache2-mod-fcgid
After installing those two packages, the fcgid module should have been enabled. To double-check, type:
- /usr/sbin/apachectl -M | grep -i cgi
The output should be:
- fcgid_module (shared)
If the output is blank, then it is not enabled. You may then enable it using:
- sudo a2enmod fcgid
When executing the apachectl command, you can ignore the following warning:
Could not reliably determine the server's fully qualified domain name ...
Apache will still work with Munin with this warning.
The rest of the configuration that will make graph zooming work properly will be covered in Step 3.
Step 2 — Installing Munin on the Munin Master
Installation packages for Munin are available in the Debian repository, so it can be installed using the distribution’s package manager. In this step, you’ll install the Munin master package from the stable branch. The version in the Debian repository, Munin 2.0.25, is the same as the latest stable release.
To install it, type:
- sudo apt-get install -y munin
Step 3 — Configuring the Munin Master
The Munin master’s main configuration file munin.conf and other files required for it to function can be found in the /etc/munin directory and its sub-directories.
The configuration file is made up of at least two sections — a global and at least one host section. Optionally, there can be a group section. Host and group sections start with their respective names in square brackets. This file contains variable definitions, directives that govern how Munin monitors servers and services, and which servers to monitor.
To start modifying it:
- cd /etc/munin
- sudo nano munin.conf
Look for these lines and uncomment them. That is, remove the # sign that precedes them. The dbdir stores all of the rrdfiles containing the actual monitoring information; htmldir stores the images and site files; logdir maintains the logs; rundir holds the state files; and tmpldir is the location for the HTML templates. Be sure to change the htmldir from /var/cache/munin/www to your web directory. In this example, we’ll be using /var/www/munin:
dbdir     /var/lib/munin
htmldir   /var/www/munin
logdir    /var/log/munin
rundir    /var/run/munin
...
tmpldir	/etc/munin/templates
Since the htmldir does not exist, let’s create and chown it so that it’s owned by the munin system user:
- sudo mkdir /var/www/munin
- sudo chown munin:munin /var/www/munin
Finally, look for the first host tree in munin.conf. It should read:
[localhost.localdomain]
    address 127.0.0.1
    use_node_name yes
Change the name of that tree to one that uniquely identifies the server. In this example, we’ll be using MuninMaster:
[MuninMaster]
    address 127.0.0.1
    use_node_name yes
That’s all for the configuration file, so save and close it.
Within the same /etc/munin directory, the next file we’ll be modifying is apache24.conf, which is Munin’s Apache 2.4 configuration file. It is sym-linked to /etc/apache2/conf-available/munin.conf. To start modifying it, open it with nano:
- sudo nano apache24.conf
At the very top of the file, modify the first line so that it reflects the htmldir path you specified in munin.conf and created previously. Based on the directory path used in this article, it should read as follows, which makes it so you can access Munin’s web interface by appending munin to the server’s IP address or domain hosted on the server:
Alias /munin /var/www/munin
To ensure that you can access Munin’s web interface remotely, delete the directory section and replace it with this:
<Directory /var/www/munin>
        Require all granted
        Options FollowSymLinks SymLinksIfOwnerMatch
</Directory>
Do the same with the last location section. Remove the Require local line and replace it with the following:
<Location /munin-cgi/munin-cgi-graph>
        Require all granted
        Options FollowSymLinks SymLinksIfOwnerMatch
        ...
</Location>
Save and close the file. Then restart Munin and Apache:
- sudo systemctl restart munin-node
- sudo systemctl restart apache2
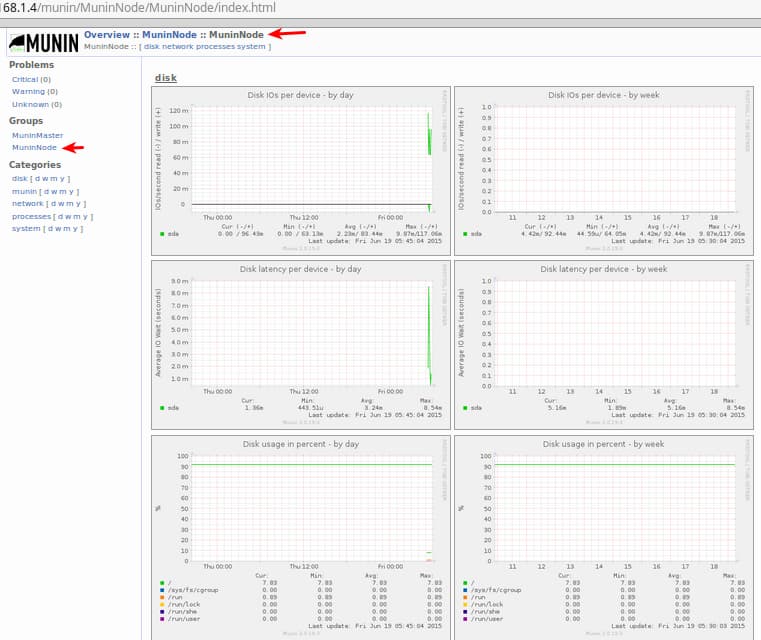
You may now access Munin’s web interface by pointing your Web browser to server-ip-address/munin
Step 4 — Adding a Node to Munin Master
In this step, we’ll show how to add a node to the Munin master. This involves modifying the Munin master’s configuration file to specify a host tree for the node, installing the Munin node package on the node, and modifying its configuration file so that it can be monitored by the Munin master.
Let’s start with the Munin node — the other Debian 8 Droplet you created.
Log into the Munin node, update the package database, and install the Munin node package:
- sudo apt-get update
- sudo apt-get install -y munin-node
After the installation has completed successfully, the node’s configuration should be in the /etc/munin directory. Open it with nano:
- sudo nano /etc/munin/munin-node.conf
Towards the middle of the file, look for an allow ^127.0.0.1$ line and modify it so that it reflects the IP address of the Munin master. Note that the IP address is in regex format, so assuming that the master server IP address is 123.46.78.100, the line should read:
allow ^123\.456\.78\.100$
Save and close the file. Then restart the Munin:
- sudo systemctl restart munin-node
Back on the Munin master, open the main configuration file:
- sudo nano /etc/munin/munin.conf
All we need to do in this file is insert a host tree for the (remote) node. The easiest approach to that is to copy and modify the host tree of the master. Be sure to replace node-ip-address with the IP address of the node you are adding:
[MuninNode]
	address node-ip-address
	use_node_name yes
Save and close the file. Then restart Apache:
- sudo systemctl restart apache2
Munin checks for new nodes every 5 minutes. Wait a few minutes, then reload the Munin master’s web interface. You should see an entry for the node. If you don’t see it yet, try again in 5 minutes. Using this method, you may add as many nodes as you have to monitor.
Step 5 — Enabling Extra Plugins
Munin monitors a system using plugin scripts, and by default, about a dozen set of plugins are installed and active. A complete list of available plugins are in the /usr/share/munin/plugins directory. To see which plugins can be used on your system, Munin provides the following command:
- sudo munin-node-configure --suggest
The output should be of this sort:
Plugin                     | Used | Suggestions
------                     | ---- | -----------
cps_                       | no   | no
cpu                        | yes  | yes
cpuspeed                   | no   | no [missing /sys/devices/system/cpu/cpu0/cpufreq/stats/time_in_state]
cupsys_pages               | no   | no [could not find logdir]
df                         | yes  | yes
df_inode                   | yes  | yes
fail2ban                   | no   | yes
ip_                        | no   | yes
A plugin with a yes in the Used column means just what it indicates, while one with a yes in the Suggestions column means it can be used. One with a no on both columns means it is not in use and cannot be used on the system. Finally, if a plugin has a no in the Used column and a yes in the Suggestions, then it is not being used but can be enabled and used on the system.
On the Munin master and node, you can also see a list of installed plugins in the /etc/munin/plugins directory.
A munin-plugins-extra package should have been installed when you installed Munin. If it was not, do so using.
- sudo apt-get install munin-plugins-extra
To enable an available plugin that’s not currently in use, create a symbolic link for it from the /usr/share/munin/plugins directory to the /etc/munin/plugin directory.
For example, to enable the Fail2ban plugin, first install Fail2ban:
- sudo apt-get install fail2ban
Then, create the symlink that enables the Munin plugin:
- sudo ln -s /usr/share/munin/plugins/fail2ban /etc/munin/plugins
Restart Munin:
- sudo systemctl restart munin-node
Wait a few minutes, reload the web interface, and you should see graphs for Fail2ban under the title Hosts blacklisted by fail2ban under the network category for the Munin master.
Troubleshooting
If you are having trouble configuring the Munin master, the Munin node, or getting the master to see the node, check out the log files for error messages:
- Munin master:
/var/log/munin/munin-update.log - Munin node:
/var/log/munin/munin-node.log
You can also check the project’s page for additional troubleshooting tips.
Conclusion
Munin can be configured to monitor the system on which it is installed. Adding remote servers to the monitored system is as simple as install the munin-node package on the remote server (or node) and then modifying the server’s and node’s configuration files to point to the other IP address.
Munin works by using plugins, but not all are enabled out of the box. Information about plugins are available on the project’s page.
Thanks for learning with the DigitalOcean Community. Check out our offerings for compute, storage, networking, and managed databases.
About the author(s)
Jack of all trades, master of a few
Technical Editor, DigitalOcean
Still looking for an answer?
This textbox defaults to using Markdown to format your answer.
You can type !ref in this text area to quickly search our full set of tutorials, documentation & marketplace offerings and insert the link!
I have used munin for some time ago but the installation was corrupt after upgrading from Debian 7 to 8 so I followed this guide to reinstall it. In my last installation i used some .htpasswd file for some password protection for the web site. Anyone having an idea how I should fix it in this version of munin and apache?
Hello, I followed the steps step by step, unfortunately at the moment of accessing the munin by the browser it does not open, it displays the following message on the page: Apache / 2.4.10 (Debian) Server at 192.168.10.112 Port 80.
Could someone tell me a solution.
 This work is licensed under a Creative Commons Attribution-NonCommercial- ShareAlike 4.0 International License.
Become a contributor for community
Get paid to write technical tutorials and select a tech-focused charity to receive a matching donation.

DigitalOcean Documentation
Full documentation for every DigitalOcean product.

Resources for startups and AI-native businesses
The Wave has everything you need to know about building a business, from raising funding to marketing your product.
The developer cloud
Scale up as you grow — whether you're running one virtual machine or ten thousand.

Start building today
From GPU-powered inference and Kubernetes to managed databases and storage, get everything you need to build, scale, and deploy intelligent applications.
