By Brook Shelley and Hazel Virdó

Introduction
WordPress is a very robust content-management system (CMS) that is free and open source. Because anyone can comment, create an account, and post on WordPress, many malicious actors have created networks of bots and servers that compromise and spam WordPress sites through brute-force attacks. The tool Fail2ban is useful in preventing unauthorized access to both your Droplet and your WordPress site. It notes suspicious or repeated login failures and proactively bans those IPs by modifying firewall rules for your Droplet.
In this guide, we will be using version 0.9.3 of Fail2ban on an Ubuntu 14.04 LAMP server, and integrating it with WordPress by using a spam log plugin.
Prerequisites
To complete this guide, you need
-
One Ubuntu 14.04 Droplet using the one-click WordPress instance or your own WordPress Droplet
-
A non-root user configured with sudo privileges for administrative tasks. You can learn how to set this up by following our Ubuntu 14.04 initial server setup guide.
-
Set up and configure Fail2ban by following this How To Install and Use Fail2ban on Ubuntu 14.04 tutorial.
-
Follow the guide on How To Configure Secure Updates and Installations in WordPress on Ubuntu
Step 1 – Installing the WordPress Fail2ban Plugin
First, log in to your WordPress site by visiting https://your_server_ip/wp-admin in your browser and using the admin credentials you created while installing WordPress. Once logged in, you will see the following screen, which is your WordPress dashboard.
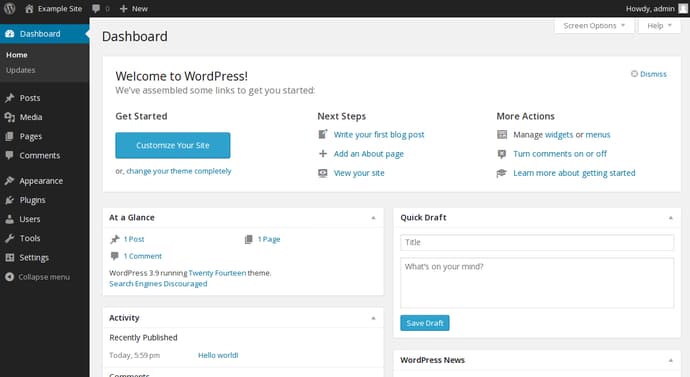
Look to the left sidebar for the word Plugins, which will appear about halfway down the sidebar. After clicking Plugins, you will see this screen:

Near the top, in the right section, you can click on Add New. This allows you to add new plugins to your WordPress site that can customize, secure, or extend your site. In this case, we will be searching for the Fail2ban plugin. The next screen will appear like this:

Enter Fail2ban in the search field, and press ENTER on your keyboard. The results should return a screen that shows a few plugins, with the one to install being WP fail2ban.

Click Install Now to start the installation, where you will see two prompts: Activate Plugin and Return to Plugin Installer. Choose to Activate Plugin, and your browser will return you to the list of installed plugins, with the new WP fail2ban plugin in the list. At this time, you can click View details to see more information about your new plugin. There is also a FAQ that will help you understand how to enable features, like blocking of specific users that may be used to spam your WordPress site with content or comments.
Step 2 — Applying the WordPress Filter to Fail2ban
This WordPress plugin includes a new custom Fail2ban filter. In this step, we will install that filter so Fail2ban can correctly parse and use the authentication logs being sent to the syslog.
First, move the filter from the WordPress plugin directory to the appropriate Fail2ban filter location. We will use the “hard” WordPress filter for better protection:
- sudo cp /var/www/html/wp-content/plugins/wp-fail2ban/filters.d/wordpress-hard.conf /etc/fail2ban/filter.d/
With your new wordpress-hard.conf filter in place, you can point Fail2ban to the appropriate authentication log by editing the file /etc/fail2ban/jail.local. A jail in Fail2ban refers to a series of rules and actions that provide the filters for IP addresses.
Open the file jail.local using nano or your favorite text editor.
- sudo nano /etc/fail2ban/jail.local
Once the file is open, scroll to the bottom and append the following lines to the end. These lines enable the plugin, set the filter to the wordpress-hard.conf filter we previously copied over to the filters.d directory, set the appropriate logging destination for the access attempts, and specify that this traffic will come in on http and https ports.
[wordpress-hard]

enabled = true
filter = wordpress-hard
logpath = /var/log/auth.log
maxretry = 3
port = http,https
Save and close the file.
Next, you can restart Fail2ban to ensure the new filter is now in place by running this command in your terminal:
- sudo service fail2ban restart
Step 3 – Ignoring Login Attempts From Your Computer
In order to prevent you or other known users from being banned through accidental authentication failures, we recommend ignoring your own local computer’s public IP address.
If you are using a Linux-based OS, use this command:
curl ipecho.net/plain ; echo
Otherwise, visit http://checkip.dyndns.org to determine your computer’s public IP address. If there are any other users of your WordPress site in alternate locations, you may want to find their addresses too.
Open jail.local for editing again:
- sudo nano /etc/fail2ban/jail.local
The following line will list off any ignored IP addresses starting with the local server IP (localhost) with a space separating each other value for known hosts that you would like to have access to WordPress. Add this to DEFAULT section, under the ignoreip statement you added during the WordPress plugin setup steps.
ignoreip = 127.0.0.1/8 your_computer_ip
Save and exit your editor.
Step 4 – Testing the Filter
To test if the filter is working, you can log out of your WordPress site’s wp-admin site and log in again.
You can use this Fail2ban jail status to ensure that your successful login was not noted by the filter.
- sudo fail2ban-client status wordpress-hard
You should see results similar to this:
Status for the jail: wordpress-hard
|- filter
|  |- File list:	/var/log/auth.log
|  |- Currently failed:	0
|  `- Total failed:	0
`- action
   |- Currently banned:	0
   |  `- IP list:
   `- Total banned:	0
If you view the auth.log file, you will see your successful login near the bottom of the file by using tail which will show the last 10 lines of output:
- sudo tail /var/log/auth.log
The successful authentication will appear like this:
Month Day Hour:Minute:Second your_server wordpress(your_server_ip)[PID]: Accepted password for admin from your_computer_ip
If an unauthorized user or failed authentication appears in the logs, your new plugin will ensure that this IP is blocked from accessing your site by altering your firewall rules appropriately.
Step 5 – Rotating Your Log Files
If you find your WordPress site is getting a very large amount of unauthorized login attempts and your log file is growing rapidly, you can rotate the log file out for a new one by editing the file /etc/logrotate.conf.
- sudo nano /etc/logrotate.conf
Append these lines, which set the maximum size of the file, the permissions for the log, and the number of weeks. For example, you can set 4 as number of weeks the file will exist for before being refreshed:
/var/log/auth.log {
    size 30k
    create 0600 root root
    rotate 4
}
Save and exit the file appropriately.
Conclusion
By following the steps in this guide, you installed and configured the Fail2ban plugin, excluded your local IP address, and tested your work. You also set up log rotation to keep your log files from growing indefinitely. Now your WordPress instance is much more robust and secure against unauthorized login attempts, comment spam, and intrusion on your site.
Thanks for learning with the DigitalOcean Community. Check out our offerings for compute, storage, networking, and managed databases.
About the author(s)
Lives in Portland, OR. Has a cat. Loves reading/writing fiction. Queer feminist.
former DO tech editor publishing articles here with the community, then founded the DO product docs team (https://do.co/docs). to all of my authors: you are incredible. working with you was a gift. love is what makes us great.
Still looking for an answer?
This textbox defaults to using Markdown to format your answer.
You can type !ref in this text area to quickly search our full set of tutorials, documentation & marketplace offerings and insert the link!
Great article, I used this to improve my Wordpress security along with some tips from a blog post I found.
You have excellent tutorials DO crew. Keep up the good work.
Great tutorial, as always. However, I am seeing some strange behavior.
Once I enable the wordpress filter, my ssh filter seems to stop working. After a reboot, the ssh filter is working again but the wordpress filter is not (confirmed with fail2ban-client status).
Both wordpress and ssh continue to log failed attempts in /var/log/auth.log but for some reason fail2ban refuses to work with both at the same time.
Any idea what might be causing this?
Thanks for the tutorial! I have a question though. Can I use this WordPress jail for several WP sites on one server?
Great tutorial. However you shouldn’t need to edit logrotate.conf. On my Ubuntu installation auth.log is already being rotated by the rsyslog script. I don’t know if rotating it twice would cause any issues, but it’s not necessary to add anyway.
I am having the same issue. I believe it is setup correctly. Fail2ban works for nginx-http-auth.
Here are my logs after failed attempts:
Mar 16 06:53:33 server-user wordpress(domain.com.au)[9254]: Authentication failure for test from 168.1.6.52
Mar 16 06:53:36 server-user wordpress(domain.com.au)[9604]: Authentication failure for erh from 168.1.6.52
Mar 16 06:53:40 server-user wordpress(domain.com.au)[9281]: Authentication failure for fgnr from 168.1.6.52
Mar 16 06:53:47 server-user wordpress(domain.com.au)[9254]: Authentication failure for fgnr from 168.1.6.52
I used a VPN so it didnt ignore my IP. Here is my wordpress.conf as provided:
before = common.conf

[Definition]

_daemon = wordpress

failregex = ^%(__prefix_line)sAuthentication failure for .* from <HOST>$
            ^%(__prefix_line)sBlocked authentication attempt for .* from <HOST>$
            ^%(__prefix_line)sBlocked user enumeration attempt from <HOST>$
            ^%(__prefix_line)sPingback requested from <HOST>$

ignoreregex =
And my jail.local setting for wordpress
#WordPress Plugin addition
[wordpress]
enabled = true
port = http,https
filter = wordpress
logpath = /var/log/auth.log
maxretry = 3
Regex debug:
sudo fail2ban-regex /var/log/auth.log /etc/fail2ban/filter.d/wordpress.conf

Running tests
=============

Use   failregex file : /etc/fail2ban/filter.d/wordpress.conf
Use         log file : /var/log/auth.log


Results
=======

Failregex: 24 total
|-  #) [# of hits] regular expression
|   1) [24] ^\s*(<[^.]+\.[^.]+>)?\s*(?:\S+ )?(?:kernel: \[ *\d+\.\d+\] )?(?:@vserver_\S+ )?(?:(?:\[\d+\])?:\s+[\[\(]?wordpress(?:\(\S+\))?[\]\)]?:?|[\[\(]?wordpress(?:\(\S+\))?[\]\)]?:?(?:\[\d+\])?:?)?\s(?:\[ID \d+ \S+\])?\s*Authentication failure for .* from <HOST>
`-

Ignoreregex: 0 total

Date template hits:
|- [# of hits] date format
|  [802] MONTH Day Hour:Minute:Second
`-

Lines: 802 lines, 0 ignored, 24 matched, 778 missed
Missed line(s): too many to print.  Use --print-all-missed to print all 778 lines
I don’t understand why it’s not working. I am assuming has something to do with regex in the wordpress.conf, but when running debug, it matched it 24 times. For some reason it’s not banning them. Do I need to set a custom action/banaction?
Any ideas?
Thanks
Agree with rsmith4321. I received messages from cron.daily saying that ‘/etc/logrotate.conf:40 duplicate log entry for /var/log/auth.log’ auth.log is rotated by logrotate as defined in /etc/logrotate.d/rsyslog The default configuration is:
{
        rotate 7
        daily
        missingok
        notifempty
        delaycompress
        compress
        postrotate
                /usr/lib/rsyslog/rsyslog-rotate
        endscript
}
Following the instructions, I changed this way:
sudo cp logrotate.d/rsyslog logrotate.d/rsyslog.bak
sudo vi logrotate.d/rsyslog
{
        rotate 4
        size 30k
        daily
        missingok
        notifempty
        delaycompress
        compress
        postrotate
                /usr/lib/rsyslog/rsyslog-rotate
        endscript
}
I don’t know the meaning of the suggested line create 0600 root root. The default owner-user/owner-group for auth.log is syslog:adm.
 This work is licensed under a Creative Commons Attribution-NonCommercial- ShareAlike 4.0 International License.
Become a contributor for community
Get paid to write technical tutorials and select a tech-focused charity to receive a matching donation.

DigitalOcean Documentation
Full documentation for every DigitalOcean product.

Resources for startups and AI-native businesses
The Wave has everything you need to know about building a business, from raising funding to marketing your product.
The developer cloud
Scale up as you grow — whether you're running one virtual machine or ten thousand.

Start building today
From GPU-powered inference and Kubernetes to managed databases and storage, get everything you need to build, scale, and deploy intelligent applications.
