By Andrew Dugan
Senior AI Technical Content Creator II

Introduction
OpenClaw (formerly known as Moltbot and Clawdbot) is an open-source, self-hosted personal AI assistant that can run directly on your computer. It can execute a variety of tasks, such as managing your calendar, browsing the web, organizing files, managing your email, and running terminal commands. It supports any Large Language Model (LLM), and you can communicate with it through standard chat apps that you already use like WhatsApp, iMessage, Telegram, Discord, or Slack.
While it is technically possible to run OpenClaw on your local machine, security concerns arise when giving an AI agent open access to your computer with all of your personal data on it. A better approach is to deploy it on a separate machine specifically for OpenClaw or to deploy it on a cloud server.
There are 3 ways to deploy OpenClaw with DigitalOcean. You can either deploy yourself on a DigitalOcean Droplet, deploy with a pre-built 1-Click Application in the Droplet Marketplace, or use the DigitalOcean App Platform. Each of these options will have different security and maintenance considerations, so choose an option based on your app’s needs.
When to choose each deployment option
-
Bare DigitalOcean Droplet Deploy directly on a DigitalOcean Droplet only if you require full control over server configuration and are comfortable managing security hardening manually.
-
1-Click Application A 1-Click Application is best for solo developers who want improved security benefits with a fast, self-contained deployment with maximal control, and minimal abstraction. This requires minimal decisions and setup. It is a great option for fast experimentation, but it is not as scalable as the App Platform option.
-
App Platform The App Platform is best for teams with a production level deployment that requires long-term operational maturity. For example, if you need to scale quickly (horizontal auto-scaling), need operational consistency with automatic restarts, zero-downtime deploys, or sleep mode requirements for cost optimization.
Both the 1-Click Application and the App Platform deployment options will be covered in this tutorial below. If you prefer to manually deploy OpenClaw on a DigitalOcean Droplet without a 1-Click Application or the App Platform, you can follow the Quickstart Guide.
The DigitalOcean 1-Click and App Platform deployments handle many of the security best-practices for you automatically. These security enhancements include:
- Authenticated communication: Droplets generate an OpenClaw gateway token, so communication with your OpenClaw is authenticated, essentially protecting your instance from unauthorized users.
- Hardened firewall rules: Droplets harden your server with default firewall rules that rate-limit OpenClaw ports to prevent inappropriate traffic from interfering with your OpenClaw use and to help prevent denial-of-service attacks.
- Non-root user execution: Droplets run OpenClaw as a non-root user on the server, limiting the attack surface if an inappropriate command is executed by OpenClaw.
- Docker container isolation: Droplets run OpenClaw inside Docker containers on your server, setting up an isolated sandbox and further preventing unintended commands from impacting your server.
- Private DM pairing: Droplets configure Direct Message (DM) pairing by default, which prevents unauthorized individuals from being able to talk to your OpenClaw.
While deploying this way on a cloud server offers security benefits, OpenClaw is still quite new. Like many new tools, it might have architectural characteristics that have not been designed to work with additional security features yet. Therefore, with added security features, some of OpenClaw’s functionality may not function as perfectly as it was intended. For example, some skills might not work out-of-the-box and can require some additional manual set up.
Key Takeaways
-
OpenClaw is a powerful, self-hosted AI assistant that can execute tasks like managing calendars, browsing the web, and running terminal commands. It should not be run on your personal machine due to significant security risks associated with giving an AI agent high-level system access.
-
Deploying OpenClaw on a DigitalOcean 1-Click Application or on the App Platform provides a safer environment through security features like authenticated communication, hardened firewall rules, non-root user execution, Docker container isolation, and private Direct Message (DM) pairing.
-
OpenClaw is model-agnostic and supports various LLMs via Application Programming Interface (API) keys or local deployment, making it flexible for different use cases and preferences.
In this tutorial, you will first deploy an OpenClaw instance onto DigitalOcean’s 1-Click Deploy OpenClaw. Then you will deploy an instance on the App Platform. If you only need to be able to deploy on the App Platform, skip ahead to that section below.
Step 1 — Creating an OpenClaw Droplet
First, sign in to your DigitalOcean account and create a Droplet. On the Create Droplets page in the DigitalOcean Control Panel, under Region, select the region closest to you. Under Choose an Image, select the Marketplace tab.
In the search bar, type OpenClaw and select the OpenClaw image from the search results.
Next, choose a Droplet plan. The Basic plan with at least 4GB of RAM (such as the s-2vcpu-4gb size) is recommended for running OpenClaw effectively.
Under Authentication, select SSH Key and add your SSH key if you haven’t already. If you need to create an SSH key, follow the instructions in How to Add SSH Keys to New or Existing Droplets.
Finally, give your Droplet a hostname (such as OpenClaw-server), and click Create Droplet.
Alternatively, you can create an OpenClaw Droplet using the DigitalOcean API. To create a 4GB OpenClaw Droplet in the NYC3 region, use the following curl command. You’ll need to either save your API access token to an environment variable or substitute it into the command:
curl -X POST -H 'Content-Type: application/json' \
     -H 'Authorization: Bearer '$TOKEN'' -d \
    '{"name":"choose_a_name","region":"nyc3","size":"s-2vcpu-4gb","image":"openclaw"}' \
    "https://api.digitalocean.com/v2/droplets"
Once your Droplet is created, it takes a few minutes to fully initialize. After initialization, you can SSH into your Droplet using the IPv4 address shown in your DigitalOcean dashboard:
ssh root@your_droplet_ip
Replace your_droplet_ip with your Droplet’s actual IP address.
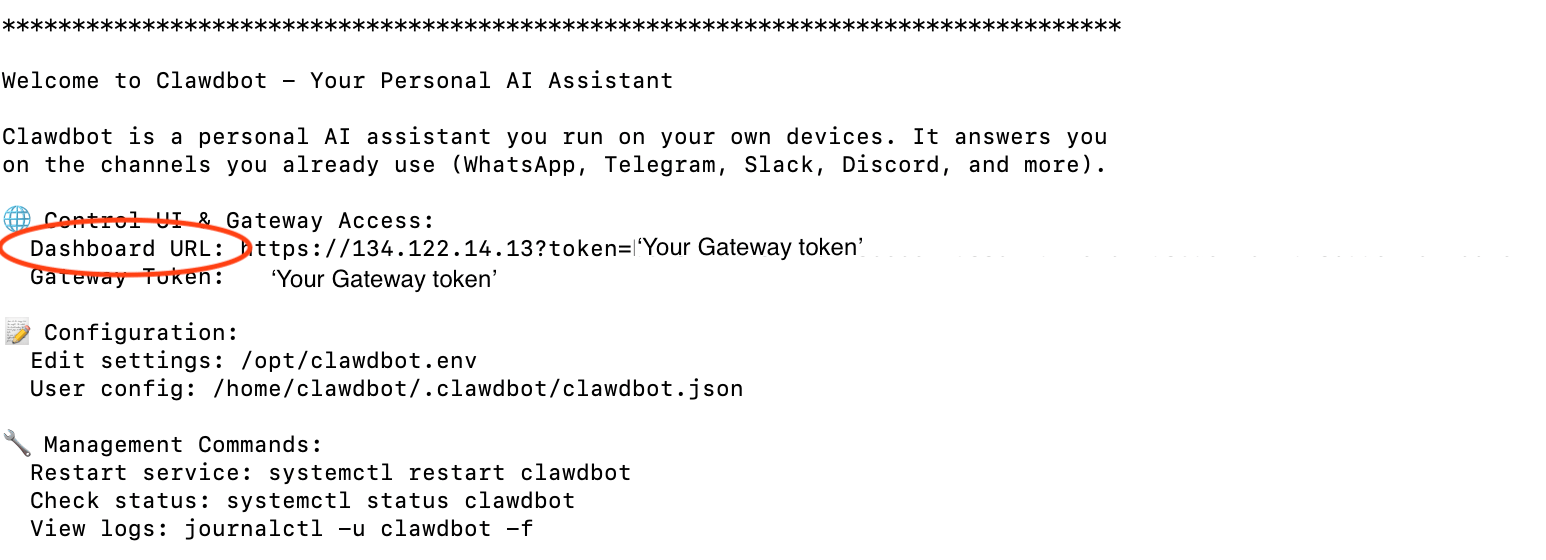
Once logged in, the OpenClaw installation will be ready to configure. The DigitalOcean 1-Click Deploy OpenClaw includes OpenClaw version 2026.1.24-1 pre-installed with all necessary dependencies.
You will see a welcome message from OpenClaw. Under the Control UI & Gateway Access section, you will see a Dashboard URL. Note the Dashboard URL value. You will use it later to access the GUI in your browser.
Within the terminal, choose Anthropic as your AI Provider. If you have access to the DigitalOcean AI Platform, you can select that option. OpenAI models will be available soon. Once you select your provider, provide the respective API/Secret key.
Step 2 — Using OpenClaw
With the 1-Click Application, there are 2 ways to use OpenClaw: you can either use the Graphical User Interface (GUI) through your browser, or you can use the Text User Interface (TUI) through your terminal.
After entering your API key, it may ask if you want to run pairing automation now. This pairing is to give you access to the UI dashboard (GUI). You will need to follow the directions in the terminal to open the GUI in your browser and add your Gateway token into your GUI settings to continue the automated pairing.
In your browser, click refresh, and you will be directed to the default chat page.
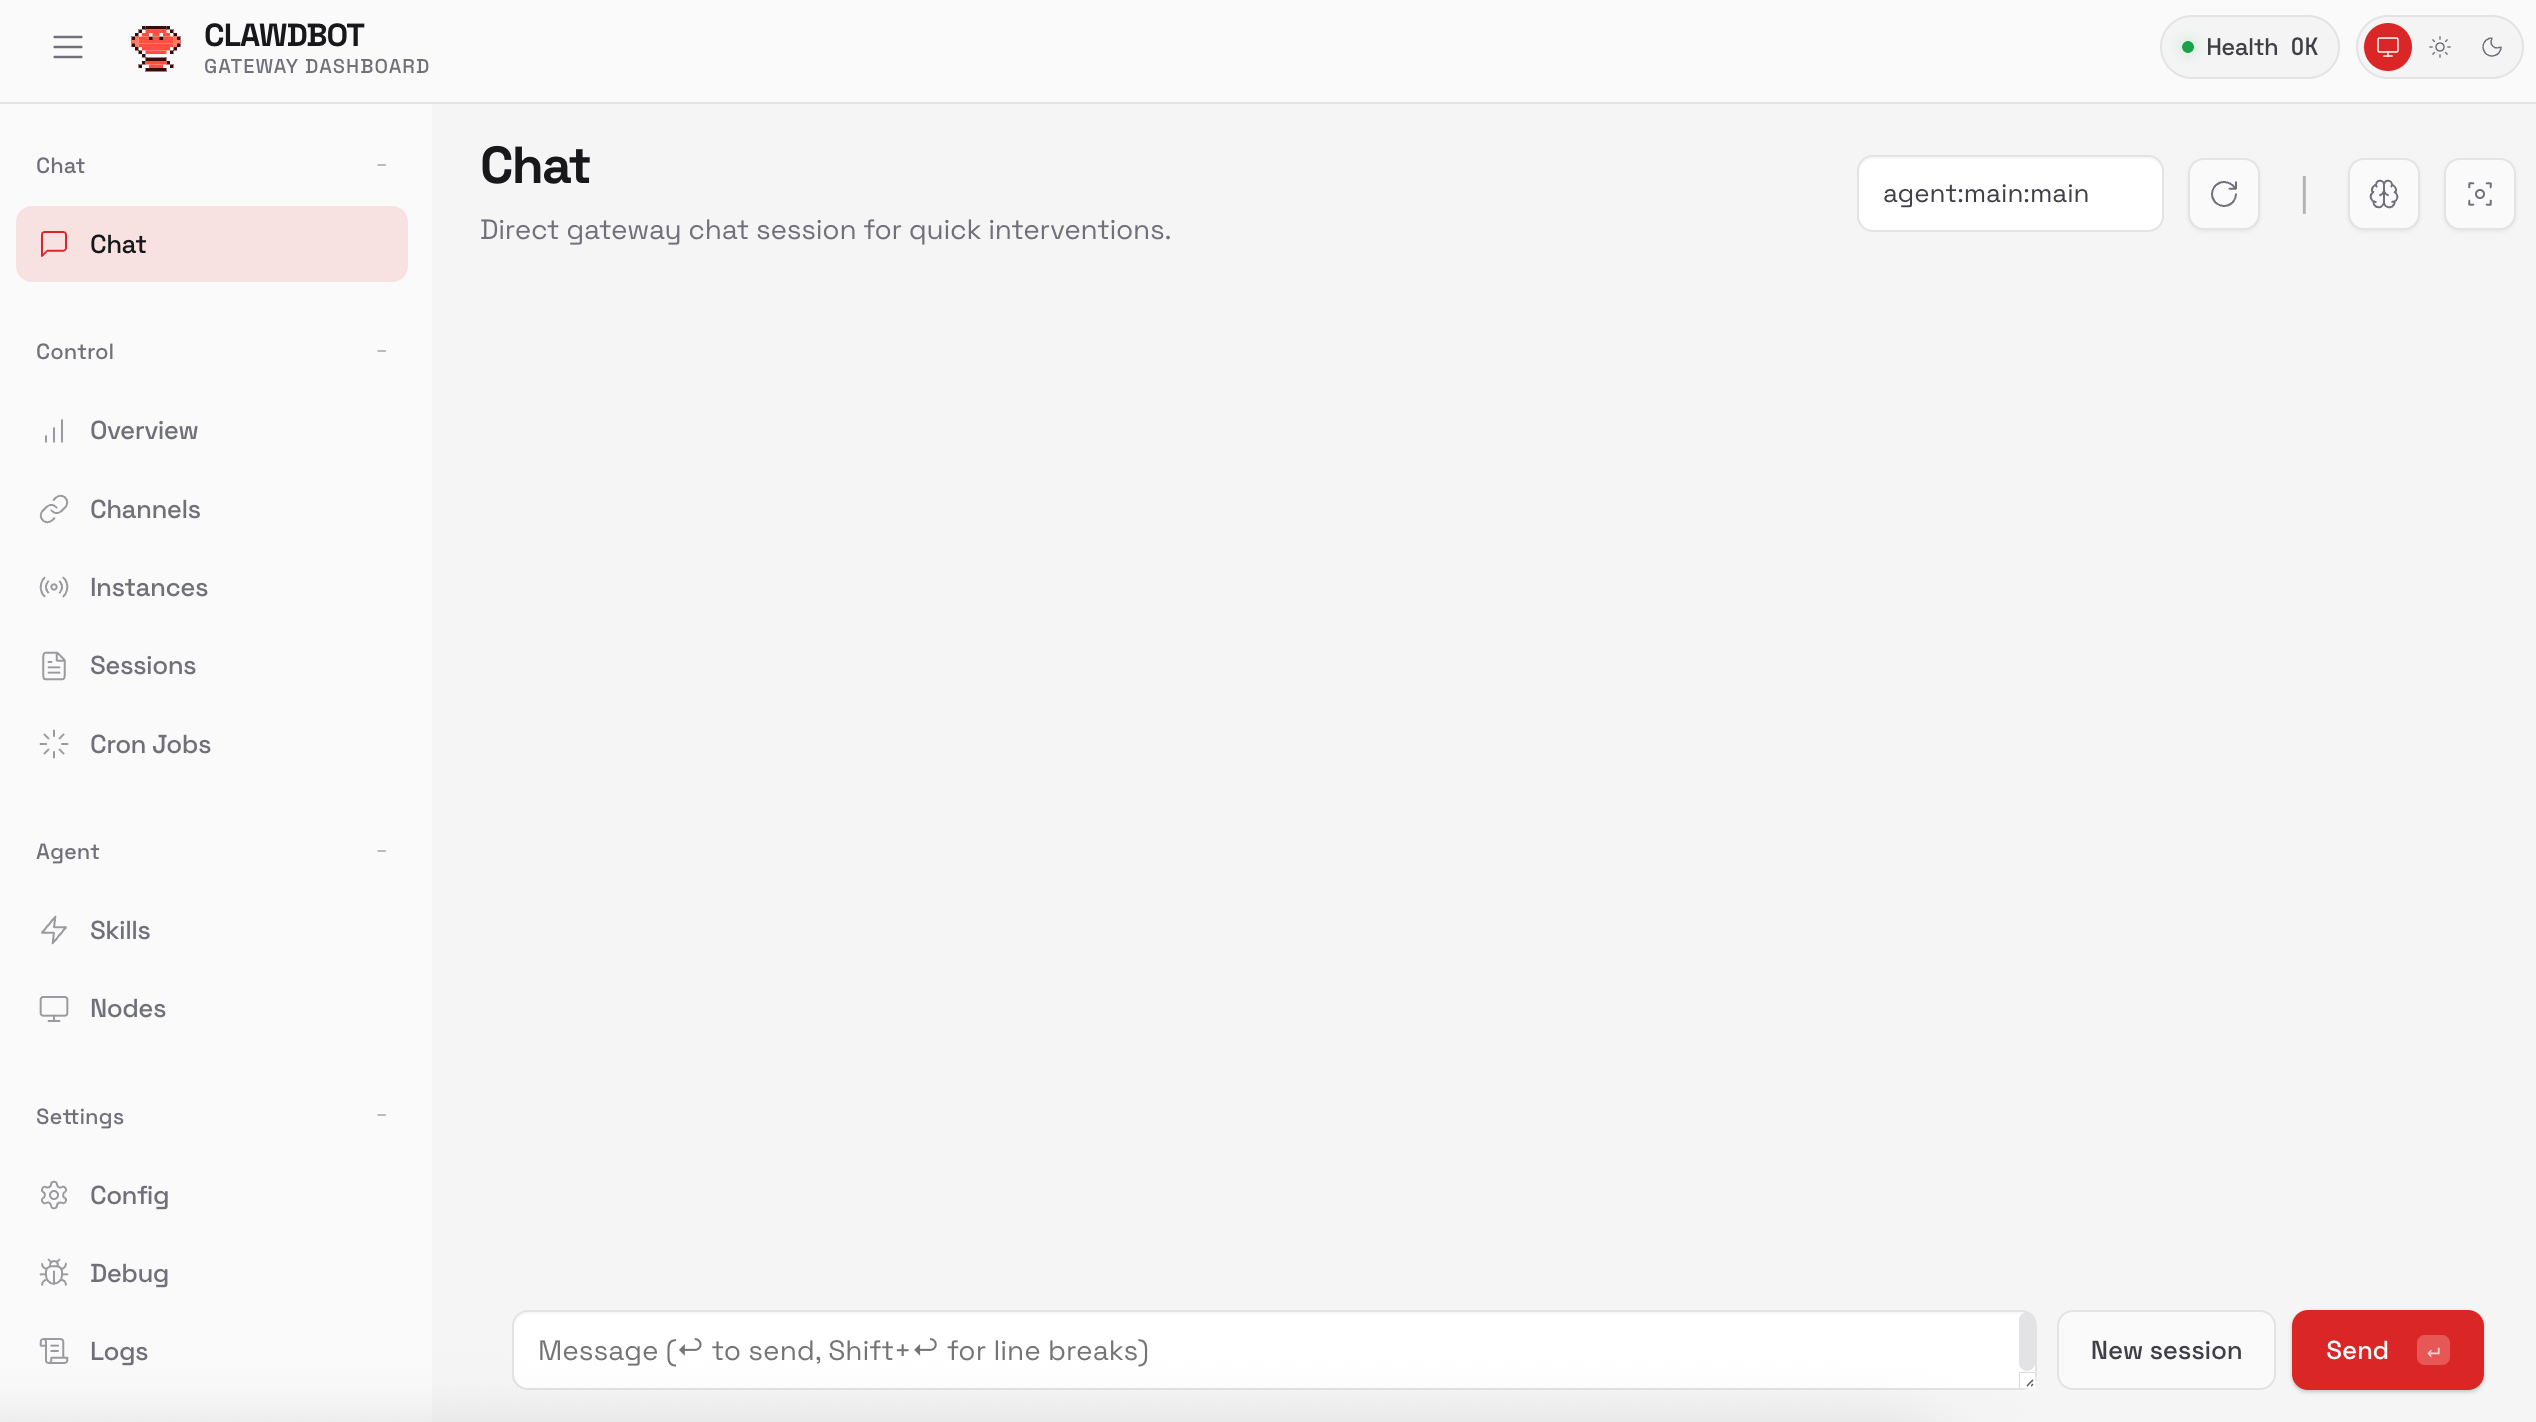
Here you can type a message and send, and OpenClaw will respond. For example, if you ask about what files it can see, it will tell you.
InputWhat files can you currently see on my computer?
OutputHere’s a list of the files and directories currently visible in the sandbox workspace:
.
├── AGENTS.md
├── BOOTSTRAP.md
├── HEARTBEAT.md
├── USER.md
└── skills
    ├── 1password
    │   ├── SKILL.md
    │   └── references
...
From the GUI, you can review the bot’s usage, add communication channels, schedule cron jobs, add skills, and manage all aspects of OpenClaw.
To use the TUI, run the following command:
/opt/openclaw-tui.sh
Note: Depending on the version, the script may also be located at /opt/clawdbot-tui.sh.
You’ve now successfully deployed OpenClaw on DigitalOcean and accessed it through a web browser. From here, you can explore additional OpenClaw capabilities, such as browsing the web, managing files, or executing terminal commands on your Droplet.
Step 3 — Installing Skills with the 1-Click Application
OpenClaw comes with over 50 skills automatically loaded in the skill registry. You can install skills in the GUI by navigating to the Skills section in the browser dashboard. For example, to integrate with Google Calendar, search for calendar, and click on Install.
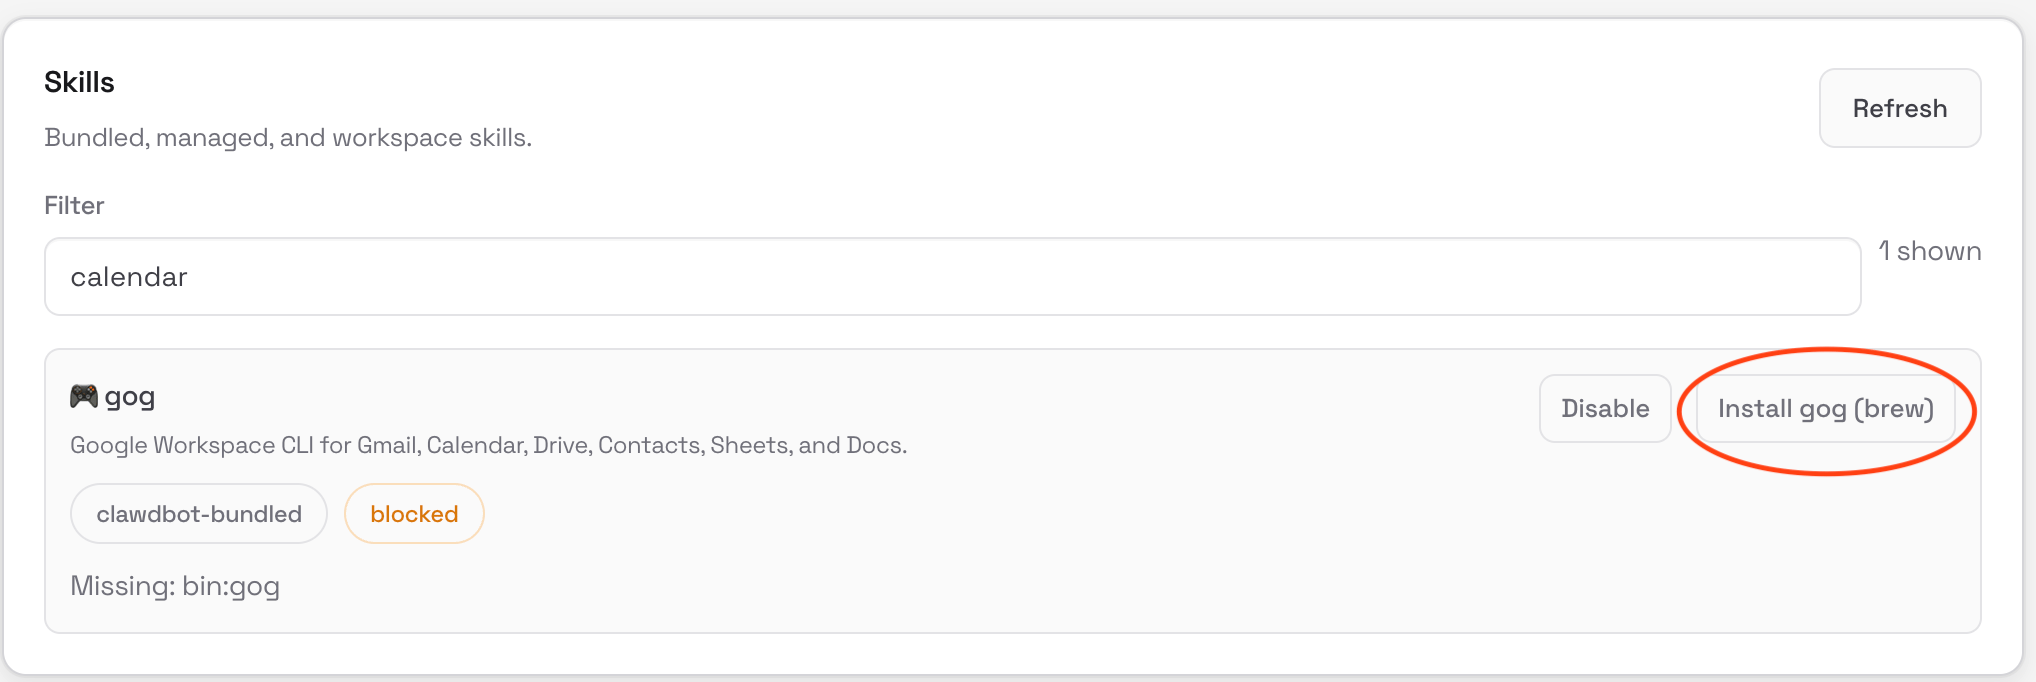
A large number of skills are available to perform a wide range of tasks including managing your files, automating web browsing, monitoring health and smart home technologies, and managing social media communication. Read through What is OpenClaw? for an overview of how OpenClaw works and what OpenClaw’s capabilities are.
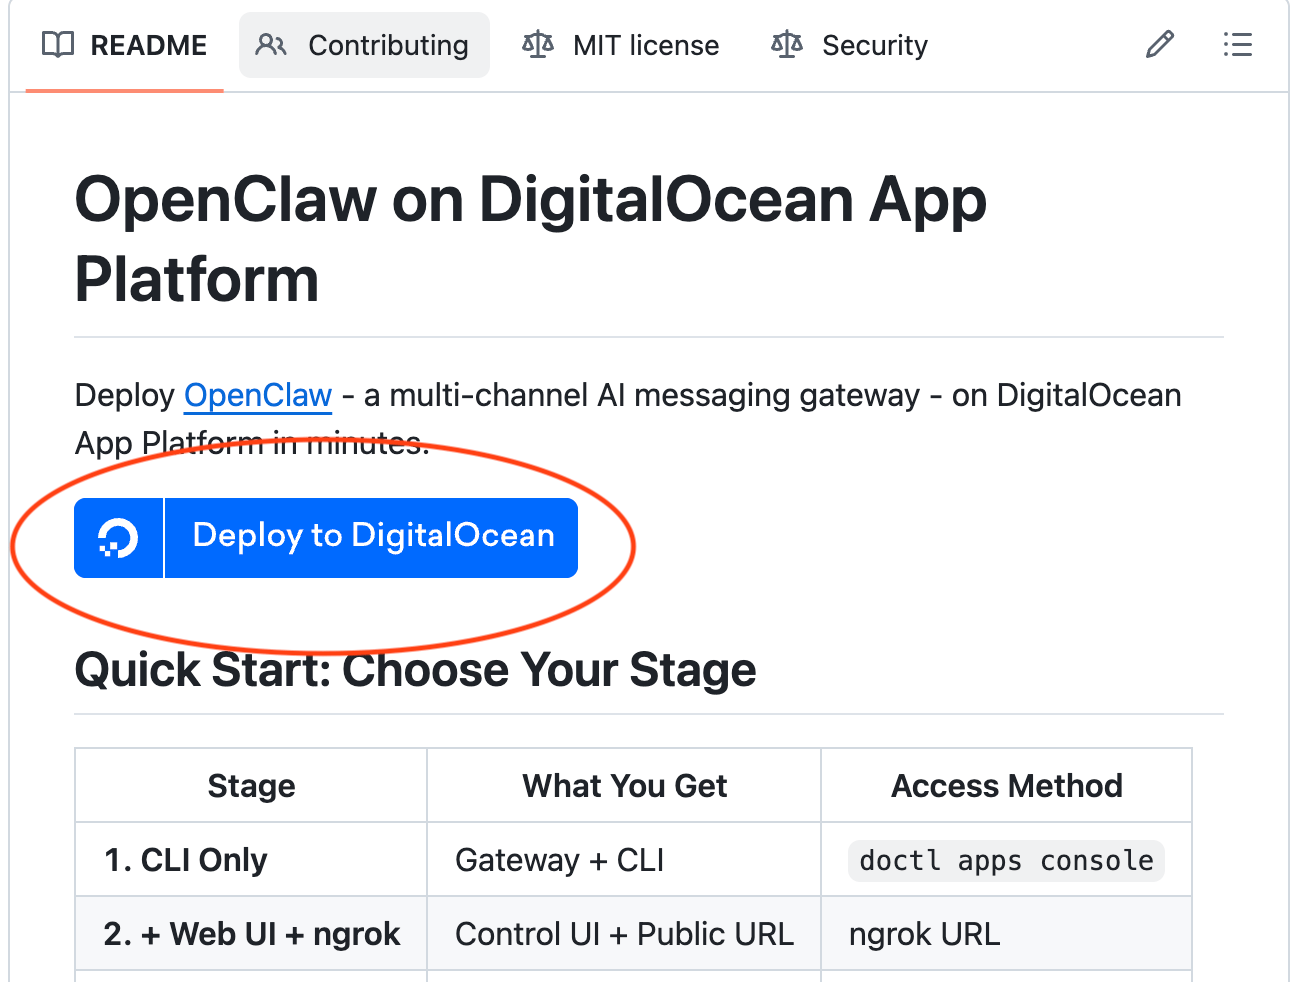
Step 1 — Creating the OpenClaw App
Deploying through DigitalOcean’s App Platform follows a slightly different process. First, go to the OpenClaw App Platform repo and click on the Deploy to Digital Ocean button.
Sign in or Create an Account. Scroll down in the Environment Variables section and click Edit.
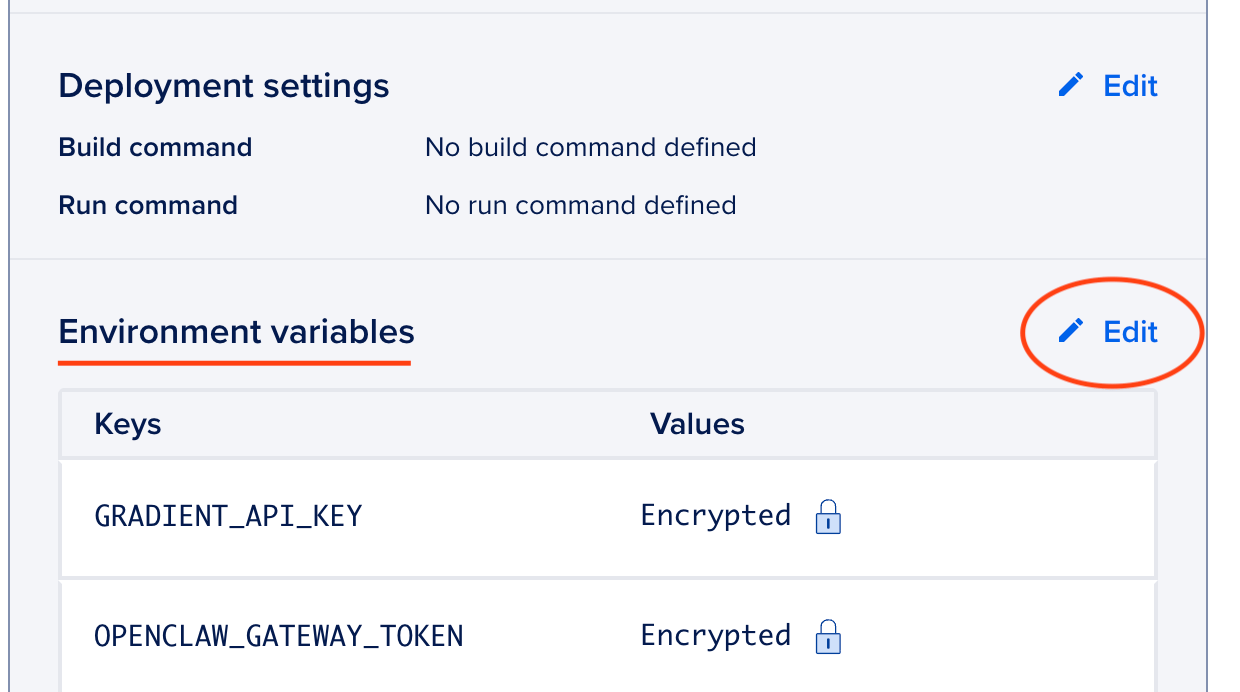
Add your model access key to the GRADIENT_API_KEY parameter. This will allow you to use your DigitalOcean AI Platform serverless inference account for the OpenClaw bot. Finally, click on Create APP. It can take up to 5 minutes to finish building the app.
After it has finished building, go to the Console tab of the app, and confirm it is working by typing in:
openclaw gateway health
You now have a working OpenClaw App. If you would like to connect to it remotely, you will need to install and configure doctl, the official command line interface (CLI) for the DigitalOcean API. You will need to follow the instructions to create an API token, use the API token to grant account access to doctl, then use the doctl apps console command to initiate a console session for the app. This step is not completely necessary because you can just use the Console in your application through the DigitalOcean website.
Step 2 — Connecting OpenClaw to WhatsApp
When you initiate the console session, you will be accessing it as the root user. So first, you need to change to the openclaw user:
su openclaw
Then you need to change directories into the home directory of the openclaw user:
cd
Note: The cd command without arguments changes to the current user’s home directory. Since you’re now the openclaw user, this will navigate to /home/openclaw.
To connect your OpenClaw application to WhatsApp, go to the Console of your OpenClaw application enter the following command:
openclaw channels add
Follow the instructions to add WhatsApp, scan the QR code, and connect with your bot through WhatsApp.
Step 3 — Installing Skills with the App Platform Application
To install skills through the App Platform application, from the openclaw user in the console, browse skills with the following command:
openclaw skills
Find a skill that you would like to use and install it with the following command, replacing skill_name with the name of the skill you would like to install:
npx clawhub install <skill_name>
You now have an OpenClaw App Platform application with a WhatsApp connection and skills. You can execute the openclaw command to access the rest of openclaw’s features.
FAQ
Can I use a model other than Claude?
Yes, OpenClaw is designed to be model-agnostic, so it does support models other than Anthropic’s Claude. It allows users to use various Large Language Models (LLMs) via API keys or locally. However, note that using the DigitalOcean 1-Click Deploy OpenClaw as outlined above, most users will only be able to use Anthropic (support for OpenAI coming soon!).
Can I deploy it on other operating systems that are not Linux?
Yes, you can deploy OpenClaw on Windows, macOS, and Linux, and other platforms.
What are the main security concerns?
The main security concerns are its high-level system access, potential for misconfiguration, and its ability to execute arbitrary code that might be harmful to your system. It’s important to be aware of the environment in which it’s deployed and the access it has.
How do I give API Key access to my Agents?
It is possible to selectively give agents more control over the world around you. The default OpenClaw application will keep these keys together in an environment that is available to all agents. This configuration gives you control to inject the keys you want to the agents that should have those powers. On the “Agents” Menu bar, select the Agent you’d like to grant access (or “Defaults” for all), then under Sandbox > Docker > Env, add the selected API Keys that should be used.
How does pricing work with OpenClaw?
OpenClaw is free and open-source to download and use, but you are paying for the LLM tokens. Therefore, the price depends on your usage. You should be careful with this because with scheduled jobs or other functionality, the costs can increase quickly and unexpectedly.
Conclusion
In this tutorial, you deployed OpenClaw on DigitalOcean, creating a secure environment for your personal AI assistant. By running OpenClaw on a cloud server instead of your local machine, you’ve significantly reduced security risks while maintaining the full functionality of this powerful tool.
The DigitalOcean OpenClaw deployment provides critical security features out of the box—including authenticated communication, hardened firewall rules, Docker container isolation, and non-root user execution—that make it safer to experiment with AI agent capabilities. You accessed it through a web browser and can now execute various tasks through your preferred messaging apps. Next, try adding new skills to your OpenClaw instance and customize the app to best suit your agentic needs.
Thanks for learning with the DigitalOcean Community. Check out our offerings for compute, storage, networking, and managed databases.
About the author
Andrew is an NLP Scientist with 8 years of experience designing and deploying enterprise AI applications and language processing systems.
Still looking for an answer?
 This work is licensed under a Creative Commons Attribution-NonCommercial- ShareAlike 4.0 International License.
Become a contributor for community
Get paid to write technical tutorials and select a tech-focused charity to receive a matching donation.

DigitalOcean Documentation
Full documentation for every DigitalOcean product.

Resources for startups and AI-native businesses
The Wave has everything you need to know about building a business, from raising funding to marketing your product.
The developer cloud
Scale up as you grow — whether you're running one virtual machine or ten thousand.

Start building today
From GPU-powered inference and Kubernetes to managed databases and storage, get everything you need to build, scale, and deploy intelligent applications.
