By Savic and Kathryn Hancox

The author selected the Free and Open Source Fund to receive a donation as part of the Write for DOnations program.
Introduction
Typically, hosting a software application on the internet requires infrastructure management, planning, and monitoring for a monolithic system. Unlike this traditional approach, the serverless architecture (also known as function as a service, or FaaS) breaks down your application into functions. These functions are stateless, self contained, event triggered, functionally complete entities that communicate via APIs that you manage, instead of the underlying hardware and explicit infrastructure provisioning. Functions are scalable by design, portable, faster to set up and easier to test than ordinary apps. For the serverless architecture to work in principle, it requires a platform agnostic way of packaging and orchestrating functions.
OpenFaaS is an open-source framework for implementing the serverless architecture on Kubernetes, using Docker containers for storing and running functions. It allows any program to be packaged as a container and managed as a function via the command line or the integrated web UI. OpenFaaS has excellent support for metrics and provides autoscaling for functions when demand increases.
In this tutorial, you will deploy OpenFaaS to your DigitalOcean Kubernetes cluster at your domain and secure it using free Let’s Encrypt TLS certificates. You’ll also explore its web UI and deploy existing and new functions using the faas-cli, the official command line tool. In the end, you’ll have a flexible system for deploying serverless functions in place.
Prerequisites
- A DigitalOcean Kubernetes cluster with your connection configured as the
kubectldefault. The cluster must have at least 8GB RAM and 4 CPU cores available for OpenFaaS (more will be required in case of heavier use). Instructions on how to configurekubectlare shown under the Connect to your Cluster step when you create your cluster. To create a Kubernetes cluster on DigitalOcean, see Kubernetes Quickstart. - Docker installed on your local machine. Following Steps 1 and 2 for your distribution, see How To Install Docker.
- An account at Docker Hub for storing Docker images you’ll create during this tutorial.
- faas-cli, the official CLI tool for managing OpenFaaS, installed on your local machine. For instructions for multiple platforms, visit the official docs.
- The Helm package manager installed on your local machine. To do this, complete Step 1 and add the
stablerepo from Step 2 of the How To Install Software on Kubernetes Clusters with the Helm 3 Package Manager tutorial. - The Nginx Ingress Controller and Cert-Manager installed on your cluster using Helm in order to expose OpenFaaS using Ingress Resources. For guidance, follow How to Set Up an Nginx Ingress on DigitalOcean Kubernetes Using Helm.
- A fully registered domain name to host OpenFaaS, pointed at the Load Balancer used by the Nginx Ingress. This tutorial will use
openfaas.your_domainthroughout. You can purchase a domain name on Namecheap, get one for free on Freenom, or use the domain registrar of your choice.
Note: The domain name you use in this tutorial must differ from the one used in the “How To Set Up an Nginx Ingress on DigitalOcean Kubernetes” prerequisite tutorial.
Step 1 — Installing OpenFaaS using Helm
In this step, you will install OpenFaaS to your Kubernetes cluster using Helm and expose it at your domain.
As part of the Nginx Ingress Controller prerequisite, you created example Services and an Ingress. You won’t need them in this tutorial, so you can delete them by running the following commands:
- kubectl delete -f hello-kubernetes-first.yaml
- kubectl delete -f hello-kubernetes-second.yaml
- kubectl delete -f hello-kubernetes-ingress.yaml
Since you’ll be deploying functions as Kubernetes objects, it’s helpful to store them and OpenFaaS itself in separate namespaces in your cluster. The OpenFaaS namespace will be called openfaas, and the functions namespace will be openfaas-fn. Create them in your cluster by running the following command:
- kubectl apply -f https://raw.githubusercontent.com/openfaas/faas-netes/master/namespaces.yml
You’ll see the following output:
Outputnamespace/openfaas created
namespace/openfaas-fn created
Next, you’ll need to add the OpenFaaS Helm repository, which hosts the OpenFaaS chart. To do this, run the following command:
- helm repo add openfaas https://openfaas.github.io/faas-netes/
Helm will display the following output:
Output"openfaas" has been added to your repositories
Refresh Helm’s chart cache:
- helm repo update
You’ll see the following output:
OutputHang tight while we grab the latest from your chart repositories...
...Successfully got an update from the "openfaas" chart repository
...Successfully got an update from the "jetstack" chart repository
...Successfully got an update from the "stable" chart repository
Update Complete. ⎈ Happy Helming!⎈
Before installing OpenFaaS, you’ll need to customize some chart parameters. You’ll store them on your local machine, in a file named values.yaml. Create and open the file with your text editor:
- nano values.yaml
Add the following lines:
functionNamespace: openfaas-fn
generateBasicAuth: true

ingress:
  enabled: true
  annotations:
    kubernetes.io/ingress.class: "nginx"
  hosts:
    - host: openfaas.your_domain
      serviceName: gateway
      servicePort: 8080
      path: /
First, you specify the namespace where functions will be stored by assigning openfaas-fn to the functionNamespace variable. By setting generateBasicAuth to true, you order Helm to set up mandatory authentication when accessing the OpenFaaS web UI and to generate an admin username and password login combination for you.
Then, you enable Ingress creation and further configure it to use the Nginx Ingress Controller and serve the gateway OpenFaaS service at your domain.
Remember to replace openfaas.your_domain with your desired domain from the prerequisites. When you are done, save and close the file.
Finally, install OpenFaaS into the openfaas namespace with the customized values:
- helm upgrade openfaas --install openfaas/openfaas --namespace openfaas -f values.yaml
You will see the following output:
OutputRelease "openfaas" does not exist. Installing it now.
NAME: openfaas
LAST DEPLOYED: ...
NAMESPACE: openfaas
STATUS: deployed
REVISION: 1
TEST SUITE: None
NOTES:
To verify that openfaas has started, run:

  kubectl -n openfaas get deployments -l "release=openfaas, app=openfaas"
To retrieve the admin password, run:

  echo $(kubectl -n openfaas get secret basic-auth -o jsonpath="{.data.basic-auth-password}" | base64 --decode)
The output shows that the installation was successful. Run the following command to reveal the password for the admin account:
- echo $(kubectl -n openfaas get secret basic-auth -o jsonpath="{.data.basic-auth-password}" | base64 --decode) | tee openfaas-password.txt
The decoded password is written to the output and to a file called openfaas-password.txt at the same time using tee. Note the output, which is your OpenFaaS password for the admin account.
You can watch OpenFaaS containers become available by running the following command:
- kubectl -n openfaas get deployments -l "release=openfaas, app=openfaas"
When all listed deployments become ready, type CTRL + C to exit.
You can now navigate to the specified domain in your web browser. Input admin as the username and the accompanying password when prompted. You’ll see the OpenFaaS web UI:
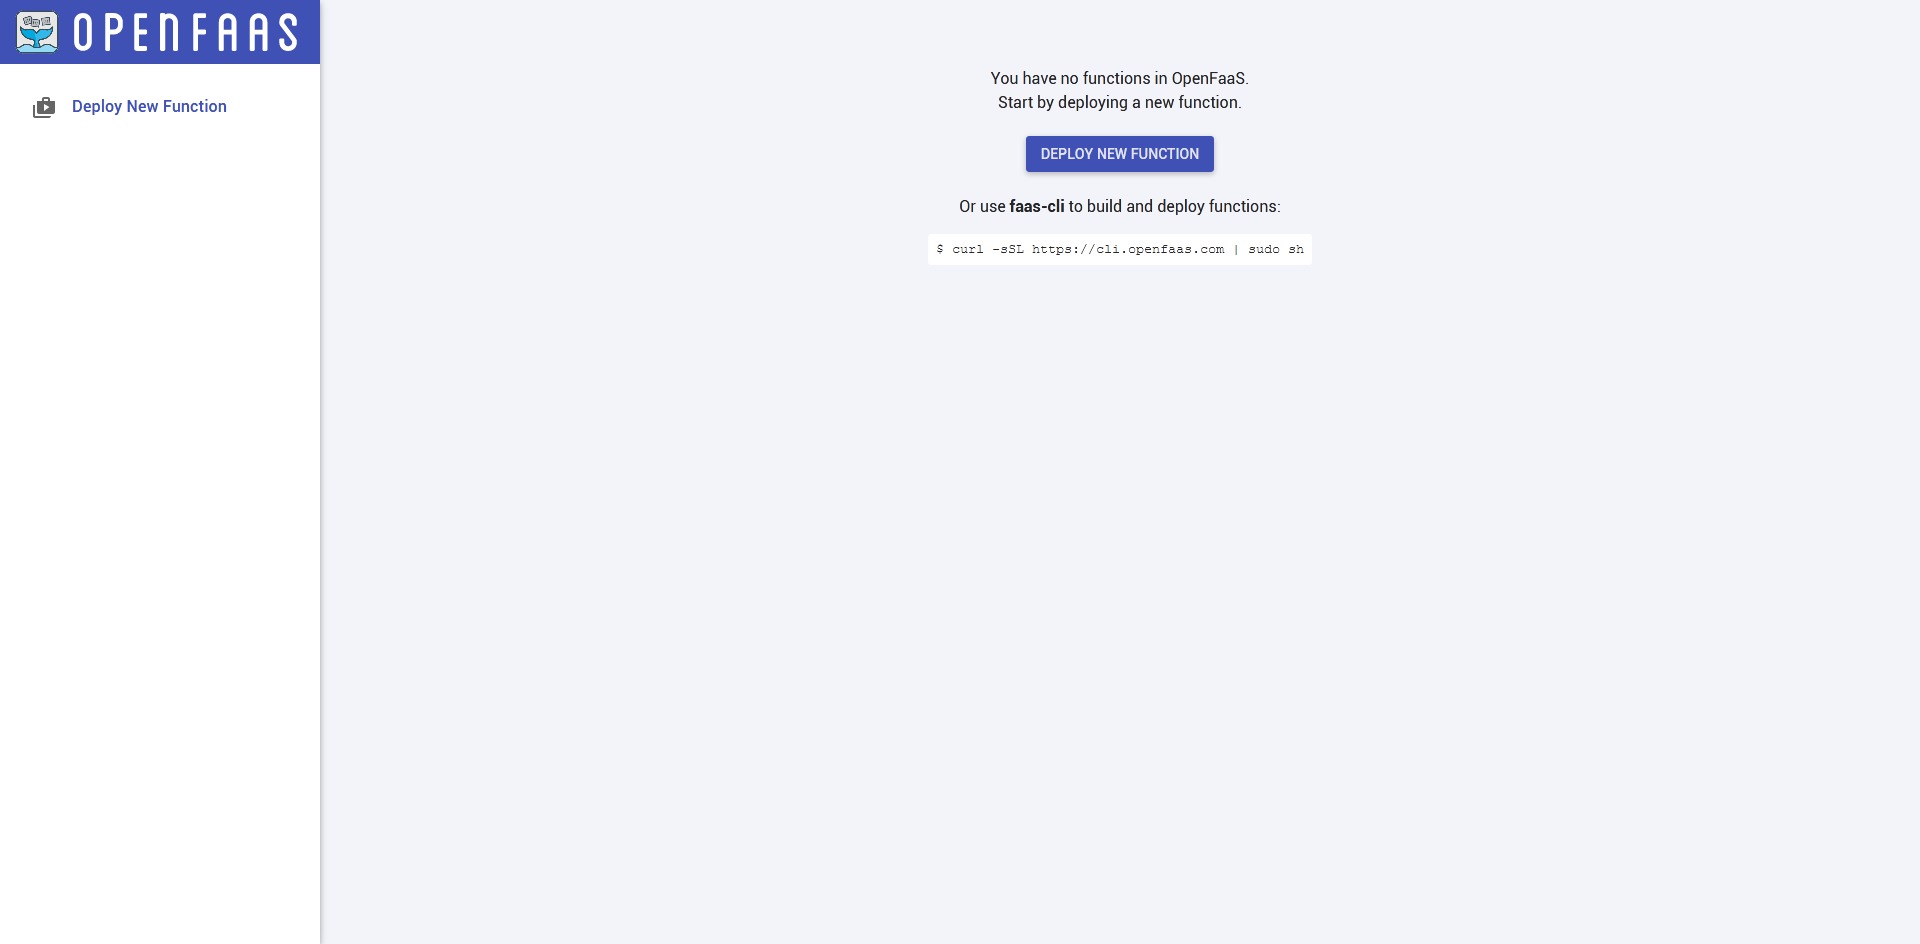
You’ve successfully installed OpenFaaS and exposed its control panel at your domain. Next, you’ll secure it using free TLS certificates from Let’s Encrypt.
Step 2 — Enabling TLS for Your Domain
In this step, you’ll secure your exposed domain using Let’s Encrypt certificates, provided by cert-manager.
To do this, you’ll need to edit the ingress config in values.yaml. Open it for editing:
- nano values.yaml
Add the highlighted lines:
generateBasicAuth: true

ingress:
  enabled: true
  annotations:
    kubernetes.io/ingress.class: "nginx"
	cert-manager.io/cluster-issuer: letsencrypt-prod
  tls:
    - hosts:
        - openfaas.your_domain
      secretName: openfaas-crt
  hosts:
    - host: openfaas.your_domain
      serviceName: gateway
      servicePort: 8080
      path: /
The tls block defines in what Secret the certificates for your sites (listed under hosts) will store their certificates, which the letsencrypt-prod ClusterIssuer issues. Generally, the specified Secret must be different for every Ingress in your cluster.
Remember to replace openfaas.your_domain with your desired domain, then save and close the file.
Apply the changes to your cluster by running the following command:
- helm upgrade openfaas --install openfaas/openfaas --namespace openfaas -f values.yaml
You’ll see the following output:
OutputRelease "openfaas" has been upgraded. Happy Helming!
NAME: openfaas
LAST DEPLOYED: ...
NAMESPACE: openfaas
STATUS: deployed
REVISION: 2
TEST SUITE: None
NOTES:
To verify that openfaas has started, run:

  kubectl -n openfaas get deployments -l "release=openfaas, app=openfaas"
To retrieve the admin password, run:

  echo $(kubectl -n openfaas get secret basic-auth -o jsonpath="{.data.basic-auth-password}" | base64 --decode)
You’ll need to wait a few minutes for the Let’s Encrypt servers to issue a certificate for your domain. In the meantime, you can track its progress by inspecting the output of the following command:
- kubectl describe certificate openfaas-crt -n openfaas
The end of the output will look similar to this:
OutputEvents:
  Type    Reason        Age   From          Message
  ----    ------        ----  ----          -------
  Normal  GeneratedKey  24m   cert-manager  Generated a new private key
  Normal  Requested     16m   cert-manager  Created new CertificateRequest resource "openfaas-crt-1017759607"
  Normal  Issued        16m   cert-manager  Certificate issued successfully
When the last line of output reads Certificate issued successfully, you can exit by pressing CTRL + C. Refresh your domain in your browser to test. You’ll see the padlock to the left of the address bar in your browser, signifying that your connection is secure.
You’ve secured your OpenFaaS domain using free TLS certificates from Let’s Encrypt. Now you’ll use the web UI and manage functions from it.
Step 3 — Deploying Functions via the Web UI
In this section, you’ll explore the OpenFaaS web UI and then deploy, manage, and invoke functions from it.
The OpenFaaS web UI has two main parts: on the left-hand side, a column where the deployed functions will be listed, and the central panel, where you’ll see detailed info about a selected function and be able to interact with it.
To deploy a new function, click the Deploy New Function button underneath the OpenFaaS logo on the upper left. You’ll see a dialog asking you to choose a function:
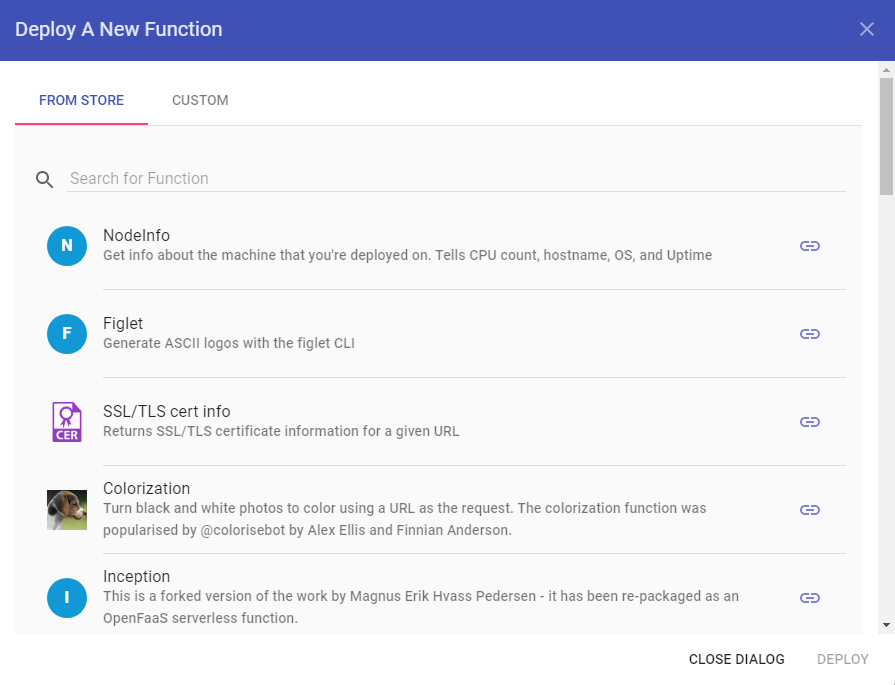
The FROM STORE tab lists pre-made functions from the official OpenFaaS function store that you can deploy right away. Each function is shown with a short description, and you can select the link icon on the right of a function to take a look at its source code. To deploy a store function from this list, select it, and then click the DEPLOY button.
You can also supply your own function by switching to the CUSTOM tab:
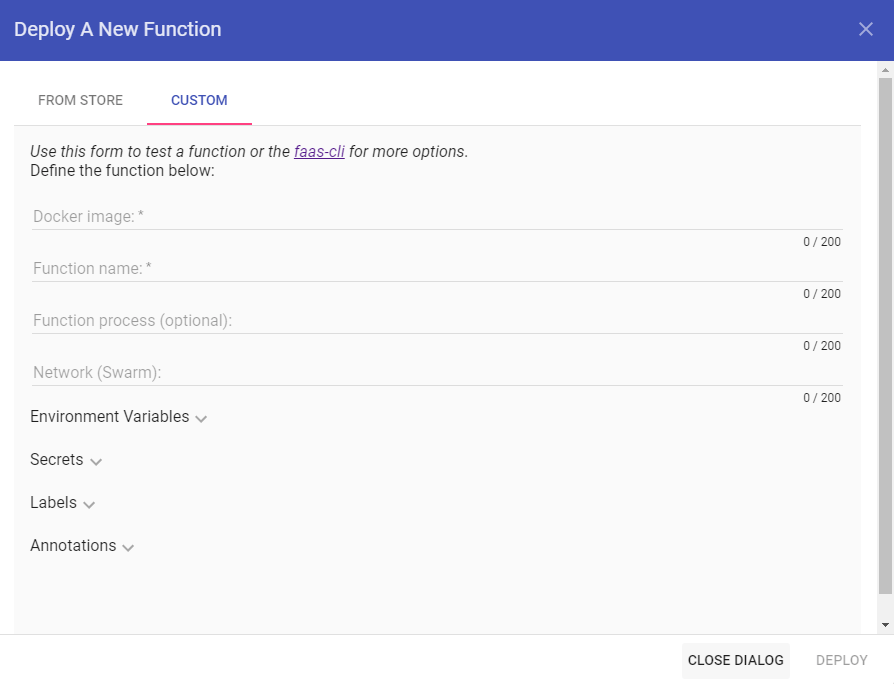
Here, you’d need to specify a Docker image of your function that is configured specifically for OpenFaaS and available at a Docker registry (such as Docker Hub). In this step, you’ll deploy a pre-made function from the OpenFaaS store, then in the next steps you’ll create and deploy custom functions to Docker Hub.
You’ll deploy the NodeInfo function, which returns information about the machine it’s deployed on, such as CPU architecture, number of cores, total RAM memory available, and uptime (in seconds).
From the list of store functions, select NodeInfo and click DEPLOY. It will soon show up in the list of deployed functions.
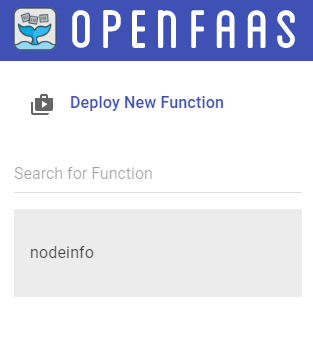
Select it. In the central part of the screen, you’ll see basic information about the deployed function.
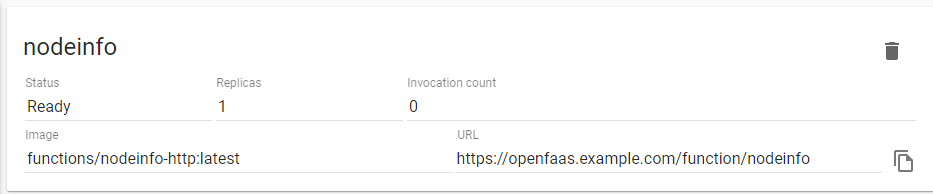
The status of the function updates in real time, and should quickly turn to Ready. If it stays at Not Ready for longer periods of time, it’s most likely that your cluster lacks the resources to accept a new pod. You can follow How To Resize Droplets for information on how to fix this.
Once Ready, the deployed function is accessible at the shown URL. To test it, you can navigate to the URL in your browser, or call it from the Invoke function panel located beneath the function info.
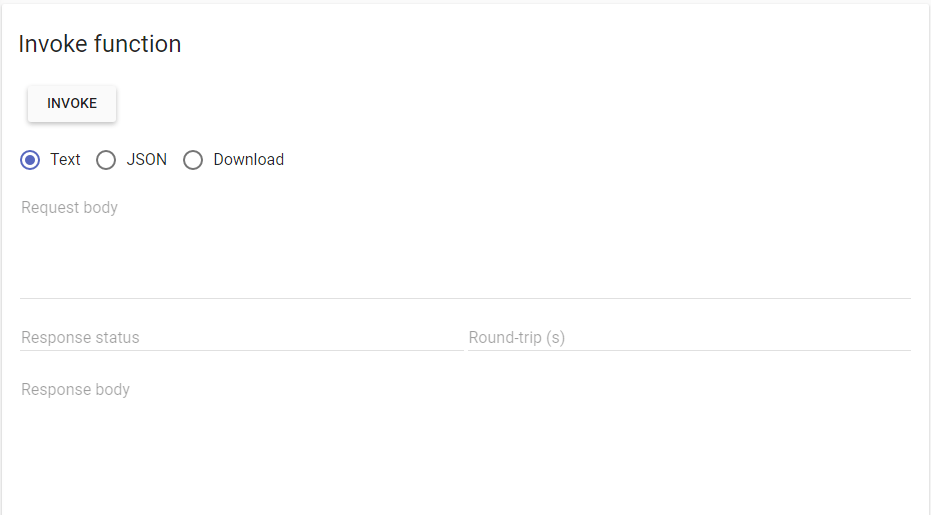
You can select between Text, JSON, and Download to indicate the type of response you expect. If you want the request to be a POST instead of GET, you can supply request data in the Request body field.
To call the nodeinfo function, click the INVOKE button. OpenFaaS will craft and execute a HTTP request according to the selected options and fill in the response fields with received data.
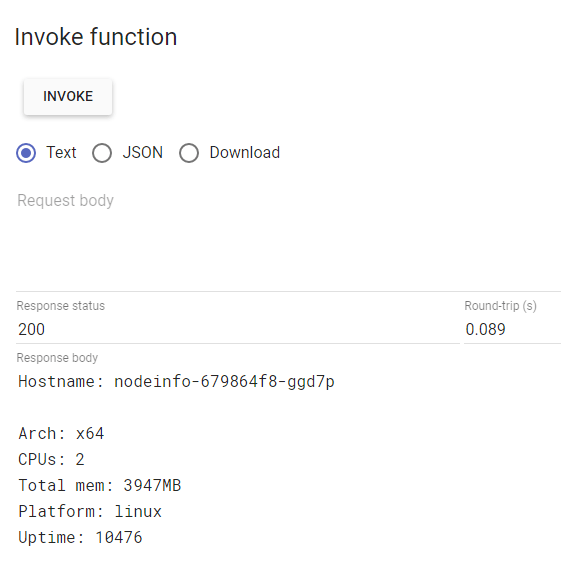
The response status is HTTP 200 OK, which means that the request was executed successfully. The response body contains system information that the NodeInfo function collects, meaning that it’s properly accessible and working correctly.
To delete a function, select it from the list and click the garbage can icon in the right upper corner of the page. When prompted, click OK to confirm. The function’s status will turn to Not Ready (which means it’s being removed from the cluster) and the function will soon vanish from the UI altogether.
In this step, you’ve used the OpenFaaS web UI, as well as deploy and manage functions from it. You’ll now see how you can deploy and manage OpenFaaS functions using the command line.
Step 4 — Managing Functions Using the faas-cli
In this section, you’ll configure the faas-cli to work with your cluster. Then, you’ll deploy and manage your existing functions through the command line.
To avoid having to specify your OpenFaaS domain every time you run the faas-cli, you’ll store it in an environment variable called OPENFAAS_URL, whose value the faas-cli will automatically pick up and use during execution.
Open .bash_profile in your home directory for editing:
- nano ~/.bash_profile
Add the following line:
. . .
export OPENFAAS_URL=https://openfaas.your_domain
Remember to replace openfaas.your_domain with your domain, then save and close the file.
To avoid having to log in again, manually evaluate the file:
- . ~/.bash_profile
Now, ensure that you have faas-cli installed on your local machine. If you haven’t yet installed it, do so by following the instructions outlined in the official docs.
Then, set up your login credentials by running the following command:
- cat ~/openfaas-password.txt | faas-cli login --username admin --password-stdin
The output will look like:
OutputCalling the OpenFaaS server to validate the credentials...
credentials saved for admin https://openfaas.your_domain
To deploy a function from the store, run the following command:
- faas store deploy function_name
You can try deploying nodeinfo by running:
- faas store deploy nodeinfo
You’ll see output like the following:
OutputDeployed. 202 Accepted.
URL: https://openfaas.your_domain/function/nodeinfo
To list deployed functions, run faas list:
- faas list
Your existing functions will be shown:
OutputFunction                        Invocations     Replicas
nodeinfo                        0               1
To get detailed info about a deployed function, use faas describe:
- faas describe nodeinfo
The output will be similar to:
Name:                nodeinfo
Status:              Ready
Replicas:            1
Available replicas:  1
Invocations:         0
Image:               functions/nodeinfo-http:latest
Function process:
URL:                 https://openfaas.your_domain/function/nodeinfo
Async URL:           https://openfaas.your_domain/async-function/nodeinfo
Labels:              faas_function : nodeinfo
                     uid : 514253614
Annotations:         prometheus.io.scrape : false
You can invoke a function with faas invoke:
- faas invoke nodeinfo
You’ll get the following message:
OutputReading from STDIN - hit (Control + D) to stop.
You can then provide a request body. If you do, the method will be POST instead of GET. When you are done with inputting data, or want the request to be GET, press CTRL + D. The faas-cli will then execute the inferred request and output the response, similarly to the web UI.
To delete a function, run faas remove:
- faas remove nodeinfo
You’ll get the following output:
OutputDeleting: nodeinfo.
Removing old function.
Run faas list again to see that nodeinfo was removed:
OutputFunction Invocations Replicas
In this step, you’ve deployed, listed, invoked, and removed functions in your cluster from the command line using the faas-cli. In the next step, you’ll create your own function and deploy it to your cluster.
Step 5 — Creating and Deploying a New Function
Now you’ll create a sample Node.JS function using the faas-cli and deploy it to your cluster.
The resulting function you’ll create will be packaged as a Docker container and published on Docker Hub. To be able to publish containers, you’ll need to log in by running the following command:
- docker login
Enter your Docker Hub username and password when prompted to finish the login process.
You’ll store the sample Node.JS function in a folder named sample-js-function. Create it using the following command:
- mkdir sample-js-function
Navigate to it:
- cd sample-js-function
Populate the directory with the template of a JS function by running the following command:
- faas new sample-js --lang node
The output will look like this:
Output2020/03/24 17:06:08 No templates found in current directory.
2020/03/24 17:06:08 Attempting to expand templates from https://github.com/openfaas/templates.git
2020/03/24 17:06:10 Fetched 19 template(s) : [csharp csharp-armhf dockerfile go go-armhf java11 java11-vert                                                  -x java8 node node-arm64 node-armhf node12 php7 python python-armhf python3 python3-armhf python3-debian ru                                                  by] from https://github.com/openfaas/templates.git
Folder: sample-js created.
  ___                   _____           ____
 / _ \ _ __   ___ _ __ |  ___|_ _  __ _/ ___|
| | | | '_ \ / _ \ '_ \| |_ / _` |/ _` \___ \
| |_| | |_) |  __/ | | |  _| (_| | (_| |___) |
 \___/| .__/ \___|_| |_|_|  \__,_|\__,_|____/
      |_|


Function created in folder: sample-js
Stack file written: sample-js.yml

...
As written in the output, the code for the function itself is in the folder sample-js, while the OpenFaaS configuration for the function is in the file sample-js.yaml. Under the sample-js directory (which resembles a regular Node.JS project) are two files, handler.js and package.json.
handler.js contains actual JS code that will return a response when the function is called. The contents of the handler look like the following:
"use strict"

module.exports = async (context, callback) => {
    return {status: "done"}
}
It exports a lambda function with two parameters, a context with request data and a callback that you can use to pass back response data, instead of just returning it.
Open this file for editing:
- nano sample-js/handler.js
Change the highlighted line as follows:
"use strict"

module.exports = async (context, callback) => {
    return {status: "<h1>Hello Sammy!</h1>"}
}
When you are done, save and close the file. This OpenFaaS function will, when called, write Hello Sammy! to the response.
Next, open the configuration file for editing:
- nano sample-js.yml
It will look like the following:
version: 1.0
provider:
  name: openfaas
  gateway: https://openfaas.your_domain
functions:
  sample-js:
    lang: node
    handler: ./sample-js
    image: sample-js:latest
For the provider, it specifies openfaas and a default gateway. Then, it defines the sample-js function, specifies its language (node), its handler and the Docker image name, which you’ll need to modify to include your Docker Hub account username, like so:
version: 1.0
provider:
  name: openfaas
  gateway: http://127.0.0.1:8080
functions:
  sample-js:
    lang: node
    handler: ./sample-js
    image: your_docker_hub_username/sample-js:latest
Save and close the file.
Then, build the Docker image, push it to Docker Hub, and deploy it on your cluster, all at the same time by running the following command:
- faas up -f sample-js.yml
There will be a lot of output (mainly from Docker), which will end like this:
Output. . .
[0] < Pushing sample-js [your_docker_hub_username/sample-js:latest] done.
[0] Worker done.

Deploying: sample-js.

Deployed. 202 Accepted.
URL: https://openfaas.your_domain/function/sample-js
Invoke your newly deployed function to make sure it’s working:
- faas invoke sample-js
Press CTRL + D. You’ll see the following output:
Output<h1>Hello Sammy!</h1>
This means that the function was packaged and deployed correctly.
You can remove the function by running:
- faas remove sample-js
You have now successfully created and deployed a custom Node.JS function on your OpenFaaS instance in your cluster.
Conclusion
You’ve deployed OpenFaaS on your DigitalOcean Kubernetes cluster and are ready to deploy and access both pre-made and custom functions. Now, you are able to implement the Function as a Service architecture, which can increase resource utilization and bring performance improvements to your apps.
If you’d like to learn more about advanced OpenFaaS features, such as autoscaling for your deployed functions and monitoring their performance, visit the official docs.
Thanks for learning with the DigitalOcean Community. Check out our offerings for compute, storage, networking, and managed databases.
About the author(s)
Expert in cloud topics including Kafka, Kubernetes, and Ubuntu.
Former Senior Technical Editor at DigitalOcean, with a strong focus on DevOps and System Administration content. Areas of expertise include Terraform, PyTorch, Python, and Django.
Still looking for an answer?
This textbox defaults to using Markdown to format your answer.
You can type !ref in this text area to quickly search our full set of tutorials, documentation & marketplace offerings and insert the link!
Hello, can we use this with Node autoscaler? For example, if I run a pod that get more ram and cpu then existing, can it start new droplet node and run that task? I’m about the provision of instance, if it can automatic get instance its just like AWS Fargate except the cluster to run the OpenFaaS
 This work is licensed under a Creative Commons Attribution-NonCommercial- ShareAlike 4.0 International License.
Become a contributor for community
Get paid to write technical tutorials and select a tech-focused charity to receive a matching donation.

DigitalOcean Documentation
Full documentation for every DigitalOcean product.

Resources for startups and AI-native businesses
The Wave has everything you need to know about building a business, from raising funding to marketing your product.
The developer cloud
Scale up as you grow — whether you're running one virtual machine or ten thousand.

Start building today
From GPU-powered inference and Kubernetes to managed databases and storage, get everything you need to build, scale, and deploy intelligent applications.
