By Sadequl Hussain and Hazel Virdó

Introduction
Today’s high traffic web applications are powered by slick and fast-response web servers, scalable, enterprise-class databases, and dynamic content served by feature-rich scripting languages. Typical Linux web application stack follows the LAMP architecture (Linux, Apache, MySQL, and PHP/Python). Widely available tutorials show us how these components can be installed and configured in one single server.
That’s seldom the case in real life. In a professional three-tier setup, the database back-end would be secluded in its own server; the web server would send its requests to an app tier acting as a middleware between the database and the website.
Although Apache is still by far the most widely-used web server, Nginx has rapidly gained popularity for its small footprint and fast response time. MySQL’s community edition is still a popular choice for databases, but many sites also use another open source database platform called PostgreSQL.
Goals
In this tutorial, we will create a simple web application in a two-tier architecture. Our base operating system for both nodes will be CentOS 7. The site will be powered by an Nginx web server running PHP code that talks to a PostgreSQL database.
Instead of adopting a “top-down” approach seen in other LAMP or LEMP tutorials, we will use a “ground-up” approach: we will create a database tier first, then the web server and then see how the web server can connect to the database.
We will call this configuration a LEPP (Linux, Nginx, PHP, PostgreSQL) stack.
Prerequisites
To follow this tutorial, you will need the following:
- Two CentOS 7 Droplets with at least 2GB of RAM and 2 CPU cores, one each for the database server and the web server.
We’ll refer to the IP addresses of these machines as your_db_server_ip and your_web_server_ip respectively; you can find the actual IP addresses of these machines on the DigitalOcean control panel.
- Sudo non-root users on both Droplets. To set this up, follow this tutorial.
Step One — Installing PostgreSQL
In this step, we will install PostgreSQL on the database server.
Connect to the empty, freshly installed CentOS 7 box where you want to install PostgreSQL. Its repository doesn’t come with CentOS 7 by default, so we will need to download the yum repository RPM first.
sudo wget http://yum.postgresql.org/9.4/redhat/rhel-7Server-x86_64/pgdg-centos94-9.4-1.noarch.rpm
Once the RPM has been saved, install the repository.
sudo yum install pgdg-centos94-9.4-1.noarch.rpm -y
Finally, install the PostgreSQL 9.4 server and its contrib modules.
sudo yum install postgresql94-server postgresql94-contrib -y
Step Two — Configuring PostgreSQL
In this step, we will customize a number of post-installation configurations for PostgreSQL.
In CentOS 7, the default location for PostgreSQL 9.4 data and configuration files is /var/lib/pgsql/9.4/data/ and the location for program binaries is /usr/pgsql-9.4/bin/. The data directory is empty at the beginning. We will need to run the initdb program to initialize the database cluster and create necessary files in it:
sudo /usr/pgsql-9.4/bin/postgresql94-setup initdb
Once the database cluster has been initialized, there will be a file called postgresql.conf in the data folder, which is the main configuration file for PostgreSQL. We will change two parameters in this file. Using vi or your favorite text editor, open the file for editing.
sudo vi /var/lib/pgsql/9.4/data/postgresql.conf
And change the following lines:
- Change
#listen_addresses = 'localhost'tolisten_addresses = '*' - Change
#port = 5432toport = 5432
The first parameter specifies which IP address the database server will listen to. As a security measure, out-of-box Postgres installations only allow local host connections. Changing this to ‘*’ means Postgres will listen for traffic from any source. The second parameter has been enabled by taking off the comment marker (#); it specifies the default port for Postgres.
Save and exit the file.
Next, we will edit pg_hba.conf, which is PostgreSQL’s Host Based Access (HBA) configuration file. It specifies which hosts and IP ranges can connect to the database server. Each entry specifies whether the connection can be made locally or remotely (host), which database it can connect to, which user it can connect as, which IP block the request can come from, and what authentication mode should be used. Any connection requests not matching with any of these entries would be denied.
Open pg_hba.conf for editing.
sudo vi /var/lib/pgsql/9.4/data/pg_hba.conf
Scroll to the bottom of the file, and add this line:
host all all your_web_server_ip/32 md5
This line tells PostgreSQL to accept database connections coming only from IP address your_web_server_ip using a standard md5 checksum for password authentication. The connection can be made against any database as any user.
Save and exit the file.
Next, start the Postgres service:
sudo systemctl start postgresql-9.4.service
And then enable it:
sudo systemctl enable postgresql-9.4.service
To check if the database server is accepting connections, we can look at the last few lines of the latest Postgres log file. The database error logs are saved in the /var/lib/pgsql/9.4/data/pg_log directory. Run the following command to see the files in this directory.
sudo ls -l /var/lib/pgsql/9.4/data/pg_log
The log file names have the pattern postgresql-day_of_week.log (for example, postgresql-Wed.log). Find the log file that corresponds to the current day, and look at the last few lines of the latest log file.
sudo tail -f -n 20 /var/lib/pgsql/9.4/data/pg_log/postgresql-day_of_week.log
The output should show something similar to this:
...

< 2015-02-26 21:32:24.159 EST >LOG:  database system is ready to accept connections
< 2015-02-26 21:32:24.159 EST >LOG:  autovacuum launcher started
Press CTRL+C to stop the output from the tail command.
Step Three — Updating the Database Server Firewall
We also need to allow Postgres database traffic to pass though the firewall. CentOS 7 implements a dynamic firewall through the firewalld daemon; the service doesn’t need to restart for changes to take effect. The firewalld service should start automatically at system boot time, but it’s always good to check.
sudo firewall-cmd --state
The default state should be running, but if it is not running start it with:
sudo systemctl start firewalld
Next, add the rules for port 5432. This is the port for PostgreSQL database traffic.
sudo firewall-cmd --permanent --zone=public --add-port=5432/tcp
Then reload the firewall.
sudo firewall-cmd --reload
Step Four — Creating and Populating the Database
In this step, we will create a database and add some data to it. This is the data our web application will dynamically fetch and display.
The first step is is to change the password of the Postgres superuser, called postgres, which is created when PostgreSQL is first installed. It’s best the user’s password is changed from within Postgres rather than the OS prompt. To do this, switch to the postgres user:
sudo su - postgres
This will change the command prompt to -bash-4.2$. Next, start the built-in client tool.
psql
By default this will log the postgres user to the Postgres database. Your prompt will change to postgres=#, the psql prompt, not an OS prompt. Issuing the \password command now will result in prompts asking to change the password.
\password
Provide a secure password for the Postgres user.
Next, create a database called product:
CREATE DATABASE product;
Then connect to the product database:
\connect product;
Next, create a table in the database called product_list:
CREATE TABLE product_list (id int, product_name varchar(50));
Run each of the following commands one at a time. Each command will add a single record to the product_list table.
INSERT INTO product_list VALUES (1, 'Book');
INSERT INTO product_list VALUES (2, 'Computer');
INSERT INTO product_list VALUES (3, 'Desk');
Finally, check the data has been added correctly.
SELECT * FROM product_list;
The output should look like this:
 id | product_name
----+--------------
  1 | Book
  2 | Computer
  3 | Desk
(3 rows)
This is all we need to do on the database server; you can now disconnect from it.
Step Five — Installing Nginx
Next, we will install and configure an Nginx web server in the other Droplet. Connect to the other empty, freshly installed CentOS 7 box.
Like PosgreSQL, the Nginx repository doesn’t come with CentOS 7 by default. We will need to download the yum repository RPM first.
sudo wget http://nginx.org/packages/centos/7/noarch/RPMS/nginx-release-centos-7-0.el7.ngx.noarch.rpm
Once the RPM has been saved, install the repository.
sudo yum install nginx-release-centos-7-0.el7.ngx.noarch.rpm -y
Finally, install the Nginx web server.
sudo yum install nginx -y
Step Six — Updating the Web Server Firewall
In this step, we will configure the firewall to allow Nginx traffic, and customize some Nginx configurations.
We need to allow HTTP/HTTPS traffic to pass though the firewall. Like before, check that the firewalld service is running.
sudo firewall-cmd --state
The default state should be running, but if it’s not running, start it:
sudo systemctl start firewalld
Now add the firewall rule for port 80 (HTTP):
sudo firewall-cmd --permanent --zone=public --add-port=80/tcp
Add another for port 443 (HTTPS):
sudo firewall-cmd --permanent --zone=public --add-port=443/tcp
Then, reload the firewall.
sudo firewall-cmd --reload
Next, start Nginx.
sudo systemctl start nginx.service
And enable it.
sudo systemctl enable nginx.service
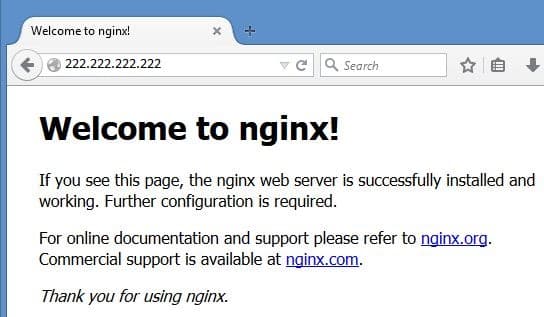
Pointing our browser to the server’s IP address should show us the default web page:
Step Seven — Configuring Nginx
There are two Nginx configuration files relevant in this step. The first one is the main configuration file and the second one is a site-specific one.
The general configuration file controls the overall server characteristics. Nginx can serve many web sites and each site is called a server block (Apache calls them virtual hosts, or vhosts). Each site’s configuration is controlled by a server block configuration file.
Let’s edit the main server configuration file.
sudo vi /etc/nginx/nginx.conf
On the second line of the file, change the worker_processes parameter from 1 to 2. This tells Nginx’s worker threads to use of all the CPU cores available. Save and exit the file.
We won’t create serve -blocks here. Instead, we will create our web application in the default server block, so let’s edit the default server block config file.
sudo vi /etc/nginx/conf.d/default.conf
The contents look like this. The parts you will edit are highlighted.
server {
    listen       80;
    server_name  localhost;

	...

    location / {
        root   /usr/share/nginx/html;
        index  index.html index.htm;
    }

    #error_page  404              /404.html;

	...

    # pass the PHP scripts to FastCGI server listening on 127.0.0.1:9000
    #
    #location ~ \.php$ {
    #    root           	html;
    #    fastcgi_pass   	127.0.0.1:9000;
    #    fastcgi_index  		index.php;
    #    fastcgi_param  		SCRIPT_FILENAME /scripts$fastcgi_script_name;
    #    include        		fastcgi_params;
    #}

 ...
}
Make the following edits:
-
Set
server_namefromlocalhosttoyour_web_server_ip. -
Add
index.phpto theindexdirective so it readsindex.php index.html index.htm. -
Delete the
location / {and}lines containing therootandindexdirectives. Without this change you may find your web page not displaying in the browser and the Nginx error log recording messages like"Unable to open primary script: /etc/nginx/html/index.php (No such file or directory)" -
Uncomment the
location ~ \.php$block (including the last curly bracket) under the pass the PHP scripts to FastCGI server comment. -
Delete the root directive under the same
location ~ \.php$block. -
Change fastcgi_pass directive value from
127.0.0.1:9000tounix:/var/run/php-fpm/php5-fpm.sock. This is to ensure the PHP FastCGI Process Manager (which we’ll install in the next step) will be listening to the Unix socket. -
Change te
fastcgi_paramdirective value toSCRIPT_FILENAME $document_root$fastcgi_script_name. This tells the web server that PHP script files will be saved under the document root directory.
Once you finish editing, the file should look like this:
server {
    listen       80;
    server_name  your_web_server_ip;

	...

    root   /usr/share/nginx/html;
    index  index.php index.html index.htm;

	...

    # pass the PHP scripts to FastCGI server listening on 127.0.0.1:9000
    #
    location ~ \.php$ {
        fastcgi_pass   unix:/var/run/php-fpm/php5-fpm.sock;
        fastcgi_index  index.php;
        fastcgi_param  SCRIPT_FILENAME $document_root$fastcgi_script_name;
        include        fastcgi_params;
    }

	...
Save and exit the file, then start the web server.
sudo systemctl restart nginx.service
Step Eight — Installing PHP
We will now install three components of PHP in the web server: the PHP engine itself, the FastCGI Process Manager (FPM) and the PHP module for PostgreSQL.
First, install PHP.
sudo yum install php -y
Next we will install the FastCGI Process Manager (FPM), which is PHP’s own implementation of FastCGI. FastCGI is like an add-on on top of your web server. It runs independently and helps speed up user requests by consolidating them in one single process, thus speeding up response time.
sudo yum install php-fpm -y
Finally, install the PHP Postgres module:
sudo yum install php-pgsql -y
Step Nine — Configuring PHP
In this step, we will configure PHP.
Open the PHP configuration file.
sudo vi /etc/php.ini
Make the following changes:
-
Change
expose_php = Ontoexpose_php = Off. Setting this parameter toOffjust means PHP doesn’t add its signature to the web server’s header and doesn’t expose the fact that the server is running PHP. -
Change
;cgi.fix_pathinfo=0to;cgi.fix_pathinfo=1.
Save and exit the file. Next, edit the FPM config file.
sudo vi /etc/php-fpm.d/www.conf
Make the following changes:
-
Change
user = apachetouser = nginx. -
Similarly, change
group = apachetogroup = nginx. -
Change
listen = 127.0.0.1:9000tolisten = /var/run/php-fpm/php5-fpm.sock. We set this same value in the Nginx default server block’s configuration file.
Save and exit vi. Next start PHP-FPM.
sudo systemctl start php-fpm.service
Then enable it.
sudo systemctl enable php-fpm.service
Step Ten — Creating the Web Application
We have all our server components ready in both the nodes. It’s now time we create our PHP application. Create a file named index.php in /usr/share/nginx/html.
sudo vi /usr/share/nginx/html/index.php
Paste in the following contents. Make sure you replace the highlighted variables with your database server IP address and Postgres password respectively.
<html>

<head>
	<title>LEPP Stack Example</title>
</head>

<body>

<h4>LEPP (Linux, Nginx, PHP, PostgreSQL) Sample Page</h4>
<hr/>
<p>Hello and welcome. This web page is dynamically showing a product list from a PostgreSQL database</p>

<?php

    $host = "your_db_server_ip";
    $user = "postgres";
    $password = "your_postgres_password";
    $dbname = "product";

    $con = pg_connect("host=$host dbname=$dbname user=$user password=$password")
            or die ("Could not connect to server\n");

    $query = "SELECT * FROM product_list";
    $resultset = pg_query($con, $query) or die("Cannot execute query: $query\n");
    $rowcount = pg_numrows($resultset);

    for($index = 0; $index < $rowcount; $index++) {
            $row = pg_fetch_array($resultset, $index);
            echo $row["id"], "-", $row["product_name"];
            echo "<br>";
    }
?>

</body>
</html>
This is a simple web page with embedded PHP code. First, it defines a number of parameters for the database connection string. Next, a connection (specified by $con) is made against the database server. A query is specified and it’s then executed against the product_list table. It iterates through the returned results and prints the contents of each row in a new line.
Once the file is written and saved, open a browser window and point it to your_web_server_ip. The contents should look like this:

Conclusion
We have built two boxes from scratch, installed and configured all the necessary software, and then deployed our web application in it. A production stack would have additional complexity, like adding external firewalls and load balancers, but this is a solid basic configuration you can use to get started. Enjoy!
Thanks for learning with the DigitalOcean Community. Check out our offerings for compute, storage, networking, and managed databases.
About the author(s)
Hi, I am Sadequl Hussain. I have been in IT for more than eighteen years and have worked with a number of technologies. Welcome to my page :=)
former DO tech editor publishing articles here with the community, then founded the DO product docs team (https://do.co/docs). to all of my authors: you are incredible. working with you was a gift. love is what makes us great.
Still looking for an answer?
This textbox defaults to using Markdown to format your answer.
You can type !ref in this text area to quickly search our full set of tutorials, documentation & marketplace offerings and insert the link!
Brilliant post! Thank you, Mr. Sadequl Hussain. I want to add my comment for some of users, who facing with problems in 10th step related to pg_connect: by default SELinux blocks this connection, solution below helped me:
setsebool -P httpd_can_network_connect_db on
 This work is licensed under a Creative Commons Attribution-NonCommercial- ShareAlike 4.0 International License.
Become a contributor for community
Get paid to write technical tutorials and select a tech-focused charity to receive a matching donation.

DigitalOcean Documentation
Full documentation for every DigitalOcean product.

Resources for startups and AI-native businesses
The Wave has everything you need to know about building a business, from raising funding to marketing your product.
The developer cloud
Scale up as you grow — whether you're running one virtual machine or ten thousand.

Start building today
From GPU-powered inference and Kubernetes to managed databases and storage, get everything you need to build, scale, and deploy intelligent applications.
