By Scott Miller and Hazel Virdó

Introduction
SETI@home is a large volunteer distributed computing project where software running on participant systems is used to analyze space telescope radio data in order to identify signals or signs of intelligent life. SETI@home uses software known as BOINC which is available on many platforms including Linux.
BOINC has a graphical application but also works via the command line. This makes running SETI@home on a Droplet or another headless server very feasible. SETI@home requires very little disk space for usage — typically, 100MB of space is sufficient — but can utilize as much CPU as it’s given.
Prerequisites
-
An Ubuntu 14.04 or Debian 7 Droplet, any size.
-
A sudo non-root user. You can follow the first four steps of this tutorial for setup on Ubuntu, and this tutorial for Debian.
Step One — Install boinc-client
SETI@home operates via the BOINC client which is available in the standard Debian and Ubuntu repositories.
sudo apt-get install boinc-client
Step Two — Connect to a SETI@home Account
With SETI@home, you’ll earn SETI credit for work completed. To connect this host to a SETI@home account and receive credit, an account key is needed.
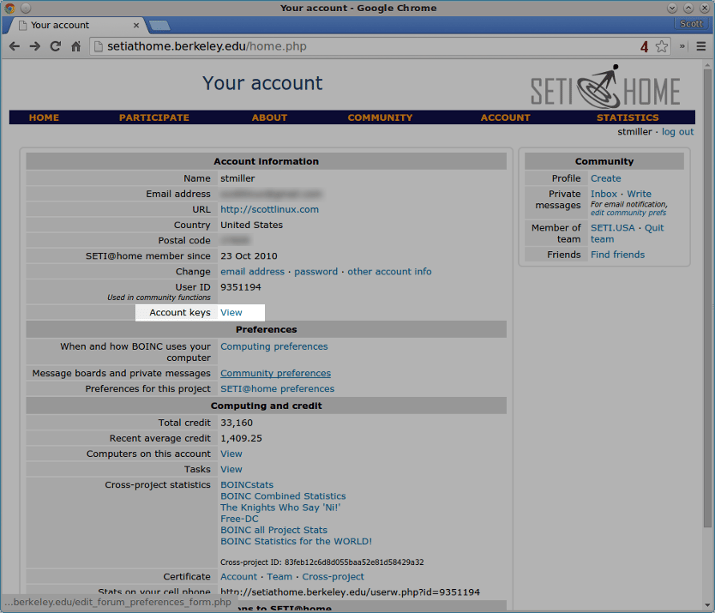
First, create a SETI@home account or log in to your existing SETI@home account. Once inside, click View next to Account keys.
You’ll see your SETI@home account key on the top of the next page. Run the following command with your account key:
boinccmd --project_attach http://setiathome.berkeley.edu account_key
At this point, boinc will begin crunching away with default values.
For now, stop the boinc-client service so CPU usage preferences can be set.
sudo service boinc-client stop
Step Three — Configure Host CPU Usage Preferences
By default, the BOINC client will use 100% of available CPU. In this step, we will configure the host to use less CPU.
Note: In a cloud hosting environment, you are required to lower your CPU utilization from 100% to avoid excessive high usage, which might affect neighboring Droplets.
Local host preferences are set in the file /var/lib/boinc client/global_prefs_override.xml, which will be empty initially. An example file is given below for this guide, which is the recommended configuration for a Droplet.
Edit the file /var/lib/boinc-client/global_prefs_override.xml.
sudo nano /var/lib/boinc-client/global_prefs_override.xml
You will see an some existing text that looks like this:
<global_preferences>
</global_preferences>
Delete that, and paste in this example file.
<global_preferences>
   <run_on_batteries>0</run_on_batteries>
   <run_if_user_active>1</run_if_user_active>
   <run_gpu_if_user_active>0</run_gpu_if_user_active>
   <suspend_cpu_usage>50.000000</suspend_cpu_usage>
   <start_hour>0.000000</start_hour>
   <end_hour>0.000000</end_hour>
   <net_start_hour>0.000000</net_start_hour>
   <net_end_hour>0.000000</net_end_hour>
   <leave_apps_in_memory>0</leave_apps_in_memory>
   <confirm_before_connecting>1</confirm_before_connecting>
   <hangup_if_dialed>0</hangup_if_dialed>
   <dont_verify_images>0</dont_verify_images>
   <work_buf_min_days>0.100000</work_buf_min_days>
   <work_buf_additional_days>0.500000</work_buf_additional_days>
   <max_ncpus_pct>100.000000</max_ncpus_pct>
   <cpu_scheduling_period_minutes>60.000000</cpu_scheduling_period_minutes>
   <disk_interval>60.000000</disk_interval>
   <disk_max_used_gb>10.000000</disk_max_used_gb>
   <disk_max_used_pct>90.000000</disk_max_used_pct>
   <disk_min_free_gb>1.500000</disk_min_free_gb>
   <vm_max_used_pct>75.000000</vm_max_used_pct>
   <ram_max_used_busy_pct>50.000000</ram_max_used_busy_pct>
   <ram_max_used_idle_pct>90.000000</ram_max_used_idle_pct>
   <max_bytes_sec_up>0.000000</max_bytes_sec_up>
   <max_bytes_sec_down>0.000000</max_bytes_sec_down>
  <cpu_usage_limit>25.000000</cpu_usage_limit>
   <daily_xfer_limit_mb>0.000000</daily_xfer_limit_mb>
   <daily_xfer_period_days>0</daily_xfer_period_days>
</global_preferences>
Next we will inspect two settings in this example file concerning CPU, which are highlighted above.
The first preference is cpu_usage_limit, which is used to limit the amount of CPU used by SETI@home. The example file uses a setting of 25.000000, meaning CPU usage is limited to 25% max. 25.000000 is a good setting if your machine is dedicated for another task or service but contribution to SETI@home is still desired.
The second preference is suspend_cpu_usage which is used to temporarily suspend SETI@home from operation when CPU usage by other application reaches that level. In the example file, suspend_cpu_usage is set to 50.000000, or 50%.
You can read more about BOINC preferences on their wiki.
After saving and closing the file, start the boinc-client. This will allow SETI@home to start performing work.
sudo service boinc-client start
Step Four — Verify the Newly Added Host
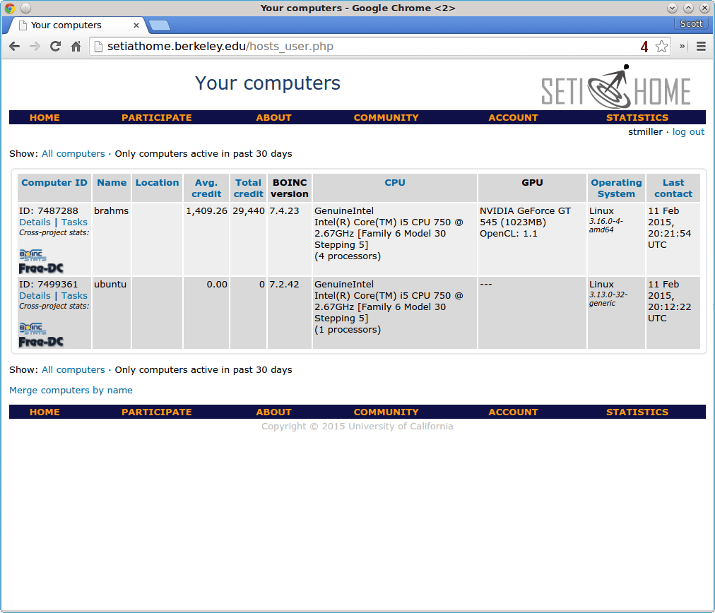
After about five minutes, the new host should appear online. Connected computers can be viewed inside the SETI@home account page.
Step Five — Check the Status of Work Units
To view the status of work units or tasks, use the command:
boinccmd --get_simple_gui_info
Note that this displays your general SETI@home account information followed by current executing tasks on this specific host.
Below is example output for --get_simple_gui_info:
boinccmd --get_simple_gui_info
======== Projects ========
1) -----------
   name: SETI@home
   master URL: http://setiathome.berkeley.edu/
   user_name: stmiller
   team_name: SETI.USA
   resource share: 100.000000
   user_total_credit: 33159.675770
   user_expavg_credit: 1409.252845
   host_total_credit: 0.000000
   host_expavg_credit: 0.000000
   nrpc_failures: 0
   master_fetch_failures: 0
   master fetch pending: no
   scheduler RPC pending: no
   trickle upload pending: no
   attached via Account Manager: no
   ended: no
   suspended via GUI: no
   don't request more work: no
   disk usage: 0.000000
   last RPC: 1423684749.199424
   project files downloaded: 0.000000
GUI URL:
   name: Message boards
   description: Correspond with other users on the SETI@home message boards
   URL: http://setiathome.berkeley.edu/forum_index.php
GUI URL:
   name: Help
   description: Ask questions and report problems
   URL: http://setiathome.berkeley.edu/forum_help_desk.php
GUI URL:
   name: Your account
   description: View your account information
   URL: http://setiathome.berkeley.edu/home.php
GUI URL:
   name: Your preferences
   description: View and modify your computing preferences
   URL: http://setiathome.berkeley.edu/prefs.php?subset=global
GUI URL:
   name: Your results
   description: View your last week (or more) of computational results and work
   URL: http://setiathome.berkeley.edu/results.php?userid=9351194
GUI URL:
   name: Your computers
   description: View a listing of all the computers on which you are running SETI@Home
   URL: http://setiathome.berkeley.edu/hosts_user.php?userid=9351194
GUI URL:
   name: Your team
   description: View information about your team: SETI.USA
   URL: http://setiathome.berkeley.edu/team_display.php?teamid=115396
GUI URL:
   name: Donate
   description: Donate to SETI@home
   URL: http://setiathome.berkeley.edu/sah_donate.php

======== Tasks ========
1) -----------
   name: 25fe12ab.24545.17667.438086664204.12.226_0
   WU name: 25fe12ab.24545.17667.438086664204.12.226
   project URL: http://setiathome.berkeley.edu/
   report deadline: Wed Mar  4 02:06:18 2015
   ready to report: no
   got server ack: no
   final CPU time: 0.000000
   state: downloaded
   scheduler state: scheduled
   exit_status: 0
   signal: 0
   suspended via GUI: no
   active_task_state: EXECUTING
   app version num: 701
   checkpoint CPU time: 352.733700
   current CPU time: 378.866400
   fraction done: 0.088431
   swap size: 110309376.000000
   working set size: 40030207.999996
   estimated CPU time remaining: 2505.901220
The status of SETI@home credit can also be viewed inside your account page under Computing and credit.
Conclusion
The SETI@home forum is the best place for news and questions about running SETI@home.
To join a team, view the team page!
Thanks for learning with the DigitalOcean Community. Check out our offerings for compute, storage, networking, and managed databases.
About the author(s)
former DO tech editor publishing articles here with the community, then founded the DO product docs team (https://do.co/docs). to all of my authors: you are incredible. working with you was a gift. love is what makes us great.
Still looking for an answer?
This textbox defaults to using Markdown to format your answer.
You can type !ref in this text area to quickly search our full set of tutorials, documentation & marketplace offerings and insert the link!
Just to let you know, this still works, exactly as written, on Ubuntu 18.04.3 :-)
 This work is licensed under a Creative Commons Attribution-NonCommercial- ShareAlike 4.0 International License.
Become a contributor for community
Get paid to write technical tutorials and select a tech-focused charity to receive a matching donation.

DigitalOcean Documentation
Full documentation for every DigitalOcean product.

Resources for startups and AI-native businesses
The Wave has everything you need to know about building a business, from raising funding to marketing your product.
The developer cloud
Scale up as you grow — whether you're running one virtual machine or ten thousand.

Start building today
From GPU-powered inference and Kubernetes to managed databases and storage, get everything you need to build, scale, and deploy intelligent applications.
