By Erin Glass
Senior Manager, DevEd

Introduction
In this tutorial, you will set up the folders and files necessary for exploring CSS and building a website. Using a code editor, you will create a project directory for our website, a folder and file for our CSS code, a file for our HTML code, and a folder for images. This tutorial series uses Visual Studio Code, a code editor freely-available for Mac, Windows, or Linux, but you may use whichever code editor you prefer. Note that certain instructions may need to be slightly modified if you use a different editor.
How To Create HTML and CSS Files and Folders
After opening your preferred text editor, open up a new project folder and name it css-practice. You’ll use this folder to store all of the files and folders you create in the course of this tutorial series.
To create a new project folder in Visual Studio Code, navigate to the “File” menu item in the top menu and select “Add Folder to Workspace.” In the new window, click the “New Folder” button and create a new folder called css-practice:
Next, create a new folder inside css-practice and name it css. Inside this folder, open up a new file in your project directory and save it as styles.css—this is the file you’ll use to store our CSS style rules. If you are using Visual Studio Code, you can create a new folder by using Right Click(on Windows) or CTRL + Left Click (on Mac) on the css-practice folder, selecting “New Folder” and creating the css folder. Then, click Right Click(on Windows) or CTRL + Left Click (on Mac) on the new css folder, select “New File”, and create the file styles.css as illustrated in the gif below:

Save the file and leave it open.
You also need to create a file to add our HTML content—the text, images, and HTML elements that will be rendered in the browser. In the project directory css-practice, open an additional new file and save it as index.html in the same way you created the styles.css file above. Make sure to save this index.html file in the css-practice folder and not in the css folder.
Next, you need to add a line of code in the index.html document that instructs the browser to use the styles.css file as our style sheet. To do this, you’ll use the HTML <link> tag and link to the styles.css file. Add the following code snippet to your HTML document:
<link rel="stylesheet" href="css/styles.css">
This code snippet tells the browser to interpret the HTML code according to the stylesheet located at css/styles.css. Make sure you don’t erase this line while adding or deleting content to your index.html file throughout this tutorial series. Save your index.html file and keep it open.
Finally, create an additional folder inside css-practice and name it images in the same way that you created the css folder above. This folder will be where you save any images you use in this tutorial series.
You should now have a project folder named css-practice that contains the folders and files necessary for exploring CSS in this tutorial series:
- A folder named
cssthat contains the filestyles.css - An empty folder named
images - A file named
index.html
If you are using Visual Studio Code, your editor should now display the following file tree and the open files:
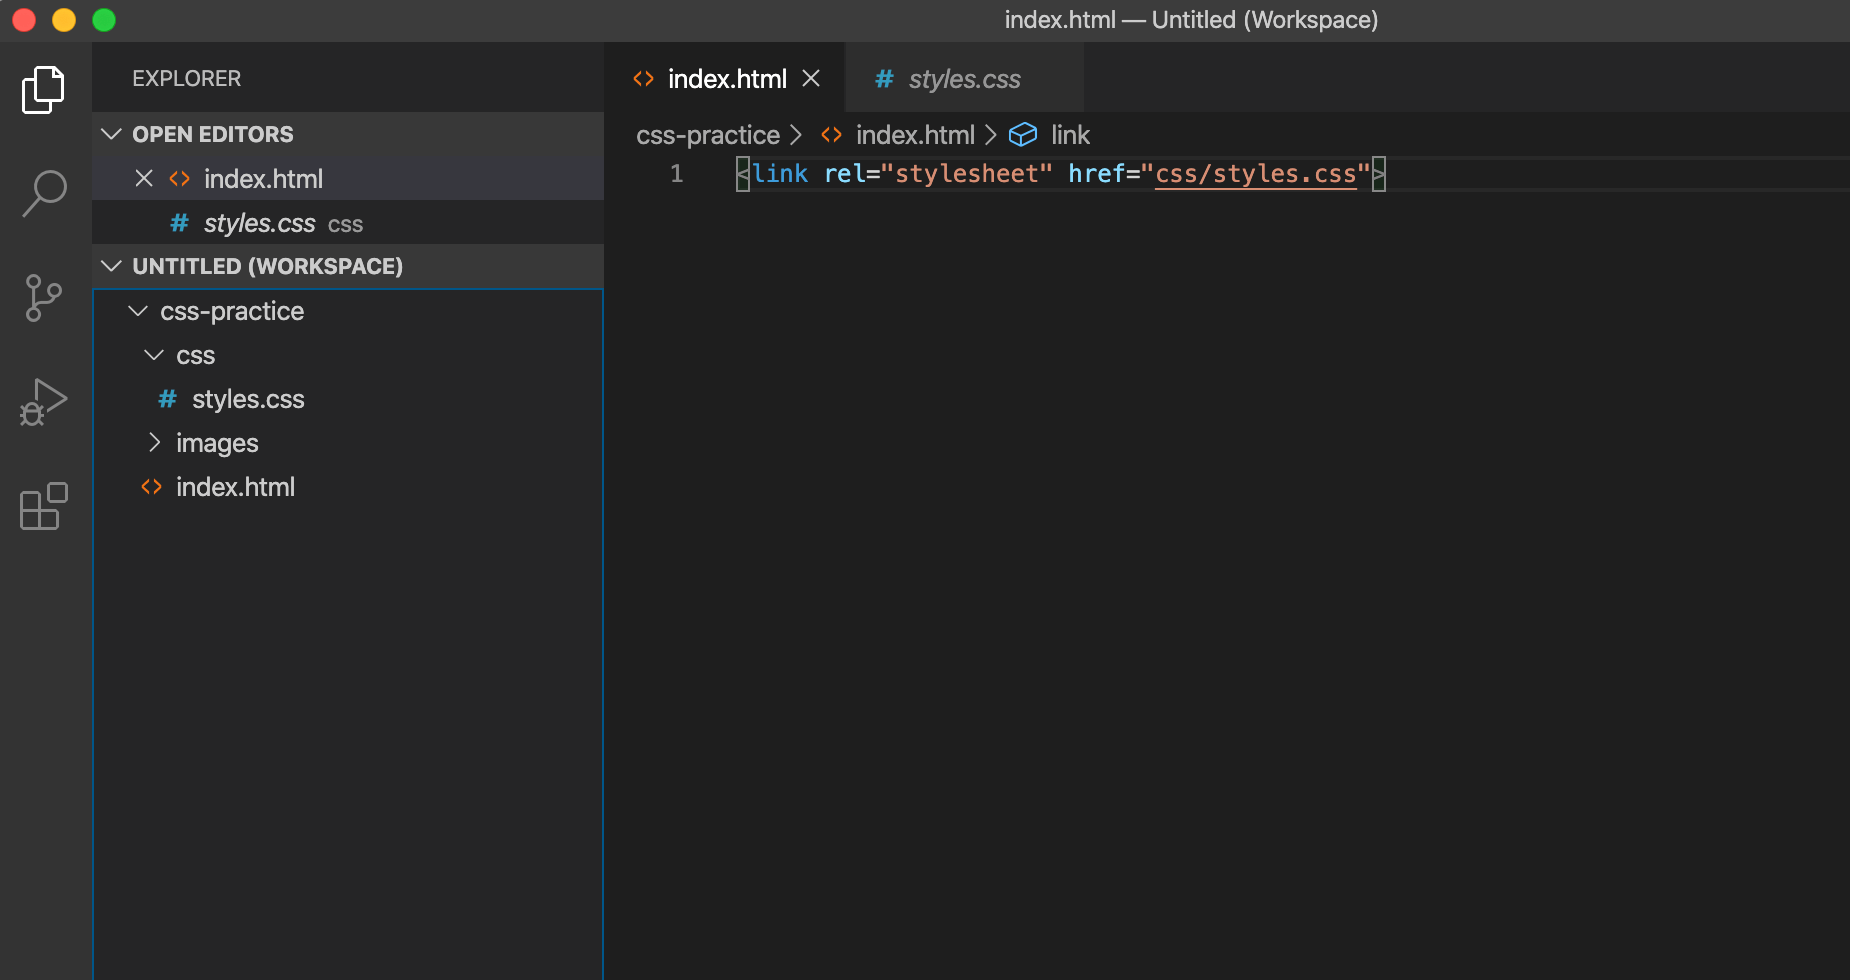
Notice that the file names include extensions (.html and .css) that refer to the type of content they contain. You will add content to these files in our hands-on exercises in the tutorials that follow.
Debugging and Troubleshooting CSS and HTML
Precision is important when working with HTML and CSS. Even an extra space or mistyped character can keep your code from working as expected.
If your HTML or CSS code is not rendering in the browser as intended, make sure you have written the code exactly as written in the tutorial. Though we encourage you to manually write out the code for the purpose of learning, copy and pasting can be helpful at times to ensure that your code matches the examples.
HTML and CSS errors can be caused by a number of things. Check your markup and CSS rules for extra or missing spaces, missing or misspelled tags, and missing or incorrect punctuation or characters. You should also make sure that you don’t accidentally use “curly” or “smart” quotation marks like “ and " that are often used by word processors. Curly quotes are designed for human-readable text and will cause an error in your code as they are not recognized as quotation marks by browsers. By typing quotation marks directly into your code editor, you can make sure you are using the right kind.
Also, each time you change your code, make sure to save your file before reloading it in the browser to check your results.
A Quick Note on Automatic HTML Support Features
Some code editors—such as the Visual Studio Code editor we’re using in this series—provide automatic support for writing HTML code. For Visual Studio Code, that support includes smart suggestions and auto completions. While this support is often useful, be aware that you might generate extra code that will create errors if you’re not used to working with these support features. If you find these features distracting, you can turn them off in the code editor’s preferences.
Conclusion
You are now ready to proceed with the tutorial series. In the next tutorial, you’ll begin exploring how CSS rules are used to control the style and layout of HTML content on a webpage.
Thanks for learning with the DigitalOcean Community. Check out our offerings for compute, storage, networking, and managed databases.
Tutorial Series: How To Build a Website With CSS
This tutorial is part of a series on creating and customizing this website with CSS, a stylesheet language used to control the presentation of websites. You may follow the entire series to recreate the demonstration website and gain familiarity with CSS or use the methods described here for other CSS website projects.
Before proceeding, we recommend that you have some knowledge of HTML, the standard markup language used to display documents in a web browser. If you don’t have familiarity with HTML, you can follow the first ten tutorials of our series How To Build a Website With HTML before starting this series.
Browse Series: 20 tutorials
About the author
Open source advocate and lover of education, culture, and community.
Still looking for an answer?
This textbox defaults to using Markdown to format your answer.
You can type !ref in this text area to quickly search our full set of tutorials, documentation & marketplace offerings and insert the link!
 This work is licensed under a Creative Commons Attribution-NonCommercial- ShareAlike 4.0 International License.
Become a contributor for community
Get paid to write technical tutorials and select a tech-focused charity to receive a matching donation.

DigitalOcean Documentation
Full documentation for every DigitalOcean product.

Resources for startups and AI-native businesses
The Wave has everything you need to know about building a business, from raising funding to marketing your product.
The developer cloud
Scale up as you grow — whether you're running one virtual machine or ten thousand.

Start building today
From GPU-powered inference and Kubernetes to managed databases and storage, get everything you need to build, scale, and deploy intelligent applications.
