Not using Debian 9?
Choose a different version or distribution.
The author selected Electronic Frontier Foundation Inc to receive a donation as part of the Write for DOnations program.
Introduction
Seafile is an open-source, self-hosted, file synchronization and sharing platform. Users can store and optionally encrypt data on their own servers with storage space as the only limitation. With Seafile you can share files and folders using cross-platform syncing and password-protected links to files with expiration dates. A file-versioning feature means that users can restore deleted and modified files or folders.
In this tutorial, you will install and configure Seafile on a Debian 9 server. You will use MariaDB (the default MySQL variant on Debian 9) to store data for the different components of Seafile, and Apache as the proxy server to handle the web traffic. After completing this tutorial, you will be able use the web interface to access Seafile from desktop or mobile clients, allowing you to sync and share your files with other users or groups on the server or with the public.
Prerequisites
Before you begin this guide, you’ll need the following:
-
One Debian 9 server with a minimum of 2GB of RAM set up by following this Initial Server Setup with Debian 9 tutorial, including a sudo non-root user and a firewall.
-
An Apache web server with a virtual host configured for the registered domain by following How To Install the Apache Web Server on Debian 9.
-
An SSL certificate installed on your server by following this How To Secure Apache with Let’s Encrypt on Debian 9 tutorial.
-
A fully registered domain name. This tutorial will use
example.comthroughout. -
Both of the following DNS records set up for your server. You can follow this introduction to DigitalOcean DNS for details on how to add them.
- An A record with
example.compointing to your server’s public IP address. - An A record with
www.example.compointing to your server’s public IP address.
- An A record with
-
A MariaDB database server installed and configured. Follow the steps in the How To Install MariaDB on Debian 9 tutorial. Skip Step 3 of this tutorial — “(Optional) Adjusting User Authentication and Privileges”. You will only be making local connections to the database server, so changing the authentication method for the root user is not necessary.
Step 1 — Creating Databases for the Seafile Components
Seafile requires three components in order to work properly. These three components are:
- Seahub: Seafile’s web frontend, written in Python using the Django web framework. From Seahub you can access, manage, and share your files using a web browser.
- Seafile server: The data service daemon that manages the raw file upload, download, and synchronization. You do not interact with the server directly, but use one of the client programs or the Seahub web interface.
- Ccnet server: The RPC service daemon to enable internal communication between the different components of Seafile. For example, when you use Seahub, it is able to access data from the Seafile server using the Ccnet RPC service.
Each of these components stores its data separately in its own database. In this step you will create the three MariaDB databases and a user before proceeding to set up the server.
First, log in to the server using SSH with your username and IP address:
ssh sammy@your_server_ip
Connect to the MariaDB database server as administrator (root):
- sudo mysql
At the MariaDB prompt, use the following SQL command to create the database user:
- CREATE USER 'sammy'@'localhost' IDENTIFIED BY 'password';
Next, you will create the following databases to store the data of the three Seafile components:
ccnet-dbfor the Ccnet server.seahub-dbfor the Seahub web frontend.seafile-dbfor the Seafile file server.
At the MariaDB prompt, create your databases:
- CREATE DATABASE `ccnet-db` CHARACTER SET = 'utf8';
- CREATE DATABASE `seafile-db` CHARACTER SET = 'utf8';
- CREATE DATABASE `seahub-db` CHARACTER SET = 'utf8';
Then, grant all privileges to the Seafile database user to access and make changes in these databases:
- GRANT ALL PRIVILEGES ON `ccnet-db`.* to `sammy`@localhost;
- GRANT ALL PRIVILEGES ON `seafile-db`.* to `sammy`@localhost;
- GRANT ALL PRIVILEGES ON `seahub-db`.* to `sammy`@localhost;
Exit the MariaDB prompt by typing exit:
- exit
Now that you have created a user and the databases required to store the data for each of the Seafile components, you will install dependencies to download the Seafile server package.
Step 2 — Installing Dependencies and Downloading Seafile
Some parts of Seafile are written in Python and therefore require additional Python modules and programs to work. In this step, you will install these required dependencies before downloading and extracting the Seafile server package.
To install the dependencies using apt run the following command:
- sudo apt install python-setuptools python-pip python-urllib3 python-requests python-mysqldb ffmpeg
The python-setuptools and python-pip dependencies oversee installing and managing Python packages. The python-urllib3 and python-requests packages make requests to websites. Finally, the python-mysqldb is a library for using MariaDB from Python and ffmpeg handles multimedia files.
Seafile requires Pillow, a python library for image processing, and moviepy to handle movie file thumbnails. These modules are not available in the Debian package repository. You will install them manually using pip:
- sudo pip install Pillow==4.3.0 moviepy
Now that you have installed the necessary dependencies, you can download the Seafile server package.
Seafile creates additional directories during setup. To keep them all organized, create a new directory and change into it:
- mkdir seafile
- cd seafile
You can now download the latest version (6.3.4 as of this writing) of the Seafile server from the website by running the following command:
- wget https://download.seadrive.org/seafile-server_6.3.4_x86-64.tar.gz
Seafile distributes the download as a compressed tar archive, which means you will need to extract it before proceeding. Extract the archive using tar:
- tar -zxvf seafile-server_6.3.4_x86-64.tar.gz
Now change into the extracted directory:
- cd seafile-server-6.3.4
At this stage, you have downloaded and extracted the Seafile server package and have also installed the necessary dependencies. You are now ready to configure the Seafile server.
Step 3 — Configuring the Seafile Server
Seafile needs some information about your setup before you start the services for the first time. This includes details like the domain name, the database configuration, and the path where it will store data. To initiate the series of question prompts to provide this information, you can run the script setup_seafile_mysql.sh, which is included in the archive you extracted in the previous step.
Run the script using bash:
- bash setup-seafile-mysql.sh
Press ENTER to continue.
The script will now prompt you with a series of questions. Wherever defaults are mentioned, pressing the ENTER key will use that value.
This tutorial uses Seafile as the server name, but you can change it if necessary.
Question 1

What is the name of the server?
It will be displayed on the client. 3 - 15 letters or digits
[ server name ] Seafile
Enter the domain name for this Seafile instance.
Question 2

What is the ip or domain of the server?.
For example: www.mycompany.com, 192.168.1.101
[ This server's ip or domain ] example.com
For Question 3 press ENTER to accept the default value. If you have set up external storage, for example, using NFS or block storage, you will need to specify the path to that location here instead.
Question 3

Where do you want to put your seafile data?
Please use a volume with enough free space
[ default "/home/sammy/seafile/seafile-data" ]
For Question 4 press ENTER to accept the default value.
Question 4

Which port do you want to use for the seafile fileserver?
[ default "8082" ]
The next prompt allows you to confirm the database configuration. You can create new databases or use existing databases for setup. For this tutorial you have created the necessary databases in Step 1, so select option 2 here.
-------------------------------------------------------
Please choose a way to initialize seafile databases:
-------------------------------------------------------

[1] Create new ccnet/seafile/seahub databases
[2] Use existing ccnet/seafile/seahub databases

[ 1 or 2 ] 2
Questions 6–9 relate to the MariaDB database server. You will only need to provide the username and password of the mysql user that you created in Step 1. Press ENTER to accept the default values for host and port.
What is the host of mysql server?

[ default "localhost" ]

What is the port of mysql server?

[ default "3306" ]

Which mysql user to use for seafile?

[ mysql user for seafile ] sammy

What is the password for mysql user "seafile"?

[ password for seafile ] password
After providing the password, the script will request the names of the Seafile databases. Use ccnet-db, seafile-db, and seahub-db for this tutorial. The script will then verify if there is a successful connection to the databases before proceeding to display a summary of the initial configuration.
Enter the existing database name for ccnet:
[ ccnet database ] ccnet-db

verifying user "sammy" access to database ccnet-db ...  done

Enter the existing database name for seafile:
[ seafile database ] seafile-db

verifying user "sammy" access to database seafile-db ...  done

Enter the existing database name for seahub:
[ seahub database ] seahub-db

verifying user "sammy" access to database seahub-db ...  done

---------------------------------
This is your configuration
---------------------------------

    server name:            Seafile
    server ip/domain:       example.com

    seafile data dir:       /home/sammy/seafile/seafile-data
    fileserver port:        8082

    database:               use existing
    ccnet database:         ccnet-db
    seafile database:       seafile-db
    seahub database:        seahub-db
    database user:          sammy

--------------------------------
Press ENTER to continue, or Ctrl-C to abort
---------------------------------
Press ENTER to confirm.
OutputGenerating ccnet configuration ...
done
Successly create configuration dir /home/sammy/seafile/ccnet.

Generating seafile configuration ...
done

Generating seahub configuration ...
----------------------------------------
Now creating seahub database tables ...
----------------------------------------
creating seafile-server-latest symbolic link ...  done

-----------------------------------------------------------------
Your seafile server configuration has been finished successfully.
-----------------------------------------------------------------
run seafile server:     ./seafile.sh { start | stop | restart }
run seahub  server:     ./seahub.sh  { start <port> | stop | restart <port> }
-----------------------------------------------------------------
If you are behind a firewall, remember to allow input/output of these tcp ports:
-----------------------------------------------------------------
port of seafile fileserver:   8082
port of seahub:               8000

When problems occur, Refer to
        https://github.com/haiwen/seafile/wiki
for information.
As you will be running Seafile behind Apache, opening ports 8082 and 8000 in the firewall is not necessary, so you can ignore this part of the output.
You have completed the initial configuration of the server. In the next step, you will configure the Apache web server before starting the Seafile services.
Step 4 — Configuring the Apache Web Server
In this step, you will configure the Apache web server to forward all requests to Seafile. Using Apache in this manner allows you to use a URL without a port number, enable HTTPS connections to Seafile, and make use of the caching functionality that Apache provides for better performance.
To begin forwarding requests, you will need to enable the proxy_http module in the Apache configuration. This module provides features for proxying HTTP and HTTPS requests. The following command will enable the module:
- sudo a2enmod proxy_http
Note: The Apache rewrite and ssl modules are also required for this setup. You have already enabled these modules as part of configuring Let’s Encrypt in the second Apache tutorial listed in the prerequisites section.
Next, update the virtual host configuration of example.com to forward requests to the Seafile file server and to the Seahub web interface.
Open the configuration file in a text editor:
- sudo nano /etc/apache2/sites-enabled/example.com-le-ssl.conf
The lines from ServerAdmin to SSLCertificateKeyFile are part of the initial Apache and Let’s Encrypt configuration that you set up as part of the prerequisite. Add the highlighted content, beginning at Alias and ending with the ProxyPassReverse directive:
<IfModule mod_ssl.c>
<VirtualHost *:443>
	ServerAdmin admin@example.com
	ServerName example.com
	ServerAlias www.example.com
	DocumentRoot /var/www/example.com/html
	ErrorLog ${APACHE_LOG_DIR}/example.com-error.log
	CustomLog ${APACHE_LOG_DIR}/example.com-access.log combined

	Include /etc/letsencrypt/options-ssl-apache.conf
	SSLCertificateFile /etc/letsencrypt/live/example.com/fullchain.pem
	SSLCertificateKeyFile /etc/letsencrypt/live/example.com/privkey.pem

	Alias /media  /home/sammy/seafile/seafile-server-latest/seahub/media
	<Location /media>
		Require all granted
	</Location>

	# seafile fileserver
	ProxyPass /seafhttp http://127.0.0.1:8082
	ProxyPassReverse /seafhttp http://127.0.0.1:8082
	RewriteEngine On
	RewriteRule ^/seafhttp - [QSA,L]

	# seahub web interface
	SetEnvIf Authorization "(.*)" HTTP_AUTHORIZATION=$1
	ProxyPass / http://127.0.0.1:8000/
	ProxyPassReverse / http://127.0.0.1:8000/
</VirtualHost>
</IfModule>
The Alias directive maps the URL path example.com/media to a local path in the file system that Seafile uses. The following Location directive enables access to content in this directory. The ProxyPass and ProxyPassReverse directives make Apache act as a reverse proxy for this host, forwarding requests to / and /seafhttp to the Seafile web interface and file server running on local host ports 8000 and 8082 respectively. The RewriteRule directive passes all requests to /seafhttp unchanged and stops processing further rules ([QSA,L]).
Save and exit the file.
Test if there are any syntax errors in the virtual host configuration:
- sudo apache2ctl configtest
If it reports Syntax OK, then there are no issues with your configuration. Restart Apache for the changes to take effect:
- sudo systemctl restart apache2
You have now configured Apache to act as a reverse proxy for the Seafile file server and Seahub. Next, you will update the URLs in Seafile’s configuration before starting the services.
Step 5 — Updating Seafile’s Configuration and Starting Services
As you are now using Apache to proxy all requests to Seafile, you will need to update the URLs in Seafile’s configuration files in the conf directory using a text editor before you start the Seafile service.
Open ccnet.conf in a text editor:
- nano /home/sammy/seafile/conf/ccnet.conf
Modify the SERVICE_URL setting in the file to point to the new HTTPS URL without the port number, for example:
SERVICE_URL = https://example.com
Save and exit the file once you have added the content.
Now open seahub_settings.py in a text editor:
- nano /home/sammy/seafile/conf/seahub_settings.py
You can now add a FILE_SERVER_ROOT setting in the file to specify the path where the file server is listening for file uploads and downloads:
# -*- coding: utf-8 -*-
SECRET_KEY = "..."
FILE_SERVER_ROOT = 'https://example.com/seafhttp'
# ...
Save and exit seahub_settings.py.
Now you can start the Seafile service and the Seahub interface:
- cd /home/sammy/seafile/seafile-server-6.3.4
- ./seafile.sh start
- ./seahub.sh start
As this is the first time you have started the Seahub service, it will prompt you to create an admin account. Enter a valid email address and a password for this admin user:
OutputWhat is the email for the admin account?
[ admin email ] admin@example.com

What is the password for the admin account?
[ admin password ] password-here

Enter the password again:
[ admin password again ] password-here

----------------------------------------
Successfully created seafile admin
----------------------------------------
Seahub is started

Done.
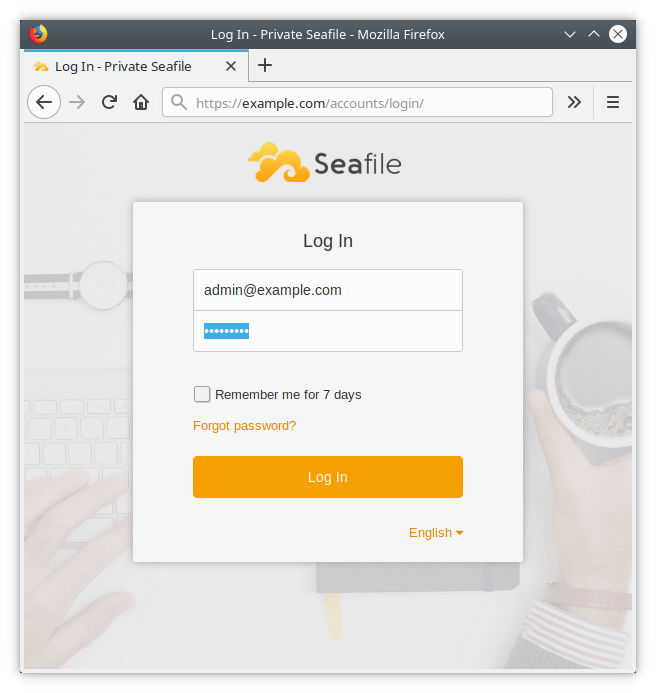
Open https://example.com in a web browser and log in using your Seafile admin email address and password.
Once logged in successfully, you can access the admin interface or create new users.
Now that you have verified the web interface is working correctly, you can enable these services to start automatically at system boot in the next step.
Step 6 — Enabling the Seafile Server to Start at System Boot
To enable the file server and the web interface to start automatically at boot, you can create the respective systemd service files and activate them.
Create a systemd service file for the Seafile file server:
- sudo nano /etc/systemd/system/seafile.service
Add the following content to the file:
[Unit]
Description=Seafile
After=network.target mysql.service

[Service]
Type=forking
ExecStart=/home/sammy/seafile/seafile-server-latest/seafile.sh start
ExecStop=/home/sammy/seafile/seafile-server-latest/seafile.sh stop
User=sammy
Group=sammy

[Install]
WantedBy=multi-user.target
Here, the ExectStart and ExecStop lines indicate the commands that run to start and stop the Seafile service. The service will run with sammy as the User and Group. The After line specifies that the Seafile service will start after the networking and MariaDB service has started.
Save seafile.service and exit.
Create a systemd service file for the Seahub web interface:
- sudo nano /etc/systemd/system/seahub.service
This is similar to the Seafile service. The only difference is that the web interface is started after the Seafile service. Add the following content to this file:
[Unit]
Description=Seafile hub
After=network.target seafile.service

[Service]
Type=forking
ExecStart=/home/sammy/seafile/seafile-server-latest/seahub.sh start
ExecStop=/home/sammy/seafile/seafile-server-latest/seahub.sh stop
User=sammy
Group=sammy

[Install]
WantedBy=multi-user.target
Save seahub.service and exit.
You can learn more about systemd unit files in the Understanding Systemd Units and Unit Files tutorial.
Finally, to enable both the Seafile and Seahub services to start automatically at boot, run the following commands:
- sudo systemctl enable seafile.service
- sudo systemctl enable seahub.service
When the server is rebooted, Seafile will start automatically.
At this point, you have completed setting up the server, and can now test each of the services.
Step 7 — Testing File Syncing and Sharing Functionality
In this step, you will test the file synchronization and sharing functionality of the server you have set up and ensure they are working correctly. To do this, you will need to install the Seafile client program on a separate computer and/or a mobile device.
Visit the download page on the Seafile website and follow the instructions to install the latest version of the program on your computer. Seafile clients are available for the various distributions of Linux (Ubuntu, Debian, Fedora, Centos/RHEL, Arch Linux), MacOS, and Windows. Mobile clients are available for Android and iPhone/iPad devices from the respective app stores.
Once you have installed the Seafile client, you can test the file synchronization and sharing functionality.
Open the Seafile client program on your computer or device. Accept the default location for the Seafile folder and click Next.
In the next window, enter the server address, username, and password, then click Login.
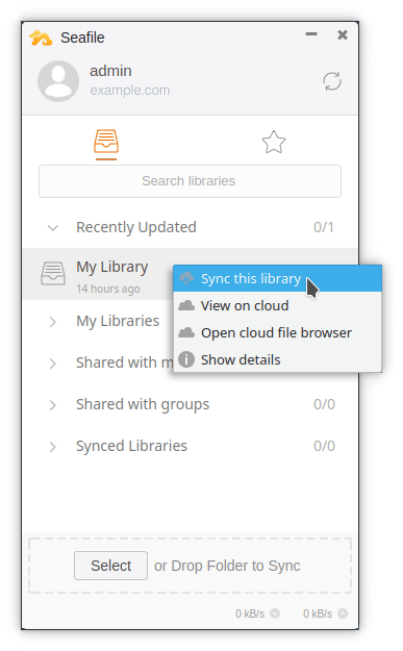
At the home page, right click on My Library and click Sync this library. Accept the default value for the location on your computer or device.
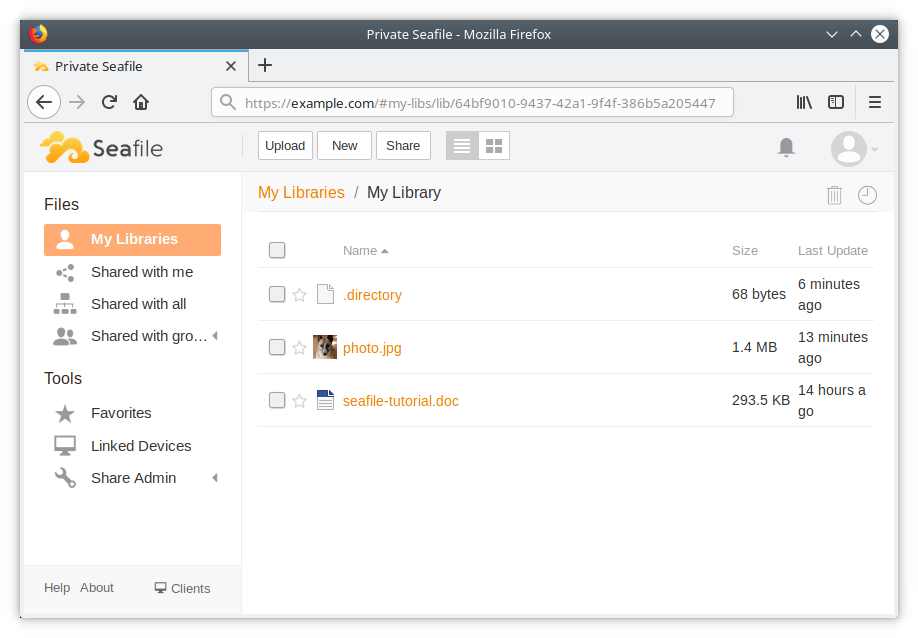
Add a file, for example a document or a photo, into the My Library folder. After some time, the file will upload to the server. The following screenshot shows the file photo.jpg copied to the My Library folder.

Now, log in to the web interface at https://example.com and verify that your file is present on the server.
Click on Share next to the file to generate a download link for this file that you can share.
You have verified that the file synchronization is working correctly and that you can use Seafile to sync and share files and folders from multiple devices.
Conclusion
In this tutorial you set up a private instance of a Seafile server. Now you can start using the server to synchronize files, add users and groups, and share files between them or with the public without relying on an external service.
When a new release of the server is available, please consult the upgrade section of the manual for steps to perform an upgrade.
Thanks for learning with the DigitalOcean Community. Check out our offerings for compute, storage, networking, and managed databases.
About the author(s)
Linux User and Sysadmin, Software developer
Former Senior Technical Editor at DigitalOcean, with a strong focus on DevOps and System Administration content. Areas of expertise include Terraform, PyTorch, Python, and Django.
Still looking for an answer?
This textbox defaults to using Markdown to format your answer.
You can type !ref in this text area to quickly search our full set of tutorials, documentation & marketplace offerings and insert the link!
 This work is licensed under a Creative Commons Attribution-NonCommercial- ShareAlike 4.0 International License.
Become a contributor for community
Get paid to write technical tutorials and select a tech-focused charity to receive a matching donation.

DigitalOcean Documentation
Full documentation for every DigitalOcean product.

Resources for startups and AI-native businesses
The Wave has everything you need to know about building a business, from raising funding to marketing your product.
The developer cloud
Scale up as you grow — whether you're running one virtual machine or ten thousand.

Start building today
From GPU-powered inference and Kubernetes to managed databases and storage, get everything you need to build, scale, and deploy intelligent applications.
