By Erika Heidi
Developer Advocate
Not using Automated Ansible?
Choose a different version or distribution.
Introduction
Server automation now plays an essential role in systems administration, due to the disposable nature of modern application environments. Configuration management tools such as Ansible are typically used to streamline the process of automating server setup by establishing standard procedures for new servers while also reducing human error associated with manual setups.
Ansible offers a simple architecture that doesn’t require special software to be installed on nodes. It also provides a robust set of features and built-in modules which facilitate writing automation scripts.
This guide explains how to use Ansible to automate the steps contained in our guide on How To Install Linux, Nginx, MySQL and PHP (LEMP) on Ubuntu 18.04. The LEMP software stack is a group of software that can be used to serve dynamic web pages and web applications. This is an acronym that describes a Linux operating system, with an Nginx (pronounced like “Engine-X”) web server. The backend data is stored in the MySQL database and the dynamic processing is handled by PHP.
Prerequisites
In order to execute the automated setup provided by the playbook we’re discussing in this guide, you’ll need:
- One Ansible control node: an Ubuntu 18.04 machine with Ansible installed and configured to connect to your Ansible hosts using SSH keys. Make sure the control node has a regular user with sudo permissions and a firewall enabled, as explained in our Initial Server Setup guide. To set up Ansible, please follow our guide on How to Install and Configure Ansible on Ubuntu 18.04.
- One or more Ansible Hosts: one or more remote Ubuntu 18.04 servers previously set up following the guide on How to Use Ansible to Automate Initial Server Setup on Ubuntu 18.04.
Before proceeding, you first need to make sure your Ansible control node is able to connect and execute commands on your Ansible host(s). For a connection test, please check step 3 of How to Install and Configure Ansible on Ubuntu 18.04.
What Does this Playbook Do?
This Ansible playbook provides an alternative to manually running through the procedure outlined in our guide on How To Install Linux, Nginx, MySQL, PHP (LEMP stack) on Ubuntu 18.04.
Running this playbook will perform the following actions on your Ansible hosts:
- Install
aptitude, which is preferred by Ansible as an alternative to theaptpackage manager. - Install the required LEMP packages.
- Set up the Nginx configuration file using the provided template.
- Enable the new Nginx configuration and disable the default one.
- Set the password for the MySQL root user.
- Remove anonymous MySQL accounts and the test database.
- Set up UFW to allow HTTP traffic on the configured port (
80by default). - Set up a PHP test script using the provided template.
Once the playbook has finished running, you will have a web PHP environment running on top of Nginx, based on the options you defined within your configuration variables.
How to Use this Playbook
The first thing we need to do is obtain the LEMP playbook and its dependencies from the do-community/ansible-playbooks repository. We need to clone this repository to a local folder inside the Ansible Control Node.
In case you have cloned this repository before while following a different guide, access your existing ansible-playbooks copy and run a git pull command to make sure you have updated contents:
- cd ~/ansible-playbooks
- git pull
If this is your first time using the do-community/ansible-playbooks repository, you should start by cloning the repository to your home folder with:
- cd ~
- git clone https://github.com/do-community/ansible-playbooks.git
- cd ansible-playbooks
The files we’re interested in are located inside the lemp_ubuntu1804 folder, which has the following structure:
lemp_ubuntu1804
├── files
│   ├── info.php.j2
│   └── nginx.conf.j2
├── vars
│   └── default.yml
├── playbook.yml
└── readme.md
Here is what each of these files are:
files/info.php.j2: Template file for setting up a PHP test page on the web server’s rootfiles/nginx.conf.j2: Template file for setting up the Nginx server. directory.vars/default.yml: Variable file for customizing playbook settings.playbook.yml: The playbook file, containing the tasks to be executed on the remote server(s).readme.md: A text file containing information about this playbook.
We’ll edit the playbook’s variable file to customize the configurations of both MySQL and Nginx. Access the lemp_ubuntu1804 directory and open the vars/default.yml file using your command line editor of choice:
- cd lemp_ubuntu1804
- nano vars/default.yml
This file contains a few variables that require your attention:
---
mysql_root_password: "mysql_root_password"
http_host: "your_domain"
http_conf: "your_domain.conf"
http_port: "80"
The following list contains a brief explanation of each of these variables and how you might want to change them:
mysql_root_password: The desired password for the root MySQL account.http_host: The host name or IP address for this web server.http_conf: The name of the configuration file to be created inside/etc/nginx/sites-available, typically set to the host or application name for easier identification.http_port: The port Nginx will use to serve this site. This is port80by default, but if you want to serve your site or application on a different port, enter it here.
Once you’re done updating the variables inside vars/default.yml, save and close this file. If you used nano, do so by pressing CTRL + X, Y, then ENTER.
You’re now ready to run this playbook on one or more servers. Most playbooks are configured to be executed on everyserver in your inventory, by default. We can use the-lflag to make sure that only a subset of servers, or a single server, is affected by the playbook. We can also use the-u` flag to specify which user on the remote server we’re using to connect and execute the playbook commands on the remote hosts.
To execute the playbook only on server1, connecting as sammy, you can use the following command:
- ansible-playbook playbook.yml -l server1 -u sammy
You will get output similar to this:
Output
PLAY [all] *****************************************************************************************************************************

TASK [Gathering Facts] *****************************************************************************************************************
ok: [server1]

TASK [Install Prerequisites] ***********************************************************************************************************
changed: [server1] => (item=aptitude)

...

TASK [UFW - Allow HTTP on port 80] *****************************************************************************************************
changed: [server1]

TASK [Sets Up PHP Info Page] ***********************************************************************************************************
changed: [server1]

RUNNING HANDLER [Reload Nginx] *********************************************************************************************************
changed: [server1]

PLAY RECAP *****************************************************************************************************************************
server1         : ok=12   changed=9    unreachable=0    failed=0    skipped=0    rescued=0    ignored=0
Note: For more information on how to run Ansible playbooks, check our Ansible Cheat Sheet Guide.
When the playbook is finished running, go to your web browser and access the host or IP address of the server, as configured in the playbook variables, followed by /info.php:
http://server_host_or_IP/info.php
You will see a page like this:
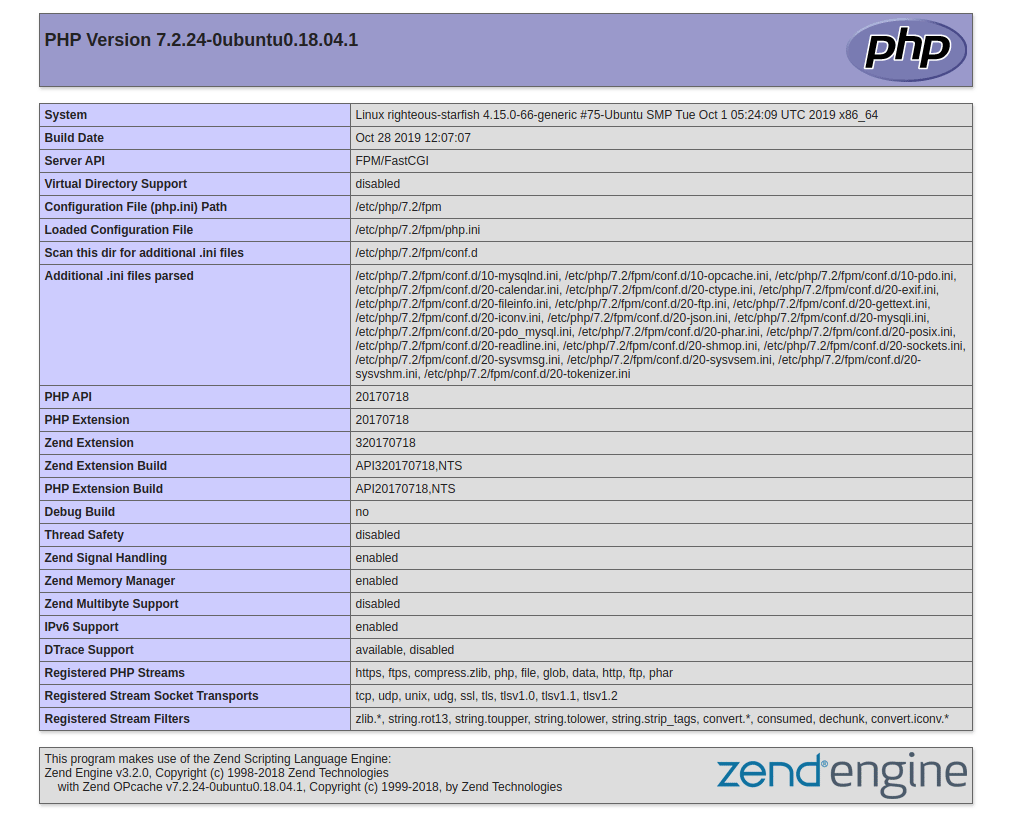
Because this page contains sensitive information about your PHP environment, it is recommended that you remove it from the server by running an rm -f /var/www/info.php command once you have finished setting it up.
The Playbook Contents
You can find the LEMP server setup featured in this tutorial in the lemp_ubuntu1804 folder inside the DigitalOcean Community Playbooks repository. To copy or download the script contents directly, click the Raw button towards the top of each script.
The full contents of the playbook as well as its associated files are also included here for your convenience.
vars/default.yml
The default.yml variable file contains values that will be used within the playbook tasks, such as the password for the MySQL root account and the domain name to configure within Nginx.
---
mysql_root_password: "mysql_root_password"
http_host: "your_domain"
http_conf: "your_domain.conf"
http_port: "80"
files/nginx.conf.j2
The nginx.conf.j2 file is a Jinja 2 template file that configures the Nginx web server. The variables used within this template are defined in the vars/default.yml variable file.
server {
       listen {{ http_port }};
       root /var/www/html;
       index index.php index.html index.htm index.nginx-debian.html;
       server_name {{ http_host }};

       location / {
               try_files $uri $uri/ =404;
       }

       location ~ \.php$ {
               include snippets/fastcgi-php.conf;
               fastcgi_pass unix:/var/run/php/php7.2-fpm.sock;
       }

       location ~ /\.ht {
               deny all;
       }
}
files/info.php.j2
The info.php.j2 file is another Jinja template, used to set up a test PHP script in the document root of the newly configured LEMP server.
<?php
phpinfo();
playbook.yml
The playbook.yml file is where all tasks from this setup are defined. It starts by defining the group of servers that should be the target of this setup (all), after which it uses become: true to define that tasks should be executed with privilege escalation (sudo) by default. Then, it includes the vars/default.yml variable file to load configuration options.
---
- hosts: all
  become: true
  vars_files:
   - vars/default.yml

 tasks:
   - name: Install Prerequisites
     apt: name={{ item }} update_cache=yes state=latest force_apt_get=yes
     loop: [ 'aptitude' ]

   - name: Install LEMP Packages
     apt: name={{ item }} update_cache=yes state=latest
     loop: [ 'nginx', 'mysql-server', 'python3-pymysql', 'php-fpm', 'php-mysql' ]

# Nginx Configuration

   - name: Sets Nginx conf file
     template:
       src: "files/nginx.conf.j2"
       dest: "/etc/nginx/sites-available/{{ http_conf }}"

   - name: Enables new site
     file:
       src: "/etc/nginx/sites-available/{{ http_conf }}"
       dest: "/etc/nginx/sites-enabled/{{ http_conf }}"
       state: link
     notify: Reload Nginx

   - name: Removes "default" site
     file:
       path: "/etc/nginx/sites-enabled/default"
       state: absent
     notify: Reload Nginx

# MySQL Configuration

   - name: Sets the root password
     mysql_user:
       name: root
       password: "{{ mysql_root_password }}"
       login_unix_socket: /var/run/mysqld/mysqld.sock

   - name: Removes all anonymous user accounts
     mysql_user:
       name: ''
       host_all: yes
       state: absent
       login_user: root
       login_password: "{{ mysql_root_password }}"

   - name: Removes the MySQL test database
     mysql_db:
       name: test
       state: absent
       login_user: root
       login_password: "{{ mysql_root_password }}"

# UFW Configuration

   - name: "UFW - Allow HTTP on port {{ http_port }}"
     ufw:
       rule: allow
       port: "{{ http_port }}"
       proto: tcp

# Sets Up PHP Info Page

   - name: Sets Up PHP Info Page
     template:
       src: "files/info.php.j2"
       dest: "/var/www/html/info.php"

# Handlers

 handlers:
   - name: Reload Nginx
     service:
       name: nginx
       state: reloaded

   - name: Restart Nginx
     service:
       name: nginx
       state: restarted
Feel free to modify these files to best suit your individual needs within your own workflow.
Conclusion
In this guide, we used Ansible to automate the process of installing and setting up a LEMP environment on a remote server. Because each individual typically has different needs when working with MySQL databases and users, we encourage you to check out the official Ansible documentation for more information and use cases of the mysql_user Ansible module.
If you’d like to include other tasks in this playbook to further customize your server setup, please refer to our introductory Ansible guide Configuration Management 101: Writing Ansible Playbooks.
Thanks for learning with the DigitalOcean Community. Check out our offerings for compute, storage, networking, and managed databases.
About the author
Dev/Ops passionate about open source, PHP, and Linux. Former Senior Technical Writer at DigitalOcean. Areas of expertise include LAMP Stack, Ubuntu, Debian 11, Linux, Ansible, and more.
Still looking for an answer?
This textbox defaults to using Markdown to format your answer.
You can type !ref in this text area to quickly search our full set of tutorials, documentation & marketplace offerings and insert the link!
Erika Heidi, thank you very much. Finally, i found relevant information on this topic.
I hadn’t seen acronym “LEMP” yet, or a guide that made me consider using ansible playbooks. thank you. nice article!
Thanks for this. Is it possible to update the script for idempotency? Running the script 2nd time encountered an exception
TASK [Sets the root password] **************************************************************************************************************************************************** [WARNING]: Module did not set no_log for update_password fatal: [vagrant-temp]: FAILED! => {“changed”: false, “msg”: “unable to connect to database, check login_user and login_password are correct or /root/.my.cnf has the credentials. Exception message: (1045, "Access denied for user ‘root’@‘localhost’ (using password: NO)")”}
PLAY RECAP *********************************************************************************************************************************************************************** vagrant-temp : ok=6 changed=0 unreachable=0 failed=1 skipped=0 rescued=0 ignored=0
this is a great article indeed, and seeing the playbook succeeded put my hopes high - however, when I accessed info.php, I got a 502. Turns out, a specific version pf php-fpm is set in the Jinja template (7.2, mine is 7.4) for some reason:
**2021/04/20 22:05:35 [crit] 22247#22247: *1 connect() to unix:/var/run/php/php7.2-fpm.sock failed (2: No such file or directory) while connecting to upstream, client: 71.232.100.140, server: your_domain, request: “GET /info.php HTTP/1.1”, upstream: “fastcgi://unix:/var/run/php/php7.2-fpm.sock:”, host: “ec2-XX-XXX-XX-XX.compute-1.amazonaws.com” **
so that was easy to fix
 This work is licensed under a Creative Commons Attribution-NonCommercial- ShareAlike 4.0 International License.
Become a contributor for community
Get paid to write technical tutorials and select a tech-focused charity to receive a matching donation.

DigitalOcean Documentation
Full documentation for every DigitalOcean product.

Resources for startups and AI-native businesses
The Wave has everything you need to know about building a business, from raising funding to marketing your product.
The developer cloud
Scale up as you grow — whether you're running one virtual machine or ten thousand.

Start building today
From GPU-powered inference and Kubernetes to managed databases and storage, get everything you need to build, scale, and deploy intelligent applications.
