By James Quick

Introduction
Visual Studio Code (VS Code) has become one of the most popular editors out there for web development. It has gained such popularity thanks to its many built-in features such as source control integration, namely with Git. Harnessing the power of Git from within VS Code can make your workflow more efficient and robust.
In this tutorial, you will explore using Source Control Integration in VS Code with Git.
Prerequisites
To complete this tutorial, you will need the following:
- Git installed on your machine. For more details on accomplishing this, review the Getting Started with Git tutorial.
- The latest version of Visual Studio Code installed on your machine.
Step 1 — Familiarizing with the Source Control Tab
The first thing you need to do to take advantage of source control integration is initialize a project as a Git repository.
Open Visual Studio Code and access the built-in terminal. You can open this by using the keyboard shortcut CTRL + ` on Linux, macOS, or Windows.
In your terminal, make a directory for a new project and change into that directory:
- mkdir git_test
- cd git_test
Then, create a Git repository:
- git init
Another way to accomplish this with Visual Studio Code is by opening up the Source Control tab (the icon looks like a split in the road) in the left-side panel:

Next, select Open Folder:
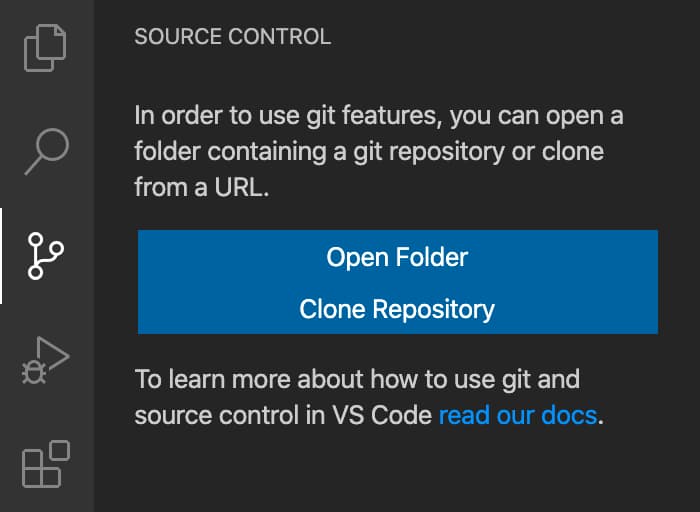
This will open up your file explorer to the current directory. Select the preferred project directory and click Open.
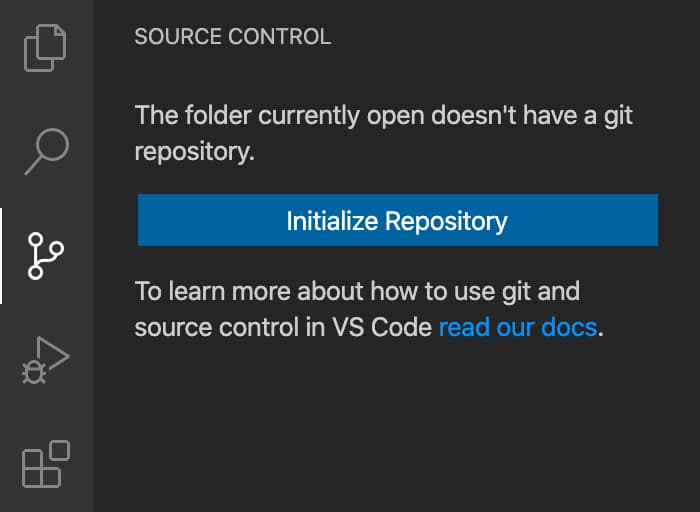
Then, select Initialize Repository:
If you now check your file system, you will see that it includes a .git directory. To do this, use the terminal to navigate to your project directory and list all of the contents:
- ls -la
You will see the .git directory that was created:
- Output.
- ..
- .git
Now that the repo has been initialized, add a file called index.html.
After doing so, you’ll see in the Source Control panel that your new file shows up with the letter U beside it. U stands for untracked file, meaning a file that is new or changed, but has not yet been added to the repository:
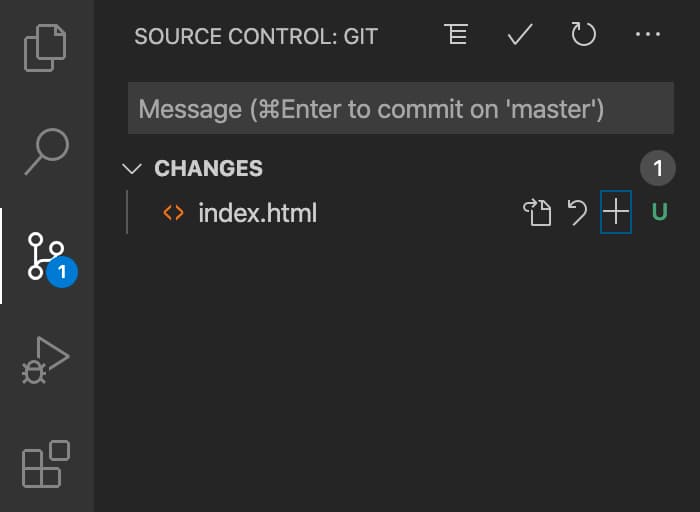
You can now click the plus icon (+) by the index.html file listing to track the file by the repository.
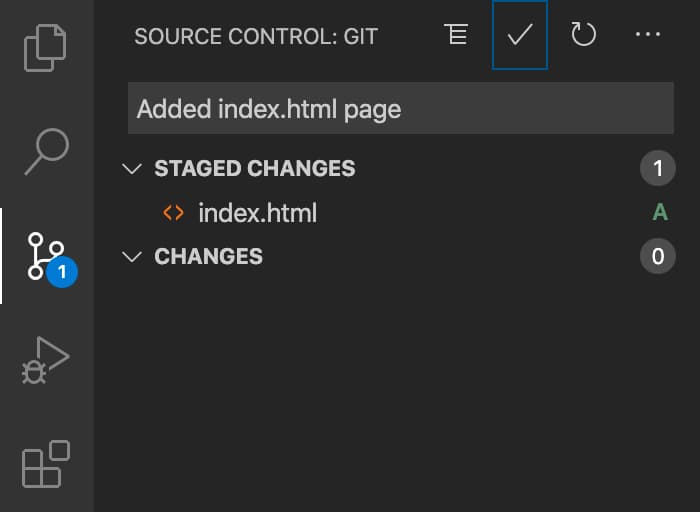
Once added, the letter next to the file will change to an A. A represents a new file that has been added to the repository.
To commit your changes, type a commit message into the input box at the top of the Source Control panel. Then, click the check icon to perform the commit.
After doing so, you will notice that are no pending changes.
Next, add a bit of content to your index.html file.
You can use an Emmet shortcut to generate an HTML5 skeleton in VS Code by pressing the ! key followed by Tab key. Go ahead and add something in the <body> like a <h1> heading and save it.
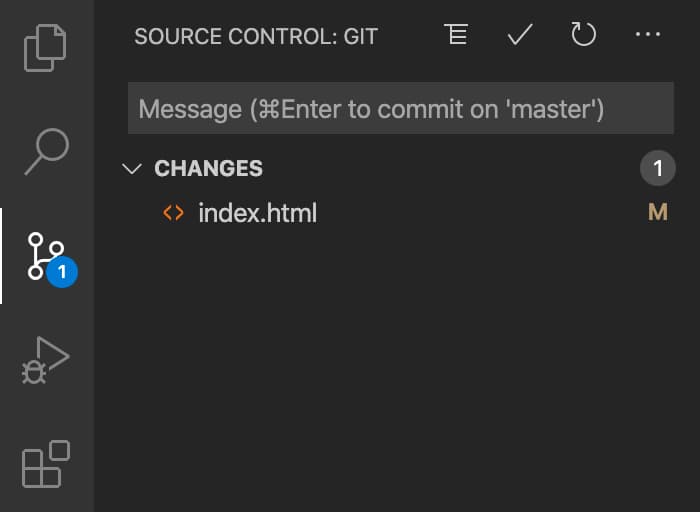
In the source control panel, you will see that your file has been changed. It will show the letter M next to it, which stands for a file that has been modified:
For practice, go ahead and commit this change as well.
Now that you’re familiar interacting with the source control panel, you will move on to interpreting gutter indicators.
Step 2 — Intepreting Gutter Indicators
In this step you will take a look at what’s called the “Gutter” in VS Code. The gutter is the skinny area to the right of the line number.
If you’ve used code folding before, the maximize and minimize icons are located in the gutter.
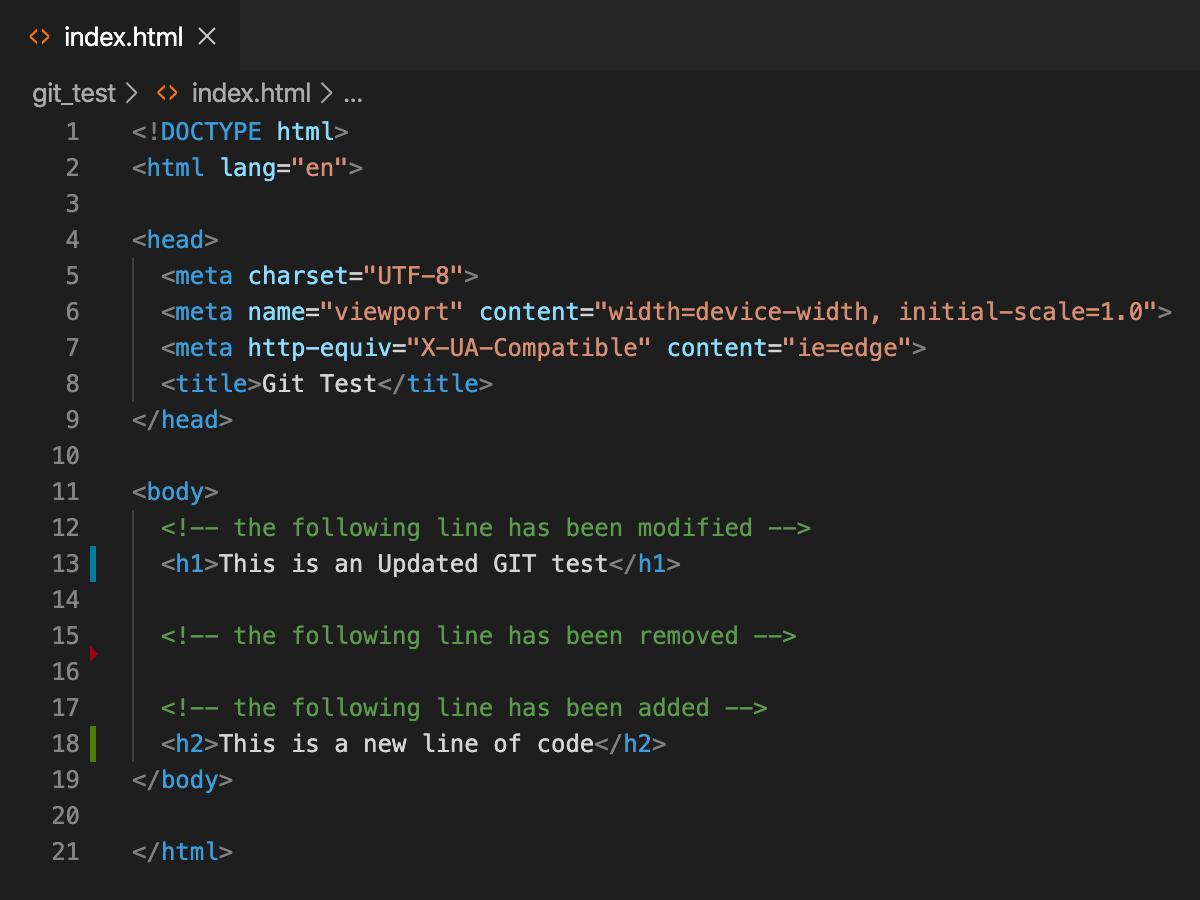
Let’s start by making a small change to your index.html file, such as a change to the content within the <h1> tag. After doing so, you will notice a blue vertical mark in the gutter of the line that you changed. The vertical blue mark signifies that the corresponding line of code has been changed.
Now, try deleting a line of code. You can delete one of the lines in the <body> section of your index.html file. Notice now in the gutter that there is a red triangle. The red triangle signifies a line or group of lines that has been deleted.
Lastly, at the bottom of your <body> section, add a new line of code and notice the green bar. The vertical green bar signifies a line of code that has been added.
This example depicts gutter indicators for a modified line, a removed line, and a new line:
Step 3 — Diffing Files
VS Code also has the ability to perform a diff on a file. Typically, you would have to download a separate diff tool to do this, so this built-in feature can help you work more efficiently.
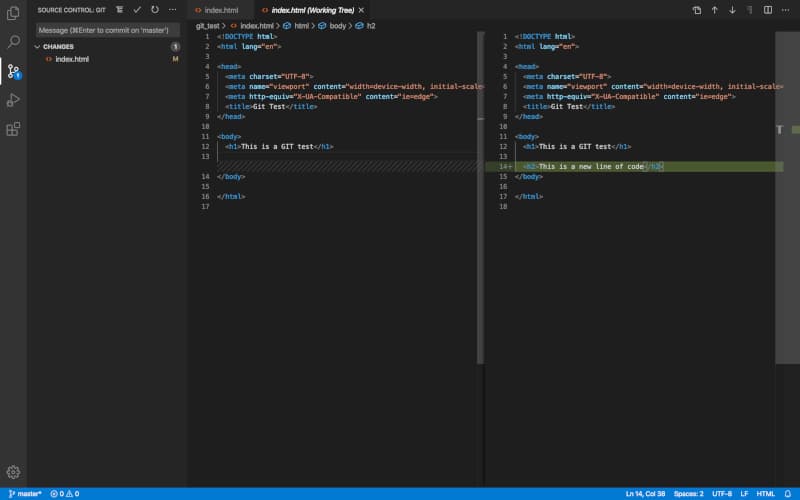
To view a diff, open up the source control panel and double-click a changed file. In this case, double-click the index.html file. You will be brought to a typical diff view with the current version of the file on the left and the previously committed version of the file on the right.
This example shows that a line has been added in the current version:
Step 4 — Working with Branches
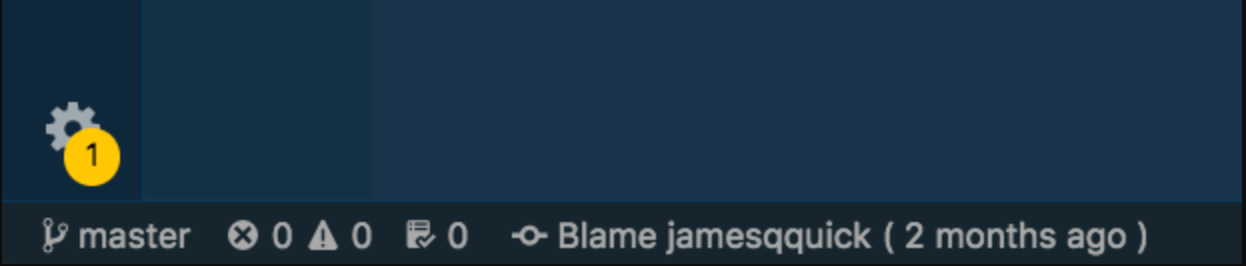
Moving to the bottom bar, you have the ability to create and switch branches. If you take a look at the very bottom left of the editor, you should see the source control icon (the one that looks like a split in the road) followed most likely by master or the name of the current working branch.

To create a branch, click on that branch name. A menu should pop up giving you the ability to create a new branch:

Go ahead and create a new branch called test.
Now, make a change to your index.html file that signifies you are in the new test branch, such as adding the text this is the new test branch.
Commit those changes to the test branch. Then, click the branch name in the bottom left again to switch back to the master branch.
After switching back to the master branch, you’ll notice that the this is the new test branch text committed to the test branch is no longer present.
Step 5 — Working with Remote Repositories
This tutorial won’t touch on it in-depth, but through the Source Control panel, you do have access to work with remote repositories. If you’ve worked with a remote repository before you’ll notice familiar commands like pull, sync, publish, stash, etc.
Step 6 — Installing Useful Extensions
Not only does VS Code come with lots of built-in functionality for Git, there are also several very popular extensions to add additional functionality.
Git Blame
This extension provides the ability to view Git Blame information in the status bar for the currently selected line.
This may sound intimidating, but not to worry, the Git Blame extension is much more about practicality than it is about making someone feel bad. The idea of “blaming” someone for a code change is less about shaming them, and more about figuring out the right person to ask questions to for certain pieces of code.
As you can see in the screenshot, this extension provides a subtle message related to the current line of code you are working on in the bottom toolbar explaining who made the change and when they made it.
Git History
Although you can view current changes, perform diffs, and manage branches with the built-in features in VS Code, it does not provide an in-depth view into your Git history. The Git History extension solves that issue.
As you can see in the image below, this extension allows you to thoroughly explore the history of a file, a given author, a branch, etc. To activate the Git History window below, right-click on a file and choose Git: View File History:
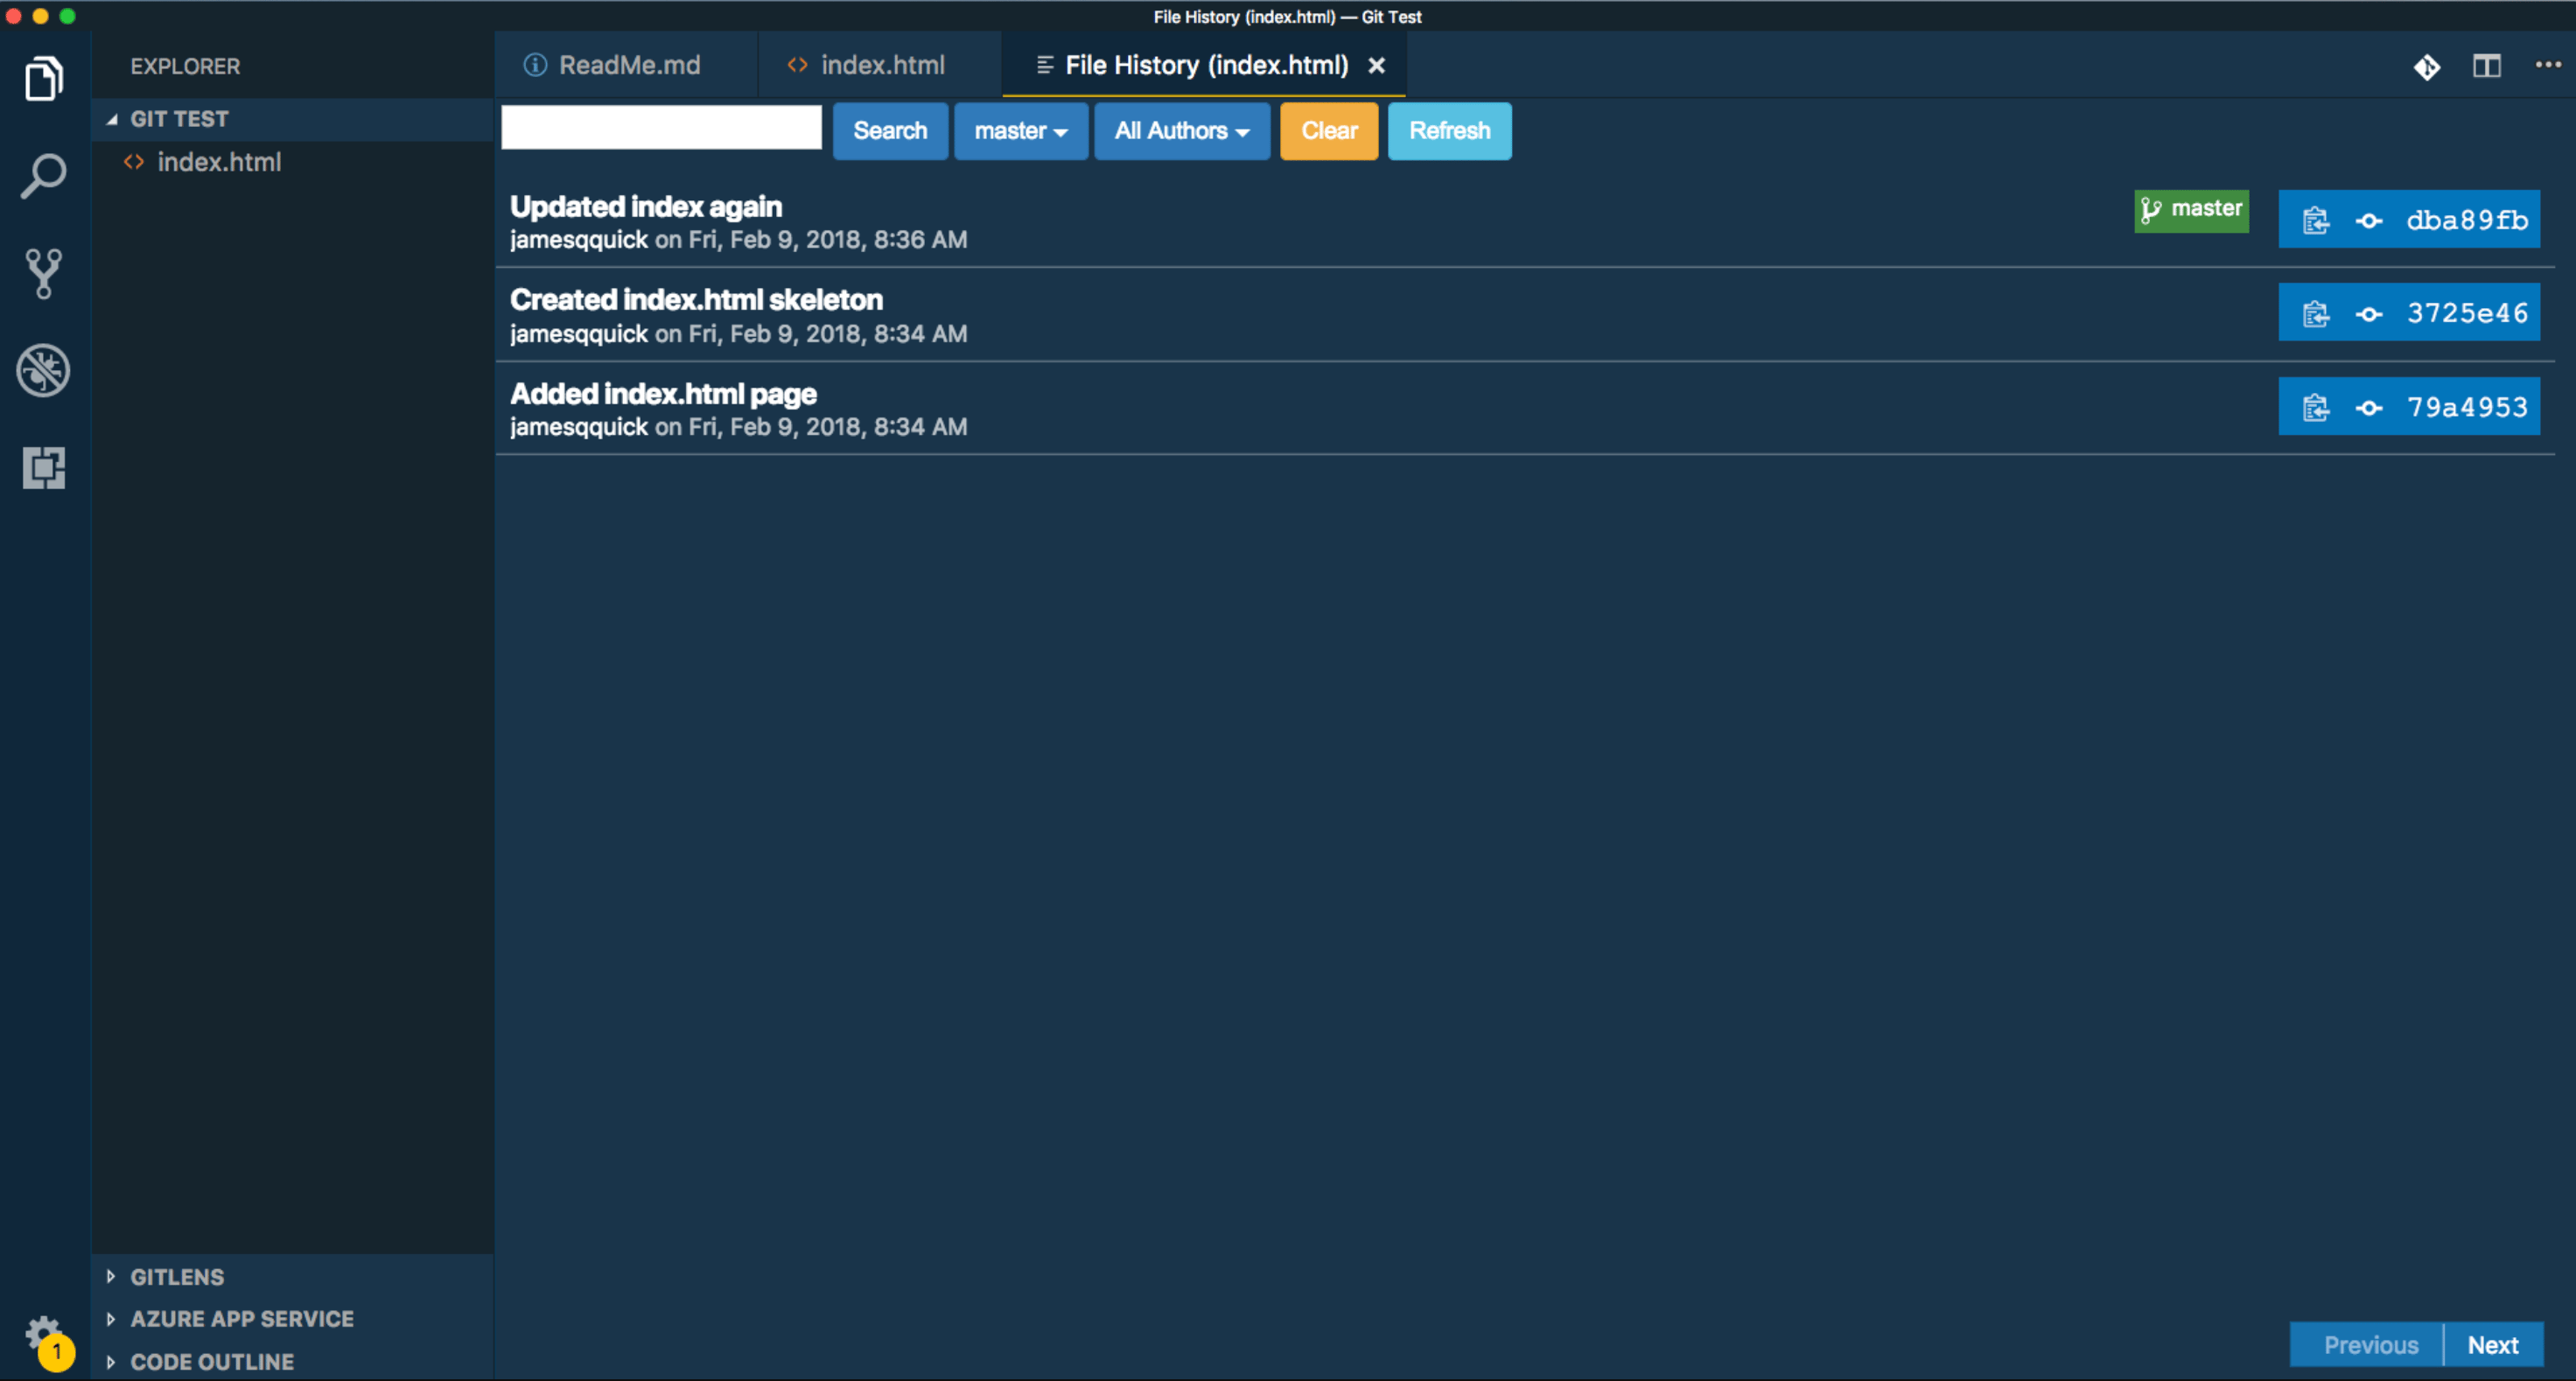
Additionally, you can compare branches and commits, create branches from commits, and more.
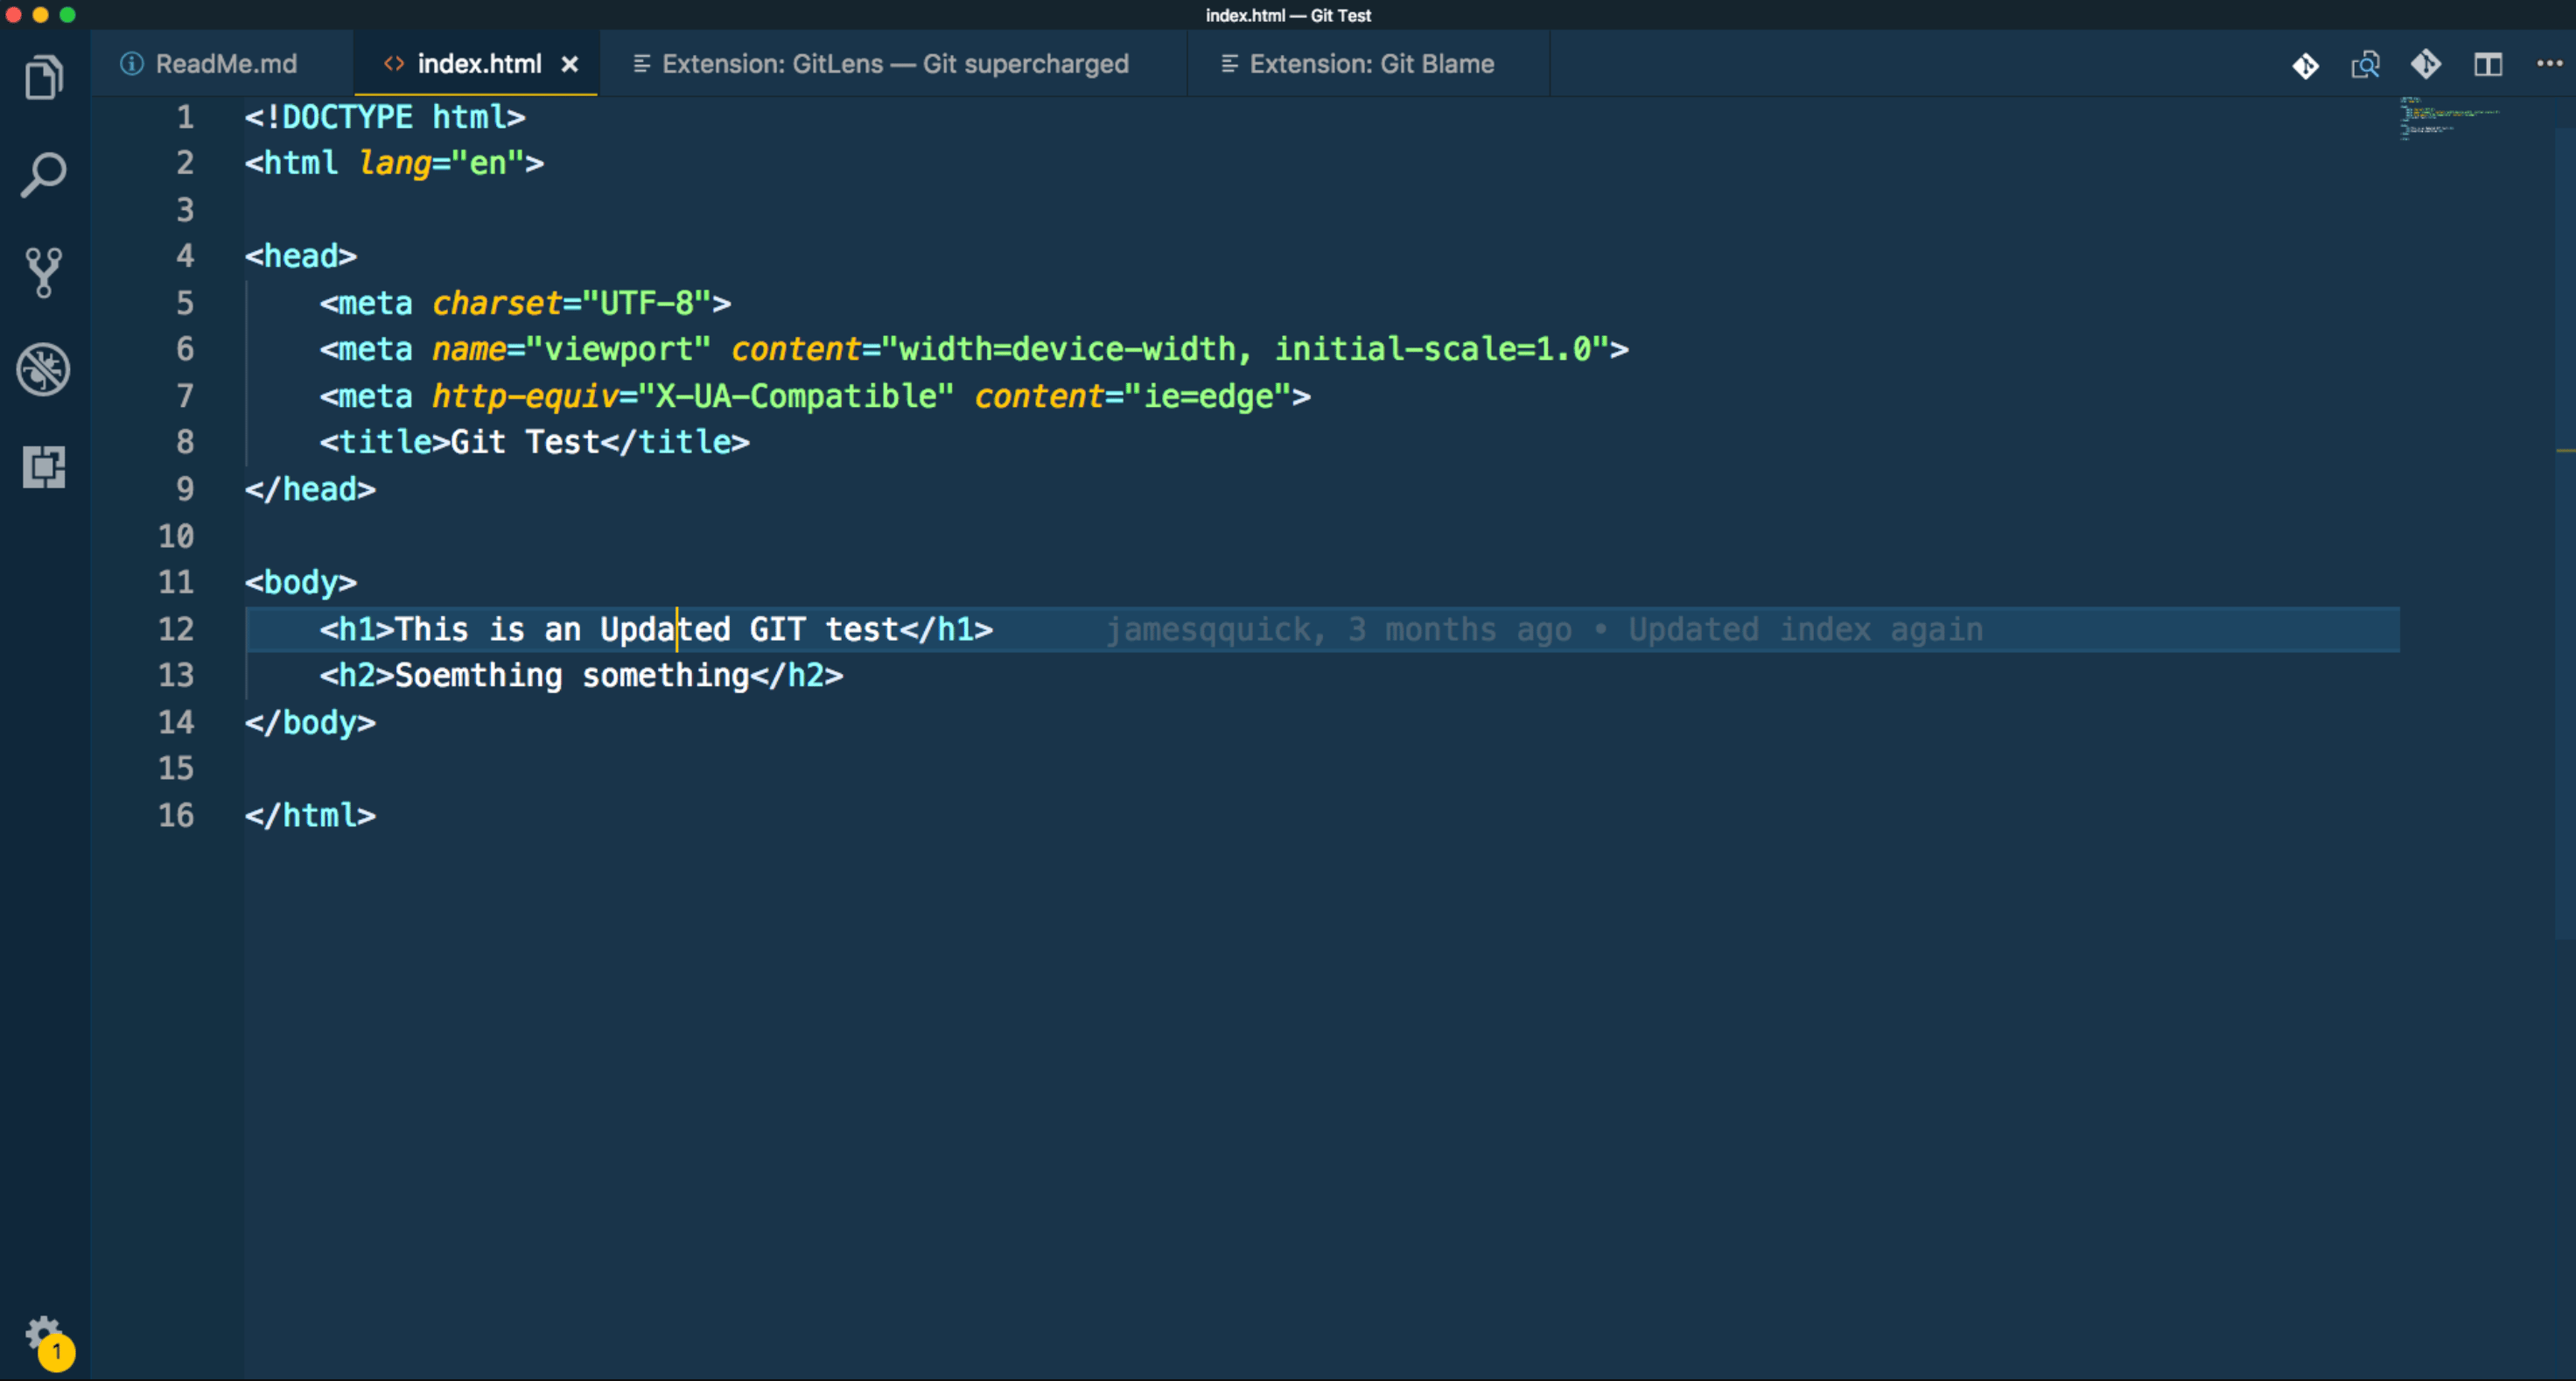
Git Lens
GitLens supercharges the Git capabilities built into Visual Studio Code. It helps you to visualize code authorship at a glance via Git blame annotations and code lens, seamlessly navigate and explore Git repositories, gain valuable insights via powerful comparison commands, and so much more.
The Git Lens extension is one of the most popular in the community and is also the most powerful. In most ways, it can replace each of the previous two extension with its functionality.
For “blame” information, a subtle message appears to the right of the line you are currently working on to inform you of who made the change, when they made it, and the associated commit message. There are some additional pieces of information that pop up when hovering over this message like the code change itself, the timestamp, and more.
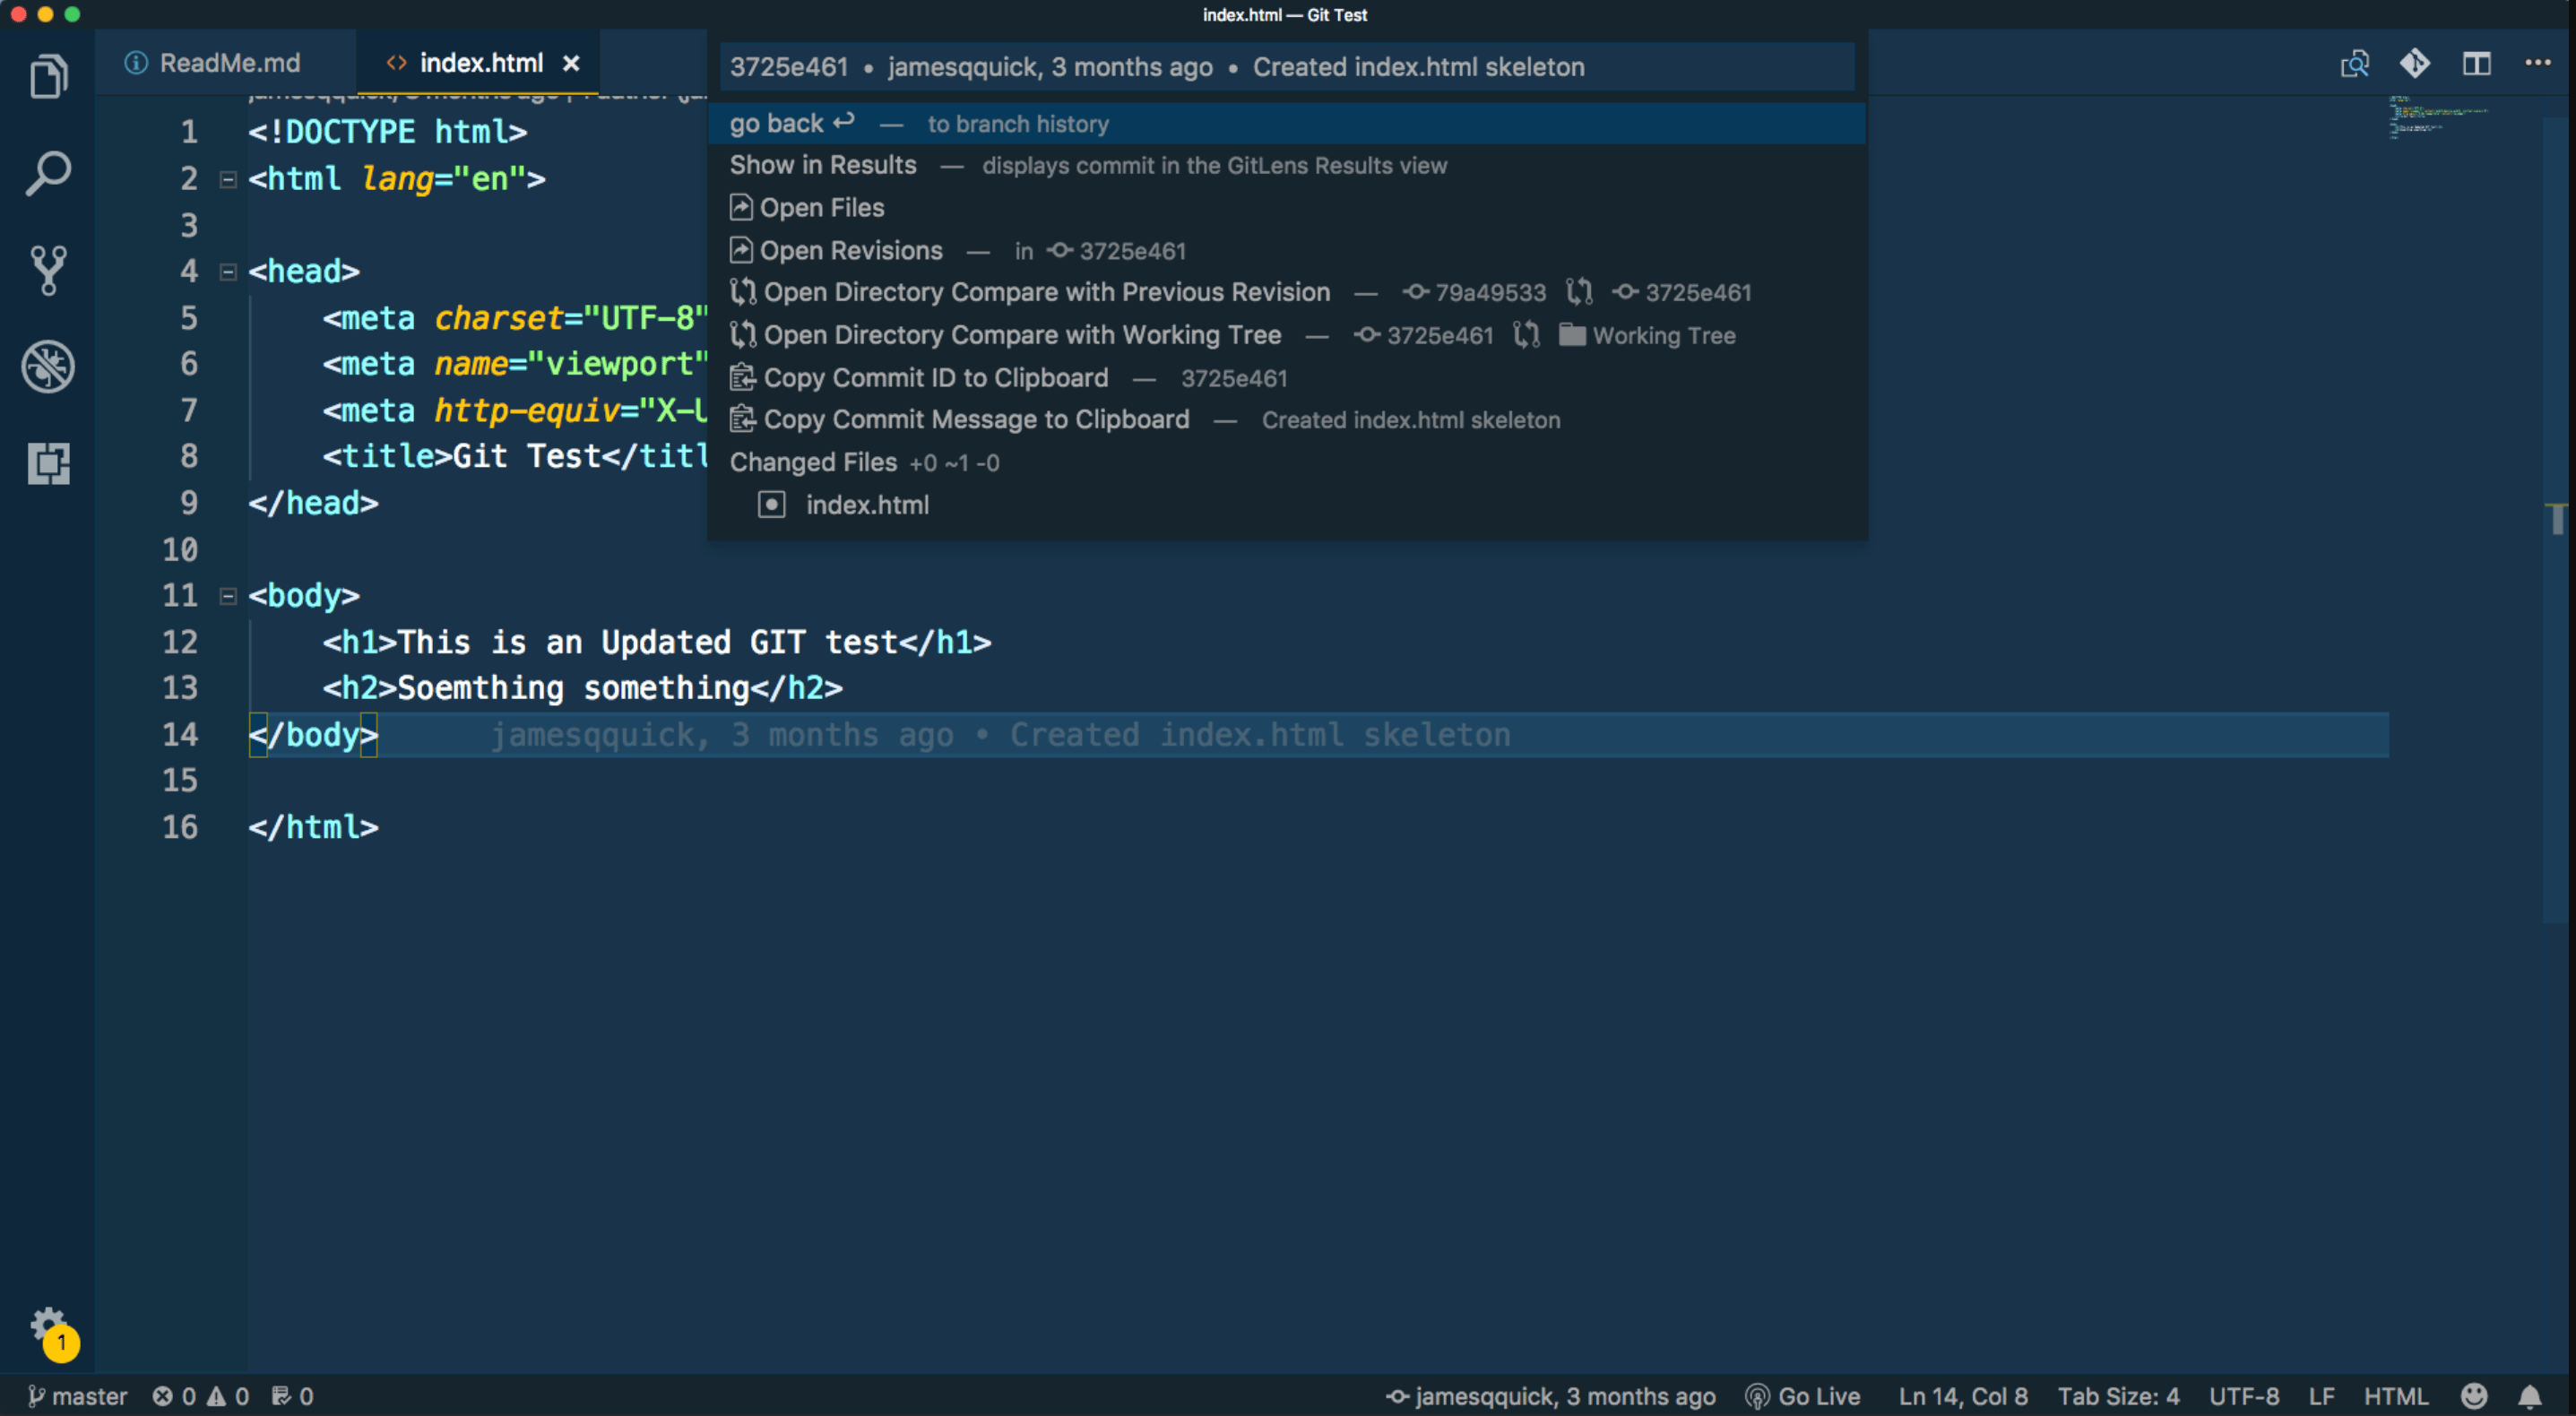
For Git history information, this extension provides a lot of functionality. You have easy access to tons of options including showing file history, performing diffs with previous versions, opening a specific revision, and more. To open up these options you can click the text in the bottom status bar that contains the author who edited the line of code and how long ago it was edited.
This will open up the following window:
This extension is packed with functionality, and it will take a while to take in all that it has to offer.
Conclusion
In this tutorial, you explored how to use source control integration with VS Code. VS Code can handle many features that previously would have required the download of a separate tool.
Thanks for learning with the DigitalOcean Community. Check out our offerings for compute, storage, networking, and managed databases.
About the author
Developer. Speaker. Teacher. Developer Advocate at Auth0.
Still looking for an answer?
This textbox defaults to using Markdown to format your answer.
You can type !ref in this text area to quickly search our full set of tutorials, documentation & marketplace offerings and insert the link!
Hi James Thank you for your tutorial which was very helpful. I am looking for details on Step 5 - working with remote repositories. Any plan to add a follow up tutorial to this one?
How do I take out this letters, it is a little bit confusing to me.
Hi, thanks for your article, it helps me a lot. But I have a question for you: I’ve installed Github extension in my code editor (VSCode) and I want to change my code by adding a line. But I can’t. It’s as if by pushing my code with the extension I can no longer modify. I wanted to know how can I add a new code with the extension.
Nice article because it starts from the correct place, explains how to use git from our development tool rather than starting from git itself. This encourages the reader to start using it and that is the important thing.
Thank you
 This work is licensed under a Creative Commons Attribution-NonCommercial- ShareAlike 4.0 International License.
Become a contributor for community
Get paid to write technical tutorials and select a tech-focused charity to receive a matching donation.

DigitalOcean Documentation
Full documentation for every DigitalOcean product.

Resources for startups and AI-native businesses
The Wave has everything you need to know about building a business, from raising funding to marketing your product.
The developer cloud
Scale up as you grow — whether you're running one virtual machine or ten thousand.

Start building today
From GPU-powered inference and Kubernetes to managed databases and storage, get everything you need to build, scale, and deploy intelligent applications.
