By Savic and Kathryn Hancox

The author selected the Free and Open Source Fund to receive a donation as part of the Write for DOnations program.
Introduction
When multiple people are working on the same Terraform project from different locations simultaneously, it is important to handle the infrastructure code and project state correctly to avoid overwriting errors. The solution is to store the state remotely instead of locally. A remote system is available to all members of your team, and it is possible for them to lock the state while they’re working.
One such remote backend is pg, which stores the state in a PostgreSQL database. During the course of this tutorial, you’ll use it with a DigitalOcean Managed Database to ensure data availability.
Terraform also supports the official, managed cloud offering by Hashicorp called Terraform Cloud—a proprietary app that syncs your team’s work in one place and offers a user interface for configuration and management.
In this tutorial, you’ll create an organization in Terraform Cloud to which you’ll connect your project. You’ll then use your organization to set up workspaces and resources. You will store your state in the managed cloud so it is always available. You’ll also set up the pg backend with an accompanying managed PostgreSQL database.
Prerequisites
- A DigitalOcean Personal Access Token, which you can create via the DigitalOcean Control Panel. You can find instructions in the DigitalOcean product documents, How to Create a Personal Access Token.
- Terraform installed on your local machine. Complete Step 1 of the How To Use Terraform with DigitalOcean tutorial.
- If you would like to use a
pgbackend, you will need a Managed PostgreSQL database cluster created and accessible. For more information, visit the Quickstart guide. You can use a separate database for this tutorial. - If you would like to use Hashicorp’s managed cloud, you will need an account with Terraform Cloud. You can create one on their sign-up page.
Note: We have specifically tested this tutorial using Terraform 1.1.3.
Storing State in a Managed PostgreSQL Database
In this section, you’ll set up a project that deploys a Droplet and stores the state in a DigitalOcean Managed PostgreSQL database using the pg provider. This provider supports state locking, so the state won’t ever be overwritten by two or more changes happening at the same time.
Start by creating a directory named terraform-team-pg in which you’ll store the project:
- mkdir ~/terraform-team-pg
Navigate to it:
- cd ~/terraform-team-pg
You’ll first define the provider and then pass in the connection string for the database and the digitalocean module. Create and open provider.tf for editing:
- nano provider.tf
Add the following lines:
terraform {
  required_providers {
    digitalocean = {
      source = "digitalocean/digitalocean"
      version = "~> 2.0"
    }
  }

  backend "pg" {
    conn_str = "your_db_connection_string"
  }
}

variable "do_token" {}

provider "digitalocean" {
  token = var.do_token
}
Here you require the digitalocean provider and define the pg backend, which accepts a connection string. Then, you define the do_token variable and pass it to the instance of the digitalocean provider.
Remember to replace your_db_connection_string with the connection string for your managed database from your DigitalOcean Control Panel, which you can find by pressing Actions, selecting Connection Details, and choosing Connection string from the dropdown menu. Then save and close the file
Warning: To continue, in the Settings of your database, make sure you have the IP address of the machine from which you’re running Terraform on an allowlist.
Initialize the project by running:
- terraform init
The output will be similar to the following:
OutputInitializing the backend...

Successfully configured the backend "pg"! Terraform will automatically
use this backend unless the backend configuration changes.

Initializing provider plugins...
- Finding digitalocean/digitalocean versions matching "~> 2.0"...
- Installing digitalocean/digitalocean v2.16.0...
- Installed digitalocean/digitalocean v2.16.0 (signed by a HashiCorp partner, key ID F82037E524B9C0E8)

Partner and community providers are signed by their developers.
If you'd like to know more about provider signing, you can read about it here:
https://www.terraform.io/docs/cli/plugins/signing.html

Terraform has created a lock file .terraform.lock.hcl to record the provider
selections it made above. Include this file in your version control repository
so that Terraform can guarantee to make the same selections by default when
you run "terraform init" in the future.

Terraform has been successfully initialized!
...
Terraform successfully initialized the backend, which means that it connected to the database.
Next, define the Droplet in a file called droplets.tf. Create and open it for editing by running:
- nano droplets.tf
Add the following lines:
resource "digitalocean_droplet" "web" {
  image  = "ubuntu-20-04-x64"
  name   = "web-1"
  region = "fra1"
  size   = "s-1vcpu-1gb"
}
This code will deploy a Droplet called web-1 in the fra1 region, running Ubuntu 20.04 on 1GB RAM and one CPU core. That is all you need to define, so save and close the file.
You’ll need your DigitalOcean token in an environment variable. Create one, replacing your_do_token with your token:
- export DO_PAT="your_do_token"
To check that the connection to the database is working, try planning the configuration:
- terraform plan -var "do_token=${DO_PAT}"
The output will be similar to the following:
OutputTerraform used the selected providers to generate the following execution plan. Resource actions are indicated with the
following symbols:
  + create

Terraform will perform the following actions:

  # digitalocean_droplet.web will be created
  + resource "digitalocean_droplet" "web" {
      + backups              = false
      + created_at           = (known after apply)
      + disk                 = (known after apply)
      + graceful_shutdown    = false
      + id                   = (known after apply)
      + image                = "ubuntu-20-04-x64"
      + ipv4_address         = (known after apply)
      + ipv4_address_private = (known after apply)
      + ipv6                 = false
      + ipv6_address         = (known after apply)
      + locked               = (known after apply)
      + memory               = (known after apply)
      + monitoring           = false
      + name                 = "web-1"
      + price_hourly         = (known after apply)
      + price_monthly        = (known after apply)
      + private_networking   = (known after apply)
      + region               = "fra1"
      + resize_disk          = true
      + size                 = "s-1vcpu-1gb"
      + status               = (known after apply)
      + urn                  = (known after apply)
      + vcpus                = (known after apply)
      + volume_ids           = (known after apply)
      + vpc_uuid             = (known after apply)
    }

Plan: 1 to add, 0 to change, 0 to destroy.
...
Terraform reported no errors and planned out the actions as usual. It successfully connected to your PostgreSQL database and stored its state. Multiple people can now work on this simultaneously with the project remaining synchronized.
Storing State in Terraform Cloud
In this step, you’ll create a project that deploys a Droplet and uses Terraform Cloud as its backend with the cloud provider. This entails creating the organization and workspace in Terraform Cloud, writing the infrastructure code, and planning it.
Creating an Organization
Terraform Cloud allows you to have multiple organizations, which house your workspaces and modules. Paid-plan organizations can have multiple teams with access-level control features, while the free plan you’ll use provides only one team per organization. You can invite team members to join the organization.
Start off by heading over to Terraform Cloud and logging in. If you haven’t yet created an organization, it will prompt you to do so.
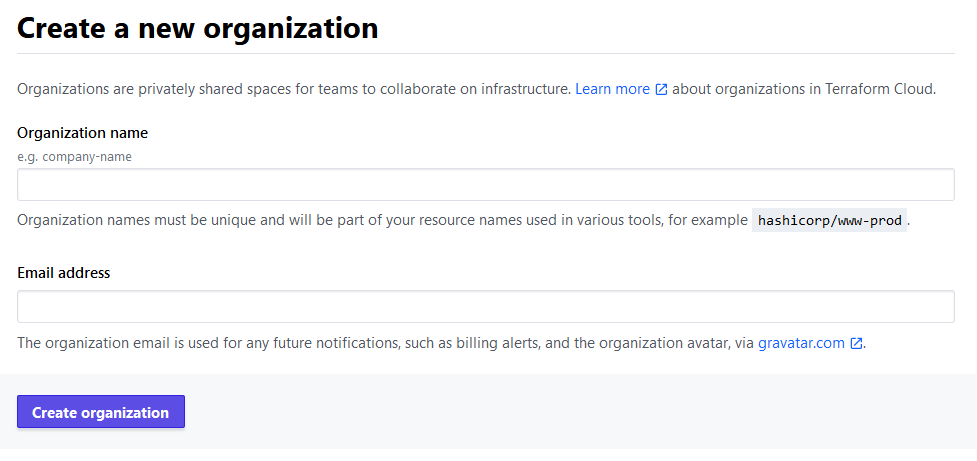
Enter an organization name of your choosing and remember that it must be unique among all names in Terraform Cloud. You’ll receive an error if the name already exists. The email address should already be filled in with the address of your account. Once you’re finished, click the Create organization button to continue.
It will then ask you to select the type of workspace.
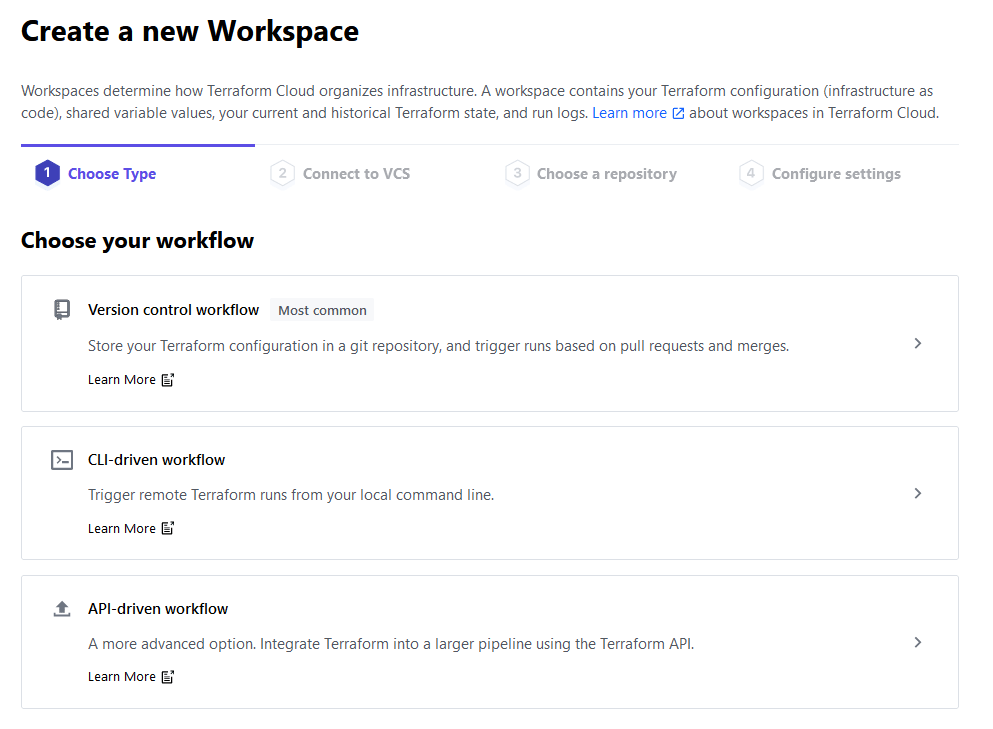
Since you’ll interface with Terraform Cloud using the command line, click the CLI-driven workflow option. Then, input a name for your workspace and leave the description empty.
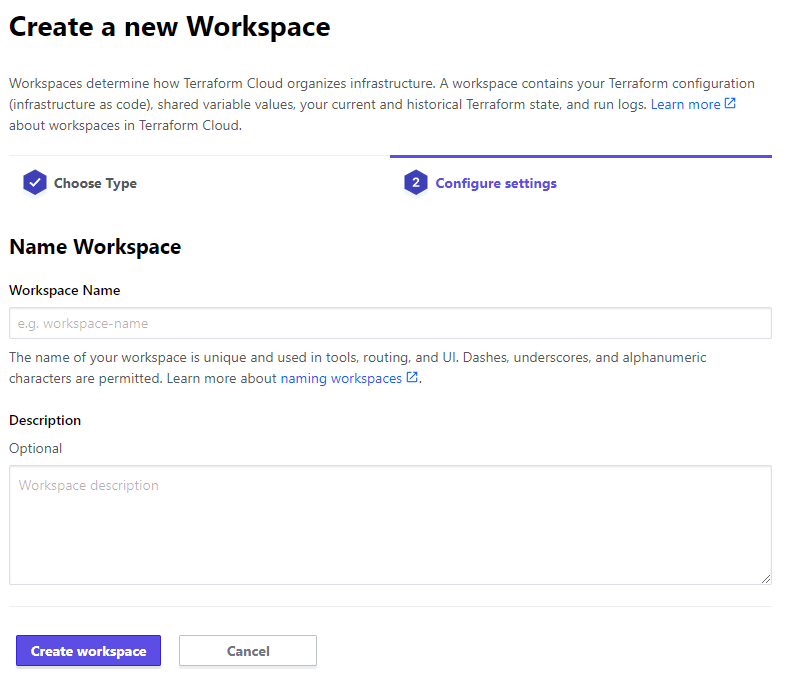
Type in a workspace name of your choosing (we’ll call it sammy), then click Create workspace to finalize the organization creation process. It will then direct you to a workspace settings page.

You’ve now created your workspace, which is a part of your organization. Since you just created it, your workspace contains no infrastructure code. In the central part of the interface, Terraform Cloud gives you starting instructions for connecting to this workspace.
Before connecting to it, you’ll need to configure the version of Terraform that the cloud will use to execute your commands. To set it, click the Settings dropdown next to Overview and select General from the list. When the page opens, navigate to the Terraform Version dropdown and select 1.1.3 (for this tutorial).

Then, click the Save settings button to save the changes.
To connect your project to your organization and workspace, you’ll first need to log in using the command line. Before you run the command, navigate to the tokens page to create a new access token for your server, which will provide access to your account. You’ll receive a prompt to create an API token.
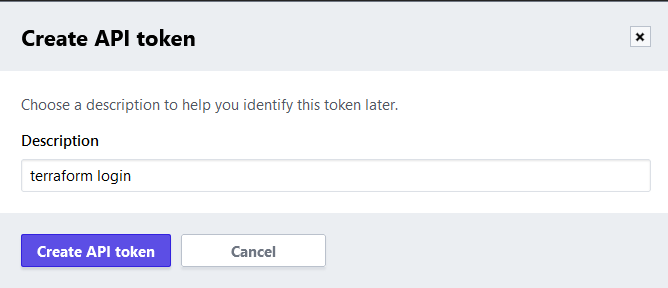
The default description is fine, so click Create API token to create it.
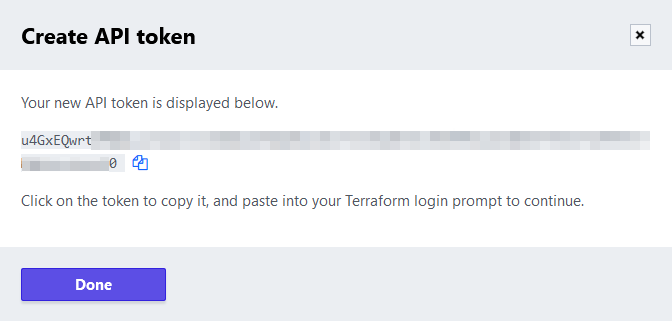
Click the token value, or the icon after it, to copy the API token. You’ll use this token to connect your project to your Terraform Cloud account.
In the command line, run the following command to log in:
- terraform login
You’ll receive the following output:
OutputTerraform will request an API token for app.terraform.io using your browser.

If login is successful, Terraform will store the token in plain text in
the following file for use by subsequent commands:
    /home/sammy/.terraform.d/credentials.tfrc.json

Do you want to proceed?
  Only 'yes' will be accepted to confirm.
...
Terraform is warning you that the token will be stored locally. Enter yes when it prompts you:
Output---------------------------------------------------------------------------------

Open the following URL to access the tokens page for app.terraform.io:
    https://app.terraform.io/app/settings/tokens?source=terraform-login


---------------------------------------------------------------------------------

Generate a token using your browser, and copy-paste it into this prompt.

Terraform will store the token in plain text in the following file
for use by subsequent commands:
    /home/sammy/.terraform.d/credentials.tfrc.json

Token for app.terraform.io:
  Enter a value:
Paste in the token you’ve copied and confirm with ENTER. Terraform will show a success message:
Output...
                                          -
                                          -----                           -
                                          ---------                      --
                                          ---------  -                -----
                                           ---------  ------        -------
                                             -------  ---------  ----------
                                                ----  ---------- ----------
                                                  --  ---------- ----------
   Welcome to Terraform Cloud!                     -  ---------- -------
                                                      ---  ----- ---
   Documentation: terraform.io/docs/cloud             --------   -
                                                      ----------
                                                      ----------
                                                       ---------
                                                           -----
                                                               -


   New to TFC? Follow these steps to instantly apply an example configuration:

   $ git clone https://github.com/hashicorp/tfc-getting-started.git
   $ cd tfc-getting-started
   $ scripts/setup.sh
You’ve configured your local Terraform installation to access your Terraform Cloud account. You’ll now create a project that deploys a Droplet and configure it to use Terraform Cloud for storing its state.
Setting Up the Project
First, create a directory named terraform-team-cloud where you’ll store the project:
- mkdir ~/terraform-team-cloud
Navigate to it:
- cd ~/terraform-team-cloud
To set up your project, you’ll need to:
- define and configure the
cloudprovider, which interfaces with Terraform Cloud. - require the
digitaloceanprovider to be able to deploy DigitalOcean resources. - define and initialize variables that you’ll use.
You’ll store the provider and module requirements specifications in a file named provider.tf. Create and open it for editing by running:
- nano provider.tf
Add the following lines:
terraform {
  required_providers {
    digitalocean = {
      source = "digitalocean/digitalocean"
      version = "~> 2.0"
    }
  }

  cloud {
    organization = "your_organization_name"

    workspaces {
      name = "your_workspace_name"
    }
  }
}

variable "do_token" {}

provider "digitalocean" {
  token = var.do_token
}
Here, you first specify your Terraform version. Then, you specify the digitalocean provider as required and set the backend to cloud. For the organization and workspaces.name, replace the highlighted values with the names you specified.
Next, you define a variable called do_token, which you pass to the digitalocean provider created after it. You’ve now configured your project to connect to your organization, so save and close the file.
Initialize your project with the following command:
- terraform init
The output will be similar to this:
OutputInitializing Terraform Cloud...

Initializing provider plugins...
- Finding digitalocean/digitalocean versions matching "~> 2.0"...
- Installing digitalocean/digitalocean v2.18.0...
- Installed digitalocean/digitalocean v2.18.0 (signed by a HashiCorp partner, key ID F82037E524B9C0E8)

Partner and community providers are signed by their developers.
If you'd like to know more about provider signing, you can read about it here:
https://www.terraform.io/docs/cli/plugins/signing.html

Terraform has created a lock file .terraform.lock.hcl to record the provider
selections it made above. Include this file in your version control repository
so that Terraform can guarantee to make the same selections by default when
you run "terraform init" in the future.

Terraform Cloud has been successfully initialized!
...
Since the Droplet definition is the same as in the previous project, you can copy it over by running:
- cp ../terraform-team-pg/droplets.tf .
Finally, you’ll define the variable values. The cloud provider does not support passing in values to variables through the command line, so you’ll have to pass them in using variable files or set them in Terraform Cloud. Terraform reads variable values from files with a filename ending in .auto.tfvars. Create and open a file called vars.auto.tfvars for editing, in which you’ll define the do_token variable:
- nano vars.auto.tfvars
Add the following line, replacing your_do_token with your DigitalOcean API token:
do_token = "your_do_token"
When you’re done, save and close the file. Terraform will automatically read this file when planning actions.
Your project is now complete and set up to use Terraform Cloud as its backend. You’ll now plan and apply the Droplet and review how that reflects in the Cloud app.
Applying the Configuration
In Step 1 of this tutorial, you planned a project using the terraform plan command. Since the Terraform Cloud project has the same resources defined, you can skip planning it again and apply it directly to Terraform Cloud.
You apply the project by running the following command to update it:
- terraform apply
You’ll notice that the output is different from when you use local as your backend:
OutputRunning apply in Terraform Cloud. Output will stream here. Pressing Ctrl-C
will cancel the remote apply if it's still pending. If the apply started it
will stop streaming the logs, but will not stop the apply running remotely.

Preparing the remote apply...

To view this run in a browser, visit:
https://app.terraform.io/app/sammy-shark/sammy/runs/run-euVu9t1yUtuq5sy9

Waiting for the plan to start...

Terraform v1.1.3
on linux_amd64
Configuring remote state backend...
Initializing Terraform configuration...

Terraform used the selected providers to generate the following execution
plan. Resource actions are indicated with the following symbols:
  + create

Terraform will perform the following actions:

  # digitalocean_droplet.web will be created
  + resource "digitalocean_droplet" "web" {
      + backups              = false
      + created_at           = (known after apply)
      + disk                 = (known after apply)
      + graceful_shutdown    = false
      + id                   = (known after apply)
      + image                = "ubuntu-20-04-x64"
      + ipv4_address         = (known after apply)
      + ipv4_address_private = (known after apply)
      + ipv6                 = false
      + ipv6_address         = (known after apply)
      + locked               = (known after apply)
      + memory               = (known after apply)
      + monitoring           = false
      + name                 = "web-1"
      + price_hourly         = (known after apply)
      + price_monthly        = (known after apply)
      + private_networking   = (known after apply)
      + region               = "fra1"
      + resize_disk          = true
      + size                 = "s-1vcpu-1gb"
      + status               = (known after apply)
      + urn                  = (known after apply)
      + vcpus                = (known after apply)
      + volume_ids           = (known after apply)
      + vpc_uuid             = (known after apply)
    }

Plan: 1 to add, 0 to change, 0 to destroy.
...
When using the cloud backend, Terraform is not planning or applying configuration from the local machine. Instead, it delegates those tasks to Terraform Cloud, and only streams the output to the console in real time.
Enter yes when prompted. Terraform will soon finish applying the configuration, and you can navigate to the workspace on the Terraform Cloud website to find that it has applied a new action.

You can now destroy the deployed resources by running the following:
- terraform destroy
In this section, you’ve connected your project to Terraform Cloud, making the state of your project accessible to your team in a central place. This allows the state to be shared and synchronized for everyone with access to the project, leading to a smoother experience.
Conclusion
In this tutorial, you’ve used two different backends: Terraform Cloud, which is Hashicorp’s managed cloud offering for Terraform; and pg, which allows you to store the project’s state in a PostgreSQL database. You used a managed PostgreSQL database from DigitalOcean, which you can provision and use with Terraform within minutes.
For more information about the features of Terraform Cloud, visit the official docs.
This tutorial is part of the How To Manage Infrastructure with Terraform series. The series covers a number of Terraform topics, from installing Terraform for the first time to managing complex projects.
Thanks for learning with the DigitalOcean Community. Check out our offerings for compute, storage, networking, and managed databases.
Tutorial Series: How To Manage Infrastructure with Terraform
Terraform is a popular open source Infrastructure as Code (IAC) tool that automates provisioning of your infrastructure in the cloud and manages the full lifecycle of all deployed resources, which are defined in source code. Its resource-managing behavior is predictable and reproducible, so you can plan the actions in advance and reuse your code configurations for similar infrastructure.
In this series, you will build out examples of Terraform projects to gain an understanding of the IAC approach and how it’s applied in practice to facilitate creating and deploying reusable and scalable infrastructure architectures.
Browse Series: 12 tutorials
About the author(s)
Expert in cloud topics including Kafka, Kubernetes, and Ubuntu.
Former Senior Technical Editor at DigitalOcean, with a strong focus on DevOps and System Administration content. Areas of expertise include Terraform, PyTorch, Python, and Django.
Still looking for an answer?
This textbox defaults to using Markdown to format your answer.
You can type !ref in this text area to quickly search our full set of tutorials, documentation & marketplace offerings and insert the link!
 This work is licensed under a Creative Commons Attribution-NonCommercial- ShareAlike 4.0 International License.
Become a contributor for community
Get paid to write technical tutorials and select a tech-focused charity to receive a matching donation.

DigitalOcean Documentation
Full documentation for every DigitalOcean product.

Resources for startups and AI-native businesses
The Wave has everything you need to know about building a business, from raising funding to marketing your product.
The developer cloud
Scale up as you grow — whether you're running one virtual machine or ten thousand.

Start building today
From GPU-powered inference and Kubernetes to managed databases and storage, get everything you need to build, scale, and deploy intelligent applications.
