
Introduction
Emacs is one of the oldest and most versatile text editors. The GNU Emacs version was originally written in 1984 and is well known for its powerful and rich editing features. It can be customized and extended with different modes, enabling it to be used like an Integrated Development Environment (IDE) for programming languages such as Java, C, and Python.
For those who have used both the Vi and the user-friendly nano text editors, Emacs presents itself as an in-between. Its strengths and features resemble those of Vi, while its menus, help files, and command-keys compare with nano.
In this article, you’ll learn how to install Emacs on an Ubuntu 22.04 server and use it for basic text editing.
Prerequisites
To follow this tutorial, you’ll need an Ubuntu 22.04 server set up with a non-root user with sudo privileges and firewall enabled. You can set this up by following our Initial Server Setup with Ubuntu 22.04 guide.
Step 1 – Installing Emacs
Begin by checking if your system already has Emacs installed:
- emacs
If the program is installed, the editor will start with the default welcome message. If not, you’ll receive this output:
OutputCommand 'emacs' not found, but can be installed with:
sudo apt  install e3           # version 1:2.82+dfsg-2
sudo apt  install emacs-gtk    # version 1:27.1+1-3ubuntu5
sudo apt  install emacs-lucid  # version 1:27.1+1-3ubuntu5
sudo apt  install emacs-nox    # version 1:27.1+1-3ubuntu5
sudo apt  install jove         # version 4.17.3.6-2
See 'snap info emacs' for additional versions.
To install Emacs, use the following command:
- sudo apt install emacs
After installing Emacs on your machine, you’re ready to move on to the next step.
Step 2 – Using the Interface
Start Emacs by issuing the command emacs in your terminal:
- emacs
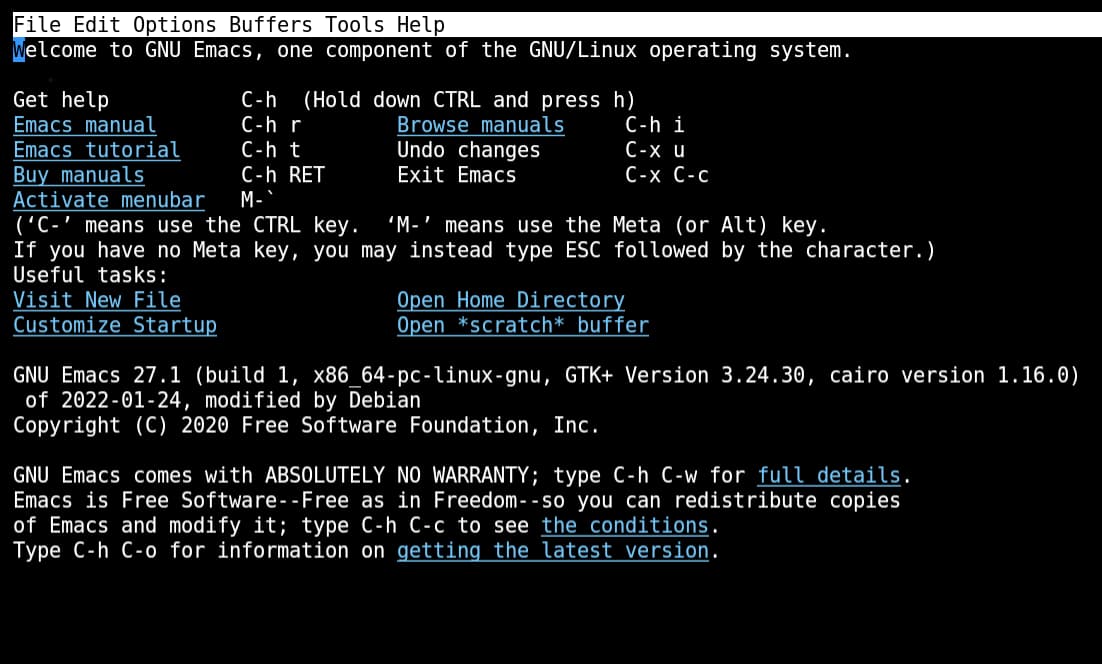
Emacs starts with an empty editing buffer and waits for you to start typing. When Emacs is started without a specified file, the program displays a welcome message:
To start a new file, move the cursor over to the link “Visit New File” by pressing the TAB key and then press ENTER. You can also press CTRL+X,then CTRL+F to create a new file. A prompt appears at the end of your terminal requesting a file name:
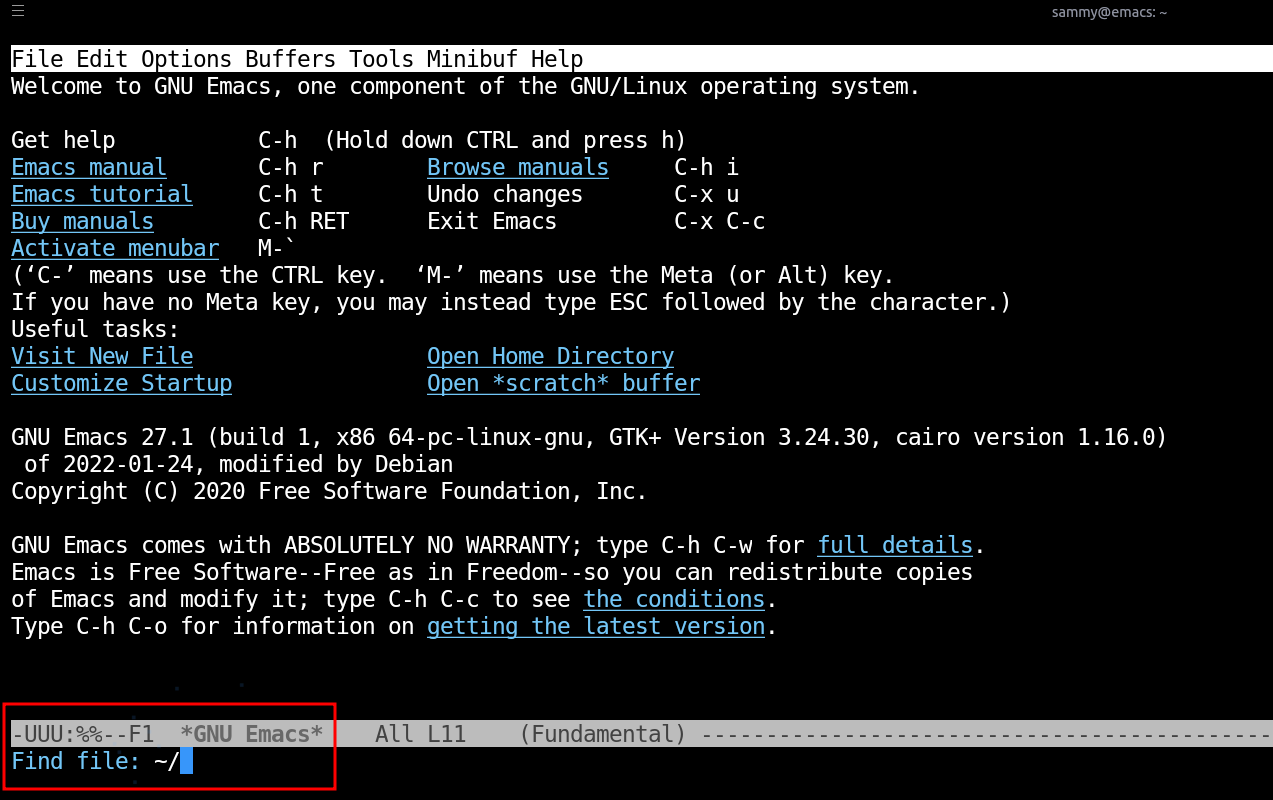
Enter a filename to get started with text editing. In the following example, myfile.txt is used. You can name this file whatever you like. Once you enter your file name, press ENTER to proceed.
An empty file will be ready for text entry:
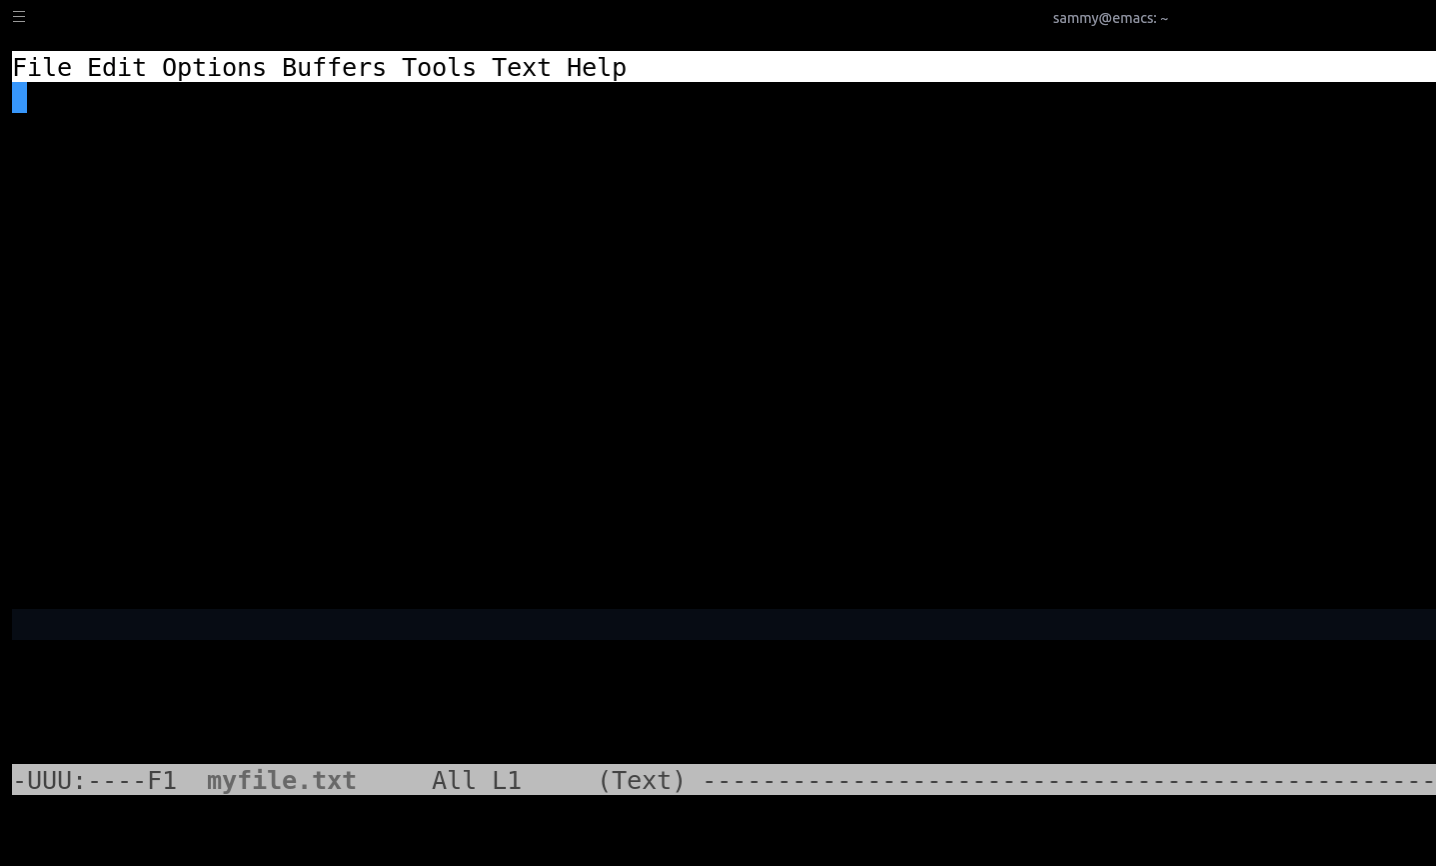
At the top of the screen there is a menu. After the menu, there is a large editing space. This is called the main buffer where you type your text or view the contents of a file.
When Emacs edits an existing file on disk, a copy of that document is first loaded into memory and then displayed in the main editing window. This area in memory is called a buffer. As you work through the document, all the changes you make in the editing space are applied to the buffer, while the original file on disk remains unchanged. Occasionally, Emacs will auto-save in the background, but it’s only when you manually save the document that the changes are written to the disk. The same applies for a new file as well. All changes are made on the buffer until you save it. The main editing space in Emacs is your view to the buffer.
After the main buffer, a highlighted bar of text is displayed near the bottom of the screen. This is called the status bar or the mode line. The text revealed here depends on what mode Emacs is currently in. Among other things, the status bar includes:
-
Name of the current file
-
Current cursor location
-
Current editing mode
-
The status of the file (-- for an unmodified file, ** for a file with un-saved changes and %% for read-only files)
Finally, a single line of space exists after the status bar where the screen ends. In this example, it’s showing the text “(New File)”. This area is called the mini buffer. Emacs is a command driven tool and the mini buffer is your main point of interaction. This is where Emacs prompts you for command inputs and reveals output.
The text-based version of Emacs treats windows differently from its GUI-based version. Unlike GUI-based applications, text-based Emacs windows don’t pop out as they can’t physically do so in a terminal or console session. When Emacs needs to start a new window its main buffer is split into two parts, like having two frames in a browser. The top half shows the main buffer and the bottom half displays the new content. An example of Emacs spawning a new window is when you are accessing its help files or tutorials.
Accessing the Menus
When Emacs starts, it usually takes up the whole screen. Most of its functions are accessible from a menu bar located at the top of the screen.
Unlike GUI-based programs, text-based menus can’t be dropped down by a mouse click. In fact, you can’t highlight and scroll through the menus with a shortcut key.
To access the menus, press the F10 key. This opens another window under the main buffer, and displays a list of keys to access the menu items. The mini buffer will prompt you to enter the required key. Once you press that key, the contents of the new window will change, reflecting the next level of options.
To exit the menus, no matter how deep you are in, press the ESC key three times. This typically closes the menu window and takes you back into the main buffer.
Here are some of the options available from the Tools menu:
- Calendar
- Simple calculator
- Programmable calculator
- Searching a directory
- Encrypting and decrypting document
- Send and read e-mails
- Search files using grep
- Spell checking
- Running shell commands and compiling code
- Version control
- Compare and merge files
- Games
Accessing Help & Tutorials
Emacs has an extensive help system along with tutorials. To access it, you can either use the menu by pressing F10 and press the RIGHT or LEFT arrow keys to select Help, or press the CTRL+H then a corresponding key. For example, you can enter one of the following keys after pressing CTRL+H to review FAQs, tutorials, news, and other topics:
tto enter an Emacs TutorialCTRL+Ffor an FAQCTRL+Pto learn about known bugs and problemsCTRL+Rto read the Emacs ManualCTRL+Eto find extra packages
Step 3 – Using Command Keys
Now that you are familiar with the user interface, you can start familiarizing yourself with Emacs’ command keys. When you open a file, you can start typing and issuing commands at the same time.
Command functions usually involve two or three keys. The most common is the CTRL key, followed by the ALT or ESC key. CTRL is shown in short form as “C” within the Emacs environment. Notes within Emacs like, C-x C-c, means that you press the CTRL+X keys together, then press CTRL+C. Similarly, C-h t, means press CTRL+H together, then release both keys and press t.
ALT and ESC keys are referred to as meta keys in Emacs. On Apple machines, instead of ALT, use the OPTION key. Other keyboards use an EDIT key. Similar to the CTRL key, Emacs uses multi-key functions with the meta key. For example, a notation like M-x means that you press ALT or OPTION and x together. Likewise, you could use ESC+X to accomplish the same command.
The ENTER key is shown as RET in Emacs, which is short for return. The ESC key is often shown as E.
The ESC key can be used to back out of a command or prompt. For example, you can press ESC multiple times to exit out of a specific menu. Another way of canceling an operation is by pressing CTRL+G.
Saving and Quitting
Once you have made some changes to your document or written some text, you can save it by pressing CTRL+X, followed by CTRL+S. The mini buffer will output the following message:
OutputWrote /home/sammy/myfile.txt
You can exit out of Emacs by pressing CTRL+X, then CTRL+C.
If it didn’t manually save the file before exiting out, you’ll receive this message:
OutputSave file /home/sammy/myfile.txt? (y, n, !, ., q, C-r, C-f, d or C-h)
Press Y to save the file.
If you press N for no, you’ll receive this message:
OutputModified buffers exist; exit anyway? (yes or no)
Enter yes to exit out without saving.
Navigating Text
Navigating through a long document or help topic can be a tedious task. Fortunately, in Emacs there are multiple ways to navigate a file.
Here is a list of some common navigation functions:
| To perform this function | Use these keys |
|---|---|
| Moving to the next line | CTRL+N (N for Next) |
| Moving to the previous line | CTRL+P (P for Previous) |
| Moving one character forward | CTRL+F (F for Forward) |
| Moving one character backward | CTRL+B (B for Backward) |
| Moving one word forward | META+F (F for Forward) |
| Moving one word backward | META+B (B for Backward) |
| Moving to the start of a line | CTRL+A |
| Moving to the end of a line | CTRL+E (E for End) |
| Moving to the start of a sentence | META+A |
| Moving to the end of a sentence | META+E (E for End) |
| Moving one page down | CTRL+V (or PgDn) |
| Moving one page up | META+V (or PgUp) |
| Moving to the beginning of the file | META+< (Alt + Shift + “<”) |
| Moving to the end of the file | META+> (Alt + Shift + “>”) |
Remember that META means you could use any of the following keys: ALT, ESC, OPTION, or EDIT.
Step 4 – Editing Functions
If you need to perform more specialized tasks common to popular word processors, like selecting or highlighting a specific section of a text file, you can do that in Emacs.
Marking Text Regions
To mark a text region follow these steps:
-
Move the cursor to the position where you would like the selection to start. You can use any of the methods described previously to move the cursor.
-
Press
CTRL+SPACEBARorCTRL+@to set a mark to begin your text highlighting. The mini buffer will show a status message ofMark Activated. -
Move the cursor to the position where you want the region to end. By using any of the key combinations described before.
-
The text will be highlighted up to the point where your cursor is now located.
-
Press
CTRL-SPACEBARorCTRL+@twice to unmark the highlighted text. The mini buffer will show a status message ofMark Deactivated.
Alternatively, like a word processor, you can hold the SHIFT key and move your cursor with the UP or DOWN arrow keys on your keyboard to make your selection.
If you want to select the paragraph your cursor is currently on, press META+H. Pressing META+h continuously thereafter will select the next paragraphs in your text file.
If you want to select all the contents of the main buffer (i.e. “select all”), press CTRL+X then h.
Cutting, Copying and Pasting Text
Similar to a word processor, you can copy, cut, and paste text:
-
To copy the text you’ve selected, press
META+W. -
To cut the text selection, press
CTRL-W. -
To paste a text selection, press
CTRL-Y.
Deleting Text
Deleting text by using the Backspace and Delete keys work the way you would expect them to.
To delete a whole word quickly, move the cursor to the beginning of a word and press META+D. To delete multiple words, press and hold the META key and continuously press D. Words will be deleted one by one.
To delete a whole line, position the cursor where you want it, then press CTRL+K. This deletes the text right up to the end of the line.
To delete a sentence, press META+K. Please note, however, that Emacs will delete a whole line or more if there aren’t two spaces after the full stop. The two spaces after a full stop is how Emacs determines when a sentence has broken across multiple lines.
Undoing and Redoing
You can undo the last operation by pressing CTRL+X then u. An alternative key combination is CTRL+_ (The key press here would be CTRL, SHIFT, and - to perform an underscore).
To redo your last undo, press CTRL+G, followed by CTRL+_.
Searching and Replacing Text
There are two search directions in Emacs: forward and backward. In forward search, the word you specify will be searched forward from the current cursor position. For backward search, it’s the other way round.
-
Press
CTRL+Sfor forward search. Then input the text you’re searching for in the mini-buffer prompt. -
Press
CTRL+Rfor backward search.
Immediately after you input your search term, Emacs will search for it and highlight any matches it finds in the main buffer.
For example, searching for the word “cat” in a text file will reveal every occurrence in the main buffer as a highlighted text:

To replace text, follow these steps:
-
Press
META+%. The mini buffer will prompt for the text to be searched withQuery replace:. -
Input the text that you’re replacing and press
ENTER. -
The mini buffer will display
Query replace your_search_term with:. -
Enter the word or phrase you want to replace the your_search_term with and press
ENTER. -
Each match will be highlighted, and you will be given a prompt to make a replacement. The mini buffer will ask
Query replacing your_search_word with your_replacement_word: (C-h for help). -
Press
yto replace the current match found. -
Press
nto skip to the next match. -
Press
qto exit without any replacements. -
Press
!to do a global replacement without any prompts. The mini buffer will output this message:replaced number occurrences.
Adding Left, Right and Center Alignment
To center a line, move the cursor to the beginning of that line and press META+O, then META+S.
To justify a selected text region do the following:
-
Highlight the text you wish to justify.
-
Press
META+X. The mini buffer will await a response. -
Input
set-justifiction-and press theTABkey. -
You will be given the following completion options:
set-justification-center,set-justification-left,set-justification-right,set-justification-noneandset-justification-full. -
Complete the justification command, by selecting
set-justification-rightor one of your choice, then pressENTER. -
The selected text will be justified to the direction of your choosing.
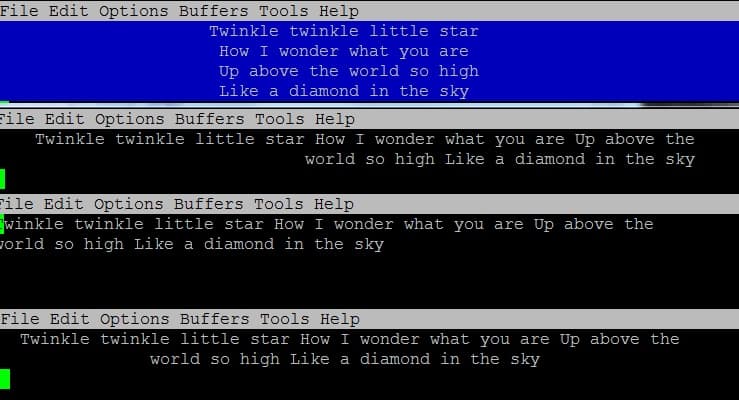
Here is an example of the text assigned to the different justification settings:
Converting Case
You can convert casing with a few different commands. Here’s a list of some command keys:
| To perform this function | Use these keys |
|---|---|
| Capitalizing a word after the cursor | META+C (C for capitalize) |
| Converting a word to lowercase | META+L (L for lowercase) |
| Converting a word to uppercase | META+U (U for uppercase) |
| Converting a paragraph to uppercase | Block select, then CTRL+X CTRL+U |
| Converting a paragraph to lowercase | Block select, then CTRL+X CTRL+L |
If you’re converting a full paragraph or more to uppercase or lowercase, you’ll be given a new window and message:
WindowYou have typed C-x C-l, invoking disabled command downcase-region. It is disabled because new users often find it confusing. Here’s the first part of its description: Convert the region to lowercaselower case. In programs, it wants two arguments.These arguments specify the starting and ending character numbers of the region to operate on. When used as a command, the text between point and the mark is operated on. Do you want to use this command anyway? You can now type 'y' to try it and enable it (no questions if you use it again). 'n' to cancel--don’t try the command, and it remains disabled. 'SPC' to try the command just this once, but leave it disabled. '!' to try it, and enable all disabled commands for this session only.
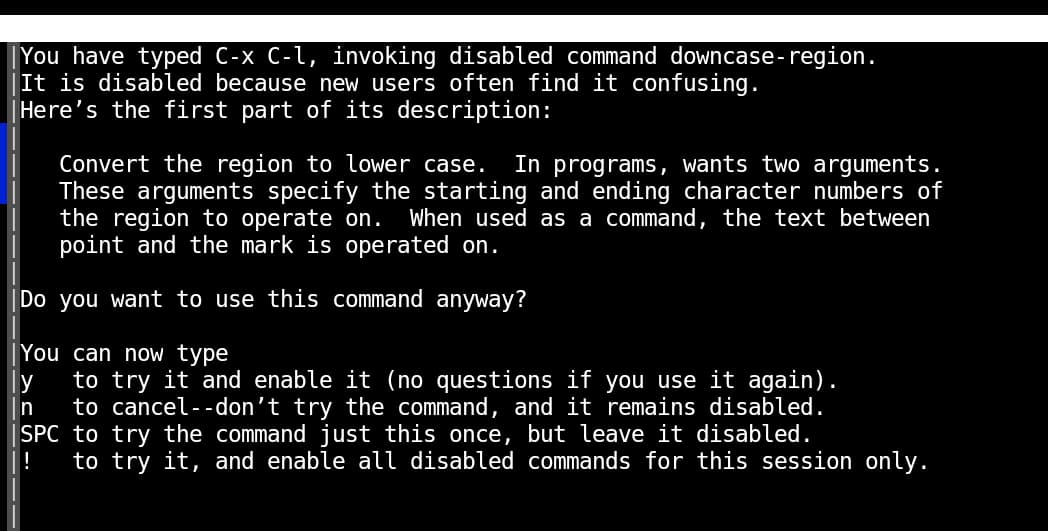
Proceed by pressing the mentioned keys.
Managing Windows
Managing windows within Emacs can help you work more efficiently with your files.
For example, from your main buffer, switch into the Emacs tutorial by pressing CTRL+h then t. Your main buffer window is now the Emacs tutorial. If you wanted to switch back to the myfile.txt buffer, press CTRL+X, then b. This is the switch buffer command. Emacs will prompt you for a buffer name to switch into. Start typing the buffer name,myfile.txt, and press ENTER. This will take you from the Emacs tutorial, to the file you specified.
Step 5 – Entering Modes
Entering a Major Mode
One of the reasons Emacs has been adopted so widely in the UNIX community is due to its ability to assume different modes. A mode can enhance the functionality of Emacs.
Depending on the mode selected, Emacs can be used as a word processor for writing text files, or it can be adapted for advanced tasks like writing Python, C, or Java code. For example, you can change Emacs’ mode to make it work with version control systems, run shell commands, or read man pages.
There are two different types of Emacs modes. One is called the major mode. In major mode, Emacs can be used as an integrated development environment (IDE) for programming or scripting languages. In this mode, the program offers specialized features like color syntax-highlighting, indentation and formatting, language specific menu options, or automatic interfacing with debuggers and compilers.
To demonstrate, you can write a “Hello World” app in Python using Emacs.
Inside your terminal and in your root directory, enter the following commands:
- cd ~
- emacs hello.py
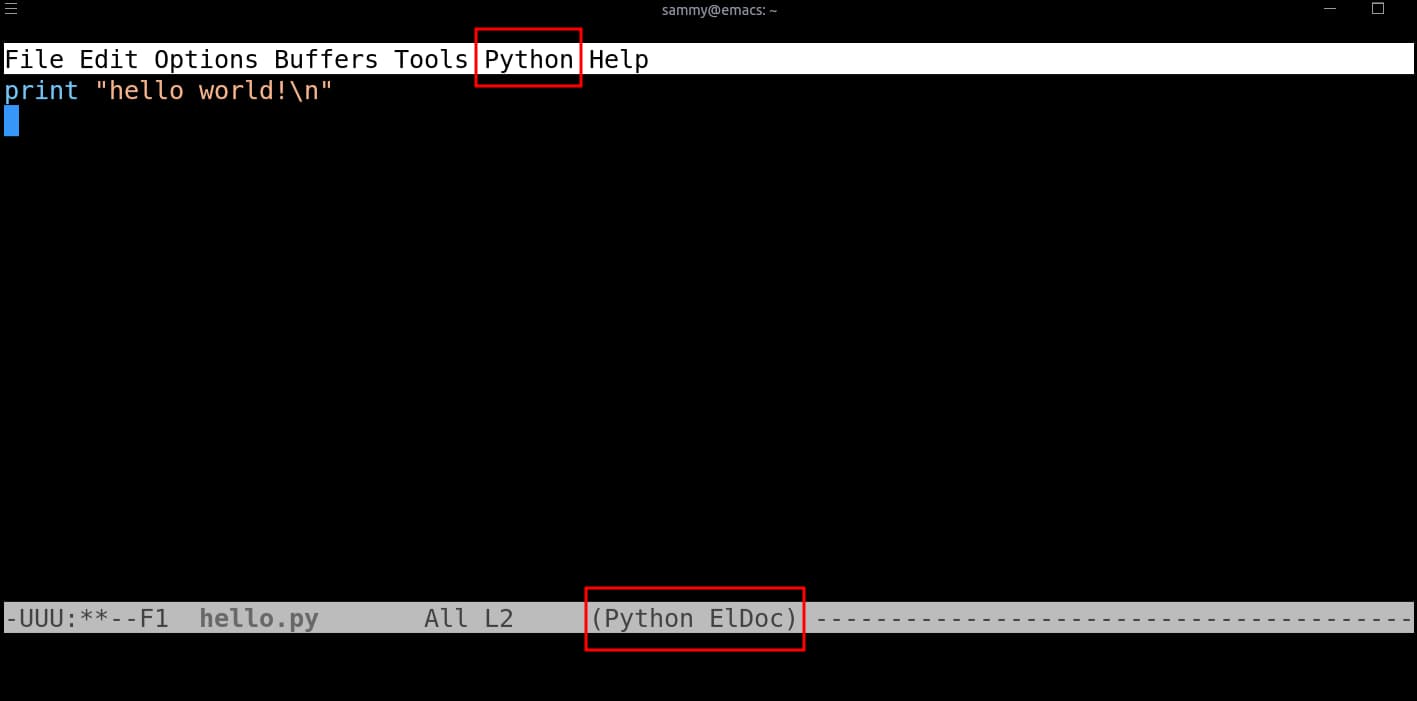
Emacs recognizes the file extension and will start in Python mode. In the main buffer, enter the following Python code:
print "hello world!\n"
The keywords are now indicated with color syntax-highlighting. Also notice that the status line above the mini buffer reveals the mode that you’re currently in. The main menu also has a separate entry specifically for Python:
Save the buffer with CTRL+X CTRL+S.
To change the major mode from within Emacs, press META+X. The mini buffer will wait for your response. You can then enter a different mode. Here are some examples of major modes:
- c-mode
- python-mode
- java-mode
- html-mode
- perl-mode
- shell-script-mode
- text-mode
Entering a Minor Mode
Compared to major modes, minor modes offer more specific features. These features can be tied to a specific major mode, or have a system-wide effect irrespective of the major mode. Also, unlike major modes, there can be multiple minor modes in effect at any one time. Minor modes are like switches: some are enabled by default, some are not. If a minor mode is already on, calling it will switch it off. If it is off, it will be switched back on.
An example of a minor mode is the option for setting justification used in the previous examples.
Another example of a minor mode is the auto-fill-mode. To enter this mode in your Emacs editor, press the META+X key, then enter auto-fill-mode.
This mode enables a line of text to break and wrap to the next line when its length becomes more than 70 characters. Remember that when you invoke a minor mode, it’s very much like a toggle switch. Invoking the same command again will disable the line wrap.
Here are some more examples of minor modes:
-
auto-save-mode: This toggles the property of auto saving that periodically saves the contents of the main buffer behind the scene. -
line-number-mode: This toggles the display of the current line number in the status bar. -
linum-mode: Toggles the display of line numbers along the left edge of the window. -
column-number-mode: Shows the current position of the cursor in status bar. -
overwrite-mode: This is like pressing theINSkey on your keyboard. When switched on, it will overwrite text on the right side of the cursor as you type. -
menu-bar-mode: This can switch the main menu on or off.
Conclusion
In this tutorial, you’ve learned about the various commands, editing features, and modes in Emacs.
To further your understanding of the Emacs editor, the GNU Emacs web page has a wealth of information including links to other resources like Emacs Wiki. You can also read the GNU Emacs manual.
Thanks for learning with the DigitalOcean Community. Check out our offerings for compute, storage, networking, and managed databases.
About the author
Hi, I am Sadequl Hussain. I have been in IT for more than eighteen years and have worked with a number of technologies. Welcome to my page :=)
Still looking for an answer?
This textbox defaults to using Markdown to format your answer.
You can type !ref in this text area to quickly search our full set of tutorials, documentation & marketplace offerings and insert the link!
hai sir .i am anbarasan currently studying in adhi parashai engineering collage,i visit your page it is use full to me .i want more information about emacs .if you free send information in my mail.
I used it for more than 25 years. A great feature is the server mode (M-x server-start). You can even have server mode over network. Try the psychotherapist if you don’t like emacs he will explain you why. Try (M-x doctor) You can play tetris and some other games when coding is boring you too much. You can make macroes save them, name them, replay them… etc… You can launch a shell within emacs and get the results of a command. You can manage files too - try to open a folder…
Just a thing: In terminal mode you might have to disable F10 keybinding setting of your shell terminal otherwise it will have priority over emacs menus.
 This work is licensed under a Creative Commons Attribution-NonCommercial- ShareAlike 4.0 International License.
Become a contributor for community
Get paid to write technical tutorials and select a tech-focused charity to receive a matching donation.

DigitalOcean Documentation
Full documentation for every DigitalOcean product.

Resources for startups and AI-native businesses
The Wave has everything you need to know about building a business, from raising funding to marketing your product.
The developer cloud
Scale up as you grow — whether you're running one virtual machine or ten thousand.

Start building today
From GPU-powered inference and Kubernetes to managed databases and storage, get everything you need to build, scale, and deploy intelligent applications.
