By Keith Thompson and Matt Abrams

The author selected Girls Who Code to receive a donation as part of the Write for DOnations program.
Introduction
Docker can be an efficient way to run web applications in production, but you may want to run multiple applications on the same Docker host. In this situation, you’ll need to set up a reverse proxy. This is because you only want to expose ports 80 and 443 to the rest of the world.
Traefik is a Docker-aware reverse proxy that includes a monitoring dashboard. Traefik v1 has been widely used for a while, and you can follow this earlier tutorial to install Traefik v1). But in this tutorial, you’ll install and configure Traefik v2, which includes quite a few differences.
The biggest difference between Traefik v1 and v2 is that frontends and backends were removed and their combined functionality spread out across routers, middlewares, and services. Previously a backend did the job of making modifications to requests and getting that request to whatever was supposed to handle it. Traefik v2 provides more separation of concerns by introducing middlewares that can modify requests before sending them to a service. Middlewares make it easier to specify a single modification step that might be used by a lot of different routes so that they can be reused (such as HTTP Basic Auth, which you’ll see later). A router can also use many different middlewares.
In this tutorial you’ll configure Traefik v2 to route requests to two different web application containers: a Wordpress container and an Adminer container, each talking to a MySQL database. You’ll configure Traefik to serve everything over HTTPS using Let’s Encrypt.
Prerequisites
To complete this tutorial, you will need the following:
- One Ubuntu 20.04 server with a sudo non-root user and a firewall. You can set this up by following our Ubuntu 20.04 initial server setup guide.
- Docker installed on your server, which you can accomplish by following Steps 1 and 2 of How to Install and Use Docker on Ubuntu 20.04.
- Docker Compose installed using the instructions from Step 1 of How to Install Docker Compose on Ubuntu 20.04.
- A domain and three A records,
db-admin.your_domain,blog.your_domainandmonitor.your_domain. Each should point to the IP address of your server. You can learn how to point domains to DigitalOcean Droplets by reading through DigitalOcean’s Domains and DNS documentation. Throughout this tutorial, substitute your domain foryour_domainin the configuration files and examples.
Step 1 — Configuring and Running Traefik
The Traefik project has an official Docker image, so you will use that to run Traefik in a Docker container.
But before you get your Traefik container up and running, you need to create a configuration file and set up an encrypted password so you can access the monitoring dashboard.
You’ll use the htpasswd utility to create this encrypted password. First, install the utility, which is included in the apache2-utils package:
- sudo apt-get install apache2-utils
Then generate the password with htpasswd. Substitute secure_password with the password you’d like to use for the Traefik admin user:
- htpasswd -nb admin secure_password
The output from the program will look like this:
Outputadmin:$apr1$ruca84Hq$mbjdMZBAG.KWn7vfN/SNK/
You’ll use this output in the Traefik configuration file to set up HTTP Basic Authentication for the Traefik health check and monitoring dashboard. Copy the entire output line so you can paste it later.
To configure the Traefik server, you’ll create two new configuration files called traefik.toml and traefik_dynamic.toml using the TOML format. TOML is a configuration language similar to INI files, but standardized. These files let us configure the Traefik server and various integrations, or providers, that you want to use. In this tutorial, you will use three of Traefik’s available providers: api, docker, and acme. The last of these, acme, supports TLS certificates using Let’s Encrypt.
Create and open traefik.toml using nano or your preferred text editor:
- nano traefik.toml
First, you want to specify the ports that Traefik should listen on using the entryPoints section of your config file. You want two because you want to listen on port 80 and 443. Let’s call these web (port 80) and websecure (port 443).
Add the following configurations:
[entryPoints]
  [entryPoints.web]
    address = ":80"
    [entryPoints.web.http.redirections.entryPoint]
      to = "websecure"
      scheme = "https"

  [entryPoints.websecure]
    address = ":443"
Note that you are also automatically redirecting traffic to be handled over TLS.
Next, configure the Traefik api, which gives you access to both the API and your dashboard interface. The heading of [api] is all that you need because the dashboard is then enabled by default, but you’ll be explicit for the time being.
Add the following code:
...
[api]
  dashboard = true
To finish securing your web requests you want to use Let’s Encrypt to generate valid TLS certificates. Traefik v2 supports Let’s Encrypt out of the box and you can configure it by creating a certificates resolver of the type acme.
Let’s configure your certificates resolver now using the name lets-encrypt:
...
[certificatesResolvers.lets-encrypt.acme]
  email = "your_email@your_domain"
  storage = "acme.json"
  [certificatesResolvers.lets-encrypt.acme.tlsChallenge]
This section is called acme because ACME is the name of the protocol used to communicate with Let’s Encrypt to manage certificates. The Let’s Encrypt service requires registration with a valid email address, so to have Traefik generate certificates for your hosts, set the email key to your email address. You then specify that you will store the information that you will receive from Let’s Encrypt in a JSON file called acme.json.
The acme.tlsChallenge section allows us to specify how Let’s Encrypt can verify that the certificate. You’re configuring it to serve a file as part of the challenge over port 443.
Finally, you need to configure Traefik to work with Docker.
Add the following configurations:
...
[providers.docker]
  watch = true
  network = "web"
The docker provider enables Traefik to act as a proxy in front of Docker containers. You’ve configured the provider to watch for new containers on the web network, which you’ll create soon.
Our final configuration uses the file provider. With Traefik v2, static and dynamic configurations can’t be mixed and matched. To get around this, you will use traefik.toml to define your static configurations and then keep your dynamic configurations in another file, which you will call traefik_dynamic.toml. Here you are using the file provider to tell Traefik that it should read in dynamic configurations from a different file.
Add the following file provider:
- [providers.file]
- filename = "traefik_dynamic.toml"
Your completed traefik.toml will look like this:
[entryPoints]
[entryPoints.web]
address = ":80"
[entryPoints.web.http.redirections.entryPoint]
to = "websecure"
scheme = "https"
[entryPoints.websecure]
address = ":443"
[api]
dashboard = true
[certificatesResolvers.lets-encrypt.acme]
email = "your_email@your_domain"
storage = "acme.json"
[certificatesResolvers.lets-encrypt.acme.tlsChallenge]
[providers.docker]
watch = true
network = "web"
[providers.file]
  filename = "traefik_dynamic.toml"
Save and close the file.
Now let’s create traefik_dynamic.toml.
The dynamic configuration values that you need to keep in their own file are the middlewares and the routers. To put your dashboard behind a password you need to customize the API’s router and configure a middleware to handle HTTP basic authentication. Let’s start by setting up the middleware.
The middleware is configured on a per-protocol basis and since you’re working with HTTP you’ll specify it as a section chained off of http.middlewares. Next comes the name of your middleware so that you can reference it later, followed by the type of middleware that it is, which will be basicAuth in this case. Let’s call your middleware simpleAuth.
Create and open a new file called traefik_dynamic.toml:
- nano traefik_dynamic.toml
Add the following code. This is where you’ll paste the output from the htpasswd command:
[http.middlewares.simpleAuth.basicAuth]
  users = [
    "admin:$apr1$ruca84Hq$mbjdMZBAG.KWn7vfN/SNK/"
  ]
To configure the router for the api you’ll once again be chaining off of the protocol name, but instead of using http.middlewares, you’ll use http.routers followed by the name of the router. In this case, the api provides its own named router that you can configure by using the [http.routers.api] section. You’ll configure the domain that you plan on using with your dashboard also by setting the rule key using a host match, the entrypoint to use websecure, and the middlewares to include simpleAuth.
Add the following configurations:
...
[http.routers.api]
  rule = "Host(`monitor.your_domain`)"
  entrypoints = ["websecure"]
  middlewares = ["simpleAuth"]
  service = "api@internal"
  [http.routers.api.tls]
    certResolver = "lets-encrypt"
The web entry point handles port 80, while the websecure entry point uses port 443 for TLS/SSL. You automatically redirect all of the traffic on port 80 to the websecure entry point to force secure connections for all requests.
Notice the last three lines here configure a service, enable tls, and configure certResolver to "lets-encrypt". Services are the final step to determining where a request is finally handled. The api@internal service is a built-in service that sits behind the API that you expose. Just like routers and middlewares, services can be configured in this file, but you won’t need to do that to achieve your desired result.
Your completed traefik_dynamic.toml file will look like this:
[http.middlewares.simpleAuth.basicAuth]
  users = [
    "admin:$apr1$ruca84Hq$mbjdMZBAG.KWn7vfN/SNK/"
  ]

[http.routers.api]
  rule = "Host(`monitor.your_domain`)"
  entrypoints = ["websecure"]
  middlewares = ["simpleAuth"]
  service = "api@internal"
  [http.routers.api.tls]
    certResolver = "lets-encrypt"
Save the file and exit the editor.
With these configurations in place, you will now start Traefik.
Step 2 – Running the Traefik Container
In this step you will create a Docker network for the proxy to share with containers. You will then access the Traefik dashboard. The Docker network is necessary so that you can use it with applications that are run using Docker Compose.
Create a new Docker network called web:
- docker network create web
When the Traefik container starts, you will add it to this network. Then you can add additional containers to this network later for Traefik to proxy to.
Next, create an empty file that will hold your Let’s Encrypt information. You’ll share this into the container so Traefik can use it:
- touch acme.json
Traefik will only be able to use this file if the root user inside of the container has unique read and write access to it. To do this, lock down the permissions on acme.json so that only the owner of the file has read and write permission.
- chmod 600 acme.json
Once the file gets passed to Docker, the owner will automatically change to the root user inside the container.
Finally, create the Traefik container with this command:
- docker run -d \
- -v /var/run/docker.sock:/var/run/docker.sock \
- -v $PWD/traefik.toml:/traefik.toml \
- -v $PWD/traefik_dynamic.toml:/traefik_dynamic.toml \
- -v $PWD/acme.json:/acme.json \
- -p 80:80 \
- -p 443:443 \
- --network web \
- --name traefik \
- traefik:v2.2
This command is a little long. Let’s break it down.
You use the -d flag to run the container in the background as a daemon. You then share your docker.sock file into the container so that the Traefik process can listen for changes to containers. You also share the traefik.toml and traefik_dynamic.toml configuration files into the container, as well as acme.json.
Next, you map ports :80 and :443 of your Docker host to the same ports in the Traefik container so Traefik receives all HTTP and HTTPS traffic to the server.
You set the network of the container to web, and you name the container traefik.
Finally, you use the traefik:v2.2 image for this container so that you can guarantee that you’re not running a completely different version than this tutorial is written for.
A Docker image’s ENTRYPOINT is a command that always runs when a container is created from the image. In this case, the command is the traefik binary within the container. You can pass additional arguments to that command when you launch the container, but you’ve configured all of your settings in the traefik.toml file.
With the container started, you now have a dashboard you can access to see the health of your containers. You can also use this dashboard to visualize the routers, services, and middlewares that Traefik has registered. You can try to access the monitoring dashboard by pointing your browser to https://monitor.your_domain/dashboard/ (the trailing / is required).
You will be prompted for your username and password, which are admin and the password you configured in Step 1.
Once logged in, you’ll see the Traefik interface:
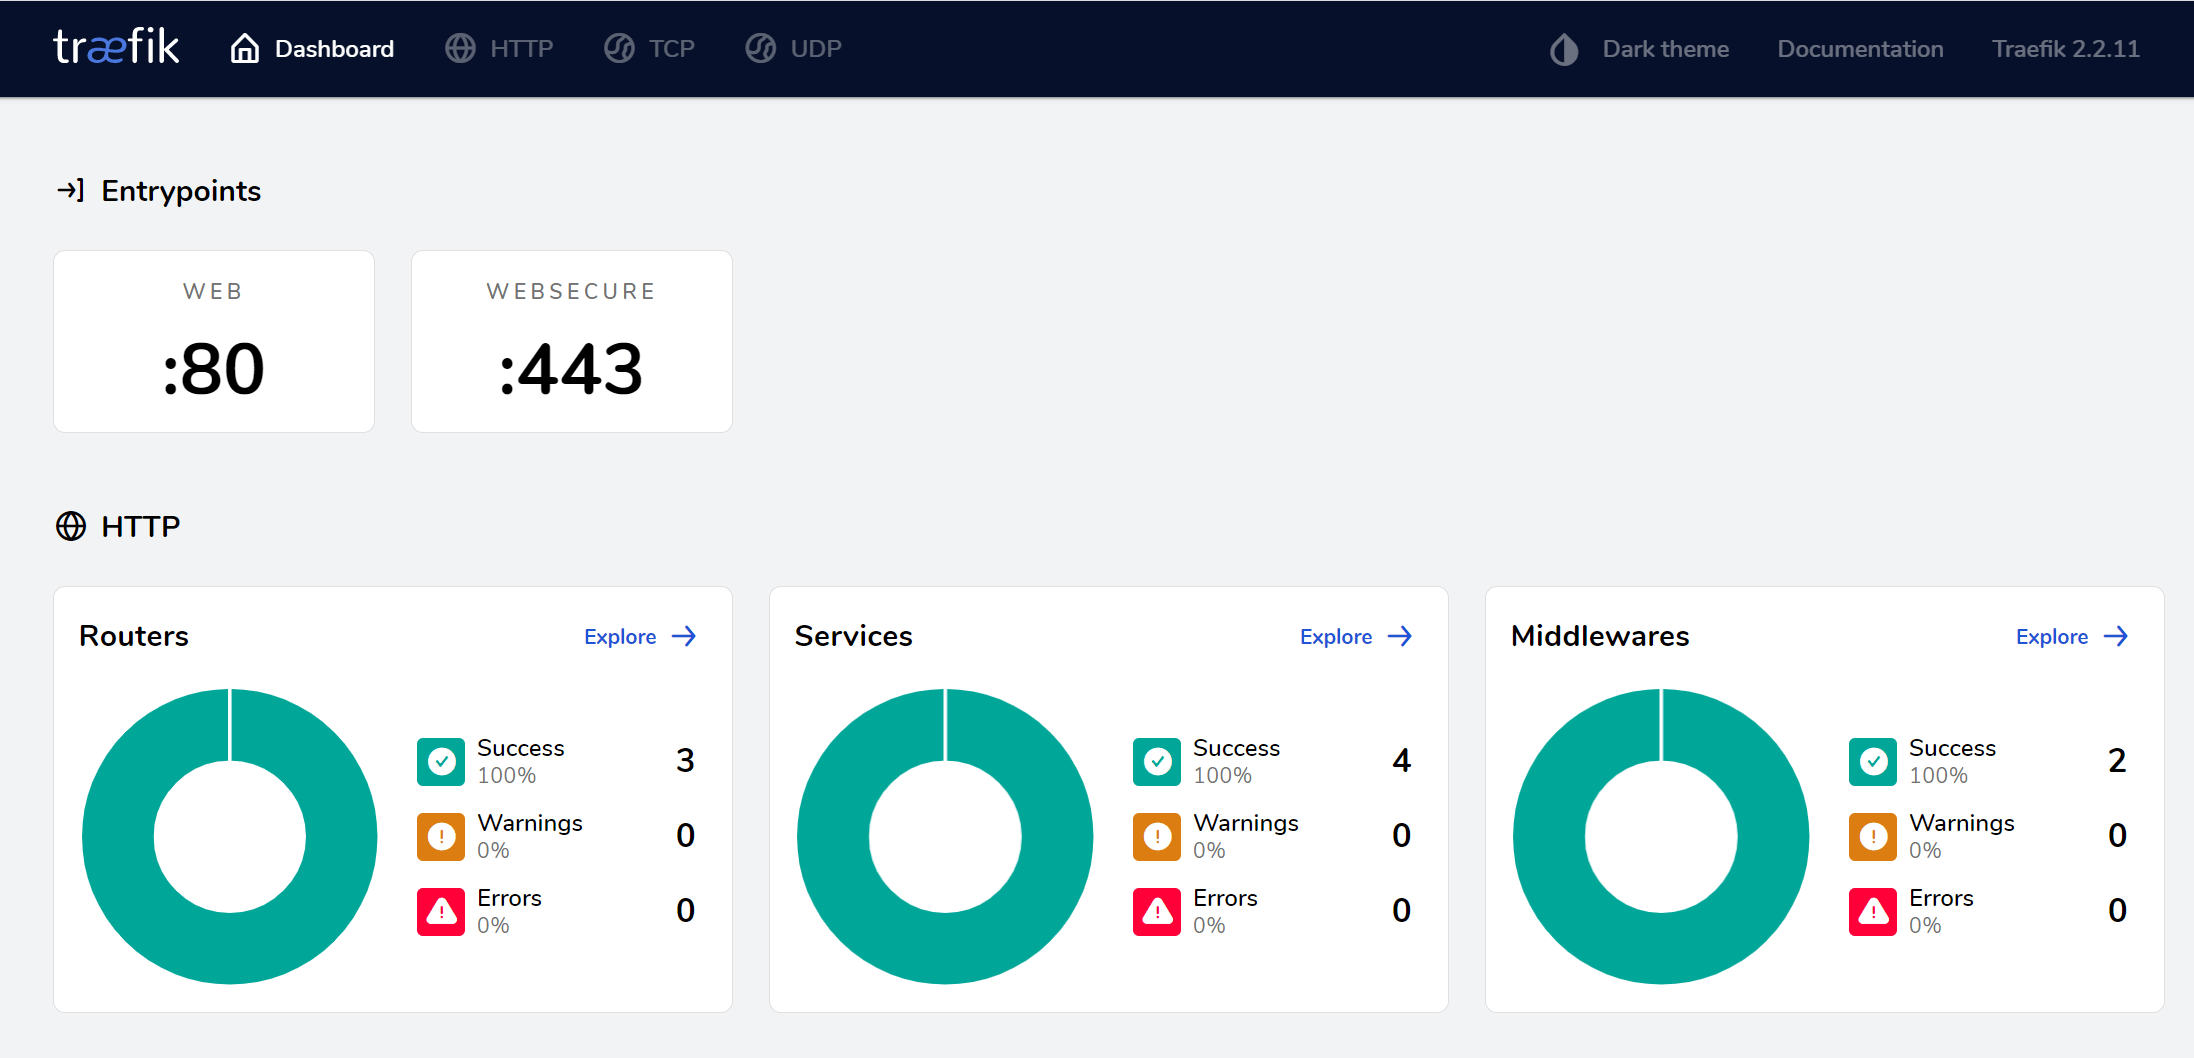
You will notice that there are already some routers and services registered, but those are the ones that come with Traefik and the router configuration that you wrote for the API.
You now have your Traefik proxy running, and you’ve configured it to work with Docker and monitor other containers. In the next step you will start some containers for Traefik to proxy.
Step 3 — Registering Containers with Traefik
With the Traefik container running, you’re ready to run applications behind it. Let’s launch the following containers behind Traefik:
- A blog using the official WordPress image.
- A database management server using the official Adminer image.
You’ll manage both of these applications with Docker Compose using a docker-compose.yml file.
Create and open the docker-compose.yml file in your editor:
- nano docker-compose.yml
Add the following lines to the file to specify the version and the networks you’ll use:
version: "3"

networks:
  web:
    external: true
  internal:
    external: false
You use Docker Compose version 3 because it’s the newest major version of the Compose file format.
For Traefik to recognize your applications, they must be part of the same network, and since you created the network manually, you pull it in by specifying the network name of web and setting external to true. Then you define another network so that you can connect your exposed containers to a database container that you won’t expose through Traefik. You’ll call this network internal.
Next, you’ll define each of your services, one at a time. Let’s start with the blog container, which you’ll base on the official WordPress image. Add this configuration to the bottom of the file:
...

services:
  blog:
    image: wordpress:4.9.8-apache
    environment:
      WORDPRESS_DB_PASSWORD:
    labels:
      - traefik.http.routers.blog.rule=Host(`blog.your_domain`)
      - traefik.http.routers.blog.tls=true
      - traefik.http.routers.blog.tls.certresolver=lets-encrypt
      - traefik.port=80
    networks:
      - internal
      - web
    depends_on:
      - mysql
The environment key lets you specify environment variables that will be set inside of the container. By not setting a value for WORDPRESS_DB_PASSWORD, you’re telling Docker Compose to get the value from your shell and pass it through when you create the container. You will define this environment variable in your shell before starting the containers. This way you don’t hard-code passwords into the configuration file.
The labels section is where you specify configuration values for Traefik. Docker labels don’t do anything by themselves, but Traefik reads these so it knows how to treat containers. Here’s what each of these labels does:
traefik.http.routers.adminer.rule=Host(```blog.your_domain```)creates a new router for your container and then specifies the routing rule used to determine if a request matches this container.traefik.routers.custom_name.tls=truespecifies that this router should use TLS.traefik.routers.custom_name.tls.certResolver=lets-encryptspecifies that the certificates resolver that you created earlier calledlets-encryptshould be used to get a certificate for this route.traefik.portspecifies the exposed port that Traefik should use to route traffic to this container.
With this configuration, all traffic sent to your Docker host on port 80 or 443 with the domain of blog.your_domain will be routed to the blog container.
You assign this container to two different networks so that Traefik can find it via the web network and it can communicate with the database container through the internal network.
Lastly, the depends_on key tells Docker Compose that this container needs to start after its dependencies are running. Since WordPress needs a database to run, you must run your mysql container before starting your blog container.
Next, configure the MySQL service:
services:
...
  mysql:
    image: mysql:5.7
    environment:
      MYSQL_ROOT_PASSWORD:
    networks:
      - internal
    labels:
      - traefik.enable=false
You’re using the official MySQL 5.7 image for this container. You’ll notice that you’re once again using an environment item without a value. The MYSQL_ROOT_PASSWORD and WORDPRESS_DB_PASSWORD variables will need to be set to the same value to make sure that your WordPress container can communicate with the MySQL. You don’t want to expose the mysql container to Traefik or the outside world, so you’re only assigning this container to the internal network. Since Traefik has access to the Docker socket, the process will still expose a router for the mysql container by default, so you’ll add the label traefik.enable=false to specify that Traefik should not expose this container.
Finally, define the Adminer container:
services:
...
  adminer:
    image: adminer:4.6.3-standalone
    labels:
      - traefik.http.routers.adminer.rule=Host(`db-admin.your_domain`)
      - traefik.http.routers.adminer.tls=true
      - traefik.http.routers.adminer.tls.certresolver=lets-encrypt
      - traefik.port=8080
    networks:
      - internal
      - web
    depends_on:
      - mysql
This container is based on the official Adminer image. The network and depends_on configuration for this container exactly match what you’re using for the blog container.
The line traefik.http.routers.adminer.rule=Host(``` db-admin.your_domain ```) tells Traefik to examine the host requested. If it matches the pattern of db-admin.your_domain, Traefik will route the traffic to the adminer container over port 8080.
Your completed docker-compose.yml file will look like this:
version: "3"

networks:
  web:
    external: true
  internal:
    external: false

services:
  blog:
    image: wordpress:4.9.8-apache
    environment:
      WORDPRESS_DB_PASSWORD:
    labels:
      - traefik.http.routers.blog.rule=Host(`blog.your_domain`)
      - traefik.http.routers.blog.tls=true
      - traefik.http.routers.blog.tls.certresolver=lets-encrypt
      - traefik.port=80
    networks:
      - internal
      - web
    depends_on:
      - mysql

  mysql:
    image: mysql:5.7
    environment:
      MYSQL_ROOT_PASSWORD:
    networks:
      - internal
    labels:
      - traefik.enable=false

  adminer:
    image: adminer:4.6.3-standalone
    labels:
    labels:
      - traefik.http.routers.adminer.rule=Host(`db-admin.your_domain`)
      - traefik.http.routers.adminer.tls=true
      - traefik.http.routers.adminer.tls.certresolver=lets-encrypt
      - traefik.port=8080
    networks:
      - internal
      - web
    depends_on:
      - mysql
Save the file and exit the text editor.
Next, set values in your shell for the WORDPRESS_DB_PASSWORD and MYSQL_ROOT_PASSWORD variables:
- export WORDPRESS_DB_PASSWORD=secure_database_password
- export MYSQL_ROOT_PASSWORD=secure_database_password
Substitute secure_database_password with your desired database password. Remember to use the same password for both WORDPRESS_DB_PASSWORD and MYSQL_ROOT_PASSWORD.
With these variables set, run the containers using docker-compose:
- docker-compose up -d
Now watch the Traefik admin dashboard while it populates.
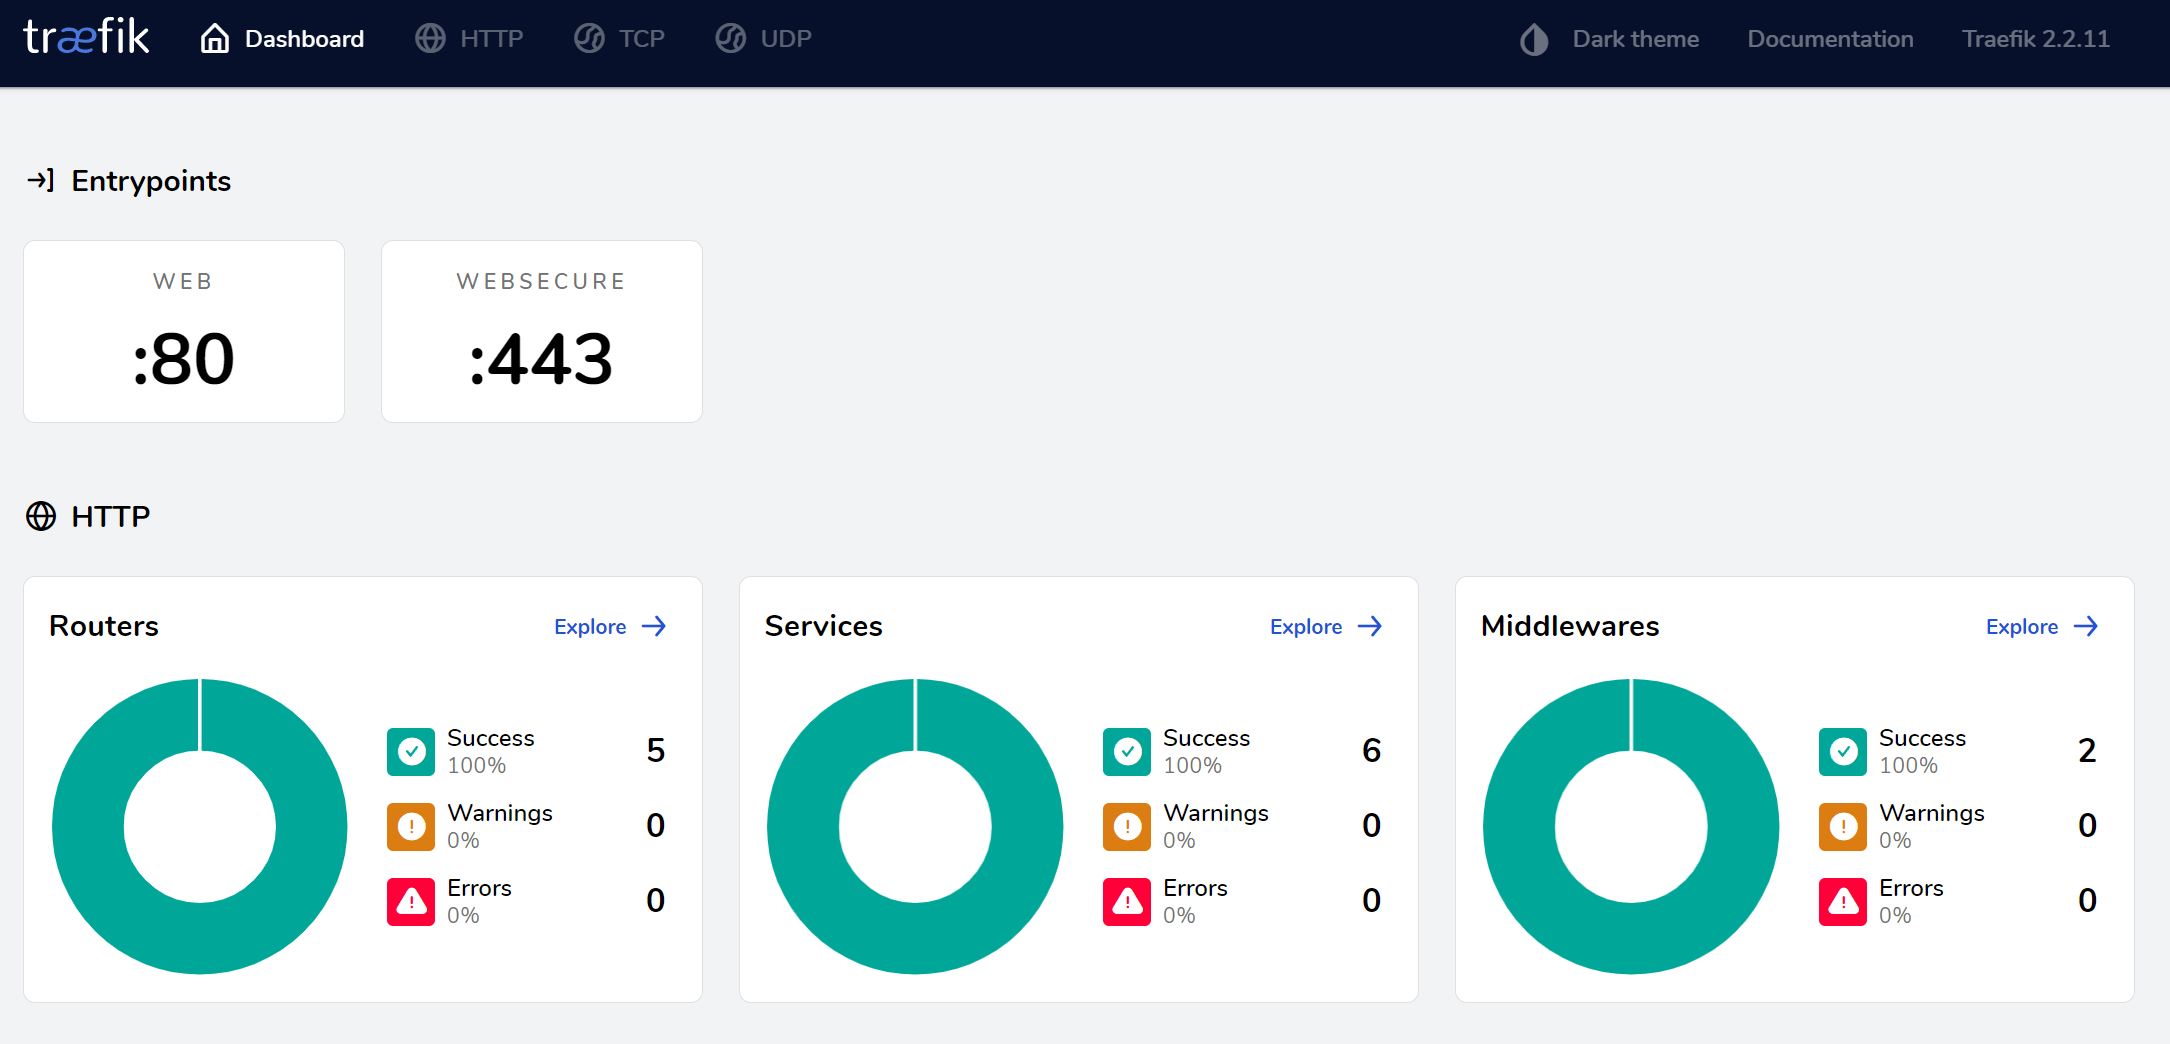
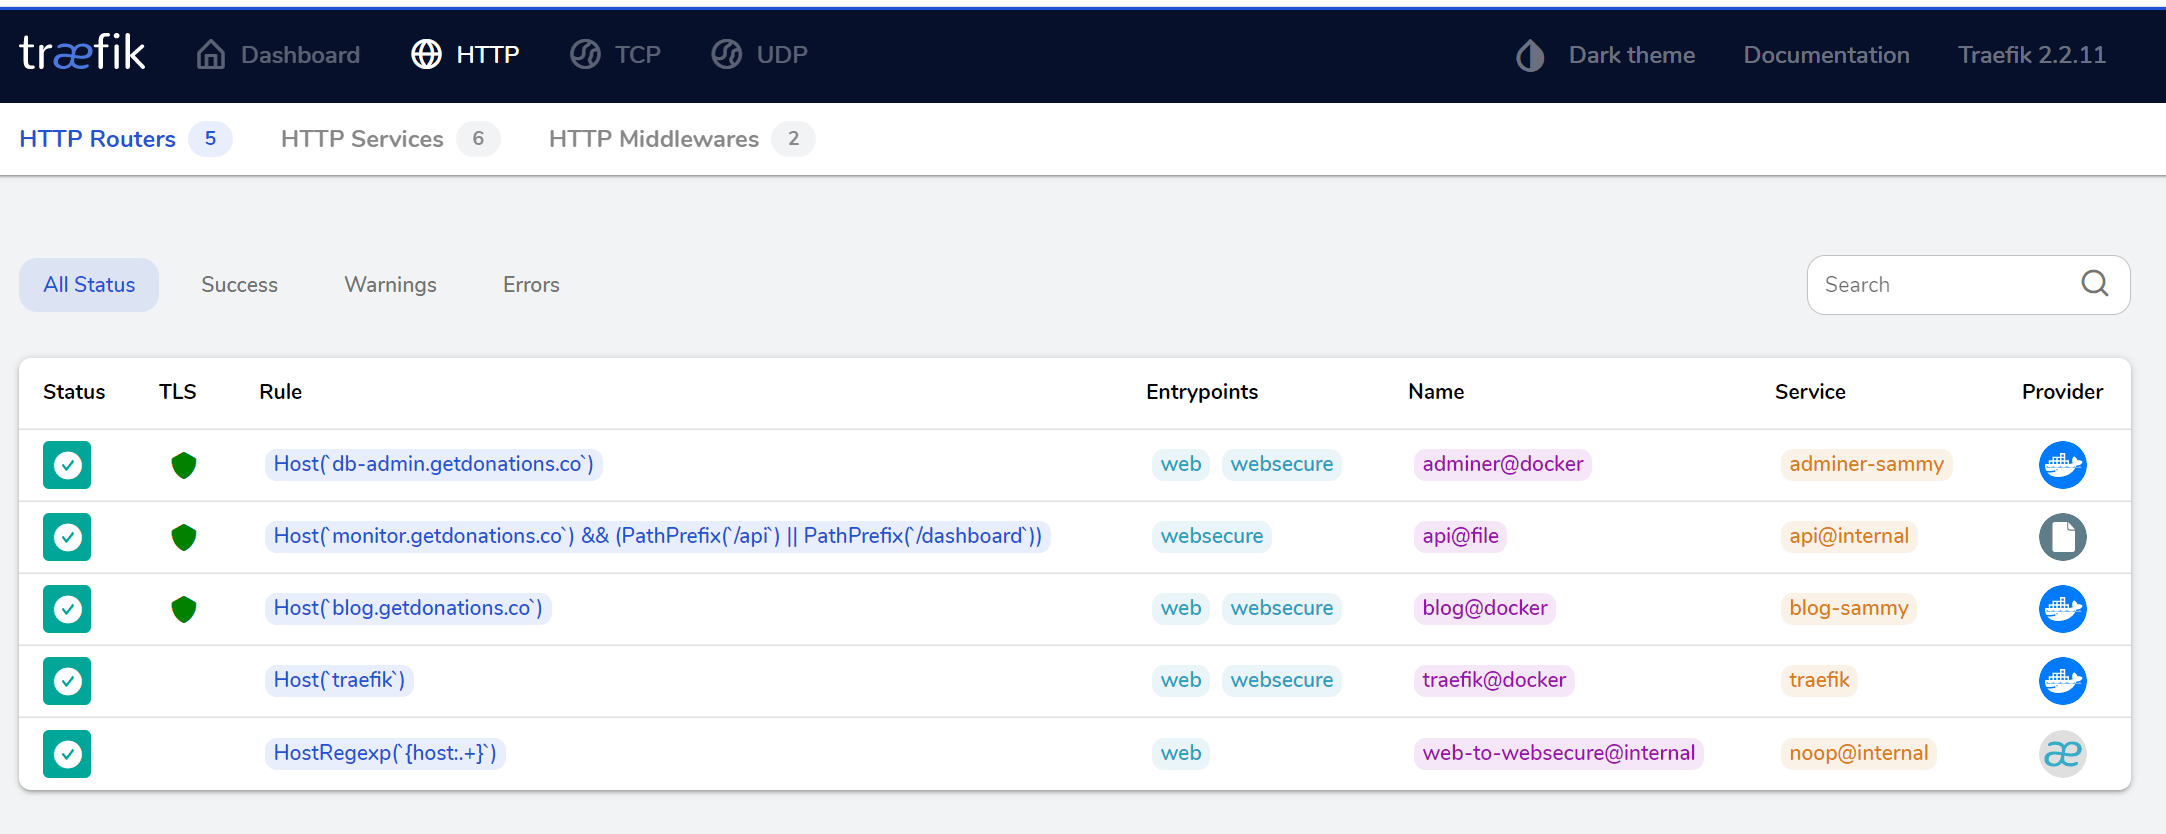
If you explore the Routers section you will find routers for adminer and blog configured with TLS:
Navigate to blog.your_domain, substituting your_domain with your domain. You’ll be redirected to a TLS connection and you can now complete the WordPress setup:
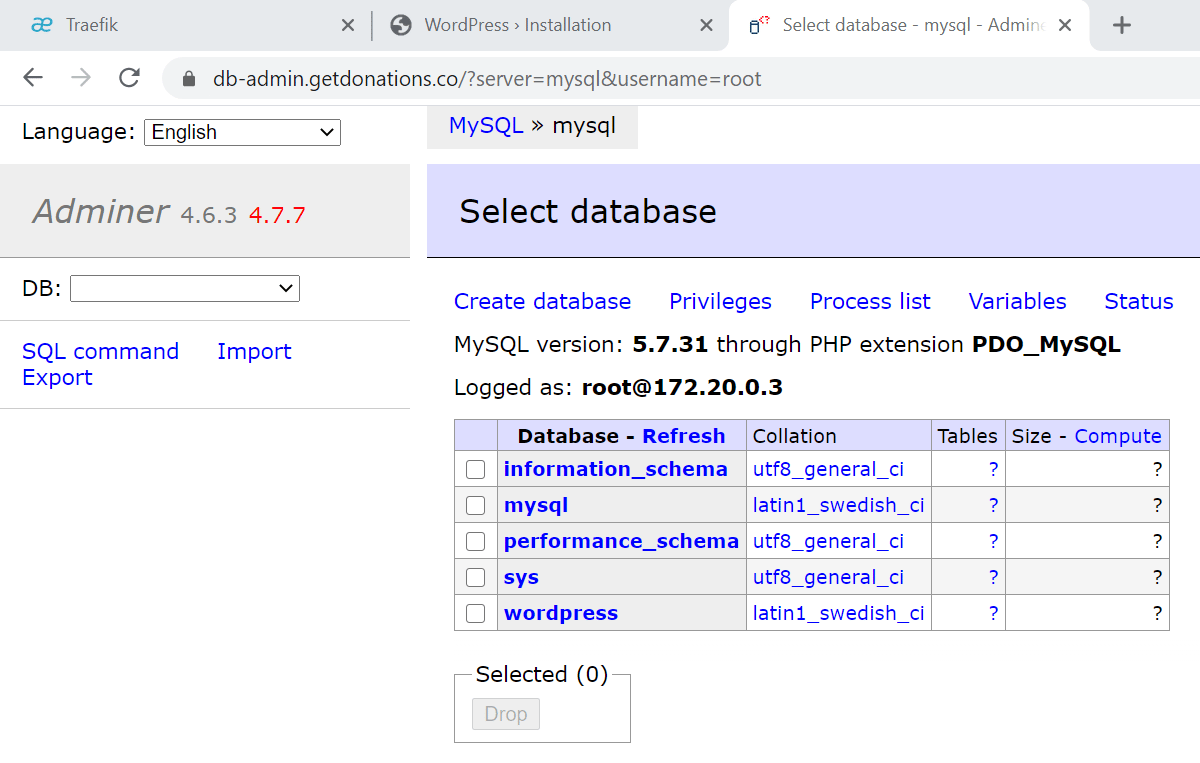
Now access Adminer by visiting db-admin.your_domain in your browser, again substituting your_domain with your domain. The mysql container isn’t exposed to the outside world, but the adminer container has access to it through the internal Docker network that they share using the mysql container name as a hostname.
On the Adminer login screen, enter root for Username, enter mysql for Server, and enter the value you set for MYSQL_ROOT_PASSWORD for the Password. Leave Database empty. Now press Login.
Once logged in, you’ll see the Adminer user interface.
Both sites are now working, and you can use the dashboard at monitor.your_domain to keep an eye on your applications.
Conclusion
In this tutorial, you configured Traefik v2 to proxy requests to other applications in Docker containers.
Traefik’s declarative configuration at the application container level makes it easy to configure more services, and there’s no need to restart the traefik container when you add new applications to proxy traffic to since Traefik notices the changes immediately through the Docker socket file it’s monitoring.
To learn more about what you can do with Traefik v2, head over to the official Traefik documentation.
Thanks for learning with the DigitalOcean Community. Check out our offerings for compute, storage, networking, and managed databases.
About the author(s)
Training Architect at A Cloud Guru by day. Programming content creator (as @coderjourney) by night.
Supporting the open-source community one tutorial at a time. Former Technical Editor at DigitalOcean. Expertise in topics including Ubuntu 22.04, Ubuntu 20.04, CentOS, and more.
Still looking for an answer?
This textbox defaults to using Markdown to format your answer.
You can type !ref in this text area to quickly search our full set of tutorials, documentation & marketplace offerings and insert the link!
Great guide, thanks! Perfectly timed as well.
The docker-compose snippet for wordpress has a line with: - traefik.http.routers.blog.tls.cert-provider=lets-encrypt while the full version of the file has: - traefik.http.routers.blog.tls.certresolver=lets-encrypt
The later one seems to be the correct one.
I felt I needed to take the time to let you know that after countless tutorials, trial and error (thank glob for click to redeploy any OS vps’s ammarite?) THIS tutorial is what finally brought me into the light. THANK you for your time and effort, as well as the patience and ability to write out a wonderfully formatted tutorial. I appreciate you.
Best howto about traefik 2 ever. Clear and simple.
To make it even better I will only add a very small intro explaining basic traefik concepts (entrypoints, routers, rules, middleware, services and providers) because they changed a little since version 1… or link documentation where this is explained in detail.
BTW, there is a small error in docker-compose with labels duplicated in the adminer section:
  adminer:
    image: adminer:4.6.3-standalone
    labels:
    labels:
Thanks for sharing!
Great guide, awful timing, had just set up a traefik v1 testserver haha.
One thing I’m wondering is why you’re using a docker run command instead of a nicely setup docker-compose file for the main entry point.
version: '3.3'
services:
    traefik:
        volumes:
            - '/var/run/docker.sock:/var/run/docker.sock'
            - '$PWD/traefik.toml:/traefik.toml'
            - '$PWD/traefik_dynamic.toml:/traefik_dynamic.toml'
            - '$PWD/acme.json:/acme.json'
        ports:
            - '80:80'
            - '443:443'
        network_mode: web
        container_name: traefik
        image: 'traefik:v2.2'
Hey,
can someone tell me how i would reference the basic auth from the dynamic.toml?
I would like to use the same simpleAuth for a different docker compose container.
Thanks in advance!
Nice tutorial! I’ve implemented everything and have a question that may challenge. On the blog container the domain I’m using resolves to 127.0.0.1. This means that https://mydomain.com is resolved within the blog container. This is ok for http but not https as https is managed by Traefik. I think I’ve fixed it by manually editing the hosts file (and pointing my domain to the IP of the Traefik container) but I don’t know if this is the best way or how to do it a ‘docker’ way. Thx
Hey! Awesome post man, I really appreciate you sharing this knowledge with the community. I’ve spent a lot of time trying to make it work in my VPS until I found this post.
I just wanted to ask if there is a way to set a container or app to the default route mydomain.com? I want to have a landing page on mydomain.com and I want to have some other app running on app.mydomain.com.
Should I just set the front end host rule to (mydomain.com)?
Thanks again for this awesome post man, keep it up!
This is a great tutorial however…
am I missing something with the certificate? I’ve followed the instructions exactly but my server is telling my the cert is the default Traefik one and not the LE cert. Do I need to create an account or register an email for it to work properly?
Hi there, I am having trouble getting the dashboard to show. I tripled checked my basic auth cred, but I can’t seem to log in to the dashboard. Any help or pointer would be appreciated, thanks!
 This work is licensed under a Creative Commons Attribution-NonCommercial- ShareAlike 4.0 International License.
Become a contributor for community
Get paid to write technical tutorials and select a tech-focused charity to receive a matching donation.

DigitalOcean Documentation
Full documentation for every DigitalOcean product.

Resources for startups and AI-native businesses
The Wave has everything you need to know about building a business, from raising funding to marketing your product.
The developer cloud
Scale up as you grow — whether you're running one virtual machine or ten thousand.

Start building today
From GPU-powered inference and Kubernetes to managed databases and storage, get everything you need to build, scale, and deploy intelligent applications.
