Not using Ubuntu 18.04?
Choose a different version or distribution.
Introduction
Apache Tomcat is a web server and servlet container that is used to serve Java applications. Tomcat is an open source implementation of the Java Servlet and JavaServer Pages technologies, released by the Apache Software Foundation. This tutorial covers the basic installation and some configuration of the latest release of Tomcat 9 on your Ubuntu 18.04 server.
Prerequisites
Before you begin with this guide, you should have a non-root user with sudo privileges set up on your server. You can learn how to do this by completing our Ubuntu 18.04 initial server setup guide.
Step 1 — Install Java
Tomcat requires Java to be installed on the server so that any Java web application code can be executed. We can satisfy that requirement by installing OpenJDK with apt.
First, update your apt package index:
- sudo apt update
Then install the Java Development Kit package with apt:
- sudo apt install default-jdk
Now that Java is installed, we can create a tomcat user, which will be used to run the Tomcat service.
Step 2 — Create Tomcat User
For security purposes, Tomcat should be run as an unprivileged user (i.e. not root). We will create a new user and group that will run the Tomcat service.
First, create a new tomcat group:
- sudo groupadd tomcat
Next, create a new tomcat user. We’ll make this user a member of the tomcat group, with a home directory of /opt/tomcat (where we will install Tomcat), and with a shell of /bin/false (so nobody can log into the account):
- sudo useradd -s /bin/false -g tomcat -d /opt/tomcat tomcat
Now that our tomcat user is set up, let’s download and install Tomcat.
Step 3 — Install Tomcat
The best way to install Tomcat 9 is to download the latest binary release then configure it manually.
Find the latest version of Tomcat 9 at the Tomcat 9 Downloads page. At the time of writing, the latest version is 9.0.10, but you should use a later stable version if it is available. Under the Binary Distributions section, then under the Core list, copy the link to the “tar.gz”. In most browsers you can do this by right-clicking the link and selecting Copy Link Address or a similar option.
Next, change to the /tmp directory on your server. This is a good directory to download ephemeral items, like the Tomcat tarball, which we won’t need after extracting the Tomcat contents:
- cd /tmp
Use curl to download the link that you copied from the Tomcat website:
- curl -O paste_the_copied_link_here
We will install Tomcat to the /opt/tomcat directory. Create the directory, then extract the archive to it with these commands:
- sudo mkdir /opt/tomcat
- sudo tar xzvf apache-tomcat-*tar.gz -C /opt/tomcat --strip-components=1
Next, we can set up the proper user permissions for our installation.
Step 4 — Update Permissions
The tomcat user that we set up needs to have access to the Tomcat installation. We’ll set that up now.
Change to the directory where we unpacked the Tomcat installation:
- cd /opt/tomcat
Give the tomcat group ownership over the entire installation directory:
- sudo chgrp -R tomcat /opt/tomcat
Next, give the tomcat group read access to the conf directory and all of its contents, and execute access to the directory itself:
- sudo chmod -R g+r conf
- sudo chmod g+x conf
Make the tomcat user the owner of the webapps, work, temp, and logs directories:
- sudo chown -R tomcat webapps/ work/ temp/ logs/
Now that the proper permissions are set up, we can create a systemd service file to manage the Tomcat process.
Step 5 — Create a systemd Service File
We want to be able to run Tomcat as a service, so we will set up systemd service file.
Tomcat needs to know where Java is installed. This path is commonly referred to as “JAVA_HOME”. The easiest way to look up that location is by running this command:
- sudo update-java-alternatives -l
Outputjava-1.11.0-openjdk-amd64 1081 /usr/lib/jvm/java-1.11.0-openjdk-amd64
Your JAVA_HOME is the output from the last column (highlighted in red). Given the example above, the correct JAVA_HOME for this server would be:
JAVA_HOME/usr/lib/jvm/java-1.11.0-openjdk-amd64
Your JAVA_HOME may be different.
With this piece of information, we can create the systemd service file. Open a file called tomcat.service in the /etc/systemd/system directory by typing:
- sudo nano /etc/systemd/system/tomcat.service
Paste the following contents into your service file. Modify the value of JAVA_HOME if necessary to match the value you found on your system. You may also want to modify the memory allocation settings that are specified in CATALINA_OPTS:
[Unit]
Description=Apache Tomcat Web Application Container
After=network.target

[Service]
Type=forking

Environment=JAVA_HOME=/usr/lib/jvm/java-1.11.0-openjdk-amd64
Environment=CATALINA_PID=/opt/tomcat/temp/tomcat.pid
Environment=CATALINA_HOME=/opt/tomcat
Environment=CATALINA_BASE=/opt/tomcat
Environment='CATALINA_OPTS=-Xms512M -Xmx1024M -server -XX:+UseParallelGC'
Environment='JAVA_OPTS=-Djava.awt.headless=true -Djava.security.egd=file:/dev/./urandom'

ExecStart=/opt/tomcat/bin/startup.sh
ExecStop=/opt/tomcat/bin/shutdown.sh

User=tomcat
Group=tomcat
UMask=0007
RestartSec=10
Restart=always

[Install]
WantedBy=multi-user.target
When you are finished, save and close the file.
Next, reload the systemd daemon so that it knows about our service file:
- sudo systemctl daemon-reload
Start the Tomcat service by typing:
- sudo systemctl start tomcat
Double check that it started without errors by typing:
- sudo systemctl status tomcat
Step 6 — Adjust the Firewall and Test the Tomcat Server
Now that the Tomcat service is started, we can test to make sure the default page is available.
Before we do that, we need to adjust the firewall to allow our requests to get to the service. If you followed the prerequisites, you will have a ufw firewall enabled currently.
Tomcat uses port 8080 to accept conventional requests. Allow traffic to that port by typing:
- sudo ufw allow 8080
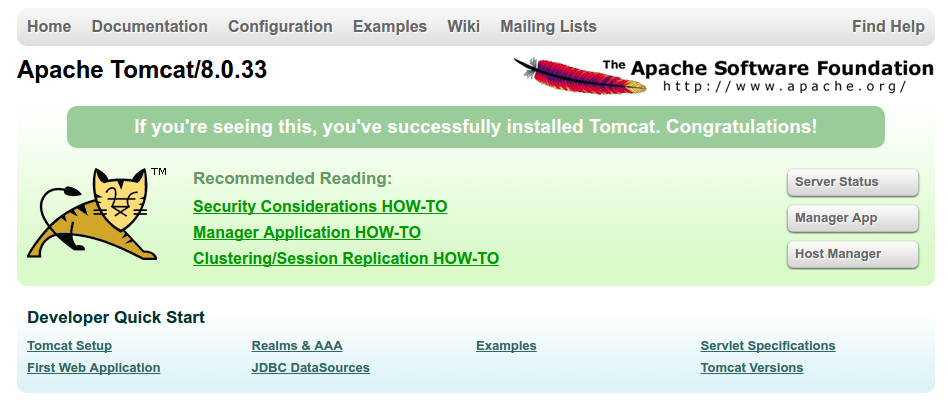
With the firewall modified, you can access the default splash page by going to your domain or IP address followed by :8080 in a web browser:
Open in web browserhttp://server_domain_or_IP:8080
You will see the default Tomcat splash page, in addition to other information. However, if you click the links for the Manager App, for instance, you will be denied access. We can configure that access next.
If you were able to successfully accessed Tomcat, now is a good time to enable the service file so that Tomcat automatically starts at boot:
- sudo systemctl enable tomcat
Step 7 — Configure Tomcat Web Management Interface
In order to use the manager web app that comes with Tomcat, we must add a login to our Tomcat server. We will do this by editing the tomcat-users.xml file:
- sudo nano /opt/tomcat/conf/tomcat-users.xml
You will want to add a user who can access the manager-gui and admin-gui (web apps that come with Tomcat). You can do so by defining a user, similar to the example below, between the tomcat-users tags. Be sure to change the username and password to something secure:
<tomcat-users . . .>
    <user username="admin" password="password" roles="manager-gui,admin-gui"/>
</tomcat-users>
Save and close the file when you are finished.
By default, newer versions of Tomcat restrict access to the Manager and Host Manager apps to connections coming from the server itself. Since we are installing on a remote machine, you will probably want to remove or alter this restriction. To change the IP address restrictions on these, open the appropriate context.xml files.
For the Manager app, type:
- sudo nano /opt/tomcat/webapps/manager/META-INF/context.xml
For the Host Manager app, type:
- sudo nano /opt/tomcat/webapps/host-manager/META-INF/context.xml
Inside, comment out the IP address restriction to allow connections from anywhere. Alternatively, if you would like to allow access only to connections coming from your own IP address, you can add your public IP address to the list:
<Context antiResourceLocking="false" privileged="true" >
  <!--<Valve className="org.apache.catalina.valves.RemoteAddrValve"
         allow="127\.\d+\.\d+\.\d+|::1|0:0:0:0:0:0:0:1" />-->
</Context>
Save and close the files when you are finished.
To put our changes into effect, restart the Tomcat service:
- sudo systemctl restart tomcat
Step 8—Access the Web Interface
Now that we have create a user, we can access the web management interface again in a web browser. Once again, you can get to the correct interface by entering your server’s domain name or IP address followed on port 8080 in your browser:
Open in web browserhttp://server_domain_or_IP:8080
The page you see should be the same one you were given when you tested earlier:
Let’s take a look at the Manager App, accessible via the link or http://server_domain_or_IP:8080/manager/html. You will need to enter the account credentials that you added to the tomcat-users.xml file. Afterwards, you should see a page that looks like this:
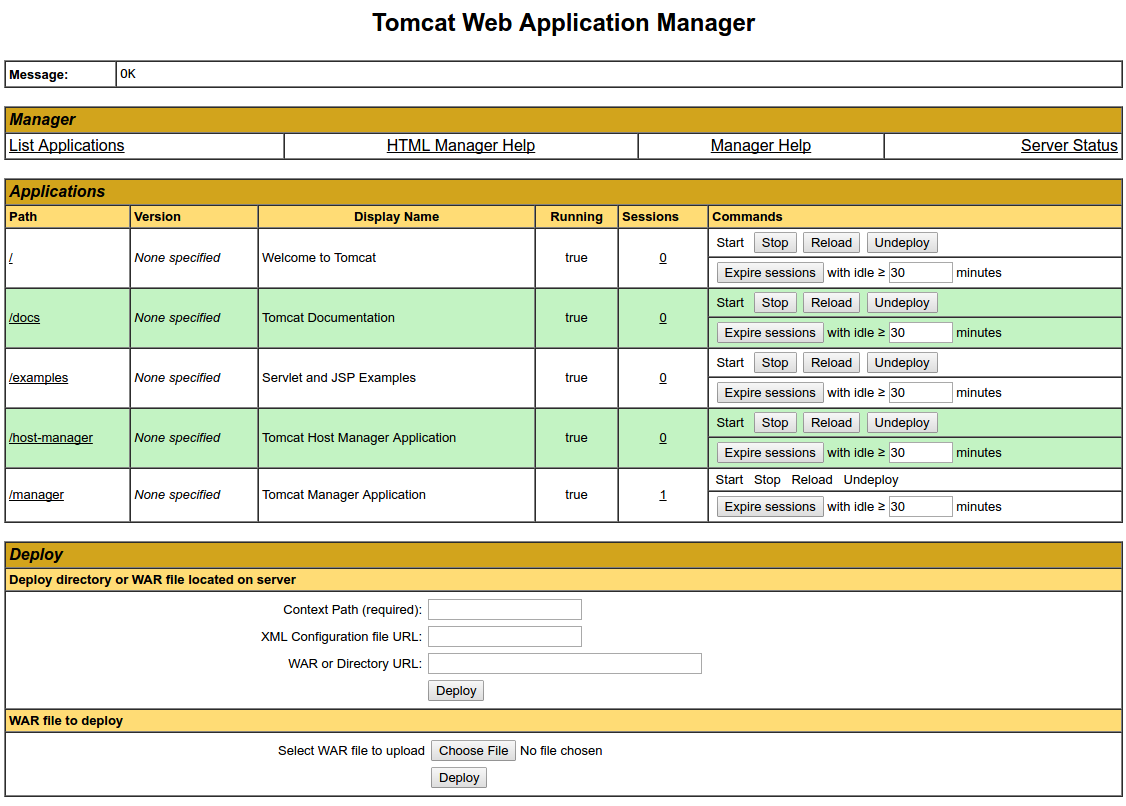
The Web Application Manager is used to manage your Java applications. You can Start, Stop, Reload, Deploy, and Undeploy here. You can also run some diagnostics on your apps (i.e. find memory leaks). Lastly, information about your server is available at the very bottom of this page.
Now let’s take a look at the Host Manager, accessible via the link or http://server_domain_or_IP:8080/host-manager/html/:
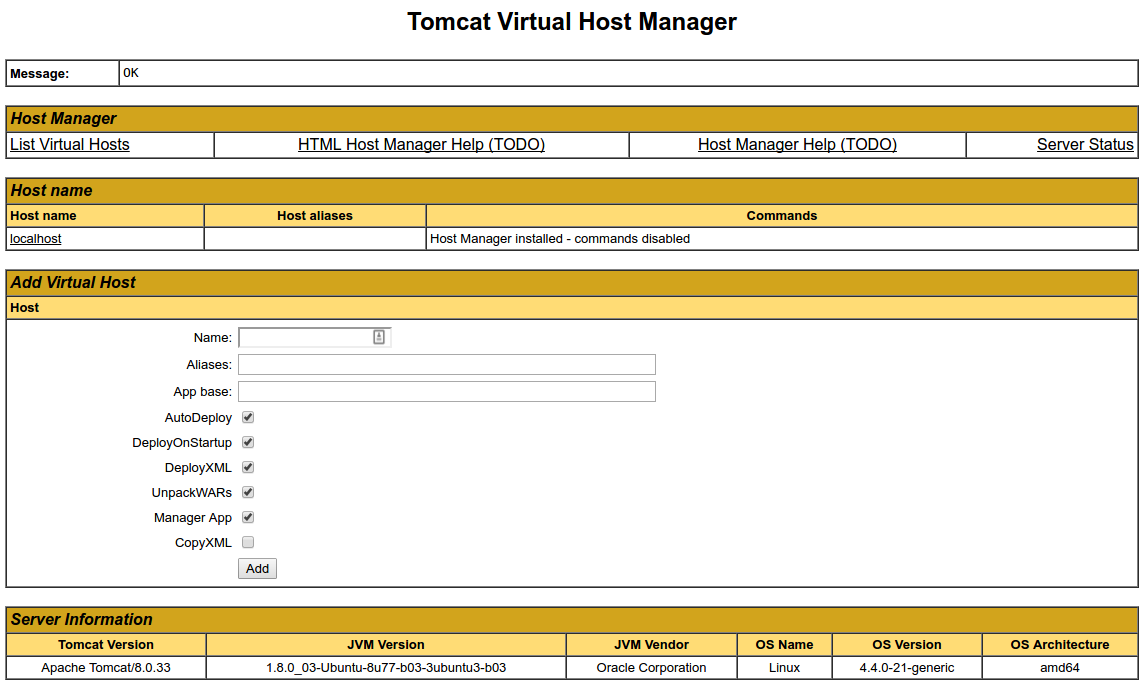
From the Virtual Host Manager page, you can add virtual hosts to serve your applications from.
Conclusion
Your installation of Tomcat is complete! Your are now free to deploy your own Java web applications!
Currently, your Tomcat installation is functional, but entirely unencrypted. This means that all data, including sensitive items like passwords, are sent in plain text that can be intercepted and read by other parties on the internet. In order to prevent this from happening, it is strongly recommended that you encrypt your connections with SSL. You can find out how to encrypt your connections to Tomcat by following this guide (note: this guide covers Tomcat 8 encryption on Ubuntu 16.04).
Thanks for learning with the DigitalOcean Community. Check out our offerings for compute, storage, networking, and managed databases.
About the author
Former Senior Technical Writer at DigitalOcean, specializing in DevOps topics across multiple Linux distributions, including Ubuntu 18.04, 20.04, 22.04, as well as Debian 10 and 11.
Still looking for an answer?
This textbox defaults to using Markdown to format your answer.
You can type !ref in this text area to quickly search our full set of tutorials, documentation & marketplace offerings and insert the link!
Will you please also include information about the minimum Digital Ocean Droplet configuration like RAM, storage etc., required for this implementation.
I have just now installed the tomcat 9 service, on a droplet with ubuntu 18.04, having 2 GB RAM the 10$ per month one. It is working successfully. If we follow this tutorial carefully, without typographical errors in nano, while enabling tomcat as service, it is a smooth sail. Thank you very much Author !.
I have use ubuntu 18.04 , having 1 GB Ram the 5$ per month.it not working and facing issue into sudo chmod -R g+r conf sudo chmod g+x conf Error code display is : chmod: cannot access ‘conf’ : No such file or directory when i ignore this message and going to move next step and start tomcat server. display message : Fail to start Apache Tomcat web application.
Please help on this issue.
Thank you, works great, but right now Tomcat does not start at boot. How can we enable it to boot up with the machine?
Hello, this tutorial does not work for me. Basically, systemd tries to stop Tomcat right after it starts. I described the problem thoroughly here: https://serverfault.com/questions/946034/systemctl-stops-tomcat-service-immediately-after-start
I found this interesting reading which you may find helpful: https://jdebp.eu/FGA/systemd-house-of-horror/tomcat.html
I also tried that on an Ubuntu 18.04 Droplet - and it also did not work. Did you check the tutorial before posting it?
For those having problems with systemd not staring Tomcat, use v9.0.13
I was using v9.0.14 and it would not start when using systemd, it kept giving “Could not contact [localhost:8005]” error (clean install, definitely nothing running on that port) - it would work when manually started via catalina.sh though. Tomcat v9.0.13 works fine when following the above steps.
https://serverfault.com/questions/946034/systemctl-stops-tomcat-service-immediately-after-start For those who have problems starting tomcat 9 this may help
 This work is licensed under a Creative Commons Attribution-NonCommercial- ShareAlike 4.0 International License.
Become a contributor for community
Get paid to write technical tutorials and select a tech-focused charity to receive a matching donation.

DigitalOcean Documentation
Full documentation for every DigitalOcean product.

Resources for startups and AI-native businesses
The Wave has everything you need to know about building a business, from raising funding to marketing your product.
The developer cloud
Scale up as you grow — whether you're running one virtual machine or ten thousand.

Get started for free
Sign up and get $200 in credit for your first 60 days with DigitalOcean.*

*This promotional offer applies to new accounts only.