- Log in to:
- Community
- DigitalOcean
- Sign up for:
- Community
- DigitalOcean
By Ashutosh Srivastava

Install GNOME Desktop Environment
To install GNOME desktop environment, login to your droplet using SSH or console and install GUI and GNOME desktop environment packages by following command:
yum -y groupinstall "GNOME Desktop"
That’s all! GUI and GNOME desktop environment is now installed.
Installing and configuring VNC server
After GNOME and GUI is installed, proceed to install VNC server:
yum -y install tigervnc-server
Now the TigerVNC server is installed. But to get it work, we need to configure it. TigerVNC configuration file has been replaced in new versions of Fedora so we need to copy it to desired location:
cp /lib/systemd/system/vncserver@.service
/etc/systemd/system/vncserver@:1.service
Now edit the VNC server configuration file “/etc/systemd/system/vncserver@:1.service” by following command (using nano editor):
nano /etc/systemd/system/vncserver@:1.service
We will be replacing the following lines of the file
` ExecStart=/sbin/runuser -l <USER> -c "/usr/bin/vncserver %i" `
` PIDFile=/home/<USER>/.vnc/%H%i.pid `
with:
` ExecStart=/sbin/runuser -l root -c "/usr/bin/vncserver %i" `
` PIDFile=/root/.vnc/%H%i.pid `
After you have done the above modification, press Ctrl+X to save the modified file in nano editor (type Y for yes).
Use following command to create a file /etc/sysconfig/desktop with some contents. If you won’t do this you will get grey screen upon connecting to VNC:
echo 'PREFERRED="$(type -p gnome-session)"' >> /etc/sysconfig/desktop
Set the password for VNC user:
vncpasswd
The VNC server is now configured. To enable and start it use the following commands:
systemctl enable vncserver@:1.service && systemctl start
vncserver@:1.service
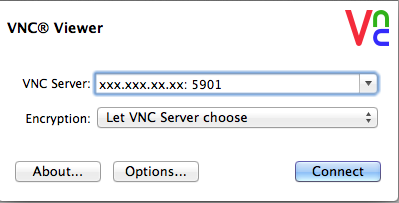
To connect to the VNC server, download any VNC client on your PC or phone and enter your server droplet IP, server root username, and password. The default port for the VNC is 5901.

<div class=“author”>Submitted by: <a href="www.techmesto.com ">Ashutosh Srivastava</a></div>
Thanks for learning with the DigitalOcean Community. Check out our offerings for compute, storage, networking, and managed databases.
Still looking for an answer?
This textbox defaults to using Markdown to format your answer.
You can type !ref in this text area to quickly search our full set of tutorials, documentation & marketplace offerings and insert the link!
Hi -
Thanks for the blog. I tried this and couldn’t get into VNC. I first had problems with enabling VNC server with this command:
systemctl enable vncserver@:1.service && systemctl start vncserver@:1.service
Got this: “Failed to issue method call: Bad Message”
I just modified the command (by removing the first “1” from “1.service”)
systemctl enable vncserver@:.service && systemctl start vncserver@:1.service
Strangely enough, this seemed to work. It created an xvnc process.
I then tried to get in through vnc viewer … it spins for a while before saying “Timed out waiting for a response from the host computer.”
FYI on my droplet:
[root@ZF1 system]# uname -a Linux ZF1 3.13.9-200.fc20.i686+PAE #1 SMP Fri Apr 4 12:24:18 UTC 2014 i686 i686 i386 GNU/Linux
I tried this tutorial on a Fedora 20 droplet, and have not been able to connect to the VNC server. My VNC client just said that it could not connect to the server. I think I have had the same issue as @bpudiped.
You might want to point out security implications, if any, when using VNC over an unencrypted network connection. :-/
Just in case this helps anyone in the future, I was able to get this working from a Fedora 23 server by running a couple of additional commands as root:
firewall-cmd --permanent --zone=public --add-port 5901/tcp
firewall-cmd --reload
+1 to the firewall addendum in the post above! The darned firewall blocking stuff >.> I did it with iptables in my version though. With how the IPTables was setup already by default, the command i used was “iptables -A IN_public_allow -p TCP -s 0/0 --destination-port 5900:5902 -j ACCEPT” and this gave me 0,1,and 2 that i could run different sized displays on. Just remove the :5902 and change the port to 5901 if you’re following the above directions exactly!
Deploy on DigitalOcean
Click below to sign up for DigitalOcean's virtual machines, Databases, and AIML products.
Become a contributor for community
Get paid to write technical tutorials and select a tech-focused charity to receive a matching donation.
DigitalOcean Documentation
Full documentation for every DigitalOcean product.
Resources for startups and SMBs
The Wave has everything you need to know about building a business, from raising funding to marketing your product.
Get our newsletter
Stay up to date by signing up for DigitalOcean’s Infrastructure as a Newsletter.
New accounts only. By submitting your email you agree to our Privacy Policy
The developer cloud
Scale up as you grow — whether you're running one virtual machine or ten thousand.
Get started for free
Sign up and get $200 in credit for your first 60 days with DigitalOcean.*
*This promotional offer applies to new accounts only.
