
React Motion is a popular library for animations in React. It makes use of physics to create animations that feel natural. All we have to do to create realistic animations is provide values for stiffness and damping and React Motion takes care of the rest.
In this post we’ll go over the basics of using the library to animate the scaling of a simple Card component. We’ll make use of styled-components for our Card’s styling. We’ll then go over a simple example of animating components as a function of state.
Installation
Just add the react-motion package to your project using npm or Yarn. Here we’ll also make use of styled-component, so we’ll add that too:
$ yarn add react-motion styled-components

# or
$ npm install react-motion styled-components
Setup
To create a simple demo, our App component will just render two Card components:
import React, { Component } from 'react';
import { injectGlobal } from 'styled-components';

import Card from './Card';

injectGlobal`
  body {
    margin: 0;
    background: #fbfbfb;
  }
`;

class App extends Component {
  render() {
    return (
      <React.Fragment>
        <Card />
        <Card title="😎 Fancy!" content="Nothing to say" />
      </React.Fragment>
    );
  }
}

export default App;
Notice how we can use style-component’s injectGlobal to inject some global styles.
And here’s all the components that make up our Card component:
import React from 'react';
import styled from 'styled-components';

const CardWrapper = styled.div`
  background: #fff;
  max-width: 500px;
  margin: 2rem auto;
  box-shadow: 0 0 10px rgba(0, 0, 0, 0.1);
  border-radius: 5px;
`;

const FooterWrapper = styled.div`
  border-top: 2px solid #f7f7f7;
  padding: 1rem 0;
  text-align: center;
`;

const HeaderWrapper = styled.div`
  background-image: url('/palm-trees.jpg');
  min-height: 150px;
  color: white;
  text-shadow: 0 2px 5px rgba(0, 0, 0, 0.3);
  background-size: 100%;
  background-position: 50%;
  display: flex;
  justify-content: flex-end;
  align-items: flex-end;
  padding: 1rem;
`;

const MainWrapper = styled.div`
  padding: 1rem;
`;

const Button = styled.button`
  background-image: linear-gradient(to bottom, #fff, #f3f3f3);
  border-radius: 8px;
  letter-spacing: 1px;
  padding: 10px 20px;
  margin: 0 0.45rem;
  border: 1px solid #ddd;
  box-shadow: 0 0 10px rgba(0, 0, 0, 0.1);
  &:active {
    background: #eee;
  }
`;

const Header = ({ title }) => {
  return (
    <HeaderWrapper>
      <h1>{title}</h1>
    </HeaderWrapper>
  );
};

const Main = ({ content }) => {
  return (
    <MainWrapper>
      <p>{content}</p>
    </MainWrapper>
  );
};

const Footer = () => {
  return (
    <FooterWrapper>
      <Button>View</Button>
      <Button>Save for later</Button>
    </FooterWrapper>
  );
};

class Card extends React.Component {
  render() {
    const { title, content } = this.props;
    return (
      <CardWrapper>
        <Header title={title} />
        <Main content={content} />
        <Footer />
      </CardWrapper>
    );
  }
}

Card.defaultProps = {
  title: 'My card title',
  content:
    'Bacon ipsum dolor amet pork chop pork shoulder.'
};

export default Card;
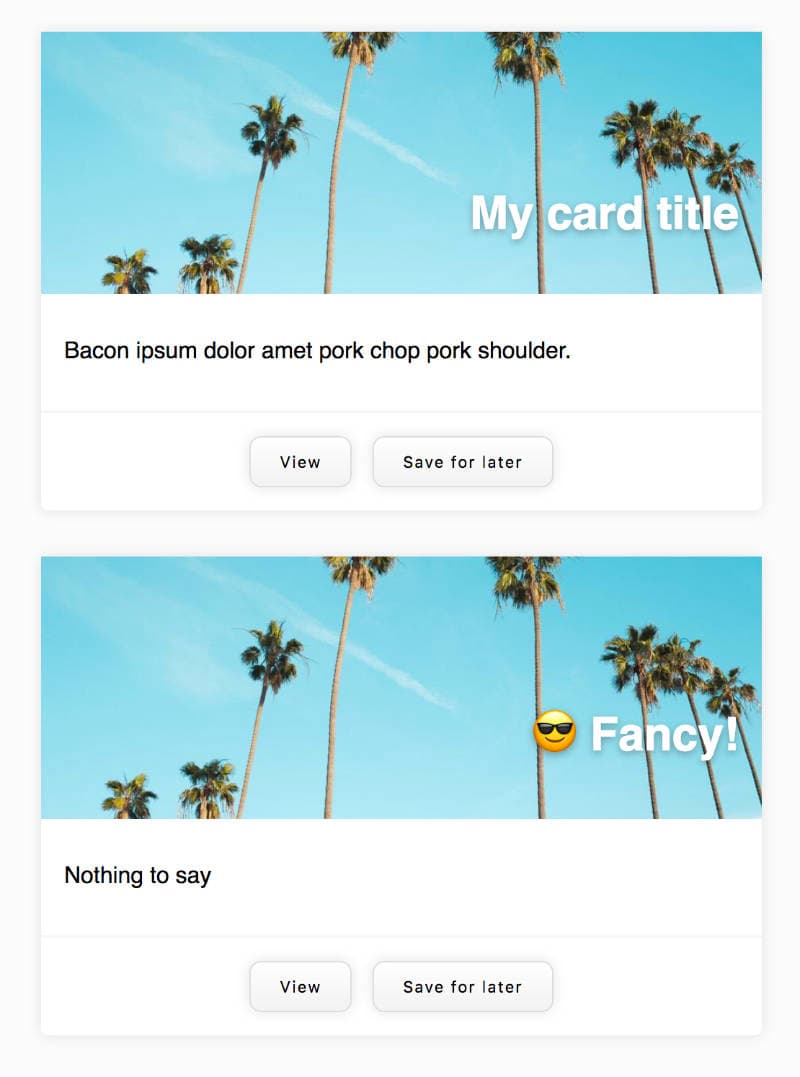
Our cards look like this:
Enter React Motion
Now, say we can to animate the cards in when they first mount. Let’s use React Motion’s Motion component to accomplish this:
// ...
import { Motion, spring } from 'react-motion';

import Card from './Card';

// ...

const AnimatedCard = props => {
  return (
    <Motion
      defaultStyle={{ scale: 0.5 }}
      style={{ scale: spring(1, { stiffness: 60, damping: 10 }) }}
    >
      {interpolatedStyle => <Card scale={interpolatedStyle.scale} {...props} />}
    </Motion>
  );
};

class App extends Component {
  render() {
    return (
      <React.Fragment>
        <AnimatedCard />
        <AnimatedCard title="😎 Fancy!" content="Nothing to say" />
      </React.Fragment>
    );
  }
}

export default App;
As you can see, the Motion component makes use of the render prop pattern. It expects a function as its children prop and the function receives the interpolatedStyle that contains the current interpolated values. Here we pass the interpolated scale value to a scale prop.
We can make use of this scale prop in our style-component like this:
// ...

const CardWrapper = styled.div`
  background: #fff;
  max-width: 500px;
  margin: 2rem auto;
  box-shadow: 0 0 10px rgba(0, 0, 0, 0.1);
  border-radius: 5px;
  transform: ${props => `scale(${props.scale})`};
`;

// ...

class Card extends React.Component {
  render() {
    const { title, content, scale } = this.props;
    return (
      <CardWrapper scale={scale}>
        <Header title={title} />
        <Main content={content} />
        <Footer />
      </CardWrapper>
    );
  }
}

// ...
The Motion component takes an optional defaultStyle prop and a required style prop. The style prop is derived using the spring helper function. Spring takes a value to spring to, and an optional config object with values for stiffness, damping and precision. When no config object is passed to spring, the stiffness defaults to 170 and the damping defaults to 26.
In the previous example we pass a scale prop that then gets used by a styled-component, but we could just as well animate inline styles. Here for example we render a h1 element that springs into view:
const FancyTitle = () => {
  return (
    <Motion defaultStyle={{ left: -100 }} style={{ left: spring(10) }}>
      {val => <h1 style={{ position: 'absolute', ...val }}>Hello!{' '}
        <span role="img" aria-label="Hand wave">
          👋
        </span>
      </h1>}
    </Motion>
  );
};
Animations as a Function of State
Using React Motion makes it just as easy to define animations that are a function of the state.
In the following example, we first animate our h1 element into view when the App component mounts, and then provide buttons that call methods to change the state, which controls the animation on the element:
import React, { Component } from 'react';
import { Motion, spring } from 'react-motion';

class App extends Component {
  state = {
    left: 0
  };

  handleClick = val => {
    if (val && !isNaN(val)) {
      this.setState({
        left: +val
      });
    }
  };

  reset = () => this.setState({ left: 0 });

  render() {
    return (
      <React.Fragment>
        <Motion
          defaultStyle={{ left: -100 }}
          style={{ left: spring(this.state.left) }}
        >
          {val => (
            <h1 style={{ position: 'absolute', ...val }}>
              Hello!{' '}
              <span role="img" aria-label="Hand wave">
                👋
              </span>
            </h1>
          )}
        </Motion>

        <input
          type="number"
          placeholder="enter a value"
          ref={input => (this.input = input)}
        />
        <button onClick={() => this.handleClick(this.input.value)}>Set</button>
        <button onClick={this.reset}>Reset</button>
      </React.Fragment>
    );
  }
}

export default App;
💃 Now go ahead and make things move! In a future post we’ll explore the rest of the API made available with React Motion (StaggeredMotion, TransitionMotion and presets).
Thanks for learning with the DigitalOcean Community. Check out our offerings for compute, storage, networking, and managed databases.
About the author
Alligator.io is a developer-focused resource that offers tutorials and insights on a wide range of modern front-end technologies, including Angular 2+, Vue.js, React, TypeScript, Ionic, and JavaScript.
Still looking for an answer?
This textbox defaults to using Markdown to format your answer.
You can type !ref in this text area to quickly search our full set of tutorials, documentation & marketplace offerings and insert the link!
 This work is licensed under a Creative Commons Attribution-NonCommercial- ShareAlike 4.0 International License.
Become a contributor for community
Get paid to write technical tutorials and select a tech-focused charity to receive a matching donation.

DigitalOcean Documentation
Full documentation for every DigitalOcean product.

Resources for startups and AI-native businesses
The Wave has everything you need to know about building a business, from raising funding to marketing your product.
The developer cloud
Scale up as you grow — whether you're running one virtual machine or ten thousand.

Start building today
From GPU-powered inference and Kubernetes to managed databases and storage, get everything you need to build, scale, and deploy intelligent applications.
