
Introduction
SaltStack, or Salt, is a powerful remote execution and configuration management system that can be used to easily manage infrastructure in a structured, repeatable way. In this series, we will be demonstrating one method of managing your development, staging, and production environments from a Salt deployment. We will use the Salt state system to write and apply repeatable actions. This will allow us to destroy any of our environments, safe in the knowledge that we can easily bring them back online in an identical state at a later time.
In our last guide, we started off by completing the initial configuration of our Salt master server. This server should now be running and capable of issuing Salt commands to itself. In this guide, we will expand our Salt master’s reach by configuring the salt-cloud components. This will allow us to hook into our DigitalOcean account to spin up resources as necessary. We will be creating profiles that define the properties of our individual components and of our environments as a whole.
Prerequisites
In order to complete this tutorial, you will need to have a Salt master server configured as outlined in this guide. We will be completing the steps in this guide using the non-root user account on that server.
You will also need access to a DigitalOcean account. We will be leveraging the DigitalOcean API through the salt-cloud command to create and control the servers that will comprise our various environments. You will need to create an API token for this purpose, which we will cover in the guide.
Create the Main Cloud Minion Configuration
We will start off by creating a configuration file at /etc/salt/cloud. This will be used as the common options for all of the servers we will be creating. Create and open the file now:
- sudo nano /etc/salt/cloud
The only configuration we will be applying at this point are the /etc/salt/minion options that will be set on each of the servers we create. Use the minion: key to start off the structure of this information:
minion:
Beneath this key, start off by specifying the Salt master server’s IP address. This is the most important setting, as it allows the Salt minion to connect back to the master after provisioning:
minion:
  master: master_server_ip
Note
Keep in mind that YAML files require very careful spacing. Two spaces are typically used for each additional level of indentation.
Next, we need to set up some mine functions. Salt minions can be configured to send the results of Salt execution modules back to a central repository on the Salt master. This system provides an avenue for minion servers to share important information with other minions.
We want to set up two mine functions. These will simply return the minion’s public and private IP addresses back to the Salt master. Other minions can then query the master for this information in order to learn how to connect to peers:
minion:
  master: master_server_ip
  mine_functions:
    external_ip:
      - mine_function: network.interface_ip
      - eth0
    internal_ip:
      - mine_function: network.interface_ip
      - eth1
Save and close the file when you are finished.
Set up the DigitalOcean Cloud Provider
Next, we will configure a DigitalOcean cloud provider file. This will contain the information necessary to connect to our DigitalOcean account and also some common settings we would like to use for the servers we will create.
Start by making a directory for our provider information:
- sudo mkdir -p /etc/salt/cloud.providers.d
Inside, create and open a file called do.conf:
- sudo nano /etc/salt/cloud.providers.d/do.conf
Inside, we will create another YAML structure. The top-level key in the structure will be the name for the provider. We will use “do” here. The driver specifies which cloud to use. DigitalOcean’s driver in Salt is called digital_ocean:
do:
  driver: digital_ocean
Next, you need to go to your DigitalOcean account and create an API token. You can get to the API section of the control panel by following this link. Click on the “Generate new token” button in the top-right corner of the page:

On the page that follows, enter a descriptive name and click “Generate Token”:
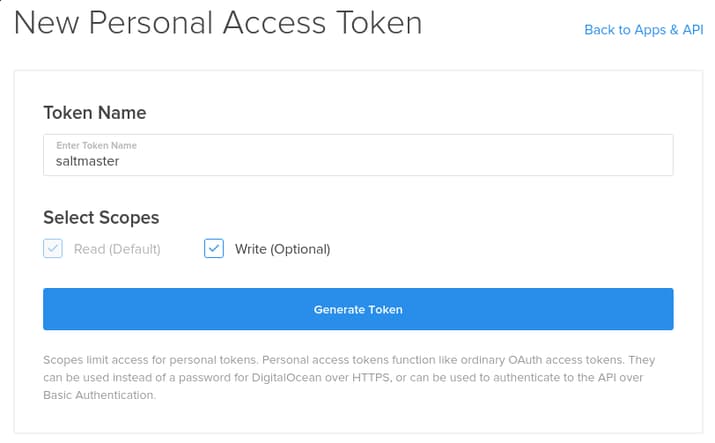
Towards the bottom of the next page, your new token will be displayed:

Copy this value before leaving the page, as it will not be displayed again. If you forget to do this, destroy the token and generate a new one.
Back in your provider configuration file, set the personal_access_token option to the value of the generated token you copied:
do:
  driver: digital_ocean
  personal_access_token: digitalocean_api_token
Next, we will specify the SSH keys information. The salt-cloud command will need to log into the servers initially using SSH in order to set up the Salt minion. We will set the ssh_key_file key to point to the location on the filesystem where we will copy our SSH private key shortly. You should set the ssh_key_names to the name or names of the SSH key that you have added to DigitalOcean:
do:
  driver: digital_ocean
  personal_access_token: digitalocean_api_token
  ssh_key_file: /etc/salt/pki/cloud/do.pem
  ssh_key_names: Work key,Home key
We also need to specify the script and script arguments so that we can control the exact version of Salt that will be deployed to new minions:
do:
  driver: digital_ocean
  personal_access_token: digitalocean_api_token
  ssh_key_file: /etc/salt/pki/cloud/do.pem
  ssh_key_names: Work key,Home key
  script: bootstrap-salt
  script_args: -P git v2015.8.0
Save and close the file when you are finished. We can see that our provider configuration has been picked up by the Salt mater by typing:
- sudo salt-cloud --list-providers
Outputdo:
    ----------
    digital_ocean:
        ----------
You can test your API key by typing:
- sudo salt-cloud --list-locations do
It should show you a list of the available regions for deployment.
Create the SSH Key File
Before we move on, we should create the SSH private key file that we referenced in the provider file. Start by creating the necessary directory structure:
- sudo mkdir -p /etc/salt/pki/cloud
Next, create a file called do.pem inside the newly created directory:
- sudo nano /etc/salt/pki/cloud/do.pem
Paste in the contents of your private key that is associated with one of your DigitalOcean keys you specified in the ssh_key_names directive in the provider file. You can usually get the contents of your private key by typing the following into your local computer:
- cat ~/.ssh/id_rsa
It should look something like this:
-----BEGIN RSA PRIVATE KEY-----
MIIEpAIBAAKCAQEA39KuD8htHaIgUGFezpTsW0Y5XtNuoSTwVg/nih1rlVyKQIkJ
UhJRAakJ9ktQjSWdyAQr0i563WU1KYeHMzQuPPOQAK0vTbMjO5StuzqPEVfPPI1n
PIbMeAg9rjX5Lhy/jSOcTwf0E91jTMYuxkZCMCIDTzeVEFLV744APotQktCruJXf
L53cVUedOI1fQTEKGa1xEk92Ja4jm/Fn+4WKqYVTKRd2/vHX/ej8bI9Pomamskvc

. . .

hd4tdQKBgQCD8s2IbXVfGQ8x0D12a5K7sfysdnESF5I5ladEAoWP4wYctuGdlDso
lBl+jlm1di+1gPqBDMdJhic48ExRBVjKfB1adDeiwhzD4zNxFakhBXHjXHj6MBps
Oo/13JyvRs6QRpBolJfVaG1b5CAR+EhAJkxxCxWch8dlwE1gb9jxXw==
-----END RSA PRIVATE KEY-----
Paste that into the file at /etc/salt/pki/cloud/do.pem and then save and close the file.
In order for Salt to use the key, the file and directory containing it must have the correct permissions. Set the permissions by typing:
- sudo chmod 700 /etc/salt/pki/cloud
- sudo chmod 600 /etc/salt/pki/cloud/do.pem
Salt can now read the private key and use it to log into new servers.
Set Up Cloud Profiles
Now that you have the DigitalOcean provider configured, we can create profiles. These profiles define the properties that we want to use when building new server instances. We can configure as many as we’d like.
We will store these files in a cloud.profiles.d directory. Create that directory now:
- sudo mkdir -p /etc/salt/cloud.profiles.d
For this guide, we will use a separate file for each of the environments we will be configuring. Let’s start with the development environment:
- sudo nano /etc/salt/cloud.profiles.d/dev-profiles.conf
Each profile is specified under a top level profile name. The name is what we use when we want to create a Droplet using the provided details.
We will start by specifying a base-dev profile. This will contain the basic properties shared by all of our development machines. For this guide, we are specifying that we want to use Ubuntu 14.04 64bit, on a 1 gigabyte Droplet in the NYC3 region. NYC3 is the region that our Salt master is deployed in, which will allow us to use private networking to communicate when necessary. With this in mind, we will be enabling private networking (this will be used in our configuration!) and also IPv6.
You can modify the size and region as you wish using the information returned from these commands:
- sudo salt-cloud --list-locations do
- sudo salt-cloud --list-sizes do
In the returned output, the “slug” associated with the size and location you want to use is the name that you should use within your configuration.
Using the Droplet information we described above, our base-dev will look like this:
base-dev:
  provider: do
  image: ubuntu-14-04-x64
  size: 1gb
  location: nyc3
  private_networking: True
  ipv6: True
This profile provides most of the details we need, but we also want to include some custom Salt grains on our minions. These will be used for targeting specific machines based on the role they play in the infrastructure and the environment that they are a part of.
We can do this by “extending” the base profile. Extending allows you to specify a new profile that will inherit the characteristics of an existing profile and allow you to add new values. The inheritance is rather picky, however, and will only allow a single extension (no extending an extension). Also, list items (like our grains) will replace rather than append previous data (which is why we could not specify our environment in the base, even though it is shared by all servers in the environment).
The web server-specific profile is pretty simple. It uses all of the original attributes and adds the two grains we specified. We are using the role “webserver”. We will match against this throughout the tutorial. The development environment will be indicated by the “dev” value:
base-dev:
  provider: do
  image: ubuntu-14-04-x64
  size: 1gb
  location: nyc3
  private_networking: True
  ipv6: True

dev-web:
  extends: base-dev
  minion:
    grains:
      role: webserver
      env: dev
Our database profile will work in almost exactly the same way. We will simply use the role “dbserver” instead of “webserver” and use the dev-db profile ID:
base-dev:
  provider: do
  image: ubuntu-14-04-x64
  size: 1gb
  location: nyc3
  private_networking: True
  ipv6: True

dev-web:
  extends: base-dev
  minion:
    grains:
      role: webserver
      env: dev

dev-db:
  extends: base-dev
  minion:
    grains:
      role: dbserver
      env: dev
Save and close the file when you are finished.
We will create a similar file for our staging environment. Create the file by typing:
- sudo nano /etc/salt/cloud.profiles.d/stage-profiles.conf
The base-stage profile is exactly the same as the base-dev profile. The extended profiles also match the previous definitions closely, modifying only the environment and the names. We also add an extended profile for our load balancer, since that is a server type that won’t exist in our development environment:
base-stage:
  provider: do
  image: ubuntu-14-04-x64
  size: 1gb
  location: nyc3
  private_networking: True
  ipv6: True

stage-web:
  extends: base-stage
  minion:
    grains:
      role: webserver
      env: stage

stage-db:
  extends: base-stage
  minion:
    grains:
      role: dbserver
      env: stage

stage-lb:
  extends: base-stage
  minion:
    grains:
      role: lbserver
      env: stage
Save and close the file when you are finished.
Finally, let’s create the production profiles:
- sudo nano /etc/salt/cloud.profiles.d/prod-profiles.conf
The production profiles are almost completely identical to the staging profiles. We just change every instance of the string “stage” with “prod”:
base-prod:
  provider: do
  image: ubuntu-14-04-x64
  size: 1gb
  location: nyc3
  private_networking: True
  ipv6: True

prod-web:
  extends: base-prod
  minion:
    grains:
      role: webserver
      env: prod

prod-db:
  extends: base-prod
  minion:
    grains:
      role: dbserver
      env: prod

prod-lb:
  extends: base-prod
  minion:
    grains:
      role: lbserver
      env: prod
Save and close the file when you are finished.
Test that your profiles are being picked up by typing:
- sudo salt-cloud --list-profiles do
You should see a listing of all of the profiles you have configured.
Create Environment Maps
We now have profiles that define exactly how to create the individual servers that we need. We can easily use these to create the servers we need, one at a time.
However, salt-cloud can also leverage additional configuration files called “maps”. Maps allow you to reference the profiles we created in order to outline the complete infrastructure you’d like to build. You provide the names of the servers you would like to create for each profile type.
Make a directory to hold the map files called cloud.maps.d:
- sudo mkdir -p /etc/salt/cloud.maps.d
Let’s start by defining our development environment. Create and open a file called dev-environment.map within this directory:
- sudo nano /etc/salt/cloud.maps.d/dev-environment.map
If you recall from the previous article where the environments we will be configuring were outlined, our development environment will only have two servers: a web server and a database server. Knowing this, our development map file should look like this:
dev-web:
  - dev-web

dev-db:
  - dev-db
The top-level item indicates the profile being used to provision the resource. The list beneath the profile name (indicated by a dash), indicates the names of the servers to spin up.
This example defines a web server called “dev-web” and a database server called “dev-db”. These servers can both be created simultaneously by pointing salt-cloud to this file. Save and close the file when you are finished.
Next, let’s create the staging environment map:
- sudo nano /etc/salt/cloud.maps.d/stage-environment.map
Our staging environment has two web server, two database server, and a load balancer. We will number our redundant servers to distinguish between them. Our map should look something like this:
stage-web:
  - stage-www1
  - stage-www2

stage-db:
  - stage-db1
  - stage-db2

stage-lb:
  - stage-lb
This will file has the ability to provision five servers in total. Save and close the file when you are finished.
Finally, we can create our production environment map file by typing:
- sudo nano /etc/salt/cloud.maps.d/prod-environment.map
This will be fairly similar to our staging environment map (with the obvious exceptions of the server names and the profiles used). Production will have an additional load balancer so that fail over can be configured:
prod-web:
  - prod-www1
  - prod-www2

prod-db:
  - prod-db1
  - prod-db2

prod-lb:
  - prod-lb1
  - prod-lb2
The bare servers needed for our production environment can be commissioned with this file. Save and close it when you are finished.
Testing Environment Provisioning
Now that we have our map files created, we can easily spin up any or all of our environments.
Before we can do this, we need to download the Salt bootstrap script to our Master server. The master will connect to the minion, upload the script, and run it in order to start Salt minions on the servers we create.
Download the bootstrap script by typing:
- sudo salt-cloud -u
This command should be run every once in awhile in order to make sure that you are using the latest version of the bootstrap script.
Once the bootstrap script is downloaded, you can spin up any of your environments by using the salt-cloud command. We will test this with the development environment since it demonstrates the process with the fewest resources.
We will pass the -P flag in order to tell salt-cloud to create the servers in parallel. Without this, Salt would wait for one server to finish bootstrapping before starting to work on the next server. We will need to use the -m flag and point it to the environment map we wish to use.
The complete command looks like this:
- sudo salt-cloud -P -m /etc/salt/cloud.maps.d/dev-environment.map
You will be asked to confirm the creation of the two servers defined in that file:
Output[INFO    ] salt-cloud starting
[INFO    ] Applying map from '/etc/salt/cloud.maps.d/dev-environment.map'.
[INFO    ] Starting new HTTPS connection (1): api.digitalocean.com
The following virtual machines are set to be created:
  dev-db
  dev-web

Proceed? [N/y]
Type “Y” to create the servers.
After the servers have been created, you can check the Salt connection by typing:
- sudo salt '*' test.ping
You should get a response from your Salt master minion and both of the new development machines. During the provisioning process the Salt master generated and accepted keys for the new servers before placing them on the minion machines. Because of this, we don’t need to use salt-key to accept each of the new keys. The new servers should respond immediately:
Outputdev-db:
    True
sm:
    True
dev-web:
    True
You can use the map file to issue salt-cloud commands to the defined servers as a group. If you are not planning on using the development machines right at this moment, feel free to destroy them again by typing:
- sudo salt-cloud -d -m /etc/salt/cloud.maps.d/dev-environment.map
This will destroy the servers through the API and remove the minion keys from the store.
You could alternatively destroy individual machines by name:
- sudo salt-cloud -d dev-db
If you do so, the next time you create with the map file, salt-cloud will only create the servers that are not already present:
sudo salt-cloud -P -m /etc/salt/cloud.maps.d/dev-environment.map
Output[INFO    ] salt-cloud starting
[INFO    ] Applying map from '/etc/salt/cloud.maps.d/dev-environment.map'.
[INFO    ] Starting new HTTPS connection (1): api.digitalocean.com
[WARNING ] u'dev-web' already exists, removing from the create map.
The following virtual machines already exist:
  dev-web
The following virtual machines are set to be created:
  dev-db

Proceed? [N/y]
Feel free to test out your other map files at this point to make sure that they can correctly provision the servers necessary for the environments we will be configuring.
Conclusion
At this point, your Salt master server should be fully capable of spinning up resources using the DigitalOcean cloud provider. We have created profiles for the characteristics of our individual machines and have established maps to easily describe the individual servers we need for each setup.
In the next guide in this series, we will begin our dive into Salt’s configuration management capabilities by setting up a reproducible Nginx configuration.
Thanks for learning with the DigitalOcean Community. Check out our offerings for compute, storage, networking, and managed databases.
Tutorial Series: Managing Development Environments with SaltStack
SaltStack is a powerful remote execution tool and configuration management system. In this series, we will use Salt to configure reproducible development, staging, and production environments onto which we can deploy an application. This is primarily meant as a learning exercise to demonstrate some common Salt components and strategies that can be used to control your infrastructure.
About the author
Former Senior Technical Writer at DigitalOcean, specializing in DevOps topics across multiple Linux distributions, including Ubuntu 18.04, 20.04, 22.04, as well as Debian 10 and 11.
Still looking for an answer?
This textbox defaults to using Markdown to format your answer.
You can type !ref in this text area to quickly search our full set of tutorials, documentation & marketplace offerings and insert the link!
with the new configuration style, to configure the Digital Ocean provider you have to use:
do: provider: digital_ocean
great article, by the way!
In article number 2 the build doesn’t build salt-could by default. After that install you will still need to run
sudo apt-get install salt-cloud
to proceed with this tutorial.
I have been walking through your tutorial the last two days. I just wanted to say thank you! I was using Puppet for a while and I am quickly falling in love with Salt after using your write up. Thank youso much for the work you have done here.
Very detailed tutorial, thanks.
Not sure if anyone has noticed. But provisioning certain images via salt-cloud fails. I am successful using 14.04.3 but fail on any later Ubuntu releases. Also having issues with coreos 835.9.0 (stable).
As for the 15.04 and 15.10 images, the failure is on using ssh later in the deployment script. After the failure salt '*' test.ping fails but I am still able to destroy the minion via salt-cloud -d <minion-name>
In regards to the coreos image, I forget what the failure was but will update this thread when I come across it again. Cheers!
Thanks for the great write up, but I am having an issue when I try to provision.
I have tried ‘provider’ to ‘driver’ but it doesn’t seem to work.
Any idea??
[ERROR ] Failed to create VM dev-db. Configuration value ‘provider’ needs to be set Traceback (most recent call last): File “/usr/lib/python2.7/dist-packages/salt/cloud/init.py”, line 1256, in create output = self.cloudsfunc File “/usr/lib/python2.7/dist-packages/salt/cloud/clouds/digital_ocean_v2.py”, line 295, in create ‘provider’: vm_[‘provider’], KeyError: ‘provider’ [ERROR ] Failed to create VM dev-web. Configuration value ‘provider’ needs to be set Traceback (most recent call last): File “/usr/lib/python2.7/dist-packages/salt/cloud/init.py”, line 1256, in create output = self.cloudsfunc File “/usr/lib/python2.7/dist-packages/salt/cloud/clouds/digital_ocean_v2.py”, line 295, in create ‘provider’: vm_[‘provider’], KeyError: ‘provider’
Hi All, when I issue the test.ping i get the following message:
charles@ubuntu-512mb-sgp1-01:/etc/salt/cloud.providers.d$ sudo salt ‘*’ test.ping ubuntu-512mb-sgp1-01: True dev-db: Minion did not return. [Not connected] dev-web: Minion did not return. [Not connected]
I cant get the minions to respond. they are different from the tutorial in that they are 512mb instances from singapore. Any idea what might be going wrong?
I followed the procedure as described above. However running salt-cloud command the process is stuck at the following line [DEBUG ] Enter passphrase for key ‘/etc/salt/pki/cloud/do.pem’:
I have already removed passphrase on my ssh key
Just want to point out that inside /etc/salt/cloud.profiles.d/{prod,dev,stage}-profiles.conf the “size” argument now requires the droplet plan you’ll use, for example:
base-prod:
  provider: do
  image: ubuntu-14-04-x64
  size: 1gb
  location: nyc3
  private_networking: True
  ipv6: True
Should be:
base-prod:
  provider: do
  image: ubuntu-14-04-x64
  size: s-1vcpu-1gb
  location: nyc3
  private_networking: True
  ipv6: True
Great article!
How can I specify a project that the droplets will deploy in rather than the default droplet?
 This work is licensed under a Creative Commons Attribution-NonCommercial- ShareAlike 4.0 International License.
Become a contributor for community
Get paid to write technical tutorials and select a tech-focused charity to receive a matching donation.

DigitalOcean Documentation
Full documentation for every DigitalOcean product.

Resources for startups and AI-native businesses
The Wave has everything you need to know about building a business, from raising funding to marketing your product.
The developer cloud
Scale up as you grow — whether you're running one virtual machine or ten thousand.

Start building today
From GPU-powered inference and Kubernetes to managed databases and storage, get everything you need to build, scale, and deploy intelligent applications.
