By Derick Sozo

Vue.js is an amazing JavaScript library that can be used to handle the front-end of all sorts of UIs besides just Single Page Apps. A screenshot-taking tool is the perfect example to showcase how powerful and easy to use Vue.js is.
A screenshot-taking tool is just a big number cruncher based on the position of the mouse and the dimensions of the screen. The numbers are calculated in the JS and then they get plugged into Vue.js which takes care of all the UI rendering without any extra crazy JavaScript DOM manipulation.
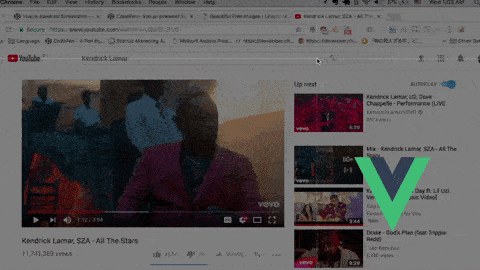
In this tutorial I’m going to show you how to build the front-end UI of something like this where you can drag your mouse to select a portion of the screen to save it as a screenshot using Vue.js.
Breaking Down the UI Into 3 Individual Parts
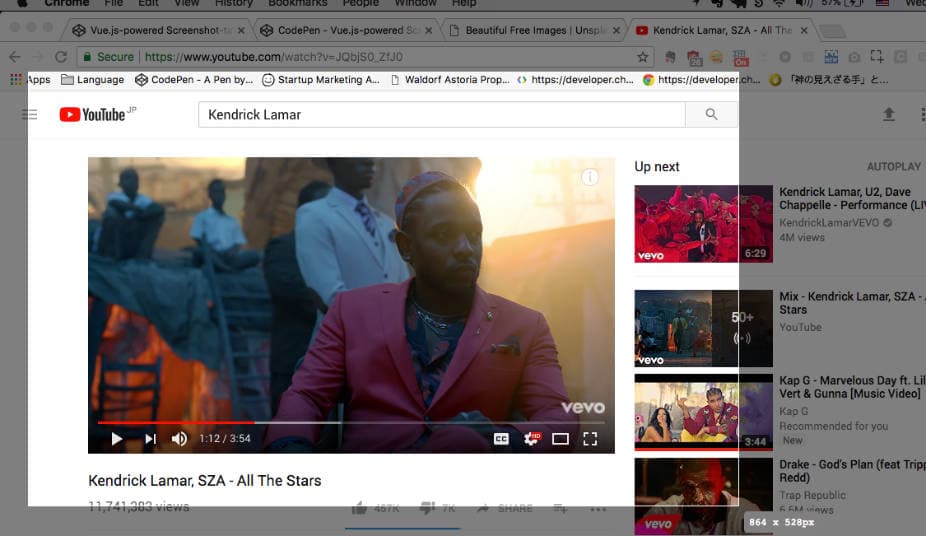
There are only 3 core parts necessary to getting a UI like this up and running. The container, the crosshairs, and the overlay.
1. The Container
This is where the Vue.js instance will be instantiated. It’s an element without any visual styles. The purpose of this element is to take care of the mouse event handling and rendering the data properties to update the UI in real-time.
The Vue Template
<div id="screenshot" class="container">
  <div class="overlay"></div>
  <div class="crosshairs"></div>
</div>
The Javascript
var screenshot = new Vue({
  el: "#screenshot"
});
2. The Crosshairs
A screenshot tool isn’t a screenshot-tool without crosshairs. This is a purely a visual element. The purpose is to clearly show the user where they currently are on the page and where they’re about to begin dragging the mouse from.
The position of the crosshairs element is rendered by explicitly setting the top and left position on the style attribute when the mouse moves.
This is where using Vue.js is so powerful. All the JavaScript code needs to concern itself with it is grabbing those left and right properties, saving them as data properties in the Vue instance, bind them using Vue.js’s binding syntax and the UI automatically updates.
Adding the crossHairsLeft and the crossHairsTop data properties to the Vue instance and the position will be saved on those properties.
Adding a mousemove event on the container element and then setting those two properties to the mouse’s position is where those values will come from.
The Vue Template for handling the crosshairs
<div @mousemove="move">
  <div class="overlay"></div>
  <div class="crosshairs" :style="{ left: crossHairsLeft + 'px', top: crossHairsTop + 'px' }"></div>
</div>
The Javascript to handle moving the crosshairs around
var screenshot = new Vue({
  el: "#screenshot",

  data: {
    crossHairsLeft: 0,
    crossHairsTop: 0
  },
  methods: {
    move: function (event) {
      this.crossHairsTop = event.clientY;
      this.crossHairsLeft = event.clientX;
    }
  }
});
The Overlay
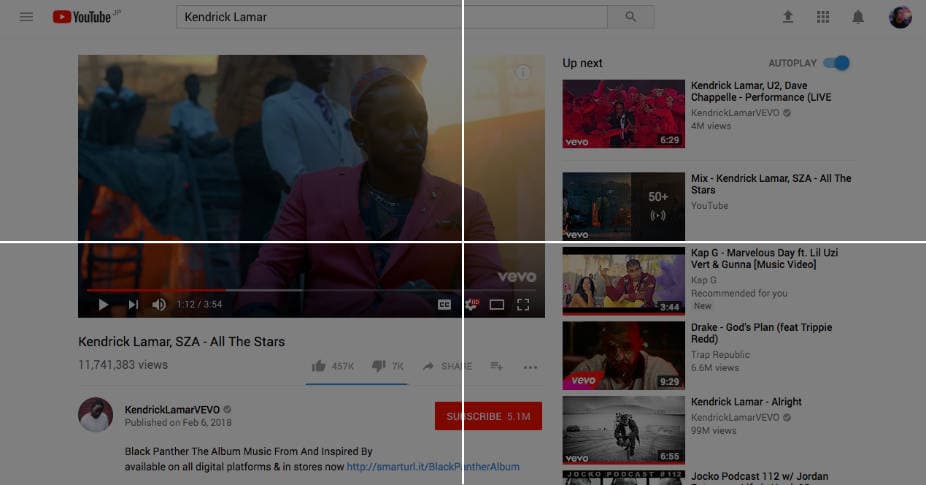
The overlay is the opaque background element that appears when the crosshairs are being moved or when the mouse is being dragged. It’s another purely visual element. When the mouse is dragged the selected area completely loses its opacity and turns white to see what area of the page will be taken a screenshot of. That will be taken care of with the borderWidth property.
Clicking on the Overlay to Get Starting Mouse Position Values
When the user clicks down the initial x and y start values of the mouse need to be captured and saved. That can be done by adding a mousedown event to the container and adding two extra properties to the Vue instance. startX and startY.
Updated Vue Template
<div @mousemove="move" @mousedown="mouseDown">
  <div class="overlay"></div>
  <div class="crosshairs" :style="{ left: crossHairsLeft + 'px', top: crossHairsTop + 'px' }"></div>
</div>
The JavaScript
var screenshot = new Vue({
  el: "#screenshot",

  data: {
    crossHairsLeft: 0,
    crossHairsTop: 0,
    startX: 0,
    startY: 0,
    isMouseDown: false
  },

  methods: {

    move: function (event) {
      this.crossHairsTop = event.clientY;
      this.crossHairsLeft = event.clientX;
    },

    mouseDown: function (event) {
      this.startX = event.clientX;
      this.startY = event.clientY;
      this.isMouseDown = true;
    }
  }
});
Dragging Down on the Overlay to Render the Selected Area
The opening that shows the selection of the page that will be taken as a screensho is rendered using a border. All the JavaScript code does is calculate the appropriate border-width using the dimensions of the screen and the initial start x and y positions.
The two new properties that are needed are a borderWidth property that will be a calculated string of border width values. And then, an isDraggingMouse boolean property to determine if the user has started dragging while clicking. That’ll be used to hide the crosshairs only after the user has started dragging rather than as soon as the click event fires.
The Vue Template
<div id="screenshot" class="container" @mousemove="move" @mousedown="mouseDown">
  <div class="overlay" :class="{ 'highlighting' : isMouseDown }" :style="{ borderWidth: borderWidth }"></div>
  <div class="crosshairs" :class="{ 'hidden' : isDraggingMouse }" :style="{ left: crossHairsLeft + 'px', top: crossHairsTop + 'px' }"></div>
</div>
The Javascript
var screenshot = new Vue({
  el: "#screenshot",

  data: {
    crossHairsLeft: 0,
    crossHairsTop: 0,
    startX: 0,
    startY: 0,
    isMouseDown: false,
    isDraggingMouse: false
  },
  methods: {
    move: function (event) {
      var startY       = this.startY,
          startX       = this.startX,
          endX         = event.clientX,
          endY         = event.clientY,
          windowWidth  = window.innerWidth,
          windowHeight = window.innerHeight;
      this.crossHairsTop = event.clientY;
      this.crossHairsLeft = event.clientX;
      if (this.isMouseDown) {
        if (endX >= startX && endY >= startY) {
          this.isDragging = true;
          this.borderWidth = startY + "px " + (windowWidth - endX) + "px " + (windowHeight - endY) + "px " + startX + "px";
        }
      }
    },
    mouseDown: function (event) {
      this.startX = event.clientX;
      this.startY = event.clientY;
      this.isMouseDown = true;
    }
  }
});
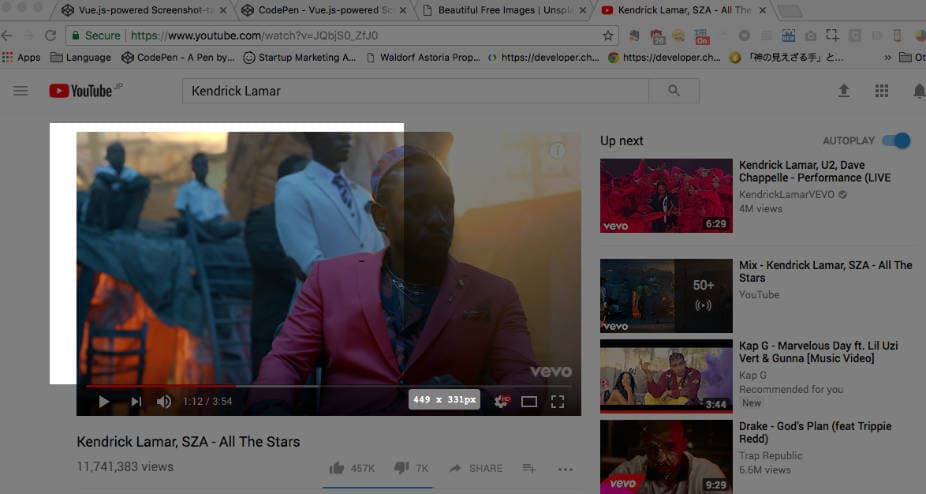
Releasing the mouse and taking the screenshot
Finally, taking the screenshot itself happens after the user releases their mouse.
The JavaScript Logic
Add @mouseup="mouseUp" to the container and the mouseUp function will take care of some necessary resets for getting ready to take another screenshot and call the function for taking the screenshot itself.
methods: {
  mouseUp: function (e) {
    this.borderWidth = 0; // resetting the overlay

    if (this.isDragging) {
      // Don't take the screenshot unless the mouse moved somehow.
      this.tookScreenShot = true;
    }

    this.isDragging = false;
    this.mouseIsDown = false;

    this.takeScreenshot();

}
The screenshot-taking functionality
A library called html2canvas will help with taking the screenshots. It converts the document, or an element of your choice, into a canvas. That canvas can then be manipulated, cropped, and finally turned into an image.
Grab the script here and add it to the page.
methods: {
  takeScreenshot: function () {
    html2canvas(document.querySelector('body')).then(canvas => {
      let croppedCanvas = document.createElement('canvas'),
          croppedCanvasContext = croppedCanvas.getContext('2d');

      croppedCanvas.width  = this.croppedImageWidth;
      croppedCanvas.height = this.croppedImageHeight;

      croppedCanvasContext.drawImage(canvas, this.startX, this.startY, this.croppedImageWidth, this.croppedImageHeight, 0, 0, this.croppedImageWidth, this.croppedImageHeight);

      this.imageUrl = croppedCanvas.toDataURL();
    });
  }
}
Conclusion
That’s about all that’s needed to get started with creating the front-end UI for a Screenshot-taking tool that could be used for a Chrome Extension.
From here on out it’s just a bunch of Math and if statements based on the positioning of the cursor and the screen dimensions to calculate everything correctly.
The most important thing that I wanted to showcase with this tutorial is that Vue.js is a powerful library that can be used to help all kinds of UI-related constructions and not just SPAs.
Reference
Want to see a completed version of this Screenshot-taking tool with the styles in place? Take a look at the Codepen here.
💻🔫
Thanks for learning with the DigitalOcean Community. Check out our offerings for compute, storage, networking, and managed databases.
About the author
Still looking for an answer?
This textbox defaults to using Markdown to format your answer.
You can type !ref in this text area to quickly search our full set of tutorials, documentation & marketplace offerings and insert the link!
In takeScreenshot() where will I get the below values? croppedImageWidth croppedImageHeight
 This work is licensed under a Creative Commons Attribution-NonCommercial- ShareAlike 4.0 International License.
Become a contributor for community
Get paid to write technical tutorials and select a tech-focused charity to receive a matching donation.

DigitalOcean Documentation
Full documentation for every DigitalOcean product.

Resources for startups and AI-native businesses
The Wave has everything you need to know about building a business, from raising funding to marketing your product.
The developer cloud
Scale up as you grow — whether you're running one virtual machine or ten thousand.

Start building today
From GPU-powered inference and Kubernetes to managed databases and storage, get everything you need to build, scale, and deploy intelligent applications.
