
Introduction
DigitalOcean Cloud Firewalls provide a powerful firewall service at the network level, leaving your servers free to do their job of serving your applications and storing your data. In this tutorial, we will adapt a two-server Wordpress and MySQL setup to use Cloud Firewalls, and demonstrate some of the advantages this service can provide. If you’d like more background on this firewall service before beginning, please read our Introduction To DigitalOcean Cloud Firewalls tutorial.
Prerequisites
Before starting this tutorial, you’ll need to have created the infrastructure outlined in How To Set Up a Remote Database to Optimize Site Performance with MySQL on Ubuntu 16.04. This will leave you with two servers, an Nginx web server with PHP and WordPress installed, and a standalone MySQL server. Throughout this tutorial we will call these servers frontend-01 and database-01 respectively.
Our Current Firewall Situation
Right now, both of our servers have firewalls set up using the ufw utility. ufw is an easy-to-use wrapper around Linux’s iptables firewall engine. Log in to both servers now and let’s check the status of our firewalls:
First, on the web server, frontend-01:
- sudo ufw status verbose
OutputStatus: active
Logging: on (low)
Default: deny (incoming), allow (outgoing), disabled (routed)
New profiles: skip

To                         Action      From
--                         ------      ----
22/tcp (OpenSSH)           ALLOW IN    Anywhere
80,443/tcp (Nginx Full)    ALLOW IN    Anywhere
22/tcp (OpenSSH (v6))      ALLOW IN    Anywhere (v6)
80,443/tcp (Nginx Full (v6)) ALLOW IN    Anywhere (v6)
In the output, after Default: we are shown that the firewall is, by default, denying all incoming connections and allowing all outgoing connections. Additionally we have four rules that allow incoming IPv4 and IPv6 TCP connections (ALLOW IN) to ports 22 (SSH), 80 (HTTP), and 443 (HTTPS).
Let’s do the same thing on the database server, database-01:
- sudo ufw status verbose
OutputStatus: active
Logging: on (low)
Default: deny (incoming), allow (outgoing), disabled (routed)
New profiles: skip

To                         Action      From
--                         ------      ----
22/tcp (OpenSSH)           ALLOW IN    Anywhere
3306                       ALLOW IN    Anywhere
22/tcp (OpenSSH (v6))      ALLOW IN    Anywhere (v6)
3306 (v6)                  ALLOW IN    Anywhere (v6)
This output is similar, except we’ve swapped the two Nginx ports for port 3306, which is the standard MySQL port. Now that we know our current setup, let’s plan our replacement.
Our Cloud Firewall Plan
Although we could just make two Cloud Firewalls, one tailored for each specific server, and apply one to frontend-01 and the other to database-01, we’re going take a more flexible approach to how we organize our rules.
First, we want to leave ourselves prepared for a future where we may need to add a third type of service to this system (perhaps a cache server). So we’re going to split up our firewall rules based on roles, not by physical server. We can apply multiple Cloud Firewalls to each Droplet, so it’s not a problem to make these firewalls fine-grained and modular.
Note: If you would like a more in-depth exploration of best-practices regarding structuring your Cloud Firewalls, please read How To Organize DigitalOcean Cloud Firewalls.
If we break things down a bit, we notice that both of our servers actually have multiple functions. There’s the primary function of either serving web pages or database information, and there’s also a management function provided by the SSH service. It would make good sense for us to create a management firewall, a frontend firewall, and a database firewall.
To handle the future scenario where we scale our web or database services to multiple hosts, we’ll use DigitalOcean’s tagging feature to organize our Droplets by role. Tags are simple labels we can apply to Droplets to categorize them and address whole groups of servers at once. The Cloud Firewall service can apply firewall rules to all Droplets in a tag, making it easy to provision new Droplets with the correct firewall rules already in place.
An additional bonus – and something that would be difficult do in a dynamic way using ufw – is that Cloud Firewalls can restrict inbound access based on tags. So for instance, our database servers only need to be accessible from our frontend servers. The current ufw setup has the database open to anybody on the network. We’ll lock that down to only our Droplets tagged with frontend.
Let’s summarize the three firewalls we need to set up, in plain language:
- Management: allow inbound traffic to TCP port 22 from any host
- Frontend: allow inbound traffic to TCP ports 80 and 443 from any host
- Database: allow inbound traffic to TCP port 3306 only from frontend tagged servers
We’re not going to restrict outbound traffic at all in this tutorial. It’s not a bad idea, but it does take some care to make sure you don’t break auto-update mechanisms and other critical features of the underlying operating system.
Now that we have a plan for our new firewalls, let’s get started.
Step 1 — Tagging Our Servers
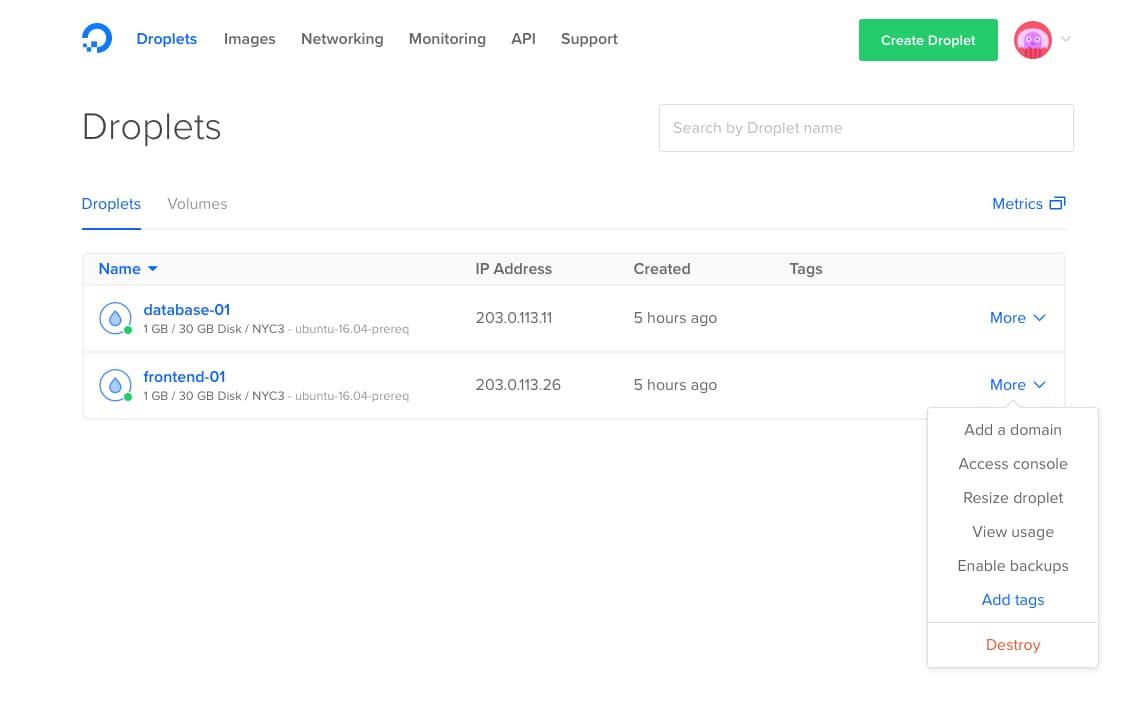
First, we’ll tag our Droplets by role, in preparation for our firewall rules. Navigate to the DigitalOcean Control Panel. The default view is a list of your Droplets. Click on the More button to the right of your frontend-01 Droplet, and select Add tags:
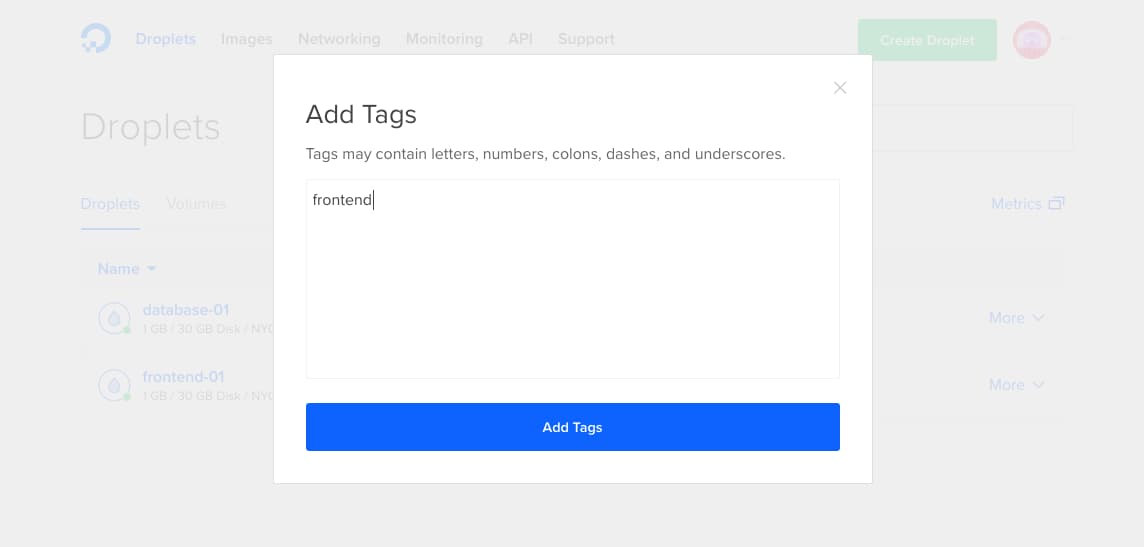
A text box will pop up where you can enter tags for this Droplet. Enter frontend and click the Add Tags button:
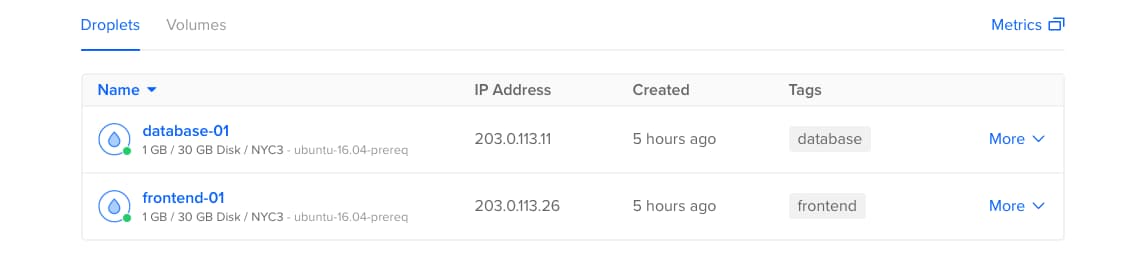
Do the same for your database server, giving it a database tag. The tags will show up in your Droplet list:
When creating future Droplets, you could apply these tags during the initial provisioning process. The Droplets will then automatically inherit the corresponding firewall rules.
We’ll set up those rules in the next step.
Step 2 — Creating Cloud Firewalls
We’re going to set up our Cloud Firewalls now. We’ll do the frontend firewall first, followed by database, then management. This order should result in no service disruptions for your website visitors, but we will temporarily lose the ability to make new SSH connections. This will not affect already established connections.
The Firewalls service is available under the Networking section on the DigitalOcean Control Panel. Once there, click the Firewalls tab, then click the Create Firewall button to get started.
Creating the Frontend Firewall
On the Create Firewall page, we need to fill out a Name, configure our Inbound Rules, and select which Droplets to apply the firewall to. We will leave the Outbound Rules section as is.
We’re creating the frontend firewall first, so put frontend-fw in the Name field.
Note: We’ll add -fw to the end of our firewall names to disambiguate them. Though the Control Panel interface uses icons to differentiate between resource types, it could get confusing if you’re using the command line or API and have multiple frontend items, for instance.
Next, we need to delete the default SSH rule from the Inbound Rules section. We’ll break this rule out into the management firewall for flexibility. Use the Delete link on the right-hand side of the page to delete the SSH rule now.
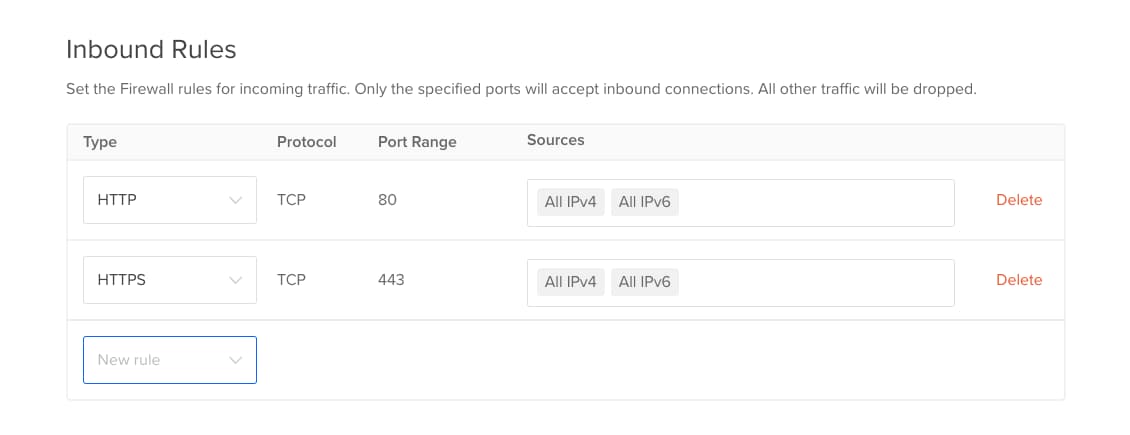
Then, click on the New rule dropdown and select HTTP. This will autofill the correct protocol (TCP) and port (80), and by default allow traffic from all IPv4 and IPv6 addresses. This is what we want.
If you have HTTPS enabled, repeat the above process to create a second rule, selecting HTTPS this time. Your Inbound Rules section will end up like this:
Finally, in the Apply to Droplets field, start typing frontend then select the frontend tag when it is auto-suggested.
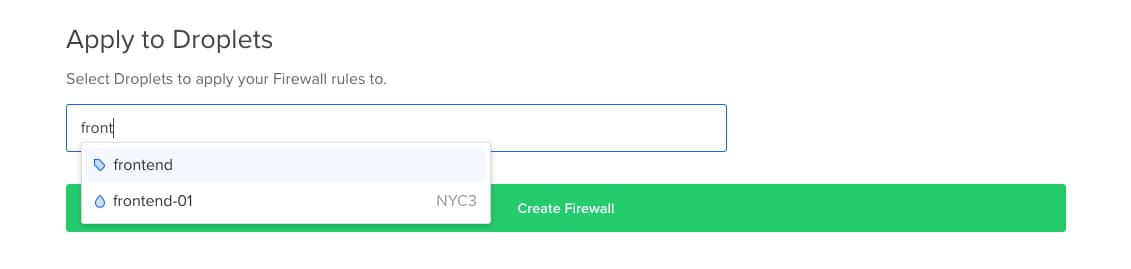
Click the Create Firewall button. The new firewall will be created and applied to any Droplet with the frontend tag. You will be returned to an updated firewall summary page showing your new firewall:
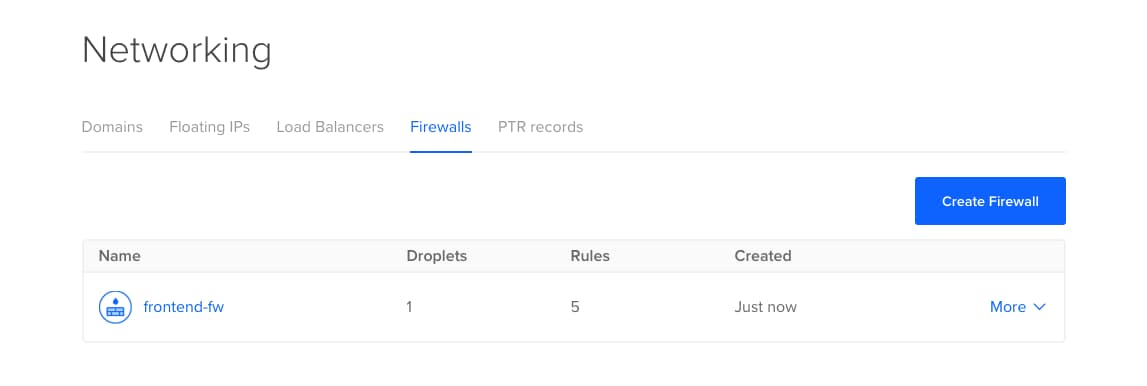
Now we’ll create the database firewall.
Creating the Database Firewall
On the Firewalls page, click Create Firewall again. The process will be mostly the same as for our frontend firewall.
Type database-fw into the Name field.
In Inbound Rules, delete the default SSH rule. Then, create a new rule using the dropdown, selecting MySQL. A default MySQL rule will be created allowing access to port 3306 from all IPs. Delete All IPv4 and All IPv6 from the Sources field. We want only our frontend servers to be able to access the database. Start typing frontend into the Sources box, and select the frontend tag when it is auto-suggested. Now any Droplet with that tag applied will be allowed access to the database server. All other IPs are blocked.
Leave the Outbound Rules as is. Under Apply to Droplets, apply this firewall to the database tag, then click Create Firewall. Once again, you’ll be returned to the firewall summary page:
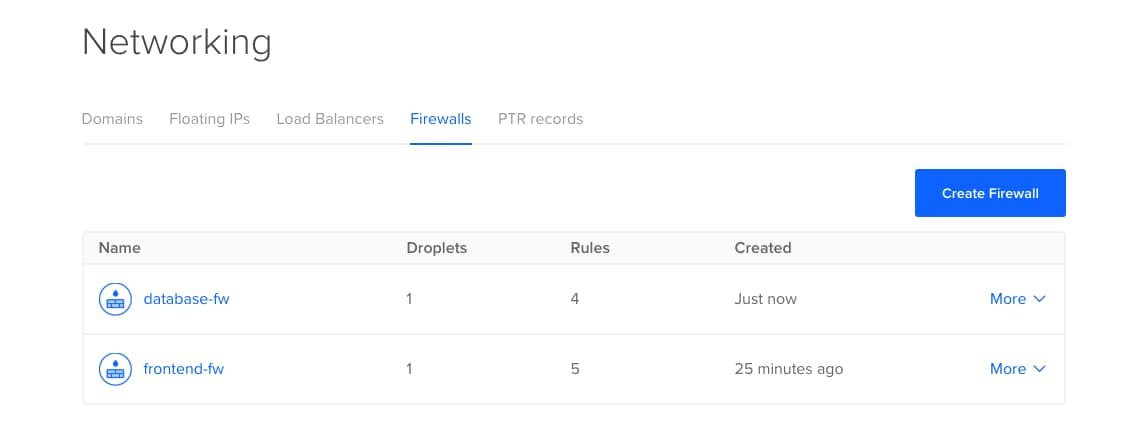
Note that both firewalls show that they are applied to one Droplet each. If you load your website, it should still load fine. Now let’s re-enabled management via SSH.
Creating the Management Firewall
Click Create Firewall one last time. Add management-fw to the Name field.
The default SSH rule is all we need for this firewall. This will allow any IP to connect to port 22.
Alternately, you could change the Sources field of the SSH rule to a specific IP that you’ll be connecting from. For instance, if your office has a static IP, and you want to restrict SSH access to only connections from the office, put that IP in Sources, replacing All IPv4 and All IPv6. If your IP ever changes in the future, you’ll just have to update this one rule to restore management access, another advantage of planning ahead and making our rules modular.
Under Apply to Droplets, add both the frontend and database tags, then click Create Firewall. Let’s take a look at our final firewall summary:
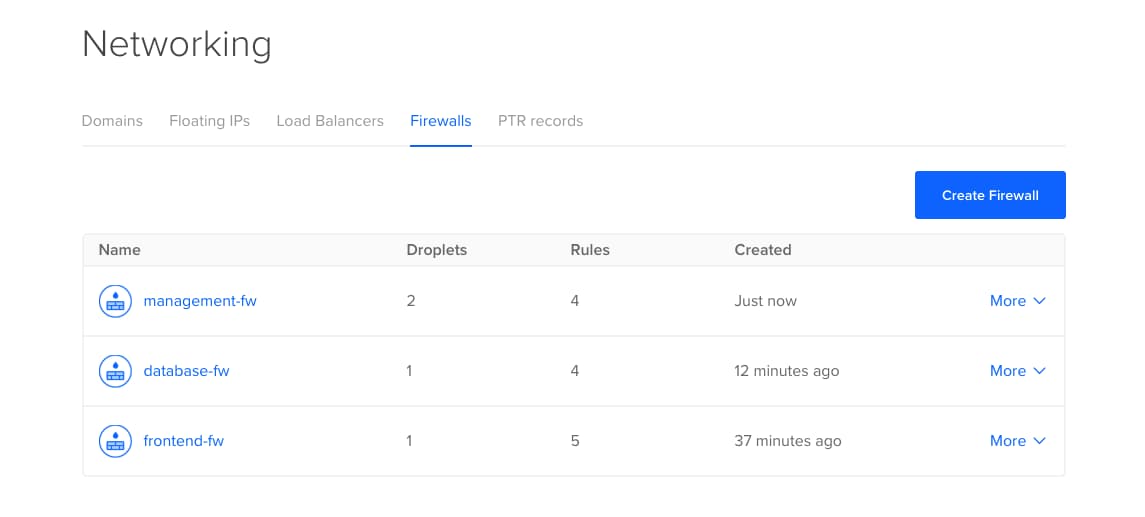
At this point, our Cloud Firewall should be fully functional, but we also still have the host-based ufw firewalls active. Let’s disable those, then test our connections.
Step 3 — Dropping the Host Firewalls
We need to disable the ufw firewall on both hosts. First, on frontend-01:
- sudo ufw disable
OutputFirewall stopped and disabled on system startup
Then on database-01:
- sudo ufw disable
OutputFirewall stopped and disabled on system startup
This stops the current firewall, flushes out all of the rules, and prevents the rules from being re-enabled on startup.
At this point, all of our connectivity should be restored. Try creating a new SSH session to one of your servers. Then load your website to verify that the web server is still connecting to the database and returning webpages to the browser.
Being able to connect to all of our services doesn’t actually prove that a firewall is functioning though. Let’s do a little more testing to verify that our firewalls are actually in place.
Step 4 — Testing Our Firewalls
To test our firewalls, we’re going to log in to a third server, and use a utility called nmap to scan our web and database servers. nmap is a port scanner that will scan our hosts and tell us which ports are open, closed, or filtered.
Log in to another Ubuntu 16.04 server that’s in the same region as your frontend-01 and database-01 servers. Then install nmap:
- sudo apt-get update
- sudo apt-get install nmap
Then, use nmap to scan the web server’s public IP:
- nmap -Pn frontend-01_public_ip
OutputStarting Nmap 7.01 ( https://nmap.org ) at 2017-06-05 17:08 UTC
Nmap scan report for 203.0.113.11
Host is up (0.0022s latency).
Not shown: 997 filtered ports
PORT    STATE SERVICE
22/tcp  open  ssh
80/tcp  open  http
443/tcp open  https

Nmap done: 1 IP address (1 host up) scanned in 4.54 seconds
Note the output about filtered ports. If the firewall was not functioning, these would show as closed ports. Filtered means that nmap can’t even connect to determine if the port is open or closed.
Note also that we see our SSH, HTTP, and HTTPS ports are open, as expected.
Next, we’ll scan the database server. Be sure to use the Droplet’s private IP if you’ve set it up that way, as that’s what the MySQL database will be listening on:
- nmap -Pn database-01_private_ip
OutputStarting Nmap 7.01 ( https://nmap.org ) at 2017-06-05 17:21 UTC
Nmap scan report for 198.51.100.20
Host is up (0.0024s latency).
Not shown: 999 filtered ports
PORT   STATE SERVICE
22/tcp open  ssh

Nmap done: 1 IP address (1 host up) scanned in 8.17 seconds
We see that most ports are filtered, as before. However, we’re only seeing the SSH port as open, with no MySQL port available. Recall that we restricted database access to only those servers tagged with frontend. Switch back over to the DigitalOcean Control Panel and add the frontend tag to the server you’re using nmap from. Then rerun the command:
- nmap -Pn database-01_private_ip
OutputStarting Nmap 7.01 ( https://nmap.org ) at 2017-06-05 17:22 UTC
Nmap scan report for 198.51.100.20
Host is up (0.0033s latency).
Not shown: 998 filtered ports
PORT     STATE SERVICE
22/tcp   open  ssh
3306/tcp open  mysql

Nmap done: 1 IP address (1 host up) scanned in 4.46 seconds
The MySQL port now shows as open. We’ve verified that both of our servers are now protected by our Cloud Firewall rules. You can now restore this test server’s original firewall settings by returning to the Control Panel and removing the Droplet’s frontend tag.
Conclusion
In this tutorial we’ve replaced a ufw firewall setup with a flexible and powerful network-based Cloud Firewall configuration. For more information on using Cloud Firewalls via doctl or the DigitalOcean API, please see the following articles:
Thanks for learning with the DigitalOcean Community. Check out our offerings for compute, storage, networking, and managed databases.
About the author
Senior Technical Writer at DigitalOcean
Still looking for an answer?
This textbox defaults to using Markdown to format your answer.
You can type !ref in this text area to quickly search our full set of tutorials, documentation & marketplace offerings and insert the link!
Is there a setup where it makes sense to keep ufw enabled? I’m thinking that to prevent any intra-digitalocean region connections I’d want to keep ufw up.
This comment has been deleted
Can we create WAF type rules too, or is this just IP based access control?
You need to warn users that they can get a HUGE SPIKE in TRAFFIC that will lead to a HUGE INCREASE in their BILL. It is reckless not to be more explicit on how to control/monitor traffic and the implications on your Bill.
I followed this and it caused my BILL to SPIKE from $ 30 to $ 218 per month. VERY DANGEROUS. I thought I was protecting/limiting the traffic as compared to the built in Firewall. NOT THE CASE.
Besides the change in the firewall settings. I didn’t do any other dev. And the SPIKE in my outbound traffic happened the exact day that I made the firewall changes by following this tutorial.
 This work is licensed under a Creative Commons Attribution-NonCommercial- ShareAlike 4.0 International License.
Become a contributor for community
Get paid to write technical tutorials and select a tech-focused charity to receive a matching donation.

DigitalOcean Documentation
Full documentation for every DigitalOcean product.

Resources for startups and AI-native businesses
The Wave has everything you need to know about building a business, from raising funding to marketing your product.
The developer cloud
Scale up as you grow — whether you're running one virtual machine or ten thousand.

Start building today
From GPU-powered inference and Kubernetes to managed databases and storage, get everything you need to build, scale, and deploy intelligent applications.
