By Scott Lee and Sharon Campbell

Introduction
Sensu is a monitoring tool written in Ruby that uses RabbitMQ as a message broker and Redis for storing data. It is well-suited for monitoring cloud environments.
Sensu connects the output from “check” scripts with “handler” scripts to create a robust monitoring and alert system. Check scripts can run on many nodes, and report on whether a certain condition is met, such as that Apache is running. Handler scripts can take an action like sending an alert email.
Both the “check” scripts and the “handler” scripts run on the Sensu master server, which is responsible for orchestrating check executions among Sensu client servers and processing check results. If a check triggers an event, it is passed to the handler, which will take a specified action.
An example of this is a check that monitors the status of an Apache web server. The check will be run on the Sensu clients. If the check reports a server as down, the Sensu server will pass the event to the handler, which can trigger an action like sending an email or collecting downtime metrics.
In this tutorial we will be installing and configuring one Sensu master server and one Sensu client server.
Prerequisites
In order to set up Sensu, you will need:
- One master node Droplet running Ubuntu 14.04. This is the node you will use to view all of the monitoring data.
- At least one additional node that you want to monitor, running Ubuntu 14.04.
Create a sudo user on each Droplet. First, create the user with the adduser command, replacing the username with the name you want to use.
adduser username
This will create the user and the appropriate home directory and group. You will be prompted to set a password for the new user and confirm the password. You will also be prompted to enter the user’s information. Confirm the user information to create the user.
Next, grant the user sudo privileges with the visudo command.
visudo
This will open the /etc/sudoers file. In the User privilege specification section add another line for the created user so it looks like this (with your chosen username instead of username):
# User privilege specification
root ALL=(ALL:ALL) ALL
username ALL=(ALL:ALL) ALL
Save the file and switch to the new user.
su - username
Update the system packages and upgrade them.
sudo apt-get update && sudo apt-get -y upgrade
Step One — Installation on the Master
First, we will set up the Sensu master server. This requires RabbitMQ, Redis, Sensu itself, and the Uchiwa dashboard, along with some supporting software.
Add the RabbitMQ source to the APT source list.
echo "deb http://www.rabbitmq.com/debian/ testing main" | sudo tee -a /etc/apt/sources.list.d/rabbitmq.list
Download and add the signing key for RabbitMQ.
curl -L -o ~/rabbitmq-signing-key-public.asc http://www.rabbitmq.com/rabbitmq-signing-key-public.asc

sudo apt-key add ~/rabbitmq-signing-key-public.asc
Install RabbitMQ and Erlang.
sudo apt-get update && sudo apt-get install -y rabbitmq-server erlang-nox
The RabbitMQ service should start automatically. If it doesn’t, start it with the following command.
sudo service rabbitmq-server start
Sensu uses SSL for secure communication between its components and RabbitMQ. Although it is possible to use Sensu without SSL, it is highly discouraged. To generate certificates, download Sensu’s certificate generator to the /tmp directory and generate the SSL certificates.
cd /tmp && wget http://sensuapp.org/docs/0.13/tools/ssl_certs.tar && tar -xvf ssl_certs.tar

cd ssl_certs && ./ssl_certs.sh generate
Create a RabbitMQ SSL directory and copy over the certificates.
sudo mkdir -p /etc/rabbitmq/ssl && sudo cp /tmp/ssl_certs/sensu_ca/cacert.pem /tmp/ssl_certs/server/cert.pem /tmp/ssl_certs/server/key.pem /etc/rabbitmq/ssl
Create and edit the /etc/rabbitmq/rabbitmq.config file.
sudo vi /etc/rabbitmq/rabbitmq.config
Add the following lines to the file. This configures the RabbitMQ SSL listener to listen on port 5671 and to use the generated certificate authority and server certificate. It will also verify the connection and fail if there is no certificate.
[
    {rabbit, [
    {ssl_listeners, [5671]},
    {ssl_options, [{cacertfile,"/etc/rabbitmq/ssl/cacert.pem"},
                   {certfile,"/etc/rabbitmq/ssl/cert.pem"},
                   {keyfile,"/etc/rabbitmq/ssl/key.pem"},
                   {verify,verify_peer},
                   {fail_if_no_peer_cert,true}]}
  ]}
].
Restart RabbitMQ.
sudo service rabbitmq-server restart
Create a RabbitMQ virtual host and user for Sensu. Change the password (pass). You’ll need this password later when you configure the Sensu server and the clients to be monitored.
sudo rabbitmqctl add_vhost /sensu
sudo rabbitmqctl add_user sensu pass
sudo rabbitmqctl set_permissions -p /sensu sensu ".*" ".*" ".*"
Install Redis.
sudo apt-get -y install redis-server
The Redis service should start automatically. If it doesn’t, start it with the following command. (Note that if Redis is already running you will receive the error: “Starting redis-server: failed.”)
sudo service redis-server start
Add the sources and keys to install Sensu.
wget -q http://repos.sensuapp.org/apt/pubkey.gpg -O- | sudo apt-key add -

echo "deb     http://repos.sensuapp.org/apt sensu main" | sudo tee -a /etc/apt/sources.list.d/sensu.list
Install Sensu and Uchiwa (Uchiwa is the monitoring dashboard).
sudo apt-get update && sudo apt-get install -y sensu uchiwa
Sensu needs the secure connection information to RabbitMQ. Make an SSL directory for Sensu and copy over the generated certs.
sudo mkdir -p /etc/sensu/ssl && sudo cp /tmp/ssl_certs/client/cert.pem /tmp/ssl_certs/client/key.pem /etc/sensu/ssl
Now all of the components for Sensu monitoring are installed.
Step Two — Configuration on the Master
Now we need to configure Sensu. We’ll create individual configuration files in the /etc/sensu/conf.d folder for easier readability and management. Unless you’ve configured the services and components mentioned in the config files on separate machines, you can leave most sample values shown below unchanged. Alternately, /etc/sensu/config.json.example<^> is another example configuration file you can copy and use to configure Sensu.
Create and edit the rabbitmq.json file.
sudo vi /etc/sensu/conf.d/rabbitmq.json
Add the following lines, which will allow Redis to connect securely to the RabbitMQ instance using your SSL certificate. The user and pass should be the ones you set for the RabbitMQ virtual host.
{
  "rabbitmq": {
    "ssl": {
      "cert_chain_file": "/etc/sensu/ssl/cert.pem",
      "private_key_file": "/etc/sensu/ssl/key.pem"
    },
    "host": "localhost",
    "port": 5671,
    "vhost": "/sensu",
    "user": "sensu",
    "password": "pass"
  }
}
Create and edit the redis.json file.
sudo vi /etc/sensu/conf.d/redis.json
Add the following lines, which include the connection information for Sensu to access the Redis instance.
{
  "redis": {
    "host": "localhost",
    "port": 6379
  }
}
Create and edit the api.json file.
sudo vi /etc/sensu/conf.d/api.json
Add the following lines, which include the connection information for Sensu to access the API service.
{
  "api": {
    "host": "localhost",
    "port": 4567
  }
}
Create and edit the uchiwa.json file.
sudo vi /etc/sensu/conf.d/uchiwa.json
Add the following lines. These include the connection information for the Uchiwa dashboard to access the Sensu API. You can optionally create a username and password in the uchiwa block for dashboard authentication. If you want the dashboard to be publicly accessible, just leave it as is.
{
    "sensu": [
        {
            "name": "Sensu",
            "host": "localhost",
            "ssl": false,
            "port": 4567,
            "path": "",
            "timeout": 5000
        }
    ],
    "uchiwa": {
        "port": 3000,
        "stats": 10,
        "refresh": 10000
    }
}
In this example, we’ll have the Sensu master server monitor itself as a client. So, create and edit the client.json file.
sudo vi /etc/sensu/conf.d/client.json
Add the following lines and edit the name value for the Sensu client. This is the name for the server that you will see in the Uchiwa dashboard. The name cannot have spaces or special characters.
You can leave the address value as localhost since we are monitoring this server. We will be creating a similar file again later for every client host to be monitored.
{
  "client": {
    "name": "server",
    "address": "localhost",
    "subscriptions": [ "ALL" ]
  }
}
Enable the Sensu services to start automatically.
sudo update-rc.d sensu-server defaults
sudo update-rc.d sensu-client defaults
sudo update-rc.d sensu-api defaults
sudo update-rc.d uchiwa defaults
Start the Sensu services.
sudo service sensu-server start
sudo service sensu-client start
sudo service sensu-api start
sudo service uchiwa start
At this point, you can access Sensu at http://ip-address:3000.
Step Three — Installation on the Client
You will need to install Sensu on every client machine to be monitored.
While still on the Sensu master server, copy the SSL certificates to the client server’s /tmp folder using SCP. Replace user and IP below with the sudo user and IP address of the client server.
scp /tmp/ssl_certs/client/cert.pem /tmp/ssl_certs/client/key.pem user@ip:/tmp
On the client to be monitored, add the Sensu key and source.
wget -q http://repos.sensuapp.org/apt/pubkey.gpg -O- | sudo apt-key add -
echo "deb     http://repos.sensuapp.org/apt sensu main" | sudo tee -a /etc/apt/sources.list.d/sensu.list
Install Sensu.
sudo apt-get update && sudo apt-get -y install sensu
You need to provide the client with connection information to RabbitMQ. Make an SSL directory for Sensu and copy the certificates in the /tmp folder that were copied from the Sensu master server.
sudo mkdir -p /etc/sensu/ssl && sudo cp /tmp/cert.pem /tmp/key.pem /etc/sensu/ssl
Create and edit the rabbitmq.json file.
sudo vi /etc/sensu/conf.d/rabbitmq.json
Add the following lines. Edit the host value to use the IP address of the RabbitMQ server; that is, the IP address of the Sensu master server. The user and password values should be the ones you set for the RabbitMQ virtual host on the Sensu master server.
{
  "rabbitmq": {
    "ssl": {
      "cert_chain_file": "/etc/sensu/ssl/cert.pem",
      "private_key_file": "/etc/sensu/ssl/key.pem"
    },
    "host": "1.1.1.1",
    "port": 5671,
    "vhost": "/sensu",
    "user": "sensu",
    "password": "pass"
  }
}
Provide configuration information for this Sensu server by creating and editing the client.json file.
sudo vi /etc/sensu/conf.d/client.json
Add the following lines. You should edit the name value to what you want this server to be called in the Uchiwa dashboard. The name cannot have spaces or special characters.
You can leave the address value set to localhost, since we are monitoring this Sensu client server.
{
  "client": {
    "name": "client1",
    "address": "localhost",
    "subscriptions": [ "ALL" ]
  }
}
Enable and start the client.
sudo update-rc.d sensu-client defaults

sudo service sensu-client start
You should now see the client on the Clients tab on the Sensu Dashboard.
Step Four — Set Up a Check
Now that Sensu is running we need to add a check on both servers. We’re going to create a Ruby script that will check if Apache is running.
If you don’t have Apache installed, install it now on both the Sensu master server and the Sensu client server.
sudo apt-get install -y apache2
Apache should be running by default on both servers.
Before installing the sensu-plugin gem, make sure you have all the required libraries. Install the Ruby libraries and the build-essential library on both the Sensu master server and the Sensu client server.
sudo apt-get install -y ruby ruby-dev build-essential
Install the sensu-plugin gem on both the Sensu master server and the Sensu client server.
sudo gem install sensu-plugin
Create a check-apache.rb file in the Sensu plugins folder and modify the file permissions on both the Sensu master server and the Sensu client server.
sudo touch /etc/sensu/plugins/check-apache.rb && sudo chmod 755 /etc/sensu/plugins/check-apache.rb
Edit the check-apache.rb file on both the Sensu master server and the Sensu client server.
sudo vi /etc/sensu/plugins/check-apache.rb
Add the following lines, which script the process of checking Apache.
#!/usr/bin/env ruby

procs = `ps aux`
running = false
procs.each_line do |proc|
  running = true if proc.include?('apache2')
end
if running
  puts 'OK - Apache daemon is running'
  exit 0
else
  puts 'WARNING - Apache daemon is NOT running'
  exit 1
end
Create and edit the check_apache.json file on only the Sensu master server.
sudo vi /etc/sensu/conf.d/check_apache.json
Add the following lines that will run the script to check Apache every 60 seconds.
{
  "checks": {
    "apache_check": {
      "command": "/etc/sensu/plugins/check-apache.rb",
      "interval": 60,
      "subscribers": [ "ALL" ]
    }
  }
}
Restart the Sensu server and API on the Sensu master server.
sudo service sensu-server restart && sudo service sensu-api restart
Restart the Sensu client on the Sensu client server.
sudo service sensu-client restart
After a few minutes, you should see the check appear on the “Checks” tab in the Sensu Dashboard.
Stop the Apache service on either server to test that the script is working.
sudo service apache2 stop
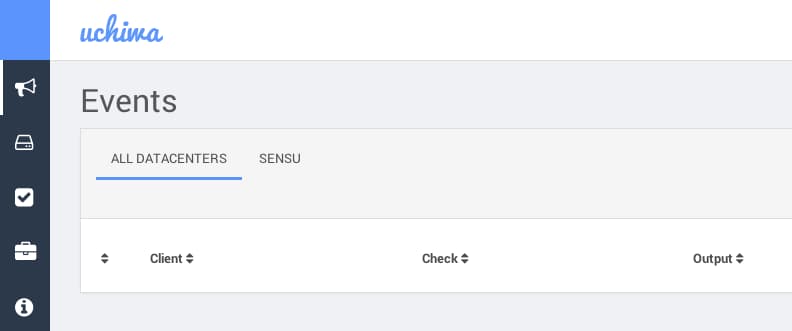
An alert should show up on the Events dashboard after a few minutes. Click on the alert to view more information and to take action such as silencing or resolving it.
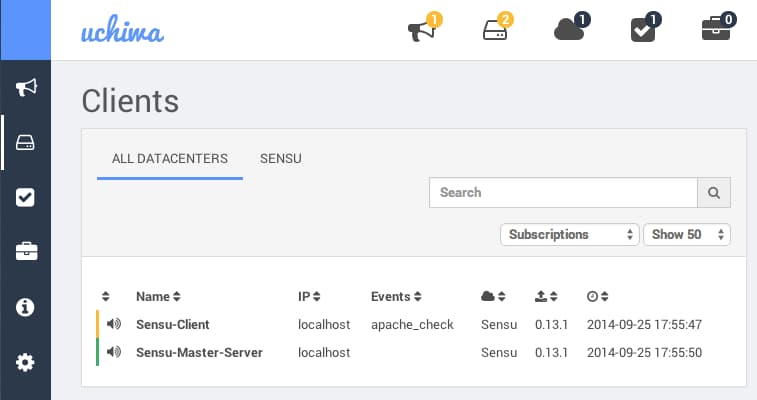
In this image, Apache has been stopped on the client server. This is the Clients page.
Start the Apache service to stop the warnings.
sudo service apache2 start
Step Five — Set Up a Handler
Handlers can send notification emails or send data to other applications like Graphite based on events. Here, we will create a handler that sends an email if the Apache check fails. Please note that your server needs to be configured to send email. You can use this Postfix Tutorial to set up a simple mail server. (You may want to have mail sent to a user on the Sensu master server for the easiest configuration.)
On the Sensu master server, create and edit the handler_email.json file.
sudo vi /etc/sensu/conf.d/handler_email.json
Add the following lines, replacing email@address.com with the email address where you want to receive notifications. Depending on your mail server setup, it may be easiest to set this to an alias for a user on the Sensu master server. This handler is called “email” and will use the mail utility to send an alert email with the subject “sensu event” to the specified email address.
{
  "handlers": {
    "email": {
      "type": "pipe",
      "command": "mail -s 'sensu event' email@address.com"
    }
  }
}
Edit the check_apache.json.
sudo vi /etc/sensu/conf.d/check_apache.json
Add the new handlers line with the email handler in the apache_check block.
{
  "checks": {
    "apache_check": {
      "command": "/etc/sensu/plugins/check-apache.rb",
      "interval": 60,
      "handlers": ["default", "email"],
      "subscribers": [ "ALL" ]
    }
  }
}
Restart sensu-api and sensu-server.
sudo service sensu-api restart && sudo service sensu-server restart
Stop the Apache service again to test the email alert. You should get one every 60 seconds.
sudo service apache2 stop
Your email should look somewhat like the following:
Return-Path: <sensu@sensu-master>
...
Subject: sensu event
To: <alerts@sensu-master.com>
...
From: sensu@sensu-master (Sensu Monitoring Framework)

{"id":"481c85c4-485d-4f25-b835-cea5aef02c69","client":{"name":"Sensu-Master-Server","address":"localhost","subscriptions":["ALL"],"version":"0.13.1","timestamp":1411681990},"check":{"command":"/etc/sensu/plugins/check-apache.rb","interval":60,"handlers":["default","email"],"subscribers":["ALL"],"name":"apache_check","issued":1411682001,"executed":1411682001,"duration":0.023,"output":"WARNING - Apache daemon is NOT running\n","status":1,"history":["0","0","0","0","0","0","0","0","0","0","0","0","0","0","0","0","0","0","0","0","1"]},"occurrences":1,"action":"create"}
Start the Apache service again to stop receiving email alerts.
sudo service apache2 start
Conclusion
Sensu is a versatile monitoring tool with its plugins and the custom scripts you can write for it. You can also create handlers to do almost anything with the data. Keep exploring to get it just right for you.
Thanks for learning with the DigitalOcean Community. Check out our offerings for compute, storage, networking, and managed databases.
About the author(s)
Hey!
Current fan and former Editorial Manager at DigitalOcean. Hi! Expertise in areas including Ubuntu, Docker, Rails, and more.
Still looking for an answer?
This textbox defaults to using Markdown to format your answer.
You can type !ref in this text area to quickly search our full set of tutorials, documentation & marketplace offerings and insert the link!
Hi,
Great tutorial. Well i tried to do as above. Few of the issues which i came across and not able to solve.
- When i start the sensu-server - i get fatal error logs as follows
{“timestamp”:“2014-10-01T09:46:09.257505+0000”,“level”:“warn”,“message”:“stopping”} <SSL_incomp><SSL_incomp><SSL_incomp><SSL_incomp><SSL_incomp><SSL_incomp><SSL_incomp><SSL_incomp><SSL_incomp><SSL_incomp><SSL_incomp><SSL_incomp><SSL_incomp><SSL_incomp><SSL_incomp><SSL_incomp><SSL_incomp><SSL_incomp><SSL_incomp><SSL_incomp><SSL_incomp><SSL_incomp>{“timestamp”:“2014-10-01T09:46:09.525127+0000”,“level”:“warn”,“message”:“reconnecting to transport”} {“timestamp”:“2014-10-01T09:46:09.525656+0000”,“level”:“fatal”,“message”:“transport connection error”,“error”:“failed to connect to rabbitmq”}
Can you please help me to overcome this.
Regards, Karan GM
I followed the tut to a tee (great tut btw), but I’m having two really stupid problems that I’m sure are my fault:
- Sensu isn’t sending email alerts even though I’ve config’d it to. I’ve also verified that that I can send emails with postfix via
echo "Test mail from postfix" | mail -s "Test Postfix" myemail@gmail.com - I can’t seem to get the username and password to work for Uchiwa. I added “user” and pass" key-value pairs to “uchiwa” block in
/etc/sensu/conf.d/uchiwa.jsonand restarted uchiwa AND sensu, but it doesn’t seem to take since I can still log in to Uchiwa unauthenticated.
If anybody has any ideas that’d be dope! :)
Cheers.
-Tim
I has exact same SSL error that was described by @karangm
Hi,
In the check result, there is a history of last 21 results . Is there anyway to get more than that.
Regards, Karan GM
Hello, I followed step by step twice and I am able to see the login for the server dashboard in my-ip:3000 but I am not able to login. I am trying with all the credentials I used in the tutorial and nothing.
I found this very useful unfortunately in my case uchiwa config needed to be /etc/sensu/uchiwa.json not /etc/sensu/conf.d/uchiwa.json. meh.
Quote:
Add the following lines, which include the connection information for Sensu to access the API service.
Actually, that’s not Sensu accessing the API service. It’s Sensu’s API service being configured for other things to access it.
 This work is licensed under a Creative Commons Attribution-NonCommercial- ShareAlike 4.0 International License.
Become a contributor for community
Get paid to write technical tutorials and select a tech-focused charity to receive a matching donation.

DigitalOcean Documentation
Full documentation for every DigitalOcean product.

Resources for startups and AI-native businesses
The Wave has everything you need to know about building a business, from raising funding to marketing your product.
The developer cloud
Scale up as you grow — whether you're running one virtual machine or ten thousand.

Start building today
From GPU-powered inference and Kubernetes to managed databases and storage, get everything you need to build, scale, and deploy intelligent applications.
