By James Quick

Introduction
Visual Studio Code is a code editor from Microsoft available on Windows, Linux, and macOS. It offers extensions that you can install through the Visual Studio Code Marketplace for additional features in your editor. When you can’t find an extension that does exactly what you need, it is possible to create your own.
In this article, you’ll create your first Visual Studio Code extension.
Prerequisites
To complete this tutorial, you will need:
- Download and install the latest version of Visual Studio Code.
- Node.js installed on your machine following How To Install Node.js and Create a Local Development Environment.
This tutorial was verified with Node v14.4.0, npm v6.14.5, yo v3.1.1, and generator-code v1.2.16.
Step 1 — Installing the Tools
The Visual Studio Code team created a generator for creating extensions, which generates all of the necessary starter files to begin creating your extension.
To get started with developing VS Code Extensions, you’ll need two different npm packages:
yo- a command-line interface for Yeoman.generator-code- a Yeoman generator for writing Visual Studio Code extensions.
You can use the built-in Terminal for Visual Studio Code to use npx to run local copies of yo and generator-code and then run the command yo code to initialize your new project:
- npx -p yo -p generator-code yo code
At this point, Yeoman will run the Code generator.
Step 2 — Creating Your First Extension
You are now ready to create your first extension.
You will then answer several questions about your project. You will need to choose what kind of extension you are creating and between “TypeScript” and “JavaScript”. We will be choosing JavaScript in this tutorial.
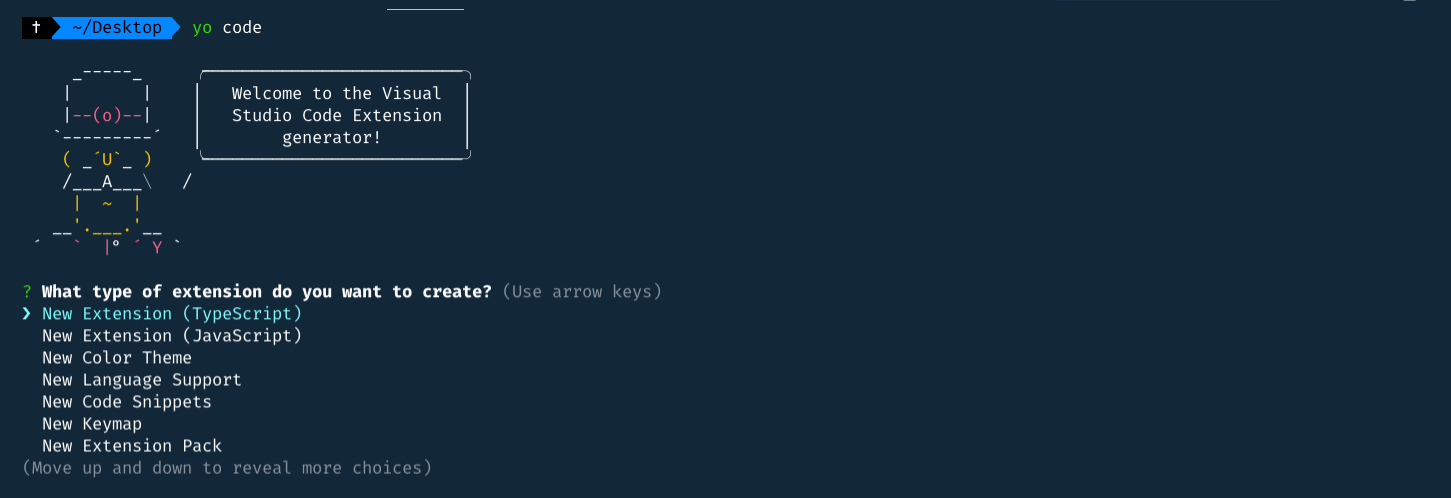
Then you will be presented with a few more questions. For this tutorial, the following choices were selected:
? What type of extension do you want to create? New Extension (JavaScript)
? What's the name of your extension? testytest
? What's the identifier of your extension? testytest
? What's the description of your extension? This is a test extension
? Enable JavaScript type checking in 'jsconfig.json'? Yes
? Initialize a git repository? Yes
? Which package manager to use? npm
After this process is complete, you will have all of the files you need to get started. Your two most important files are:
package.jsonextension.js
Open package.json and let’s take a look. You’ll see the name, description, and so on. There are two more sections that are very important.
activationEvents: this is a list of events that will activate your extension. Extensions are lazy-loaded so they aren’t activated until one of these activation events occurs.commands: list of commands that you provide the user to run via your extension.
We will come back to these shortly.
{
  // ...
  "activationEvents": [
    "onCommand:testytest.helloWorld"
  ],
  "main": "./extension.js",
  "contributes": {
    "commands": [
      {
        "command": "testytest.helloWorld",
        "title": "Hello World"
      }
    ]
  },
  // ...
}
You can also take a look at the extension.js file. This is where we are going to write the code for our extension. There’s some boilerplate code in here, so let’s break it down.
In the highlighted line below is where our command is being registered with VS Code. Notice that this name helloWorld is the same as the command in package.json. This is intentional. The package.json defines what commands are available to the user, but the extension.js file registers the code for that command.
// ...

/**
 * @param {vscode.ExtensionContext} context
 */
function activate(context) {
  console.log('Congratulations, your extension "testytest" is now active!');

  let disposable = vscode.commands.registerCommand('testytest.helloWorld', function () {
    vscode.window.showInformationMessage('Hello World from testytest!');
  });

  context.subscriptions.push(disposable);
}

// ...
In this Hello World example, all this command will do is display a “Hello World” message to the user.
Step 3 — Debugging Your Extension
Now that we have all of the necessary files installed, we can run our extension.
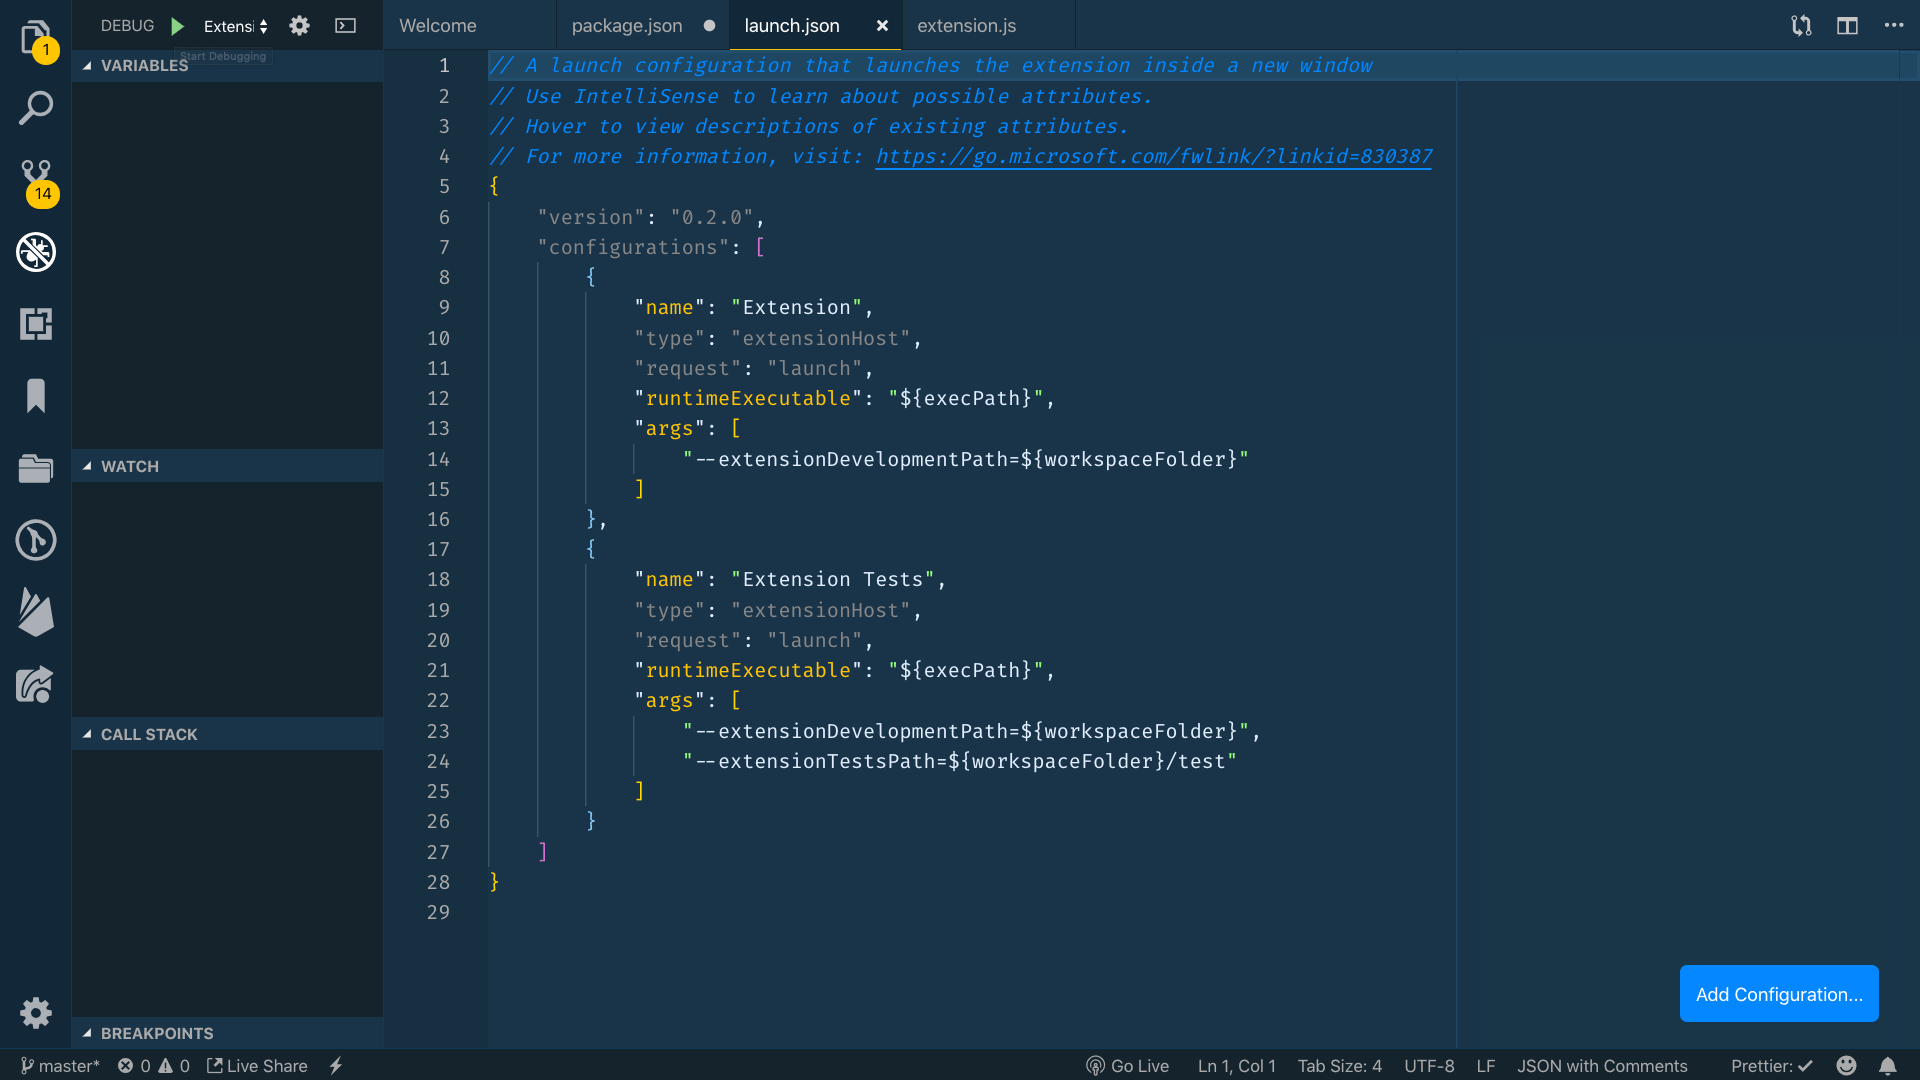
The .vscode folder is where VS Code stores configuration files of sorts for your project. In this case, it includes a launch.json that contains debug configurations.
// ...
{
  // ...
  "configurations": [
    {
      "name": "Run Extension",
      "type": "extensionHost",
      "request": "launch",
      "runtimeExecutable": "${execPath}",
      "args": [
        "--extensionDevelopmentPath=${workspaceFolder}"
      ]
    },
    // ...
  ]
}
From here, we can debug. Open the debug tab on the left on the left of your screen, and then click the “play” icon.
This will open up a new (debug) instance of VS Code.
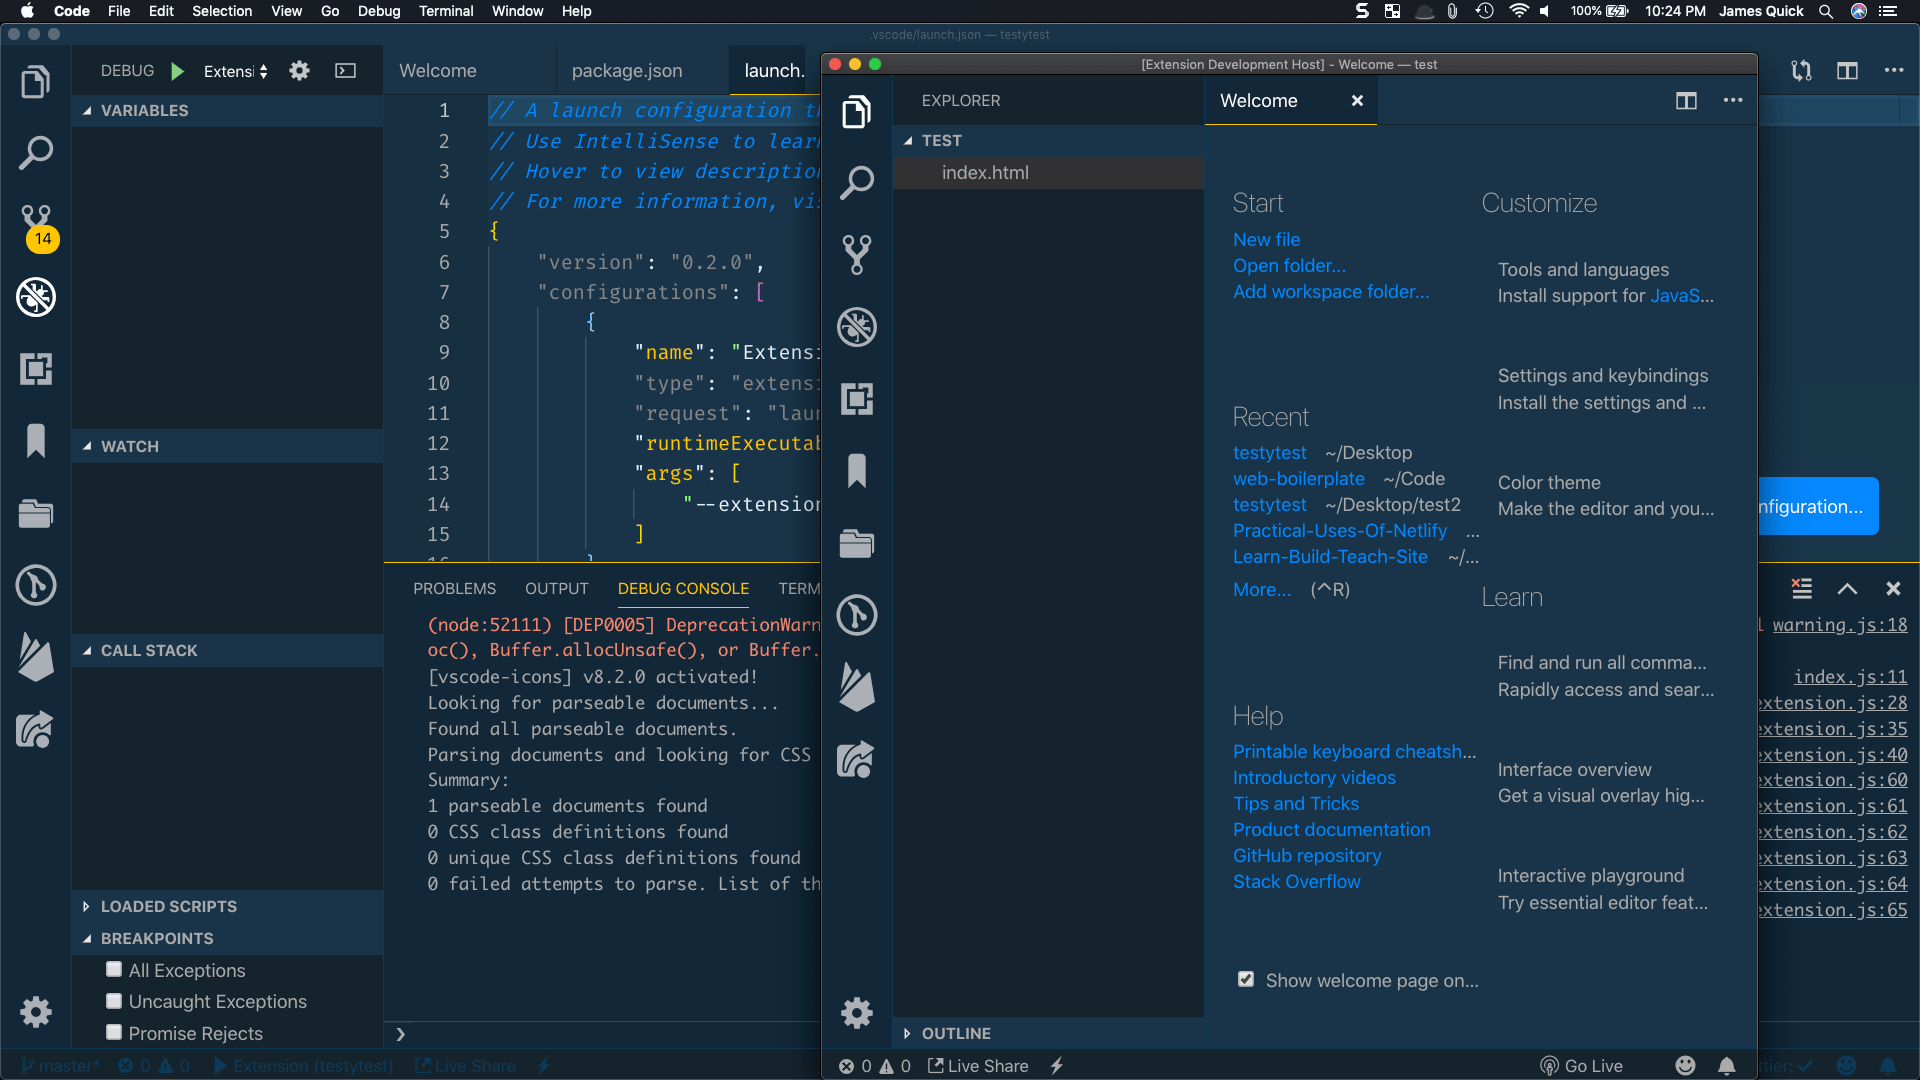
With this debug instance of VS Code open, you can open the command palette with COMMAND+SHIFT+P on Mac or CTRL+SHIFT+P on Windows and run Hello World.
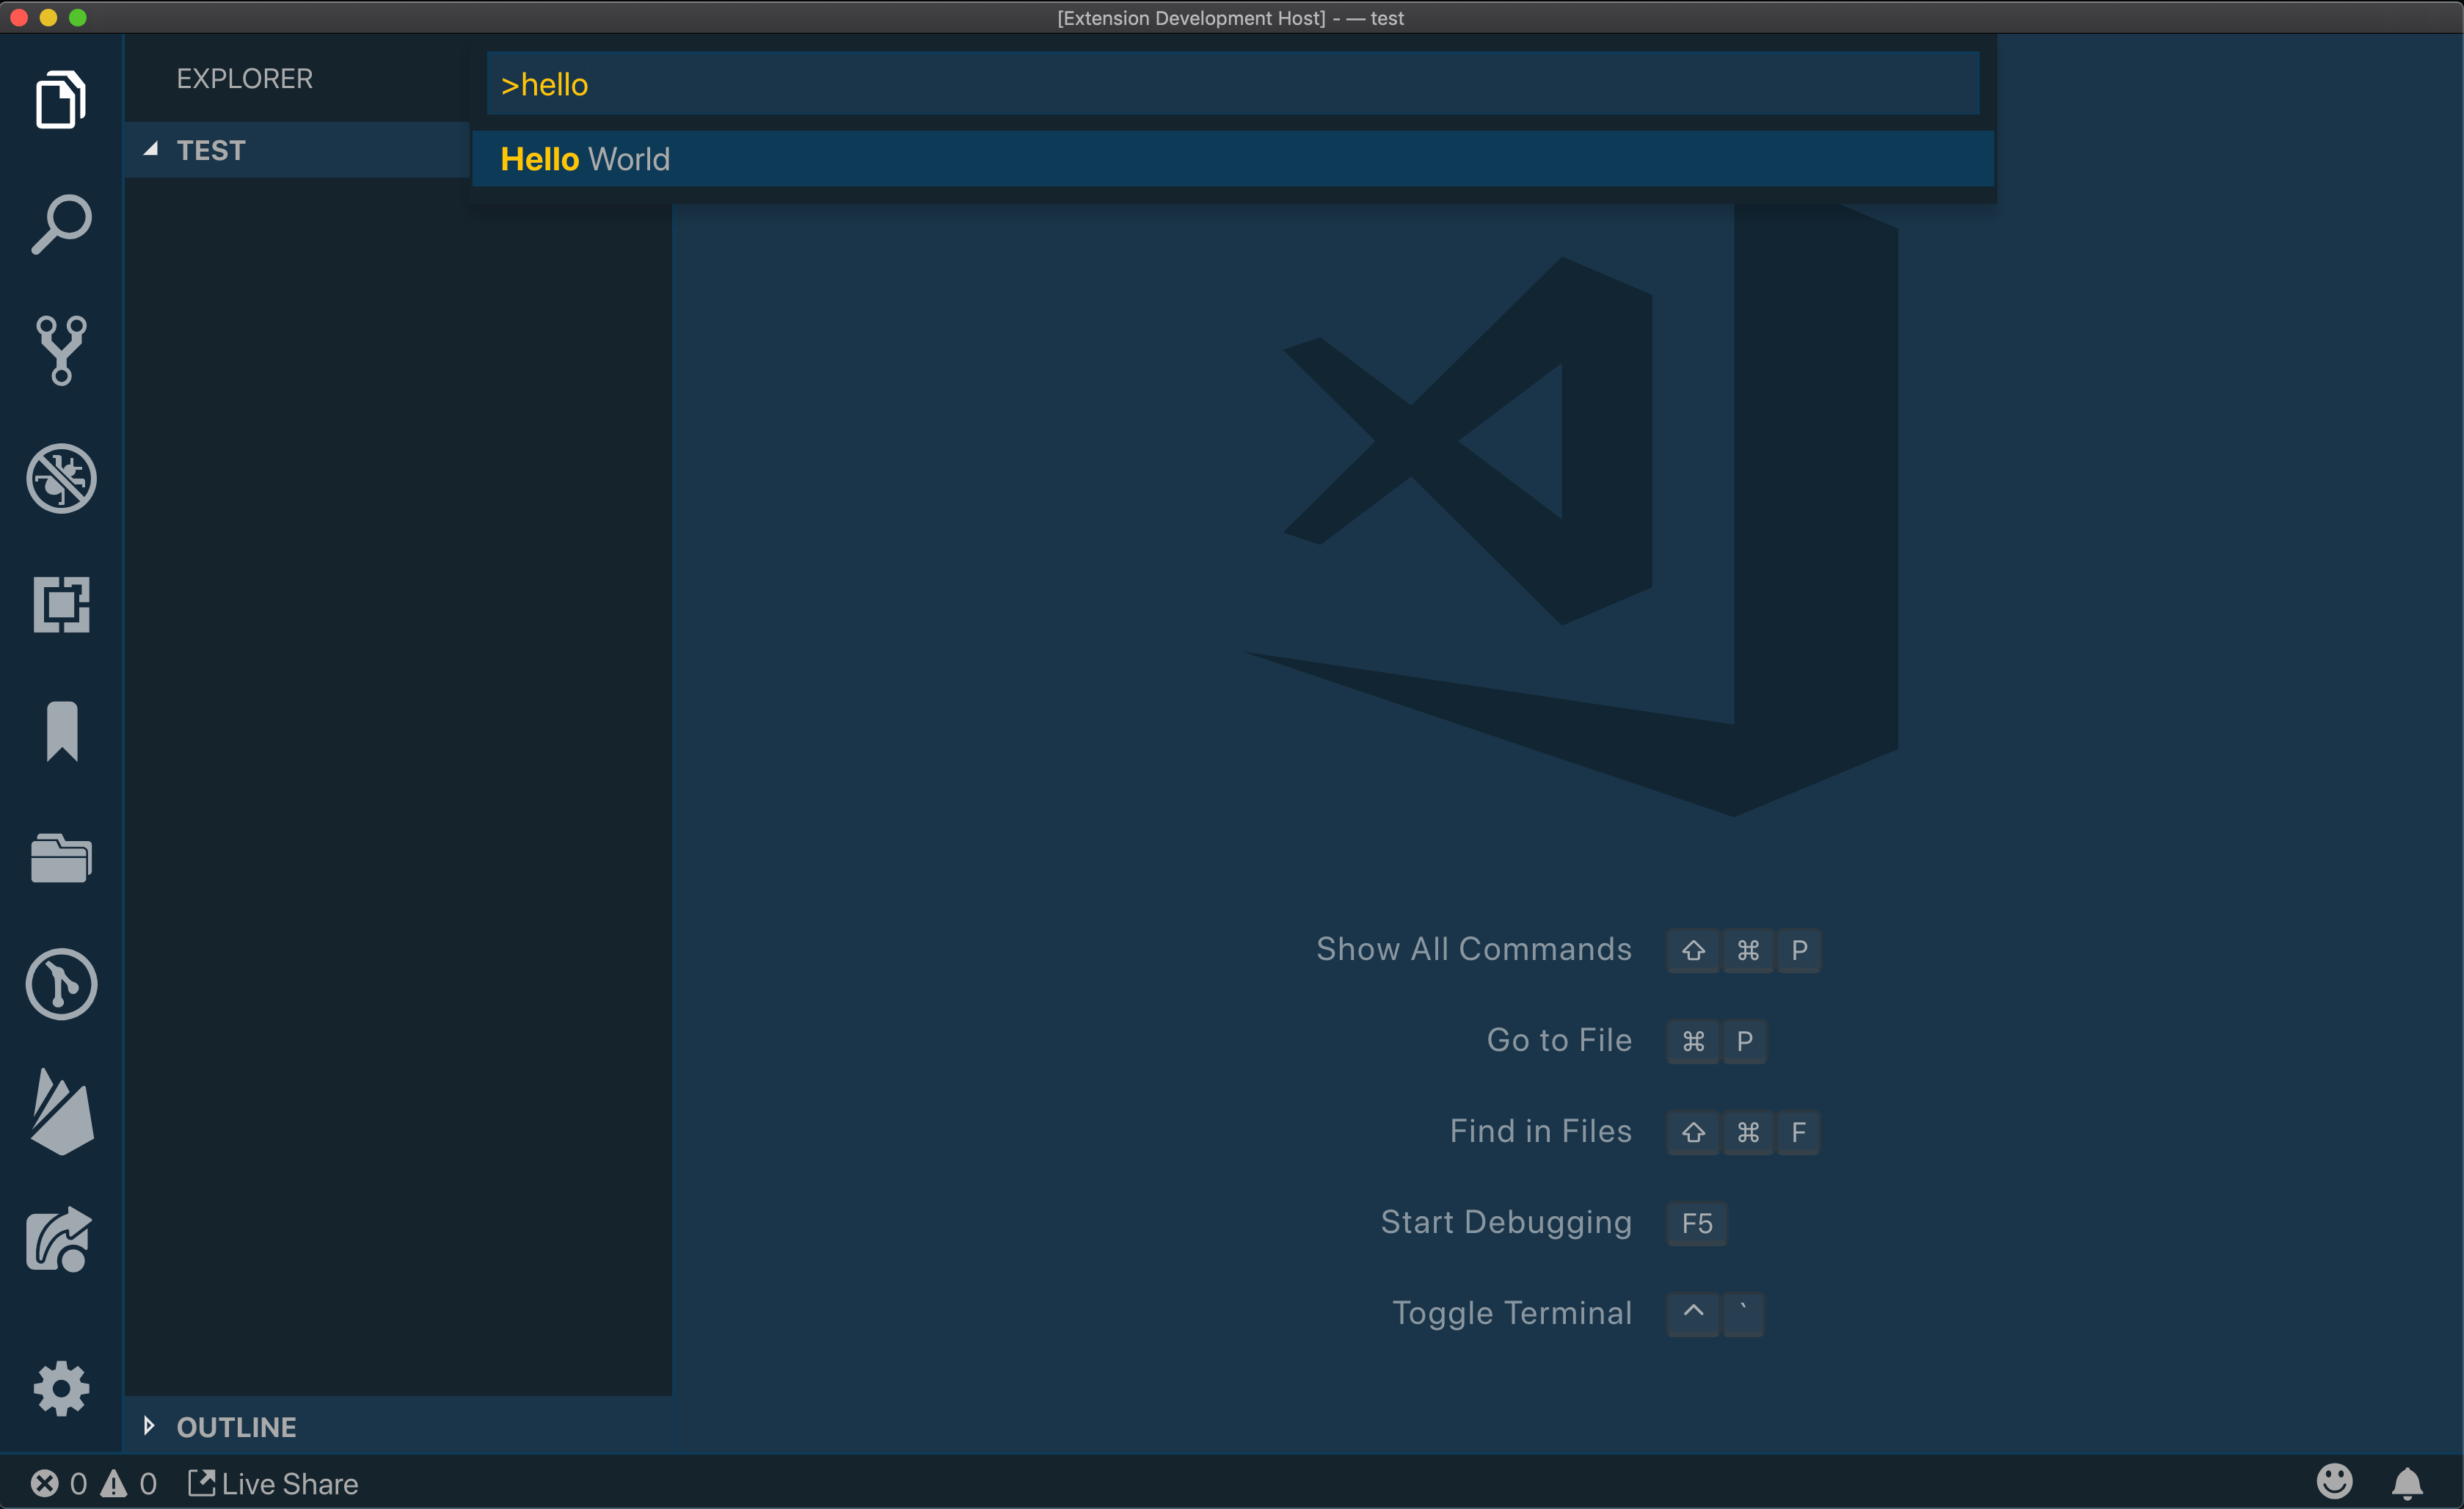
You’ll see a “Hello World” message pop up in the lower right-hand corner.
Step 4 — Editing Your Extension
Before we work on code, let’s take one more look at the activationEvents section in the package.json file. Again, this section contains a list of events that will activate our extension whenever they occur. By default, it is set to activate when our command is run.
In theory, this event could be anything, and more specifically * anything. By setting the activation event to * this means your extension will be loaded when VS Code starts up. This is not required by any means, just a note.
{
  // ...
  "activationEvents": [
    "*"
  ],
  // ...
}
We’ve got the necessary files and we know how to debug. Now let’s start building our extension. Let’s say we want this extension to be able to create an HTML file that already has boilerplate code in it and is added to our project.
Let’s first update the name of our command. In extension.js, update the name of the command from extension.helloworld to extension.createBoilerplate.
// ...

/**
 * @param {vscode.ExtensionContext} context
 */
function activate(context) {
  console.log('Congratulations, your extension "testytest" is now active!');

  let disposable = vscode.commands.registerCommand('testytest.createBoilerplate', function () {
    vscode.window.showInformationMessage('Hello World from testytest!');
  });

  context.subscriptions.push(disposable);
}

// ...
Now, update the package.json file accordingly with the change in command.
{
  // ...
  "activationEvents": [
    "onCommand:testytest.createBoilerplate"
  ],
  "main": "./extension.js",
  "contributes": {
    "commands": [
      {
        "command": "testytest.createBoilerplate",
        "title": "Create Boilerplate"
      }
    ]
  },
  // ...
}
Now, let’s write our functionality. The first thing we’ll do is require a couple of packages. We are going to use the fs (file system) and path modules.
const fs = require('fs');
const path = require('path');
We also need to get the path to the current folder. Inside of the command, add the following snippet:
if (!vscode.workspace) {
  return vscode.window.showErrorMessage('Please open a project folder first');
}

const folderPath = vscode.workspace.workspaceFolders[0].uri
  .toString()
  .split(':')[1];
We will also need to store our boilerplate HTML code into a variable so that we can write that to a file. Here’s the boilerplate HTML:
const htmlContent = `<!DOCTYPE html>
<html lang="en">
<head>
  <meta charset="UTF-8" />
  <meta name="viewport" content="width=device-width, initial-scale=1.0" />
  <meta http-equiv="X-UA-Compatible" content="ie=edge" />
  <title>Document</title>
  <link rel="stylesheet" href="app.css" />
</head>
<body>
  <script src="app.js"></script>
</body>
</html>`;
Now we need to write to the file. We can call the writeFile function of the file system module and pass it in the folder path and HTML content.
Notice that we use the path module to combine the folder path with the name of the file we want to create. Then inside of callback, if there is an error, we display that to the user. Otherwise, we let the user know that we created the boilerplate file successfully:
fs.writeFile(path.join(folderPath, 'index.html'), htmlContent, (err) => {
  if (err) {
    return vscode.window.showErrorMessage('Failed to create boilerplate file!');
  }
  vscode.window.showInformationMessage('Created boilerplate files');
});
Here’s what the full function looks like:
//...
  let disposable = vscode.commands.registerCommand(
    'testytest.createBoilerplate', async function () {
    // The code you place here will be executed every time your command is executed

    if (!vscode.workspace) {
      return vscode.window.showErrorMessage('Please open a project folder first');
    }

    const folderPath = vscode.workspace.workspaceFolders[0].uri
      .toString()
      .split(':')[1];

    const htmlContent = `<!DOCTYPE html>
<html lang="en">
<head>
  <meta charset="UTF-8" />
  <meta name="viewport" content="width=device-width, initial-scale=1.0" />
  <meta http-equiv="X-UA-Compatible" content="ie=edge" />
  <title>Document</title>
  <link rel="stylesheet" href="app.css" />
</head>
<body>
  <script src="app.js"></script>
</body>
</html>`;

    fs.writeFile(path.join(folderPath, 'index.html'), htmlContent, (err) => {
      if (err) {
        return vscode.window.showErrorMessage(
          'Failed to create boilerplate file!'
        );
      }
      vscode.window.showInformationMessage('Created boilerplate files');
    });

    // ...
  }
// ...
Go ahead and debug your newly developed extension. Then, open up the command palette and run Create Boilerplate (remember we changed the name).
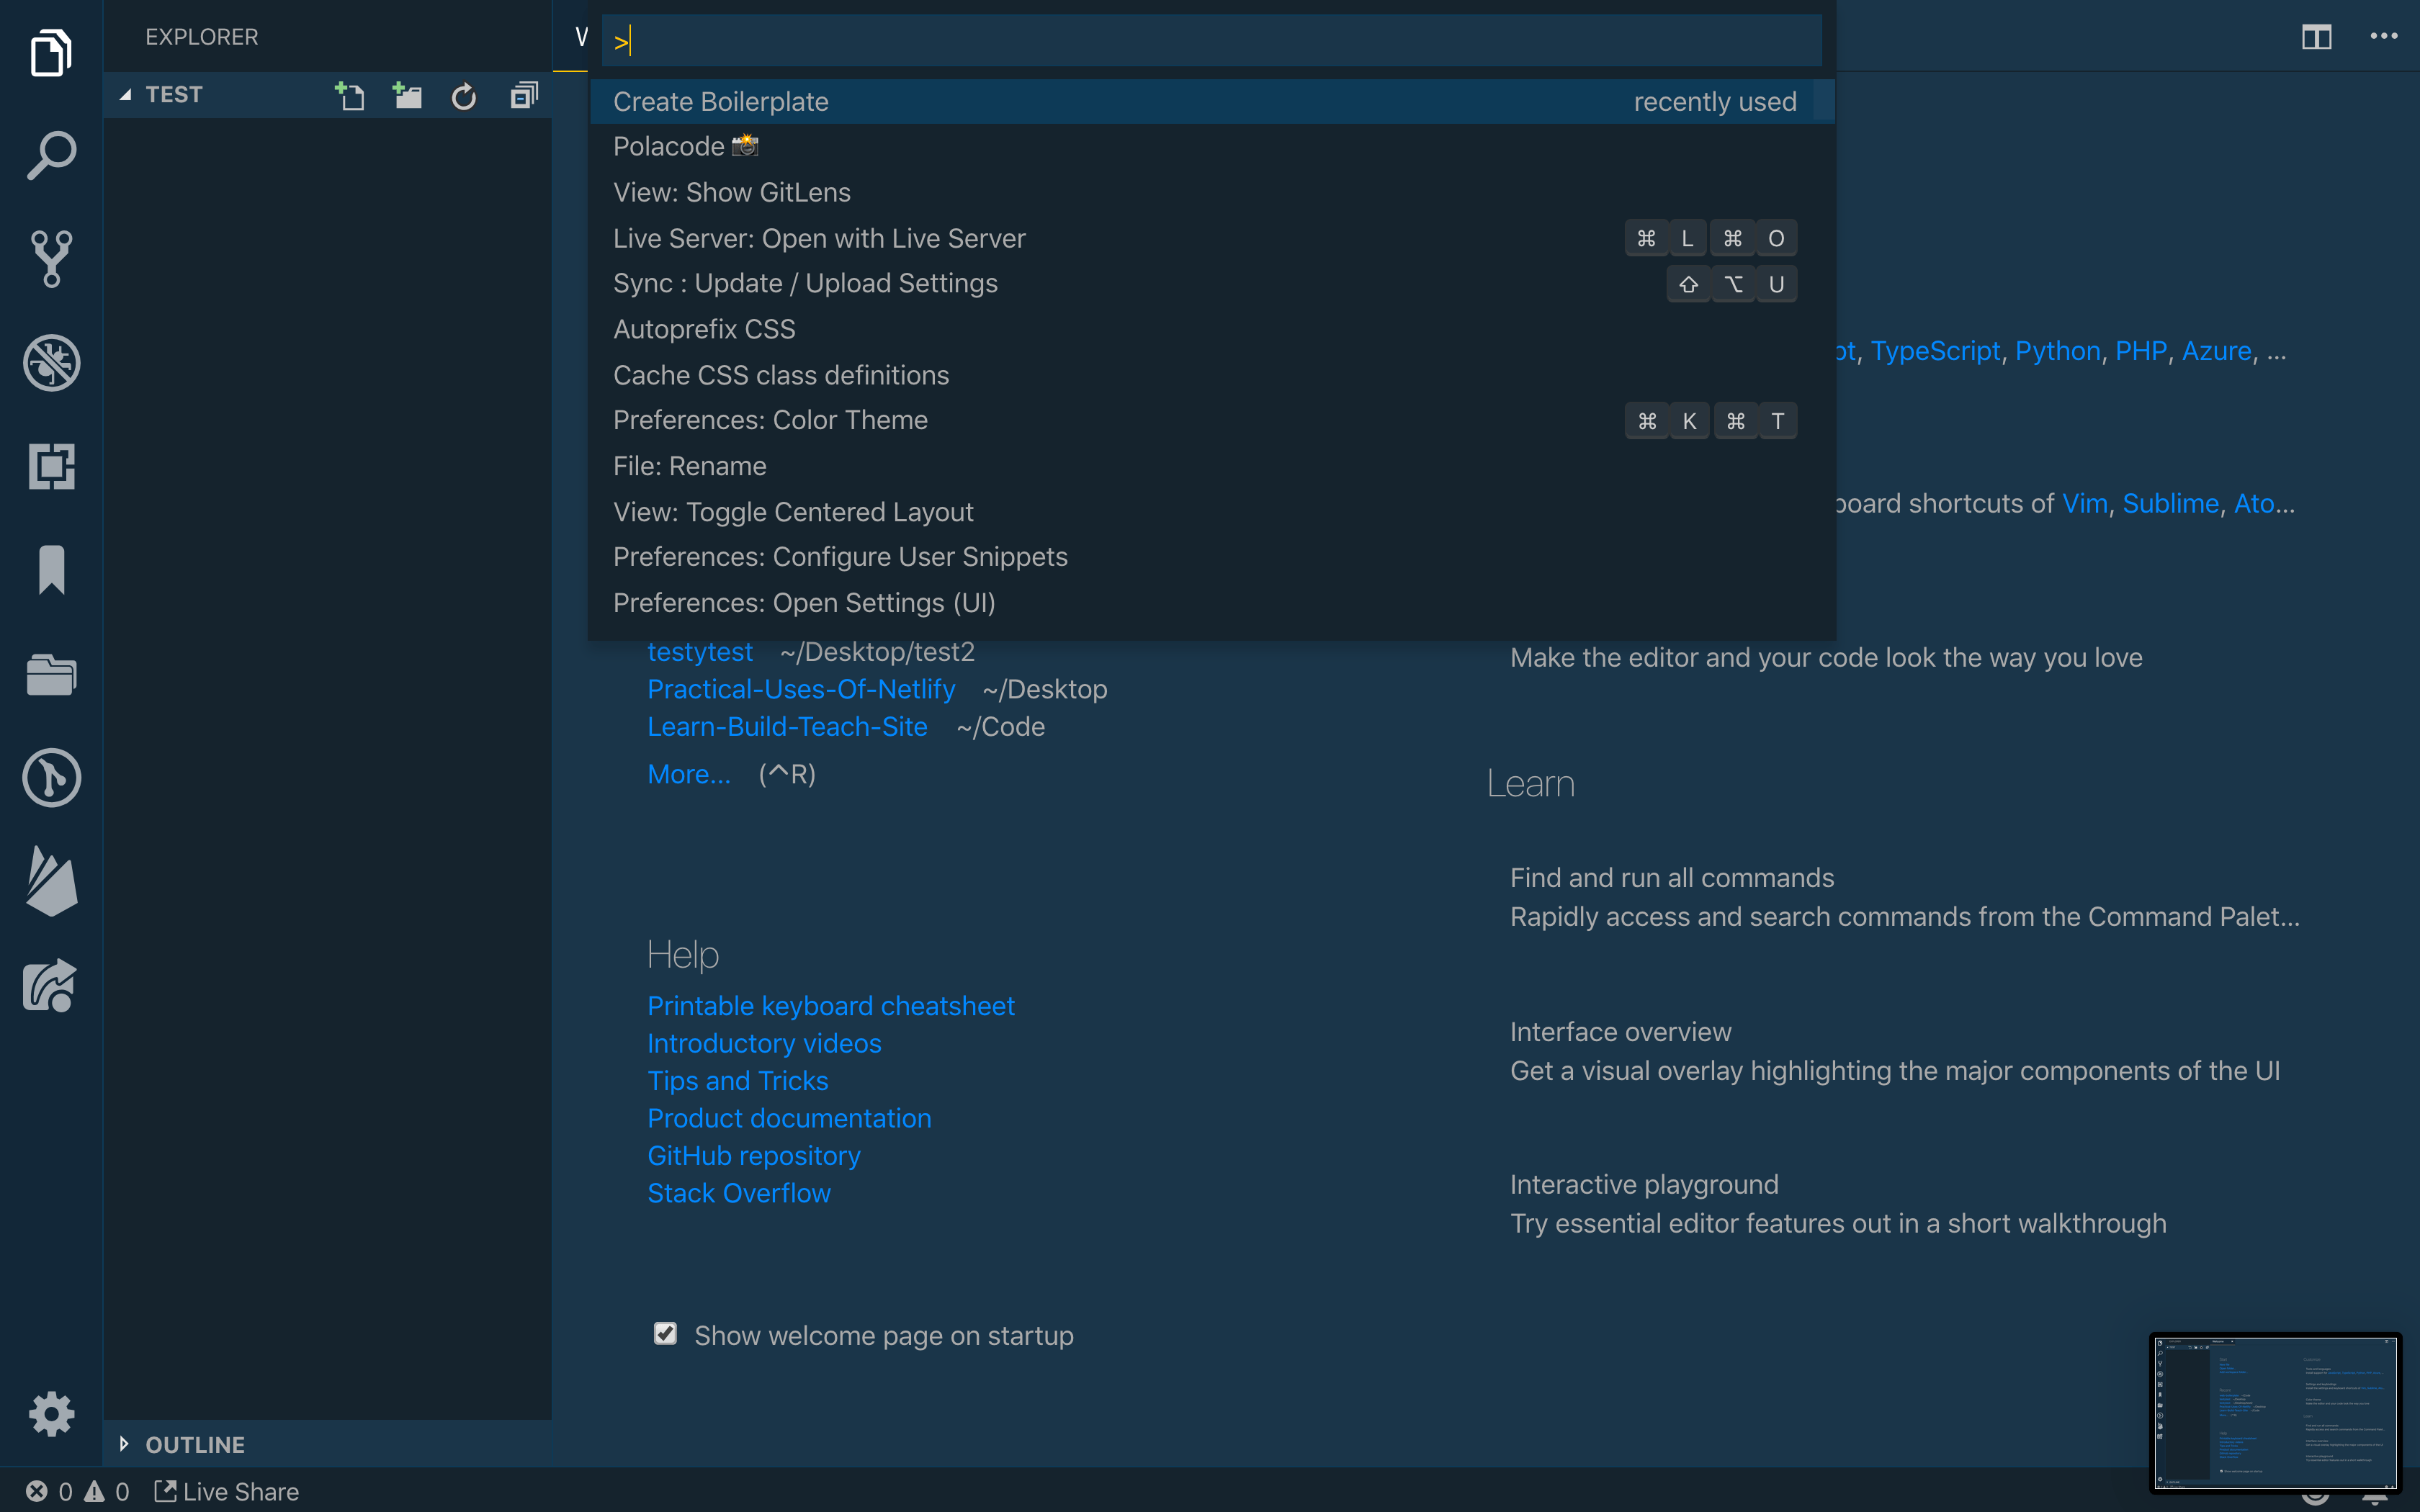
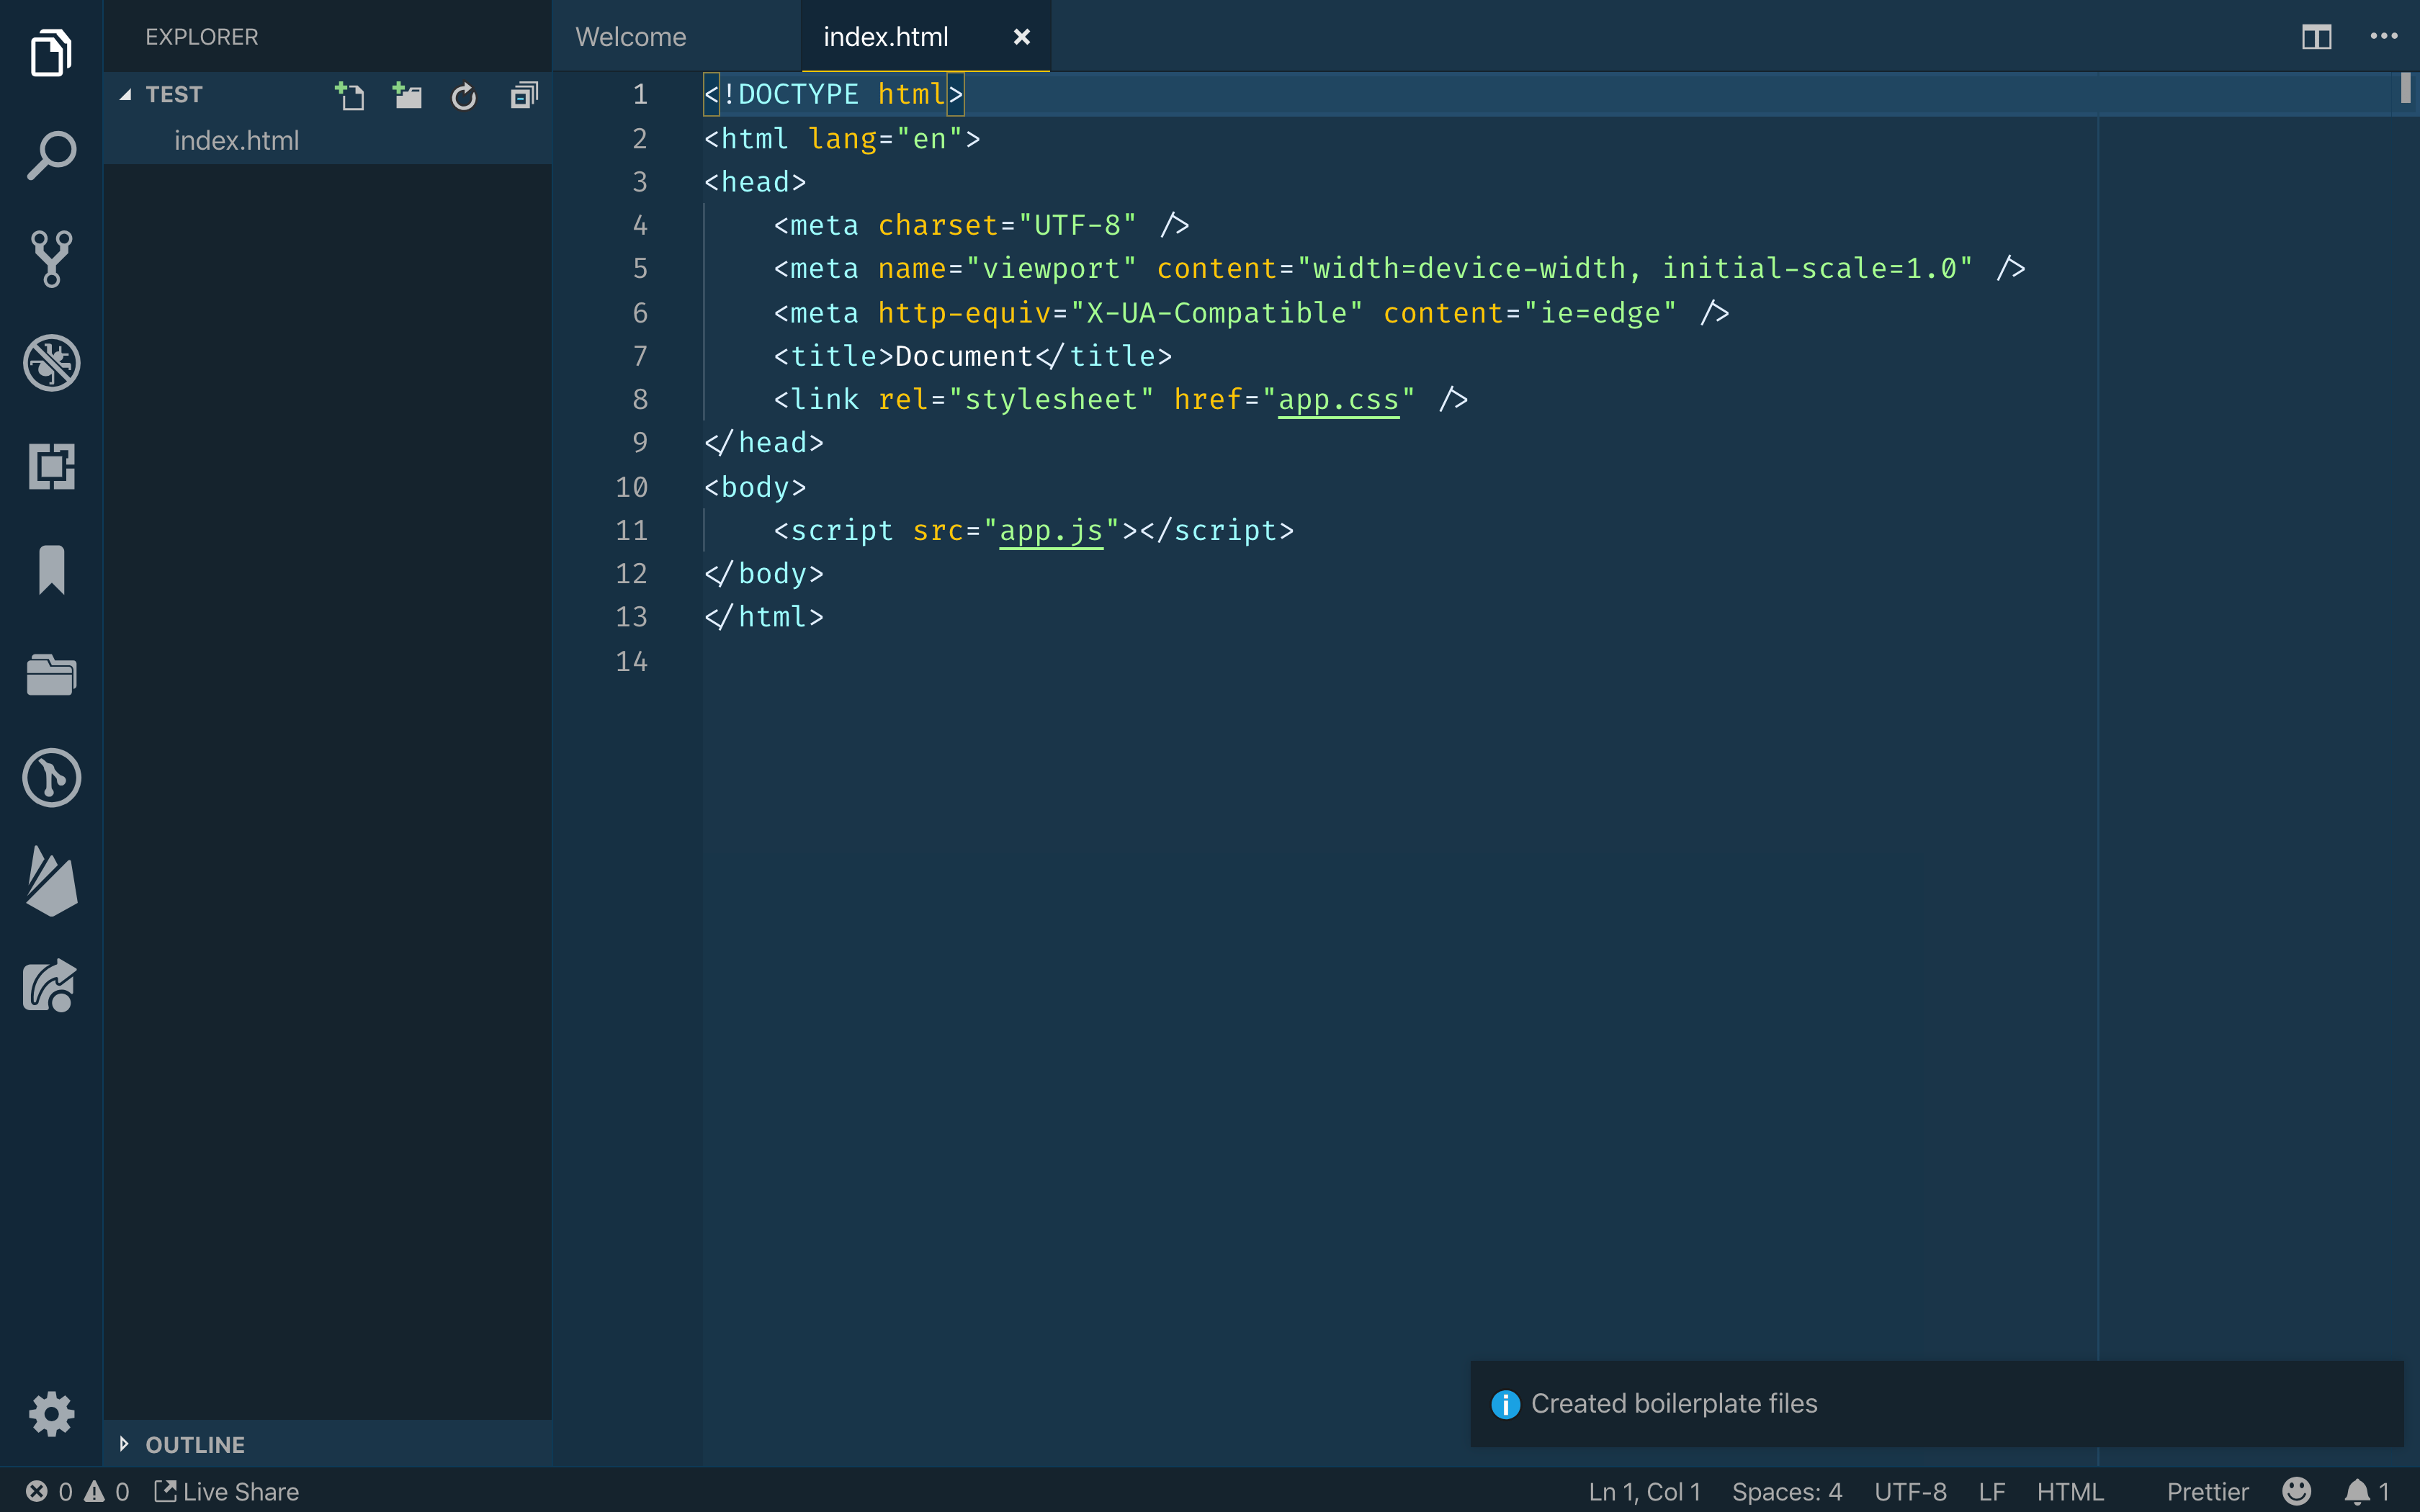
After running the command, you’ll see the newly generated index.html file and a message to let the user know:
Conclusion
To learn more about what APIs there are to use and how to use them, read through the Visual Studio Code Extension API documentation.
Thanks for learning with the DigitalOcean Community. Check out our offerings for compute, storage, networking, and managed databases.
About the author
Developer. Speaker. Teacher. Developer Advocate at Auth0.
Still looking for an answer?
This textbox defaults to using Markdown to format your answer.
You can type !ref in this text area to quickly search our full set of tutorials, documentation & marketplace offerings and insert the link!
Upon opening the debugging window, I was getting the error “vscode.workspace.workspaceFolders” is undefined, because no folder is open in it.
So a fix is to open a folder in the debugging window
Hi, thanks for the great example! Is there one with consuming REST API via the VSCODE plugin?
 This work is licensed under a Creative Commons Attribution-NonCommercial- ShareAlike 4.0 International License.
Become a contributor for community
Get paid to write technical tutorials and select a tech-focused charity to receive a matching donation.

DigitalOcean Documentation
Full documentation for every DigitalOcean product.

Resources for startups and AI-native businesses
The Wave has everything you need to know about building a business, from raising funding to marketing your product.
The developer cloud
Scale up as you grow — whether you're running one virtual machine or ten thousand.

Start building today
From GPU-powered inference and Kubernetes to managed databases and storage, get everything you need to build, scale, and deploy intelligent applications.
