By Erin Glass
Senior Manager, DevEd

Introduction
If you’ve built a static website in a local environment, the next step is to decide how to publish it to the web. One way to publish your site is to deploy it as an application through DigitalOcean App Platform, which offers free hosting for three static sites. Deploying applications often requires setting up underlying server infrastructure. App Platform automates this work, allowing you to deploy your static website to the cloud from a GitHub repository.
This tutorial will guide you through all the steps of deploying a static website to the cloud using App Platform, GitHub (a software development platform), and GitHub’s Desktop Application. The instructions here should work for any static website you’ve built in a local environment, including websites created with our tutorial series How To Build a Website With HTML. We will also walk you through how to use our sample HTML website for this tutorial if you don’t have a website ready to deploy, or would just like to test out App Platform. By the end of this tutorial, you should have a published website and an understanding of how to deploy websites to the cloud from a GitHub repository with App Platform.
Note: If you already have a GitHub account and a GitHub repository for your website project, you can skip to Step 6 for instructions on getting started with App Platform.
Deploy your frontend applications from GitHub using DigitalOcean App Platform. Let DigitalOcean focus on scaling your app.
Prerequisites
- Files for a static website, such as created in the tutorial series How To Build a Website With HTML or on your own. Make sure your website files work locally before proceeding with this tutorial.
- An email address to register for a free GitHub account.
- A credit card or Paypal account for signing up with DigitalOcean’s cloud service. You will not be charged for your first three sites.
Step 1 — Create a GitHub Account
If you don’t already have a GitHub account, you’ll need to register for one so that you can create a GitHub repository for your project. GitHub is a software development platform that allows developers to host, share, and collaborate on coding projects. To create a free account, sign up on GitHub’s homepage.
Once you have confirmed your account, you are ready to proceed to the next step. Remember your login credentials, as you’ll need them in Step 3.
Step 2 — Download and Install the GitHub Desktop App
Many developers use the command-line interface (CLI) tool Git to interact with GitHub, but you can also use the GitHub Desktop app if you are not familiar with using your computer’s terminal. (If you’d like to learn more about using the CLI tool Git, you can visit our guide How To Contribute To Open Source: Getting Started With Git. This tutorial will proceed with instructions for using the GitHub Desktop app.
Download the GitHub Desktop app by following the instructions on the GitHub Desktop homepage. Next, open the downloaded application file and complete the installation process as instructed.
After the installation is complete, you are ready to proceed to the next step.
Step 3 — Create a GitHub Repository for your Website Project
In this step, we’ll use the GitHub Desktop app to create a local repository on your machine for your website project.
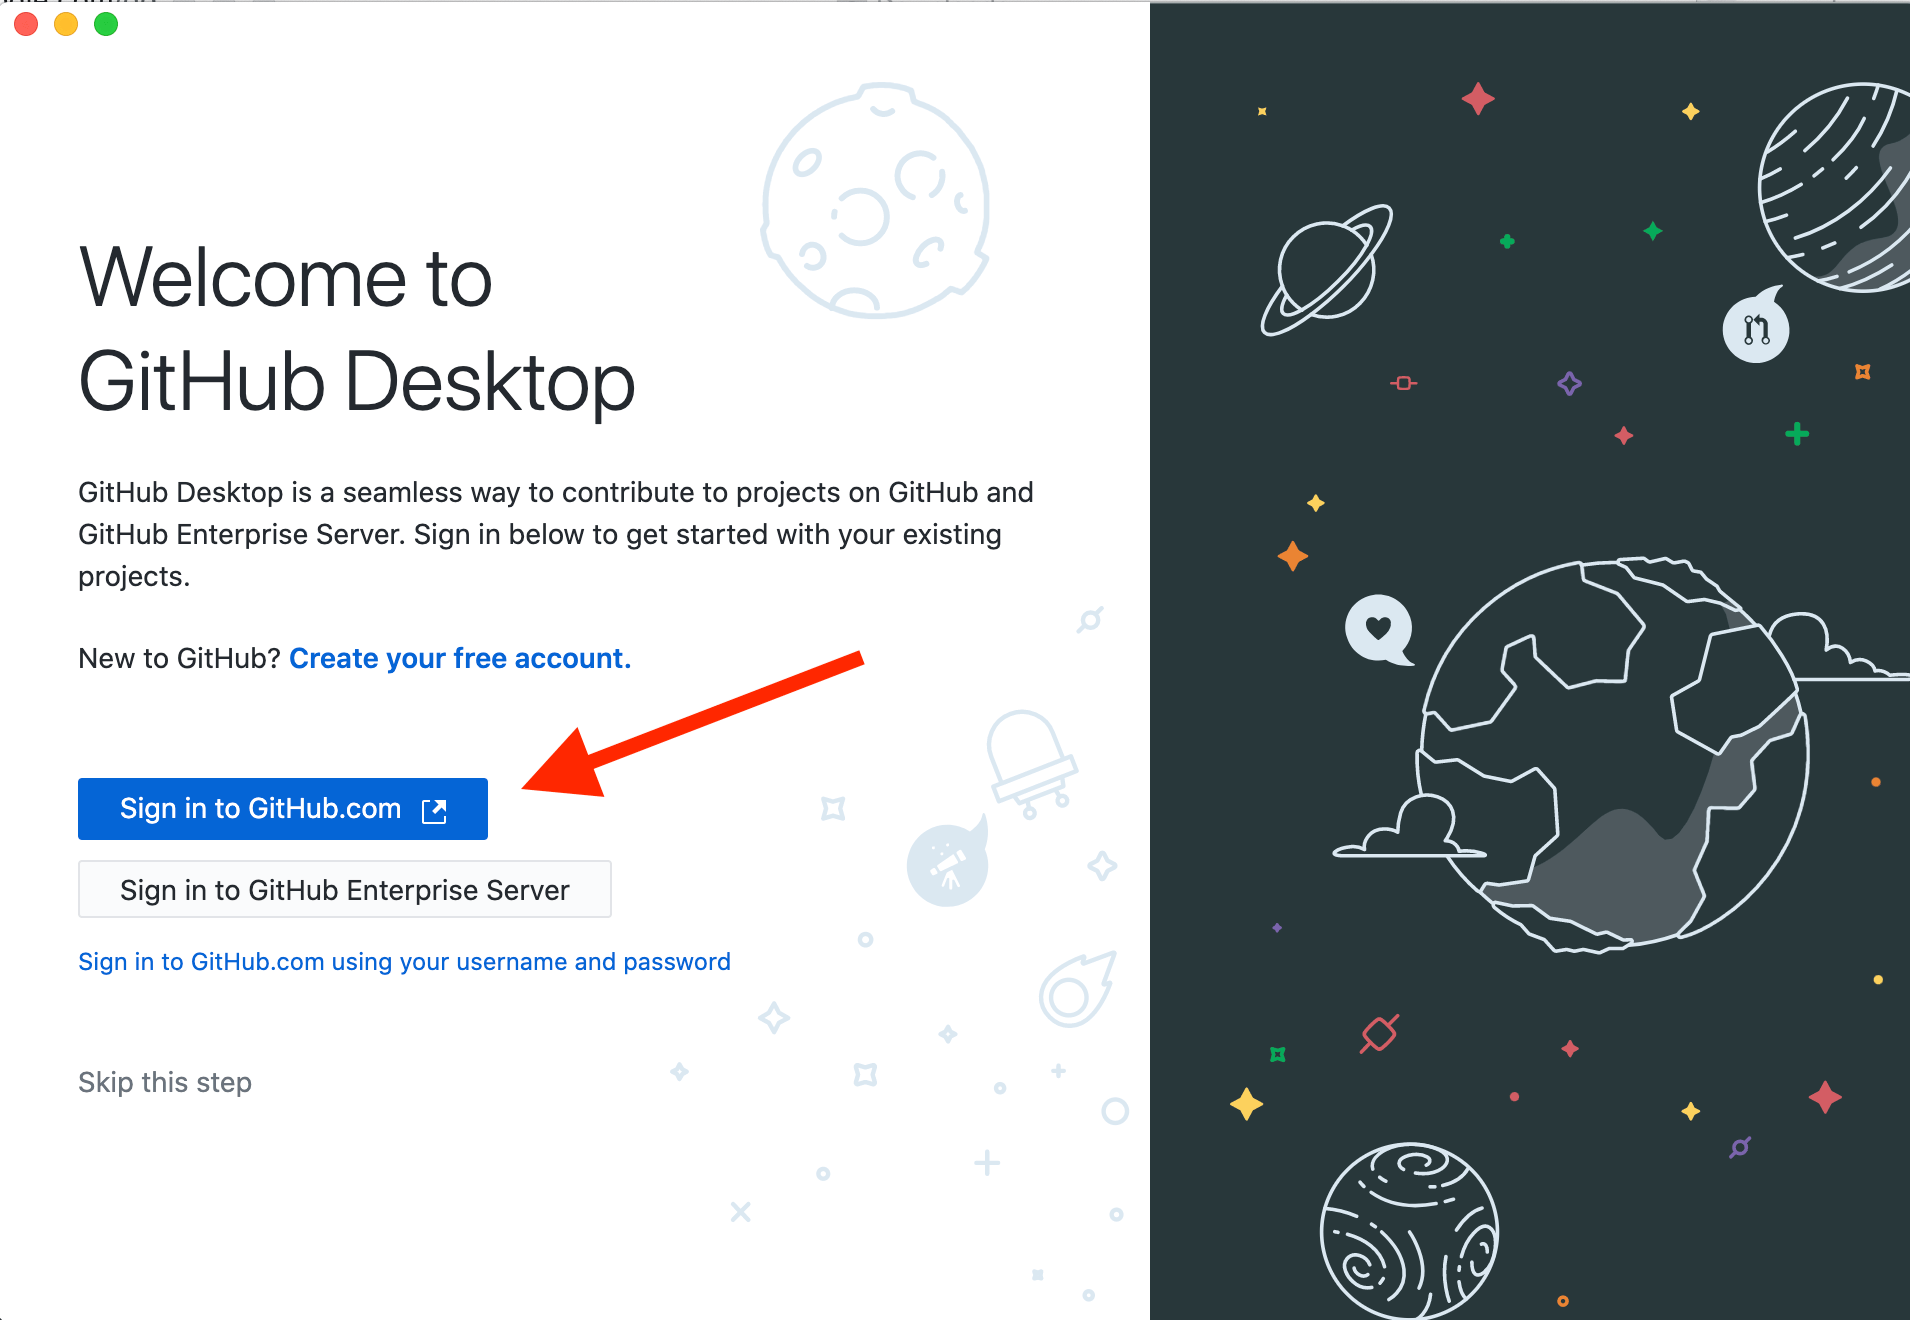
First, open the GitHub Desktop app. Click the “Sign in to GitHub.com” blue button :
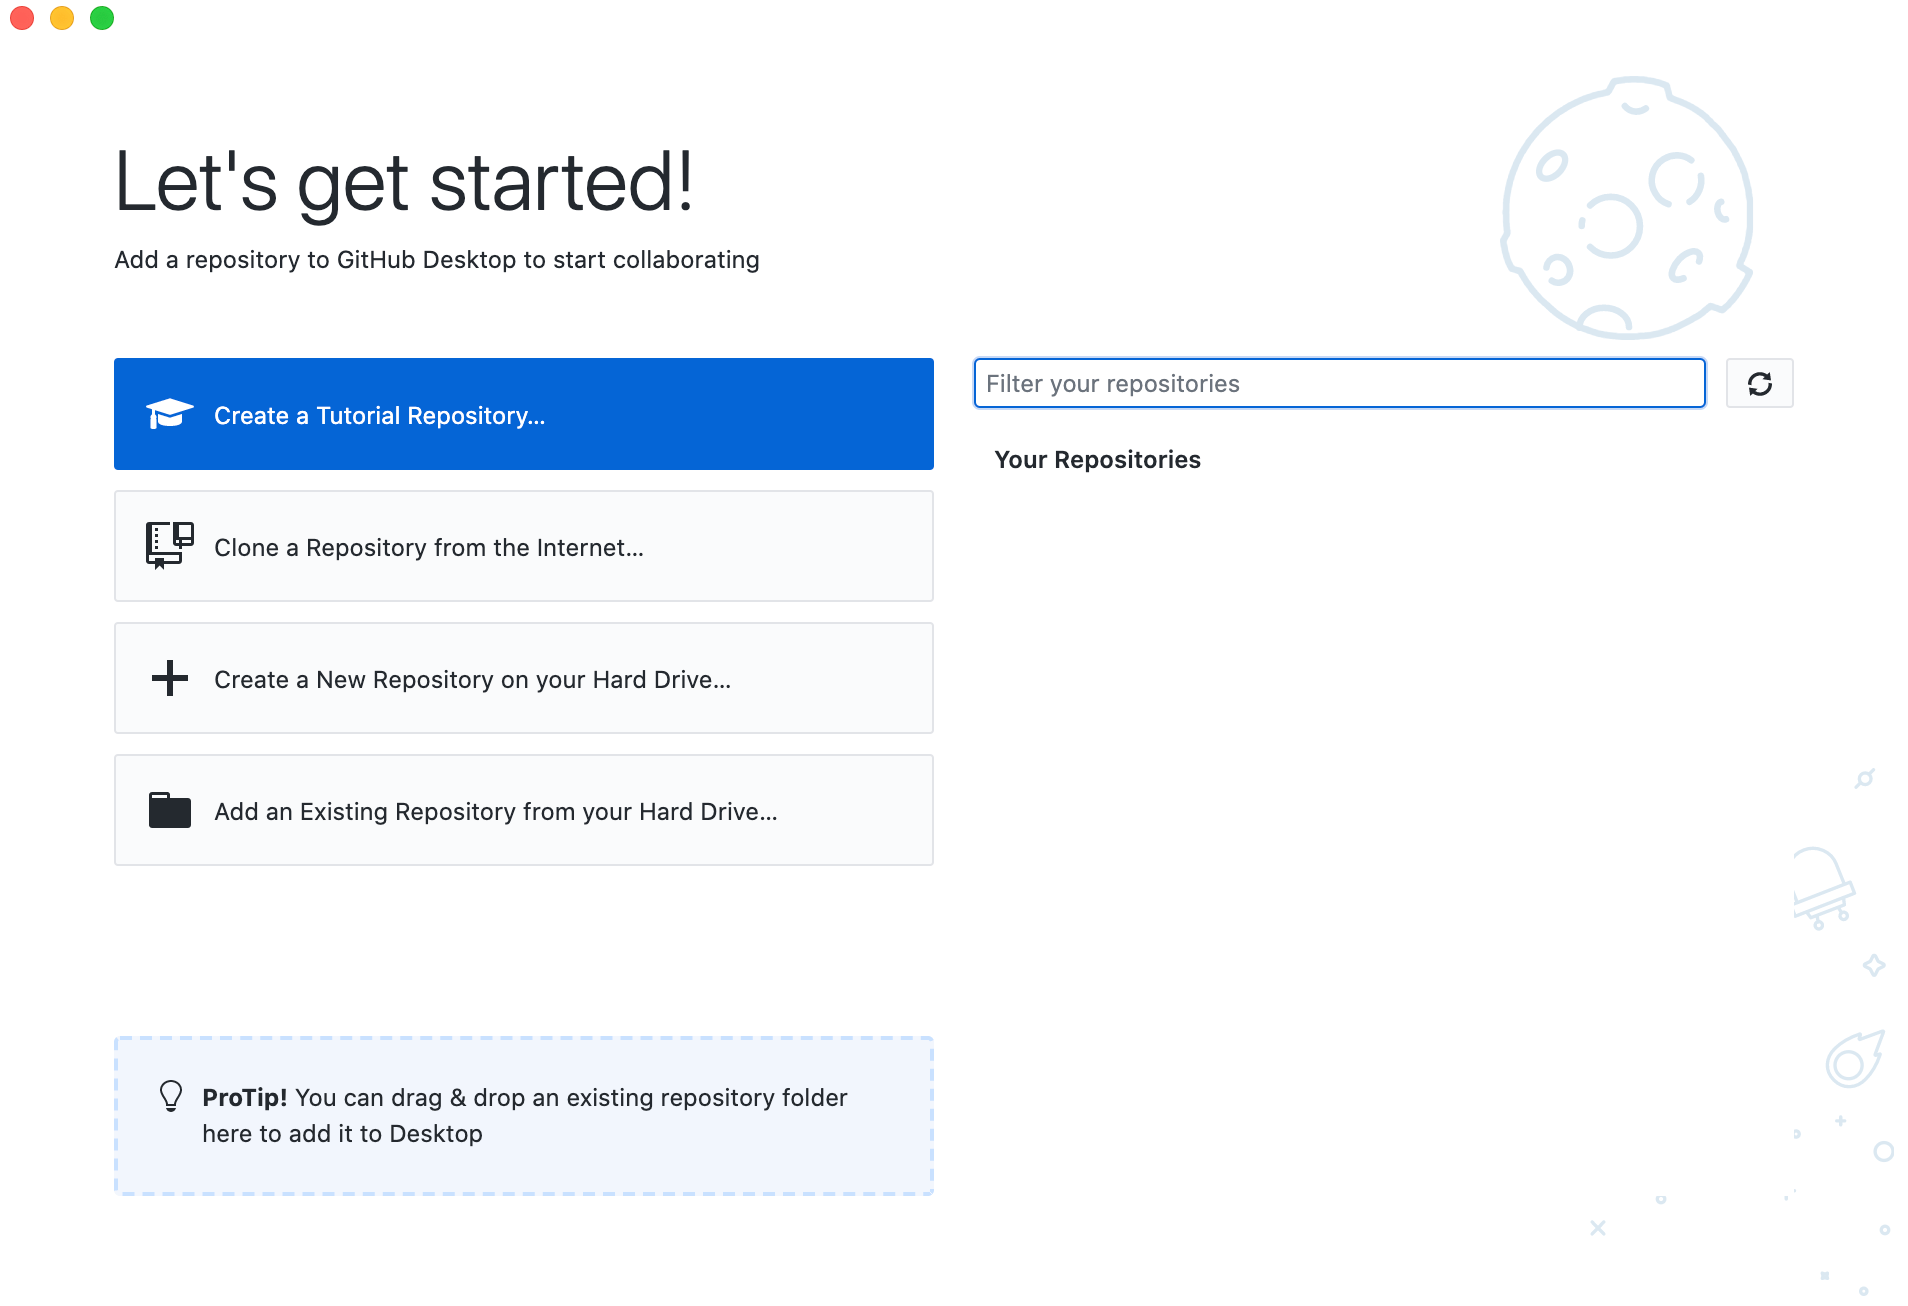
Follow the prompts to connect the GitHub Desktop app with your GitHub account. Once the Desktop app is connected with your account, a window should appear with options for getting started. Click on the “Create a New Repository on Your Hard Drive” button (third large button from the top):
Next, you will be prompted to fill out the details of your new repository:
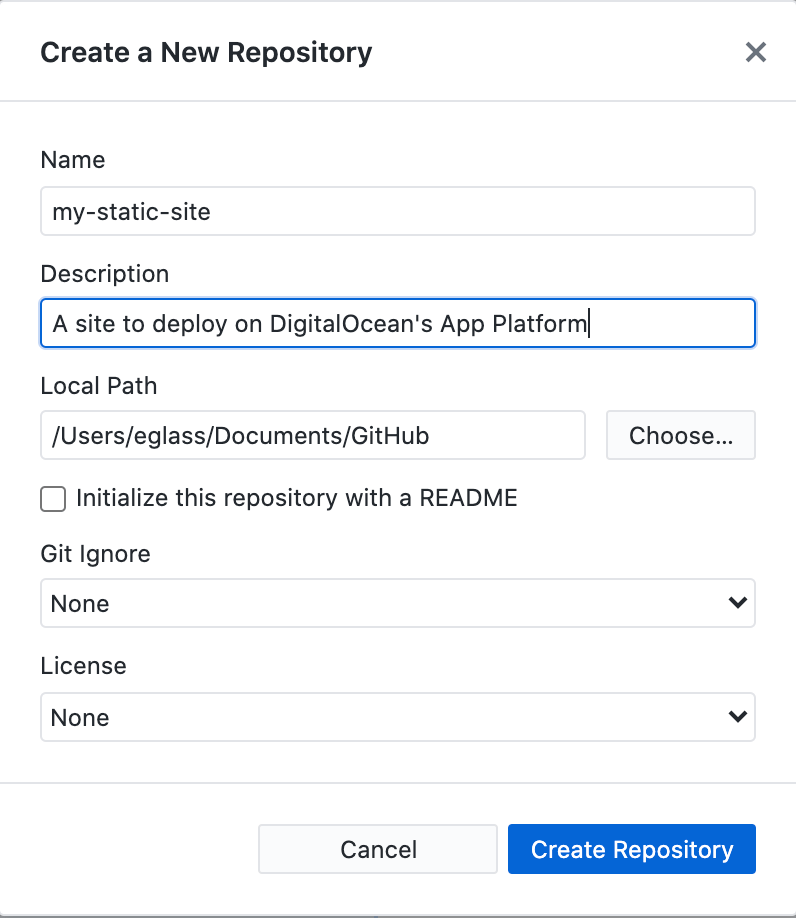
In this window, enter the following information:
- The name of your repository. For this tutorial, we’ll call it “my-static-site.”
- A description of your repository for reference.
You can leave the automatically-generated Local Path as it is. This is where GitHub Desktop will store your project on your local machine.
If you’d like to add a file to store your site’s documentation, you can check the option to initialize the repository with a README. In general, it is good practice to create a README for your repositories, but you can also leave this option unchecked for the purpose of the tutorial.
The Git Ignore option allows you to select a template for ignoring certain files. The “License” option allows you to choose an open source license for your work. To learn more about different open source license options, you can visit the Open Source Initiative’s list of Licenses and Standards. If you don’t know what to select for these options, you can keep “none” selected for both options for the purpose of this tutorial.
Click “Create Repository.” The Desktop app should now show the details of your newly-created repository. We’ll go over what these different panels display in the next step.
Once your repository is created, you should be ready to proceed to the next step.
Step 4 — Copy Website Files to GitHub Repository
In this step, we’ll copy the files of your website project and place them in the newly-created GitHub repository folder.
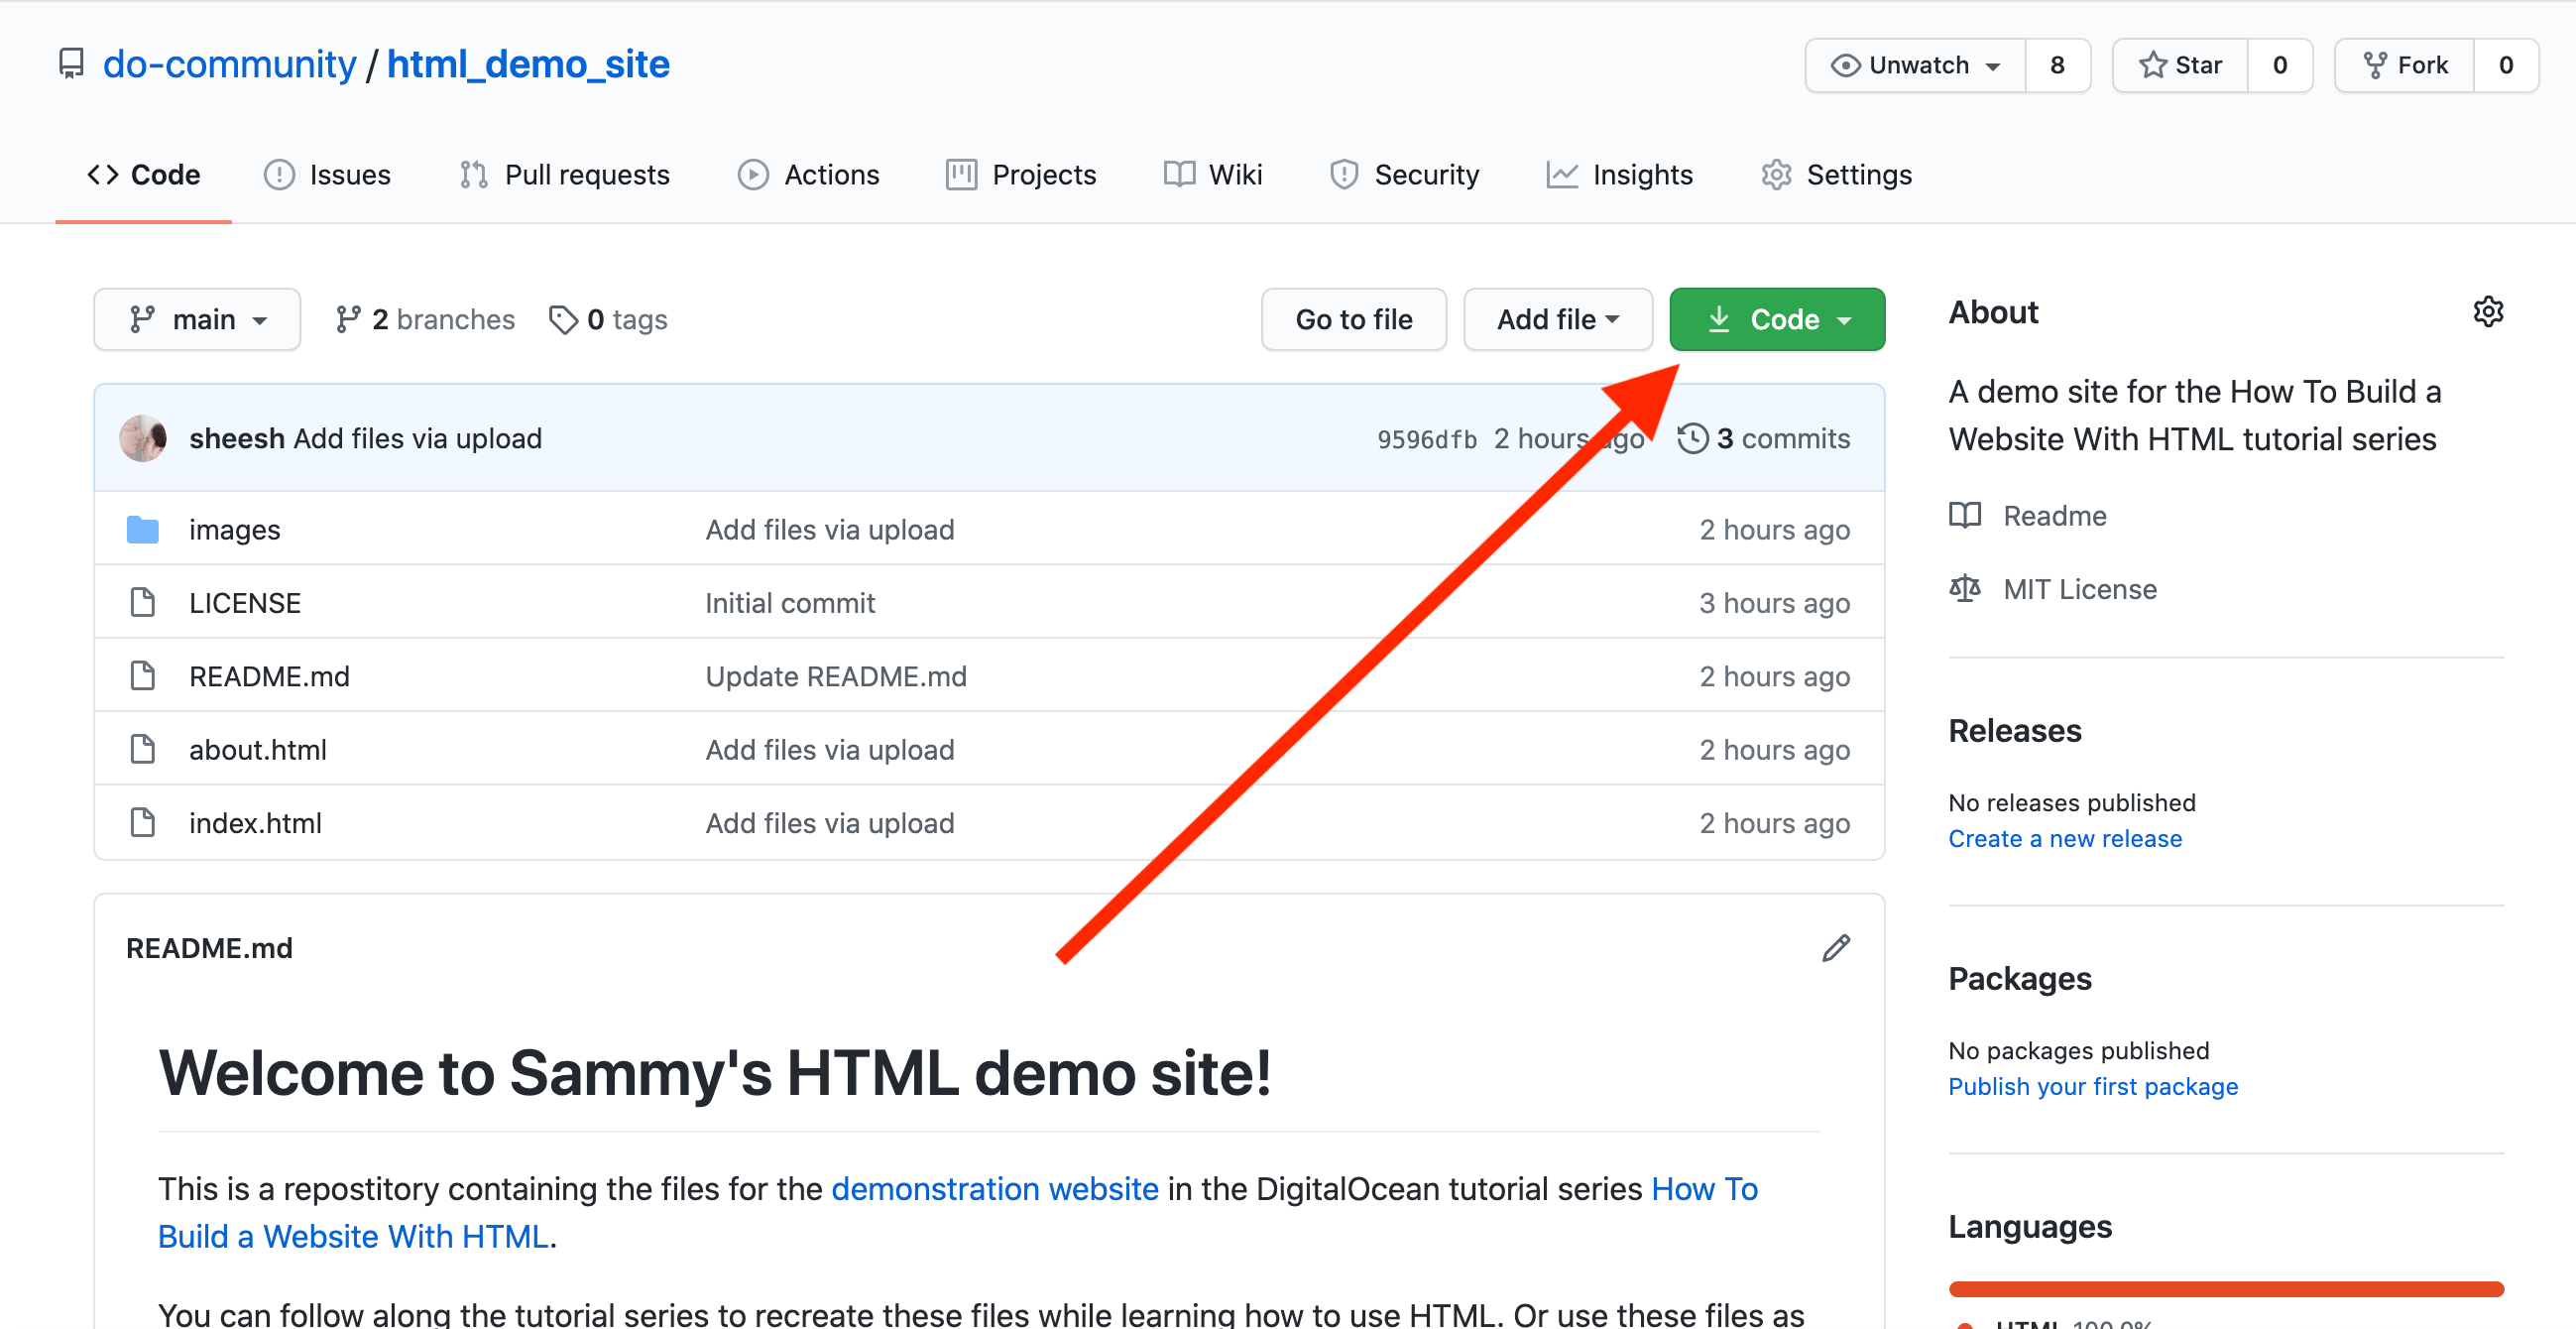
Note: If you want to use our sample website to explore App Platform, download the zip file from the GitHub repository by clicking the green “Code” button in the upper right and selecting the option to “Download ZIP”:
Once the ZIP file has finished downloading, unzip the file to access the folder that contains the website files. This folder will serve as your website project’s working folder in the steps below.
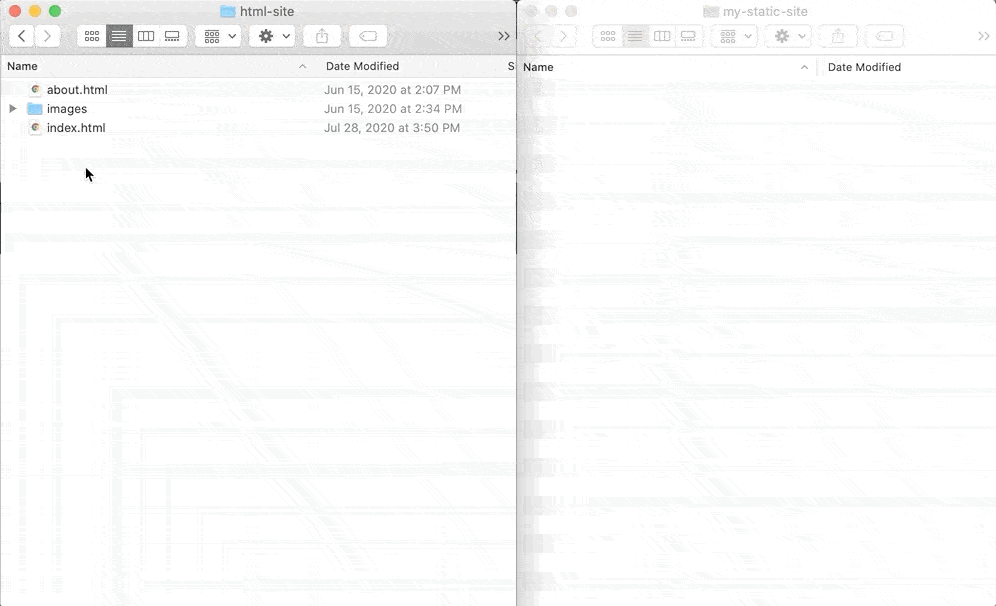
First, on your desktop, open your website project’s working folder, or the folder that is currently storing all of your website project’s files and folders. In this example, the working folder is called “html-site”.
Next, find and open the newly created repository folder that you named in Step 3. In this example, the repository folder is called “my-static-site”.
Copy the files from your working folder to your repository folder. To copy the files you can select all of your website files and simultaneously click Right Click (on Windows) or CTRL + Left Click (on Mac) and select “Copy X items”. Then, to paste copies of your files into the repository folder, click into the repository folder, click Right Click (on Windows) or CTRL + Left Click (on Mac), and select “Paste X items”:
After pasting the files into your repository folder, the GitHub Desktop app should display the files in the “Changes” panel on the left side of the app window:
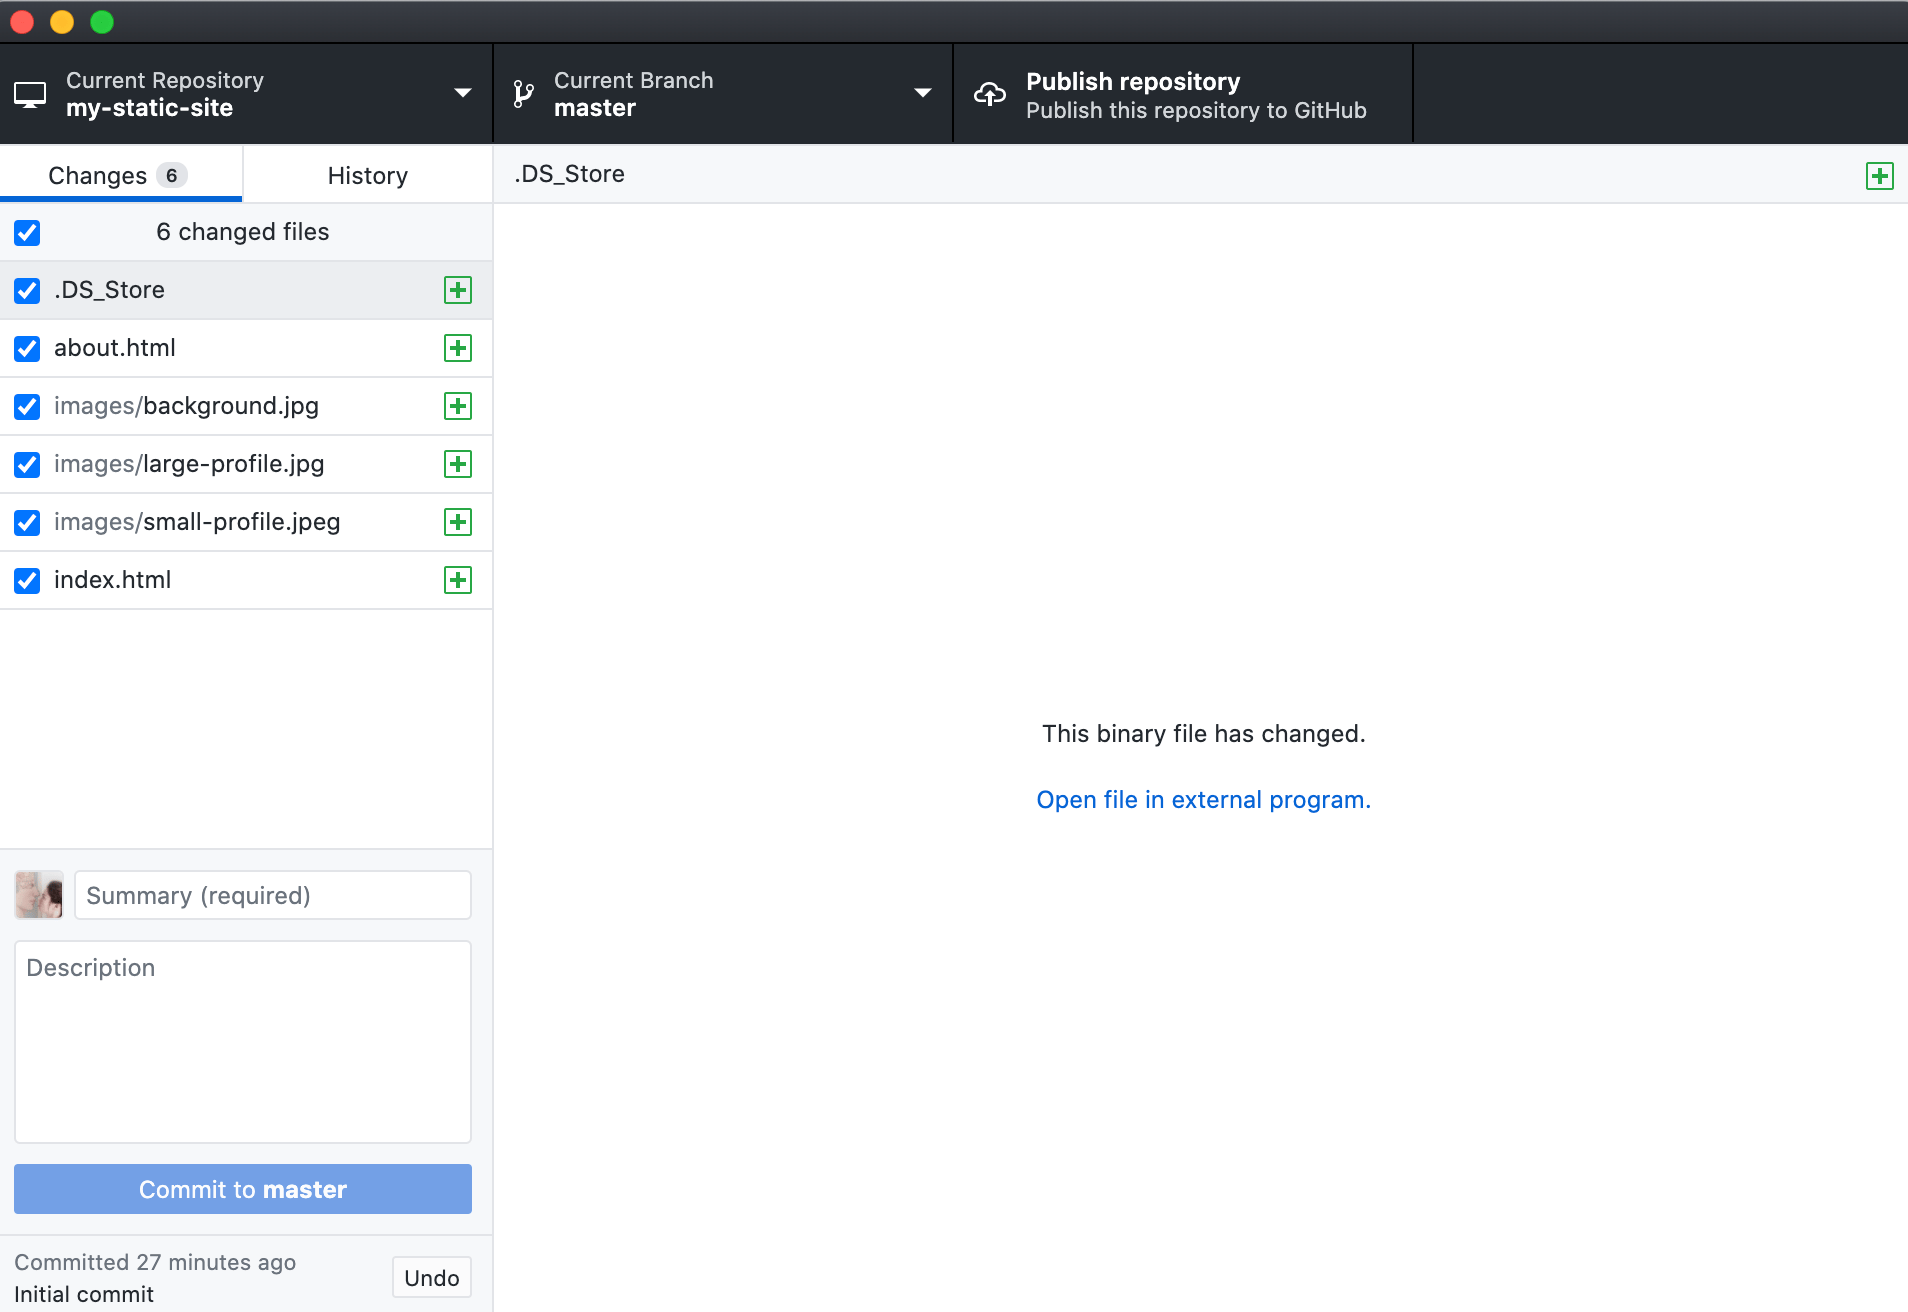
If you are using a macOS operating system, don’t be alarmed if you see the addition of a .DS_STORE file in the “Changes” panel. This is an automatically-generated file that stores information about the folder and should not affect your project.
Once your folders are in your local repository folder, you are ready to save your changes to the repository. On GitHub, saved changes are called commits. Each time you commit changes, you must make a comment describing your changes.
To commit your changes, add a comment in the field that says “Summary (required)” and any additional info you’d like to include in the field “Description” in the bottom left corner of the Desktop app:
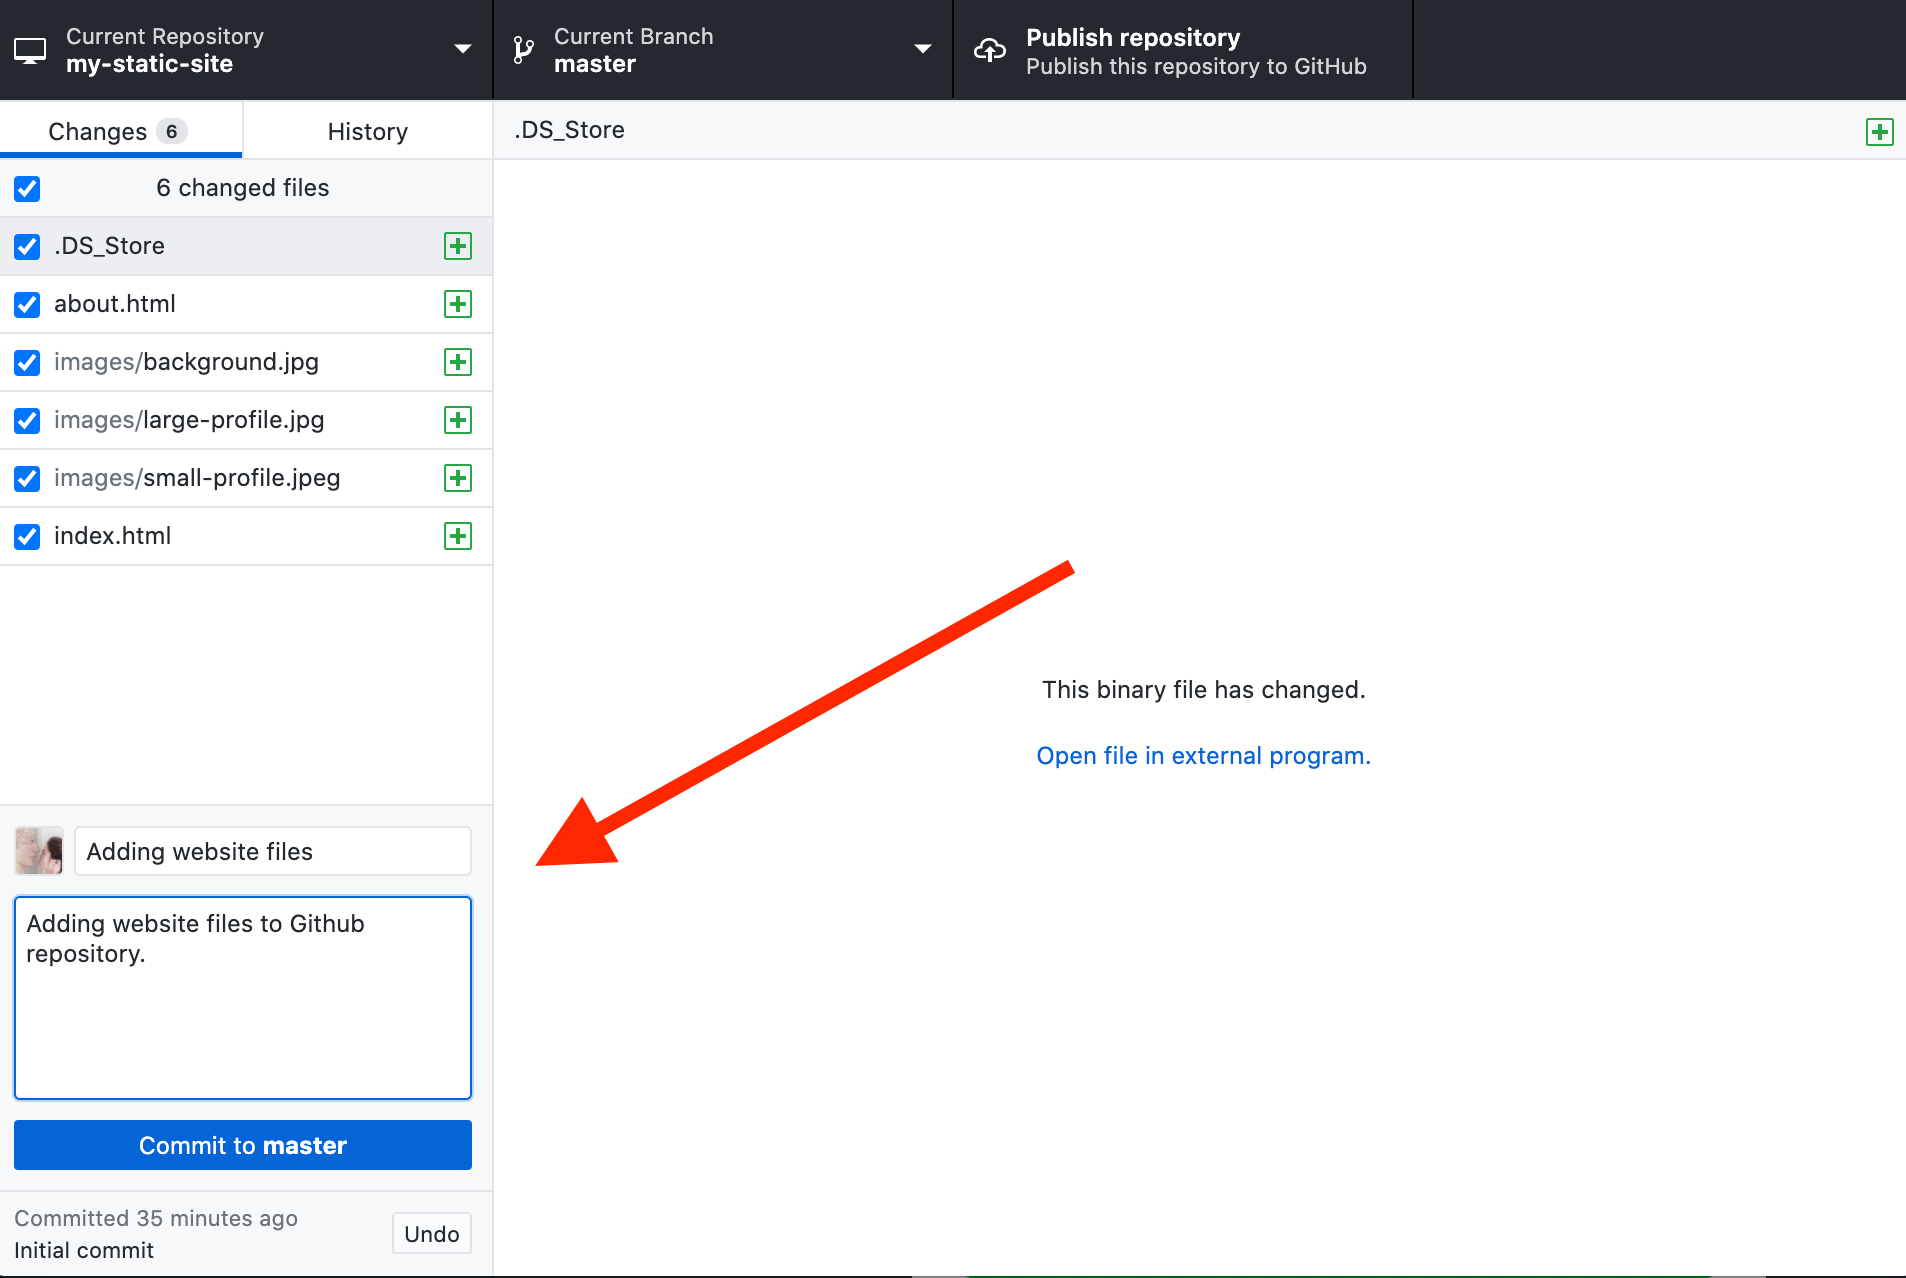
Then click the blue button “Commit to master” located below the text fields, This action will save your changes to the “main” branch of your project. Note that GitHub previously used the word “master” instead of “main” for the primary branch of users’ repositories. Please see their information on renaming these conventions, and refer to GitHub on their timeline for rolling these changes out. On GitHub, the main or master branch is the definitive branch of the project, which can be copied to work on different versions of the same repository simultaneously. To learn more about branches, you can visit our tutorial How To Use Git Branches or GitHub’s documentation.
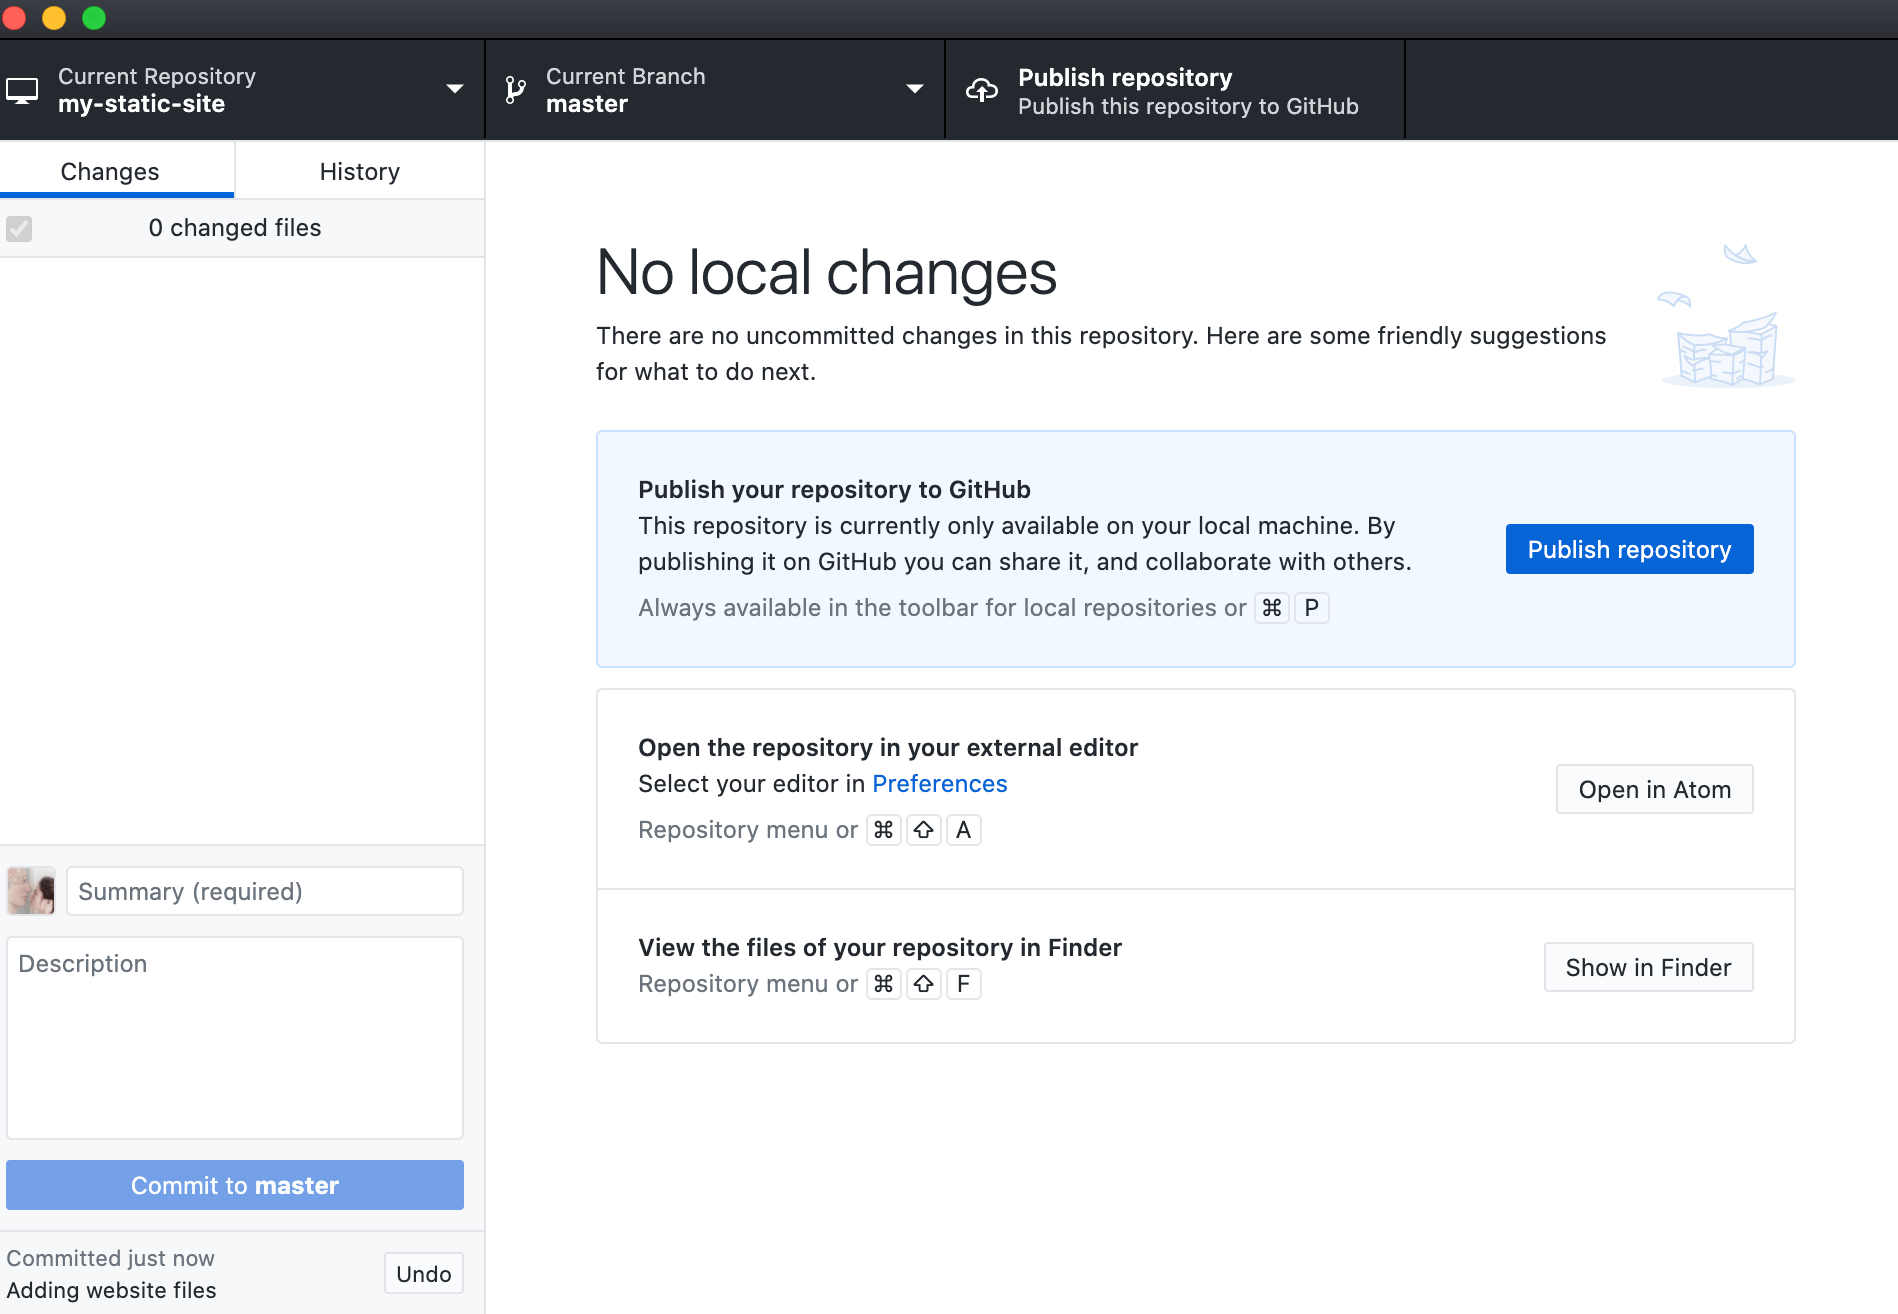
Once you have committed your changes to the main branch, your files in the left hand panel will disappear as this panel only displays files that contain uncommitted changes. You should receive a message in the bottom left corner noting that your commit was successful.
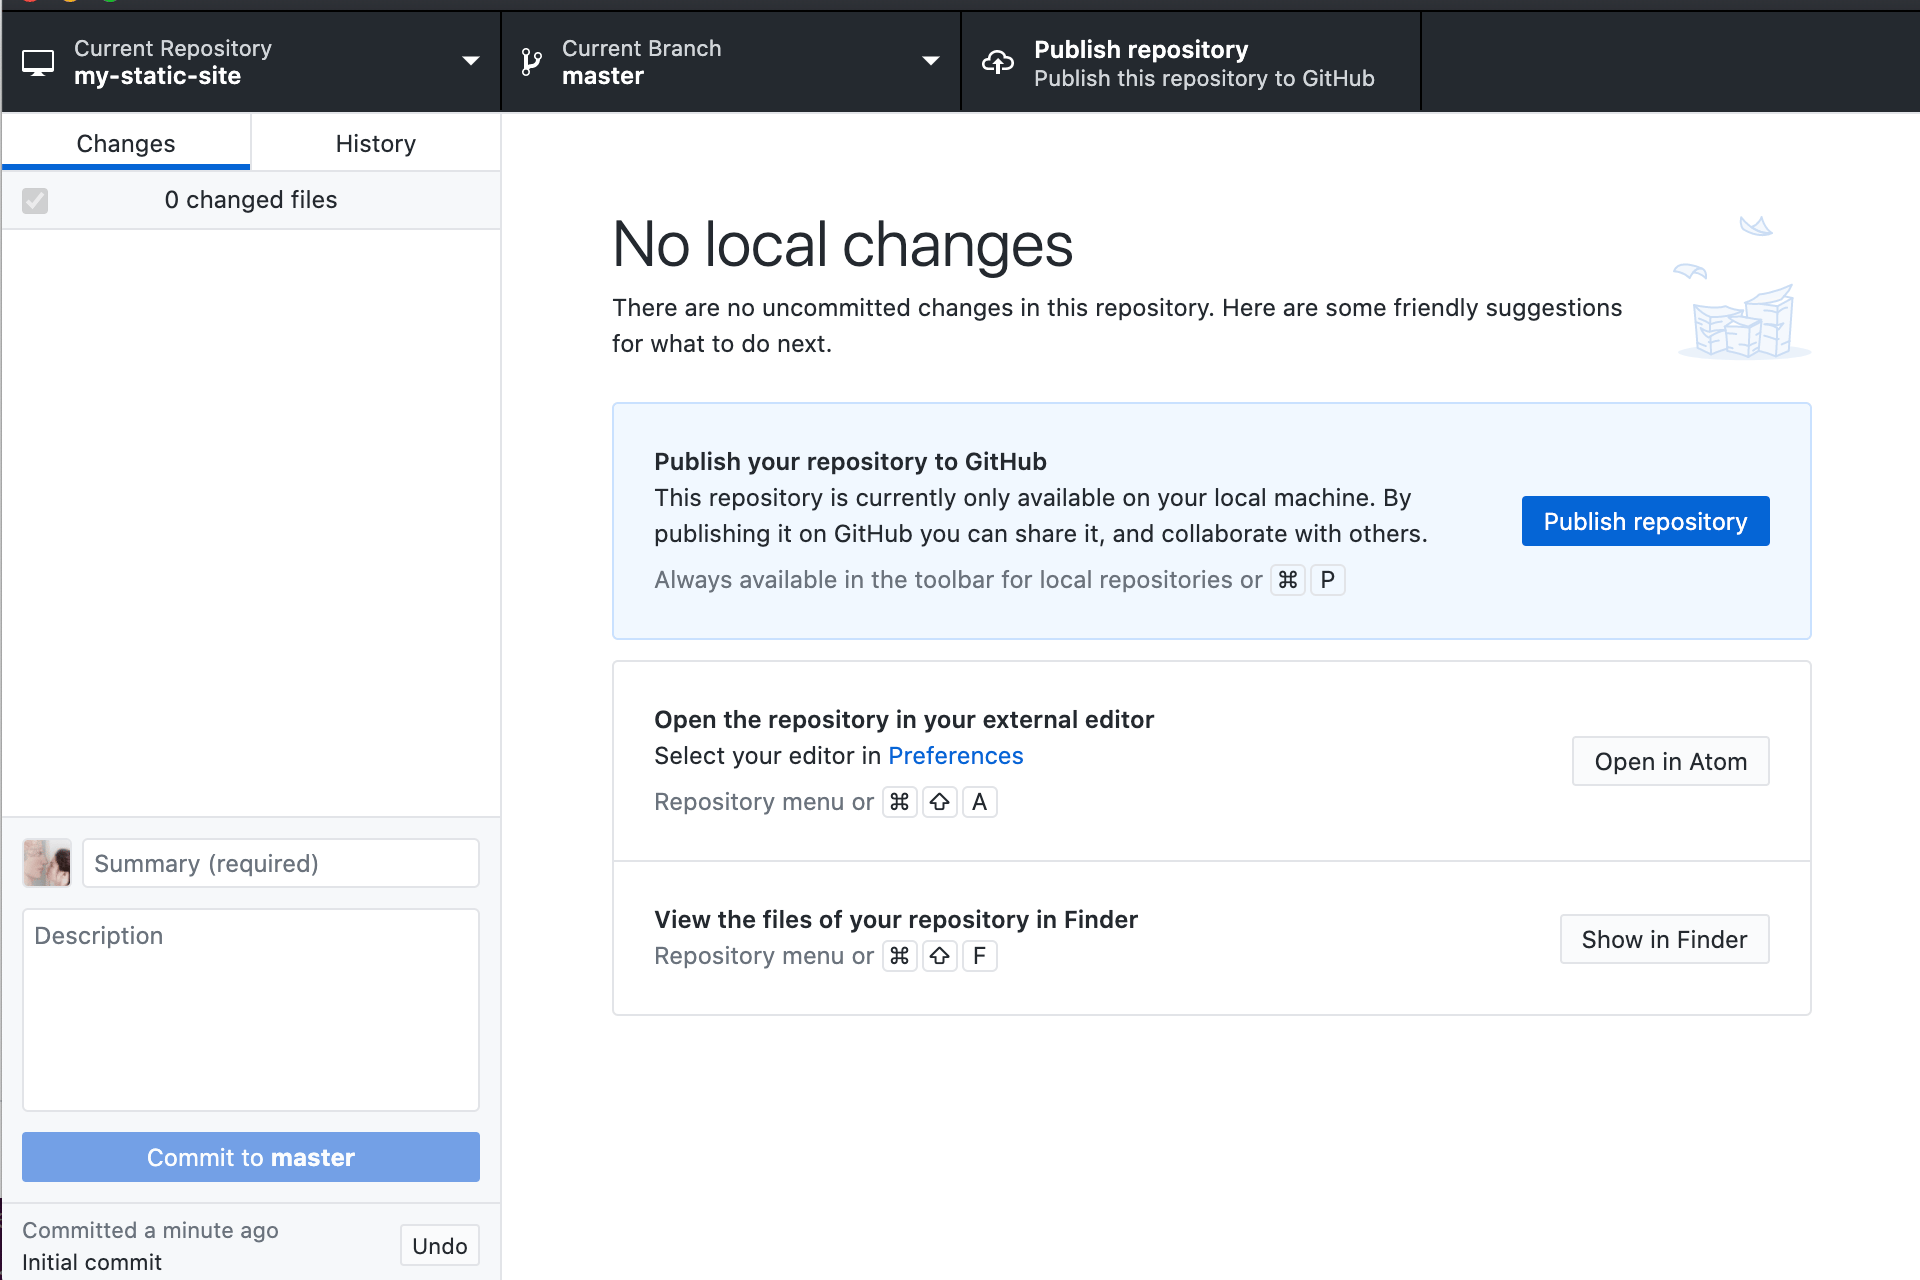
Step 5 — Pushing Committed Files to GitHub
In the last step, you committed your changes to the repository on your local machine. This repository, however, has not yet been pushed to your GitHub account. In this step, we will push this commit to your repository on GitHub, which will add your website files to your GitHub repository.
To publish your local repository to your GitHub repository, click on the blue “Publish repository” button:
Once you click the button, a modal will appear asking you to fill out the name and description of your repository. Fill out your details. You may keep the repository private if you wish.
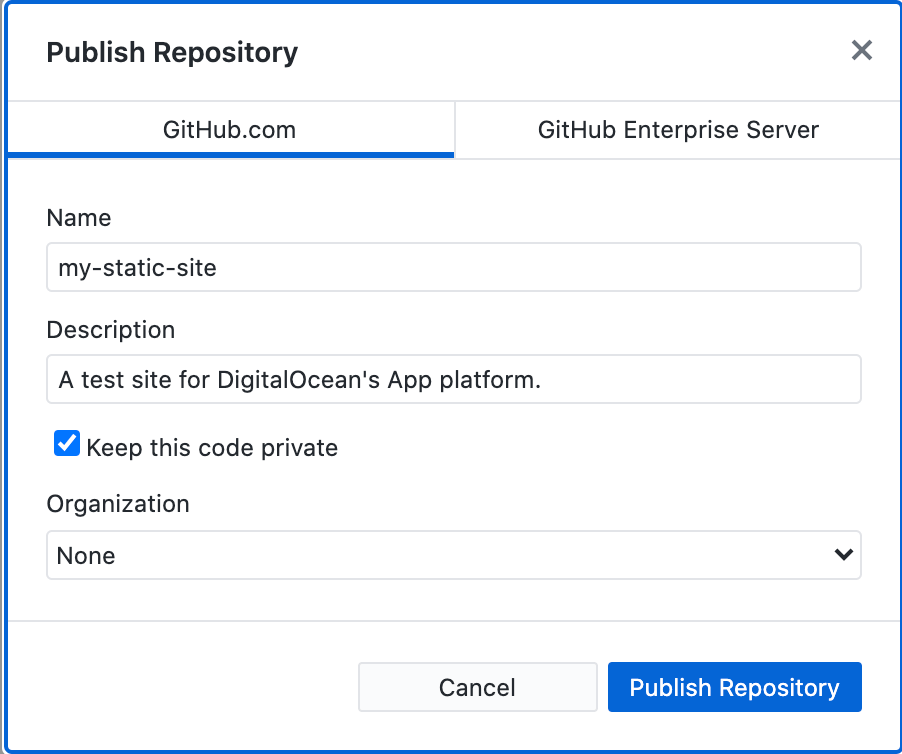
After filling out your details, click the blue “Publish repository” button. Once your files finish uploading, your repository should be available on your account on GitHub. To check, visit the relevant URL, which will have the following format:
https://github.com/your_github_account_name/your_repository_name
Be sure to replace the highlighted text with your account name and repository name. You should receive a webpage that shows your repository’s files:

Now that your website files are hosted on GitHub, we can use them with App Platform. First, however, we’ll need to create a DigitalOcean account.
Step 6 — Create Your DigitalOcean Account
To create a DigitalOcean account, visit the sign up page and choose among the following options:
- Entering an email address and password
- Using Google Single Sign On
- Using GitHub Single Sign On
If you choose to use an email address and password, you will need to verify your email address using the email automatically sent to you.
Note that you will need to enter a payment method to verify your identity and keep spammers out. You will not be charged. You may see a temporary pre-authorization charge to verify the card, which will be reversed within a week.
Once you have verified your account, you should be able to access App Platform. For complete documentation about signing up for a DigitalOcean account, please visit our guide Sign up for a DigitalOcean Account
You are now ready to proceed to the next step.
Step 7 — Deploy Your Website with DigitalOcean App Platform
In this step we’ll deploy our static website with App Platform.
First, visit the DigitalOcean App Platform portal and click on the blue “Launch Your App” button:

On the next page, you will be prompted to select your GitHub repository. Since you have not yet connected your App Platform account to your GitHub account, you’ll need to click on the “Link Your GitHub Account” button:
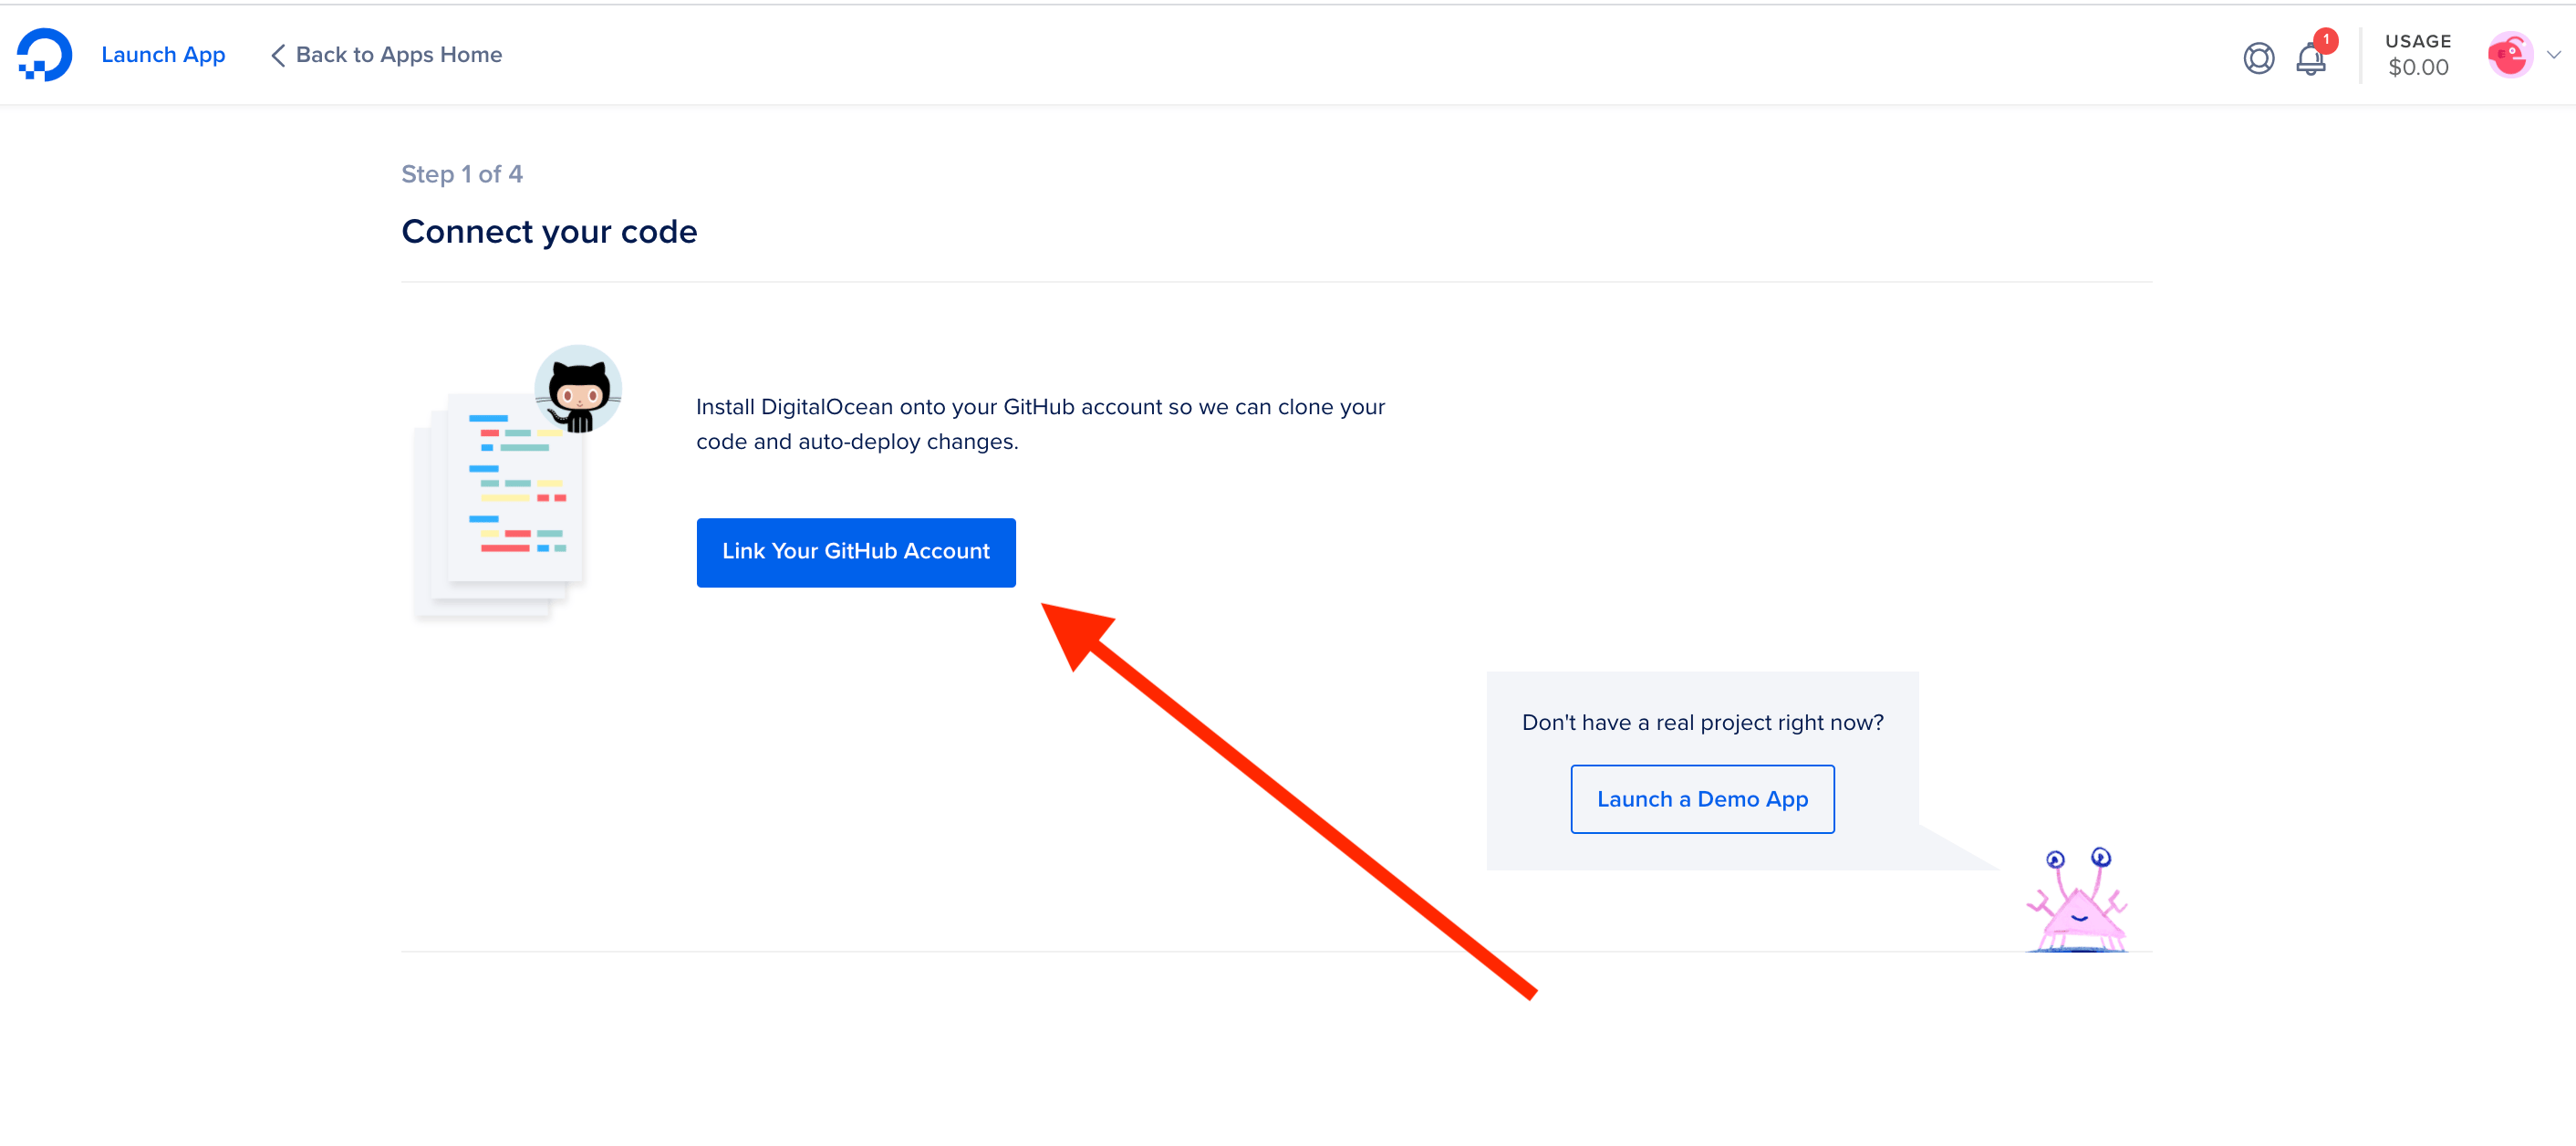
You will then be prompted to sign into your GitHub account (if you aren’t already signed in) and select the account that you want to connect to App Platform. Once selected, you will be directed to a page where you can select which repositories to permit App Platform to access. Click the “Only select repositories” button and select the repository that you pushed to your GitHub account in Step 5:
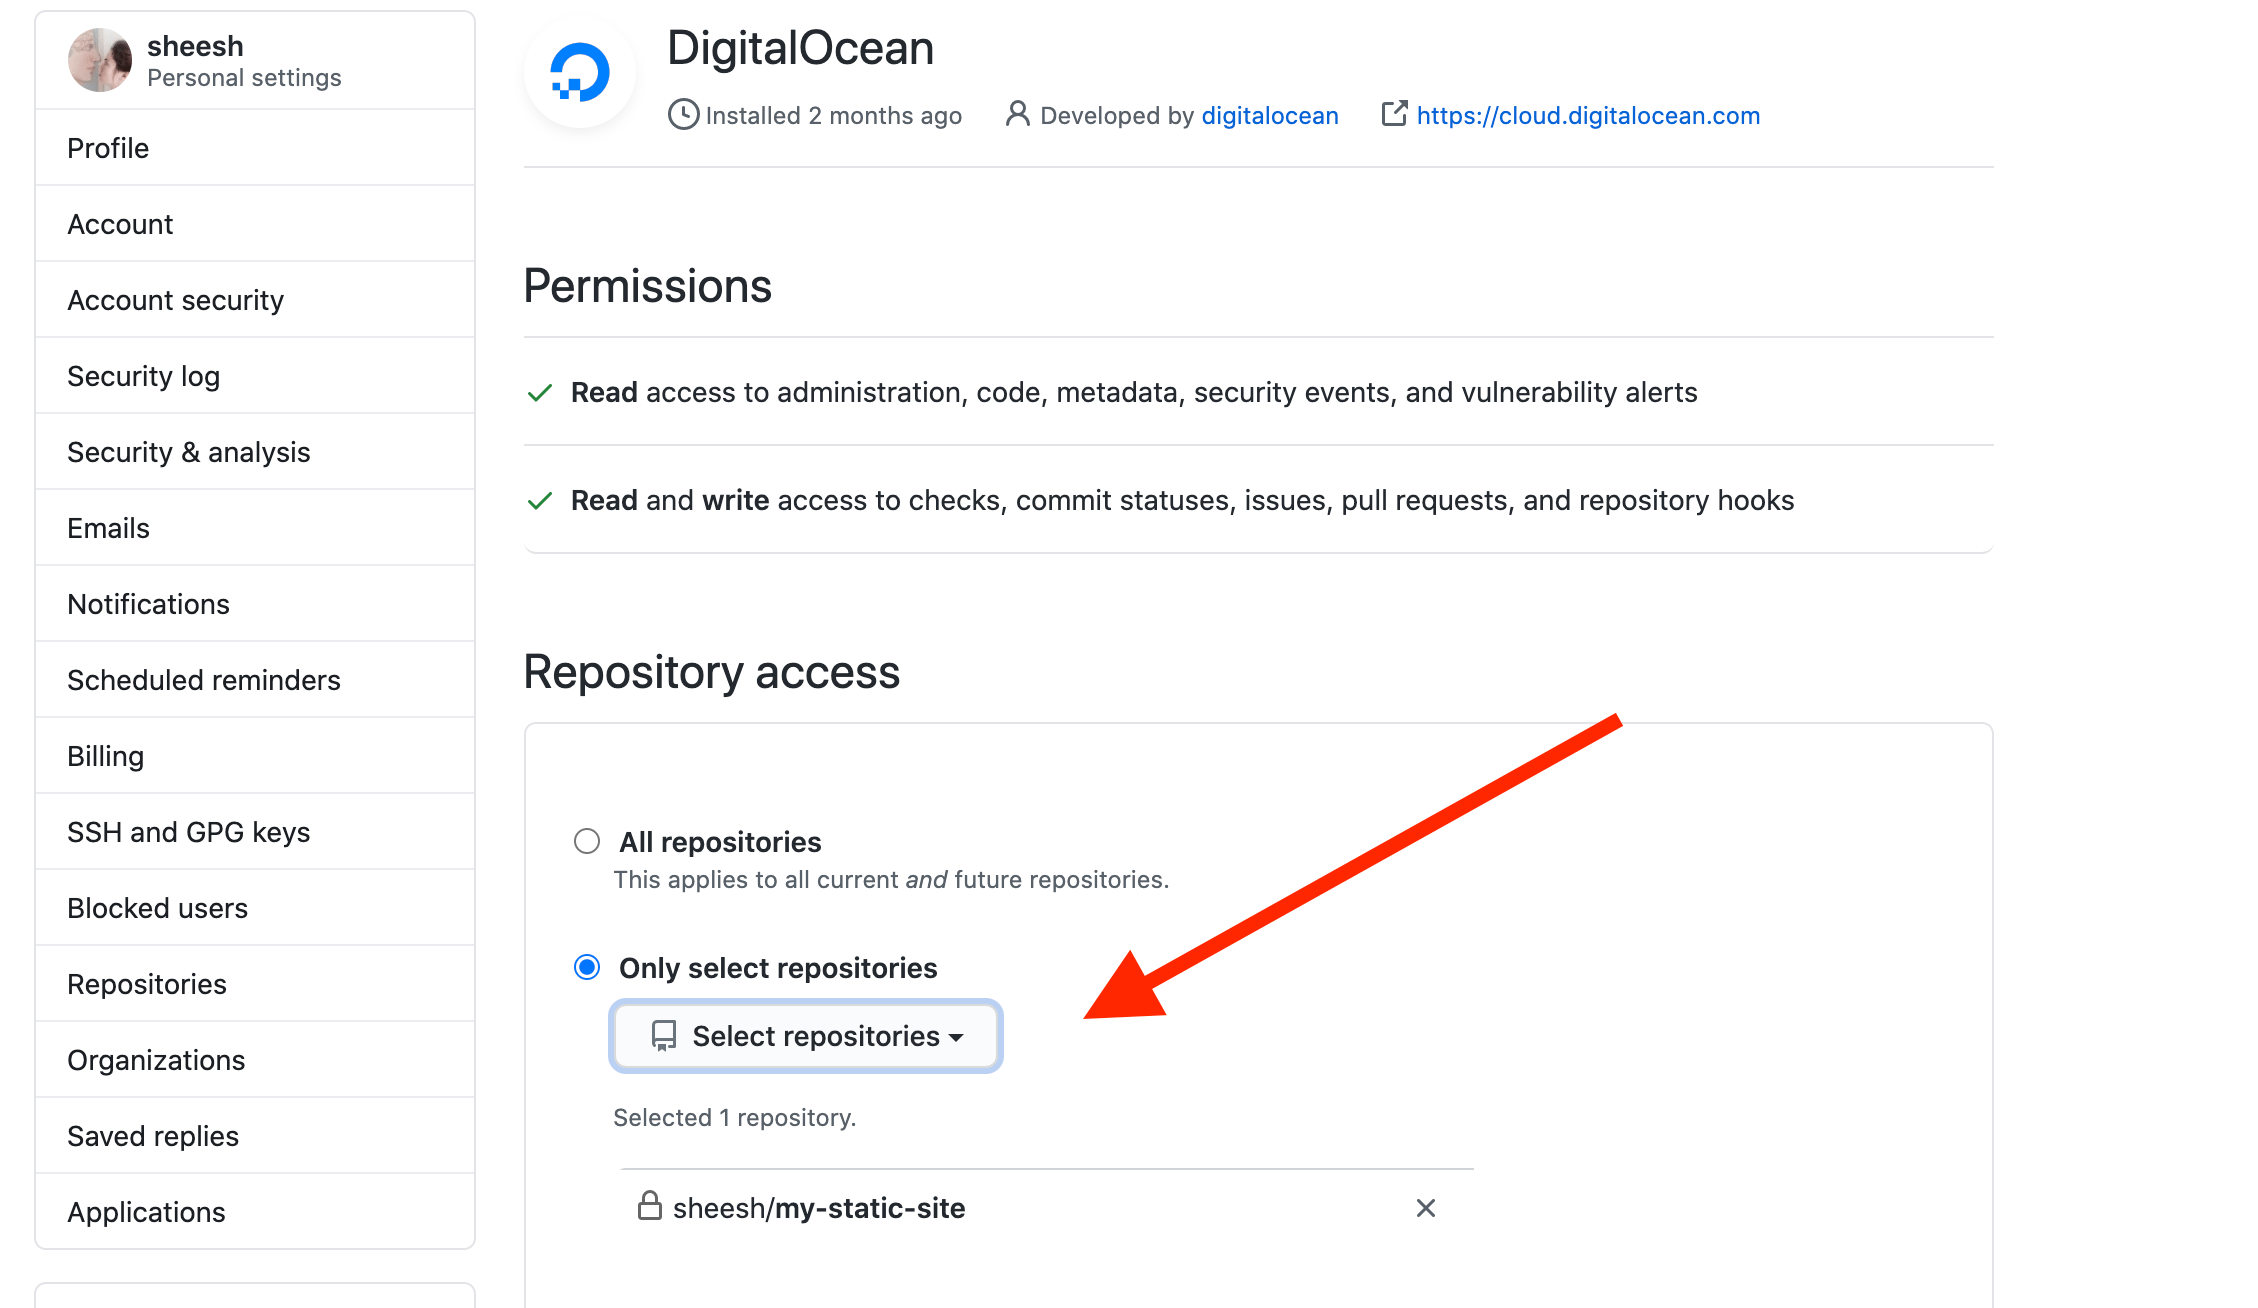
When you are done, click the “Save” button at the bottom of the webpage. You will now be directed back to App Platform, where you should now be able to select your repository in the dropdown menu:
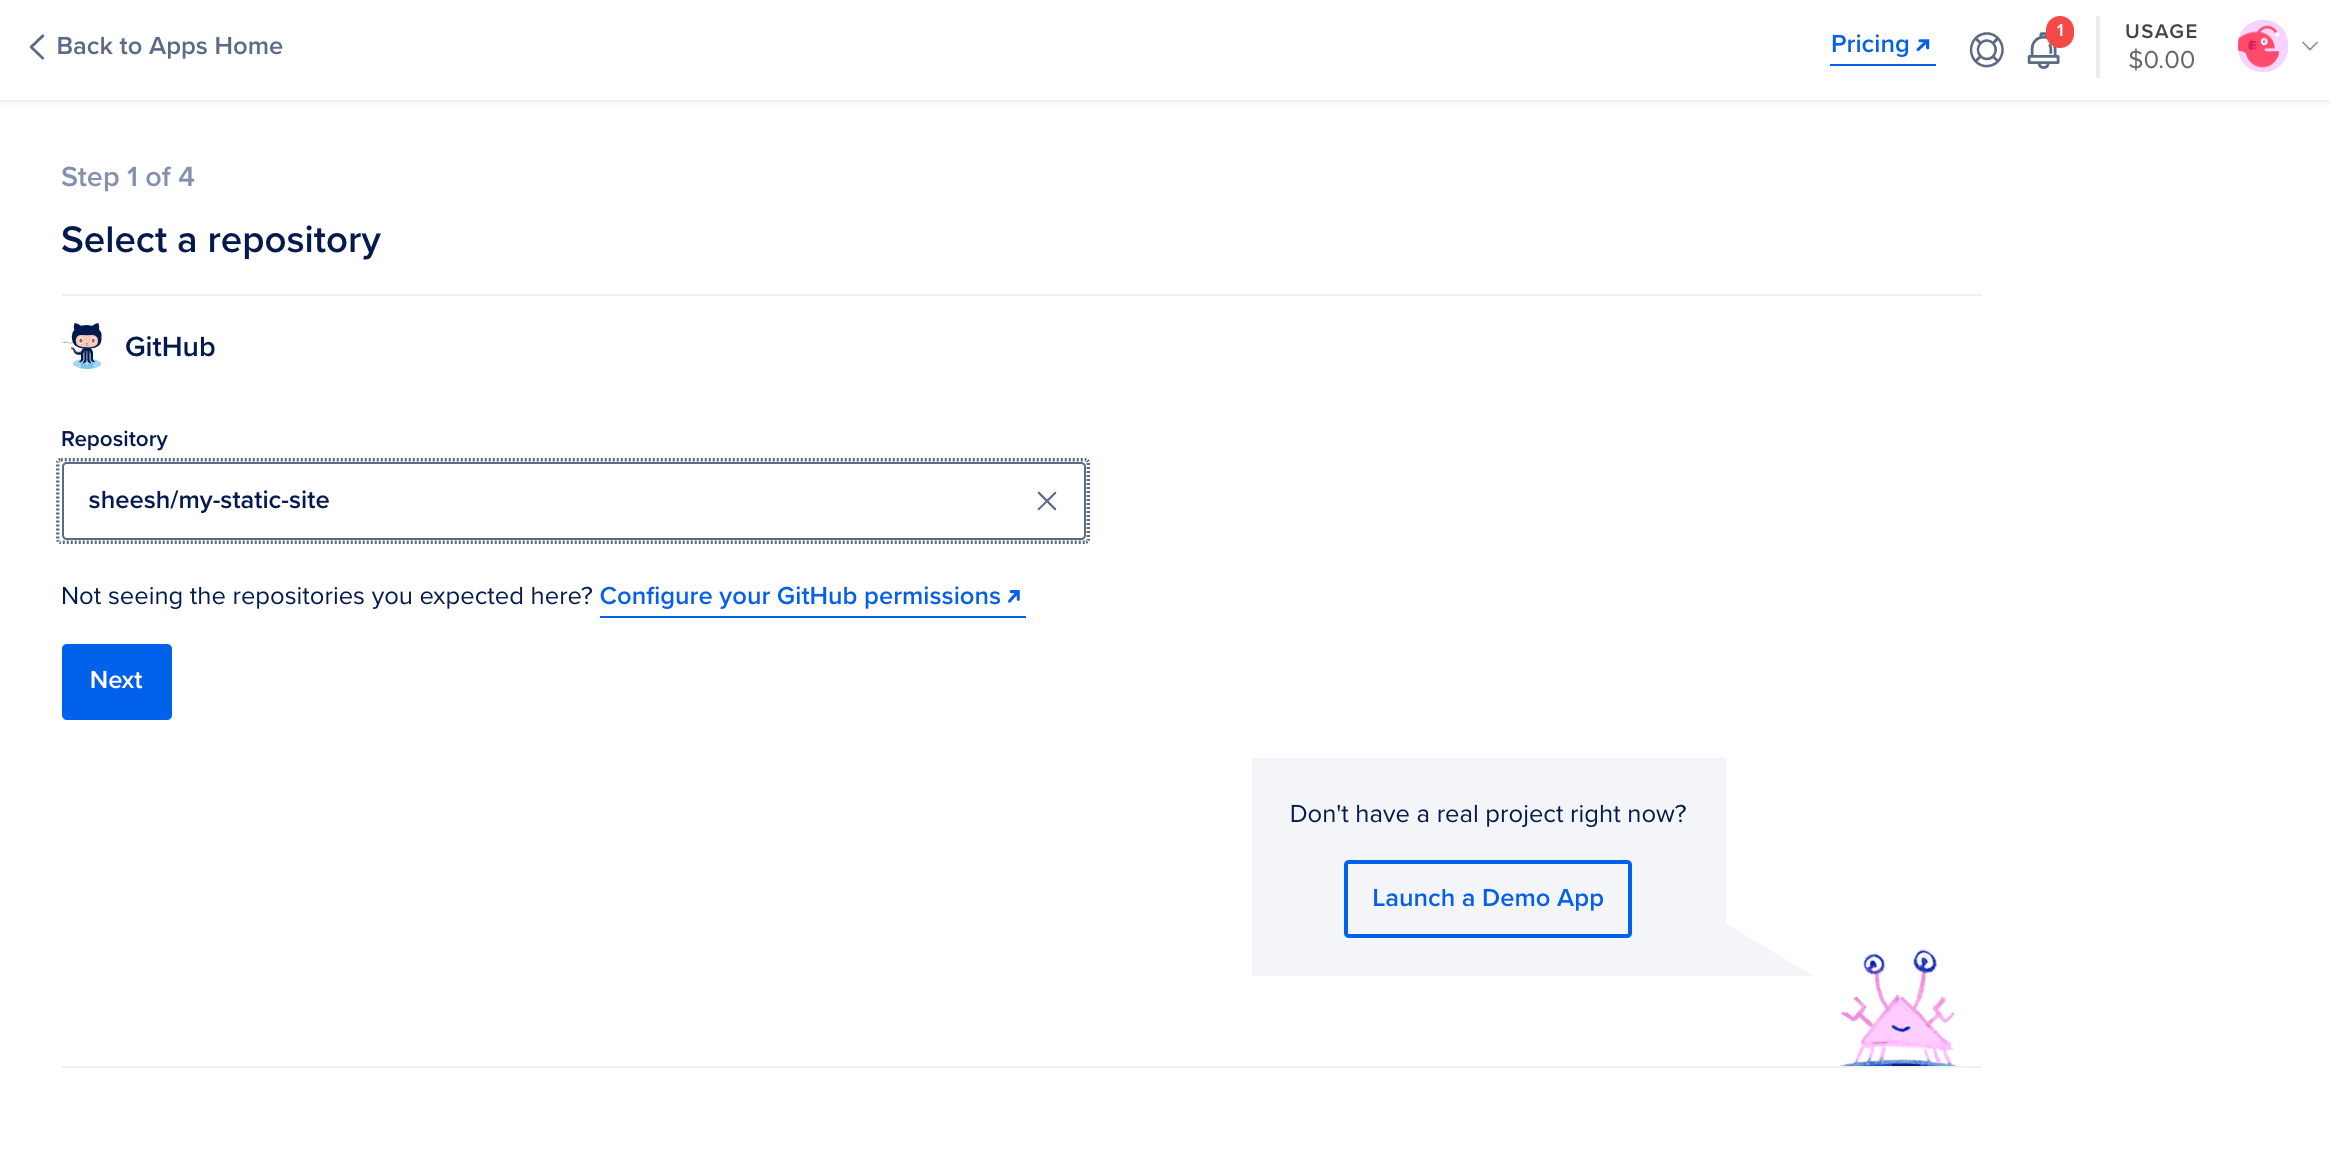
After selecting your repository, click “Next.” You will then be prompted to choose the name, branch, and options for Autodeploy. If the Autodeploy box is checked, any future changes you make to your repository files will be immediately pushed to your live site. Make your selections and click “Next”:
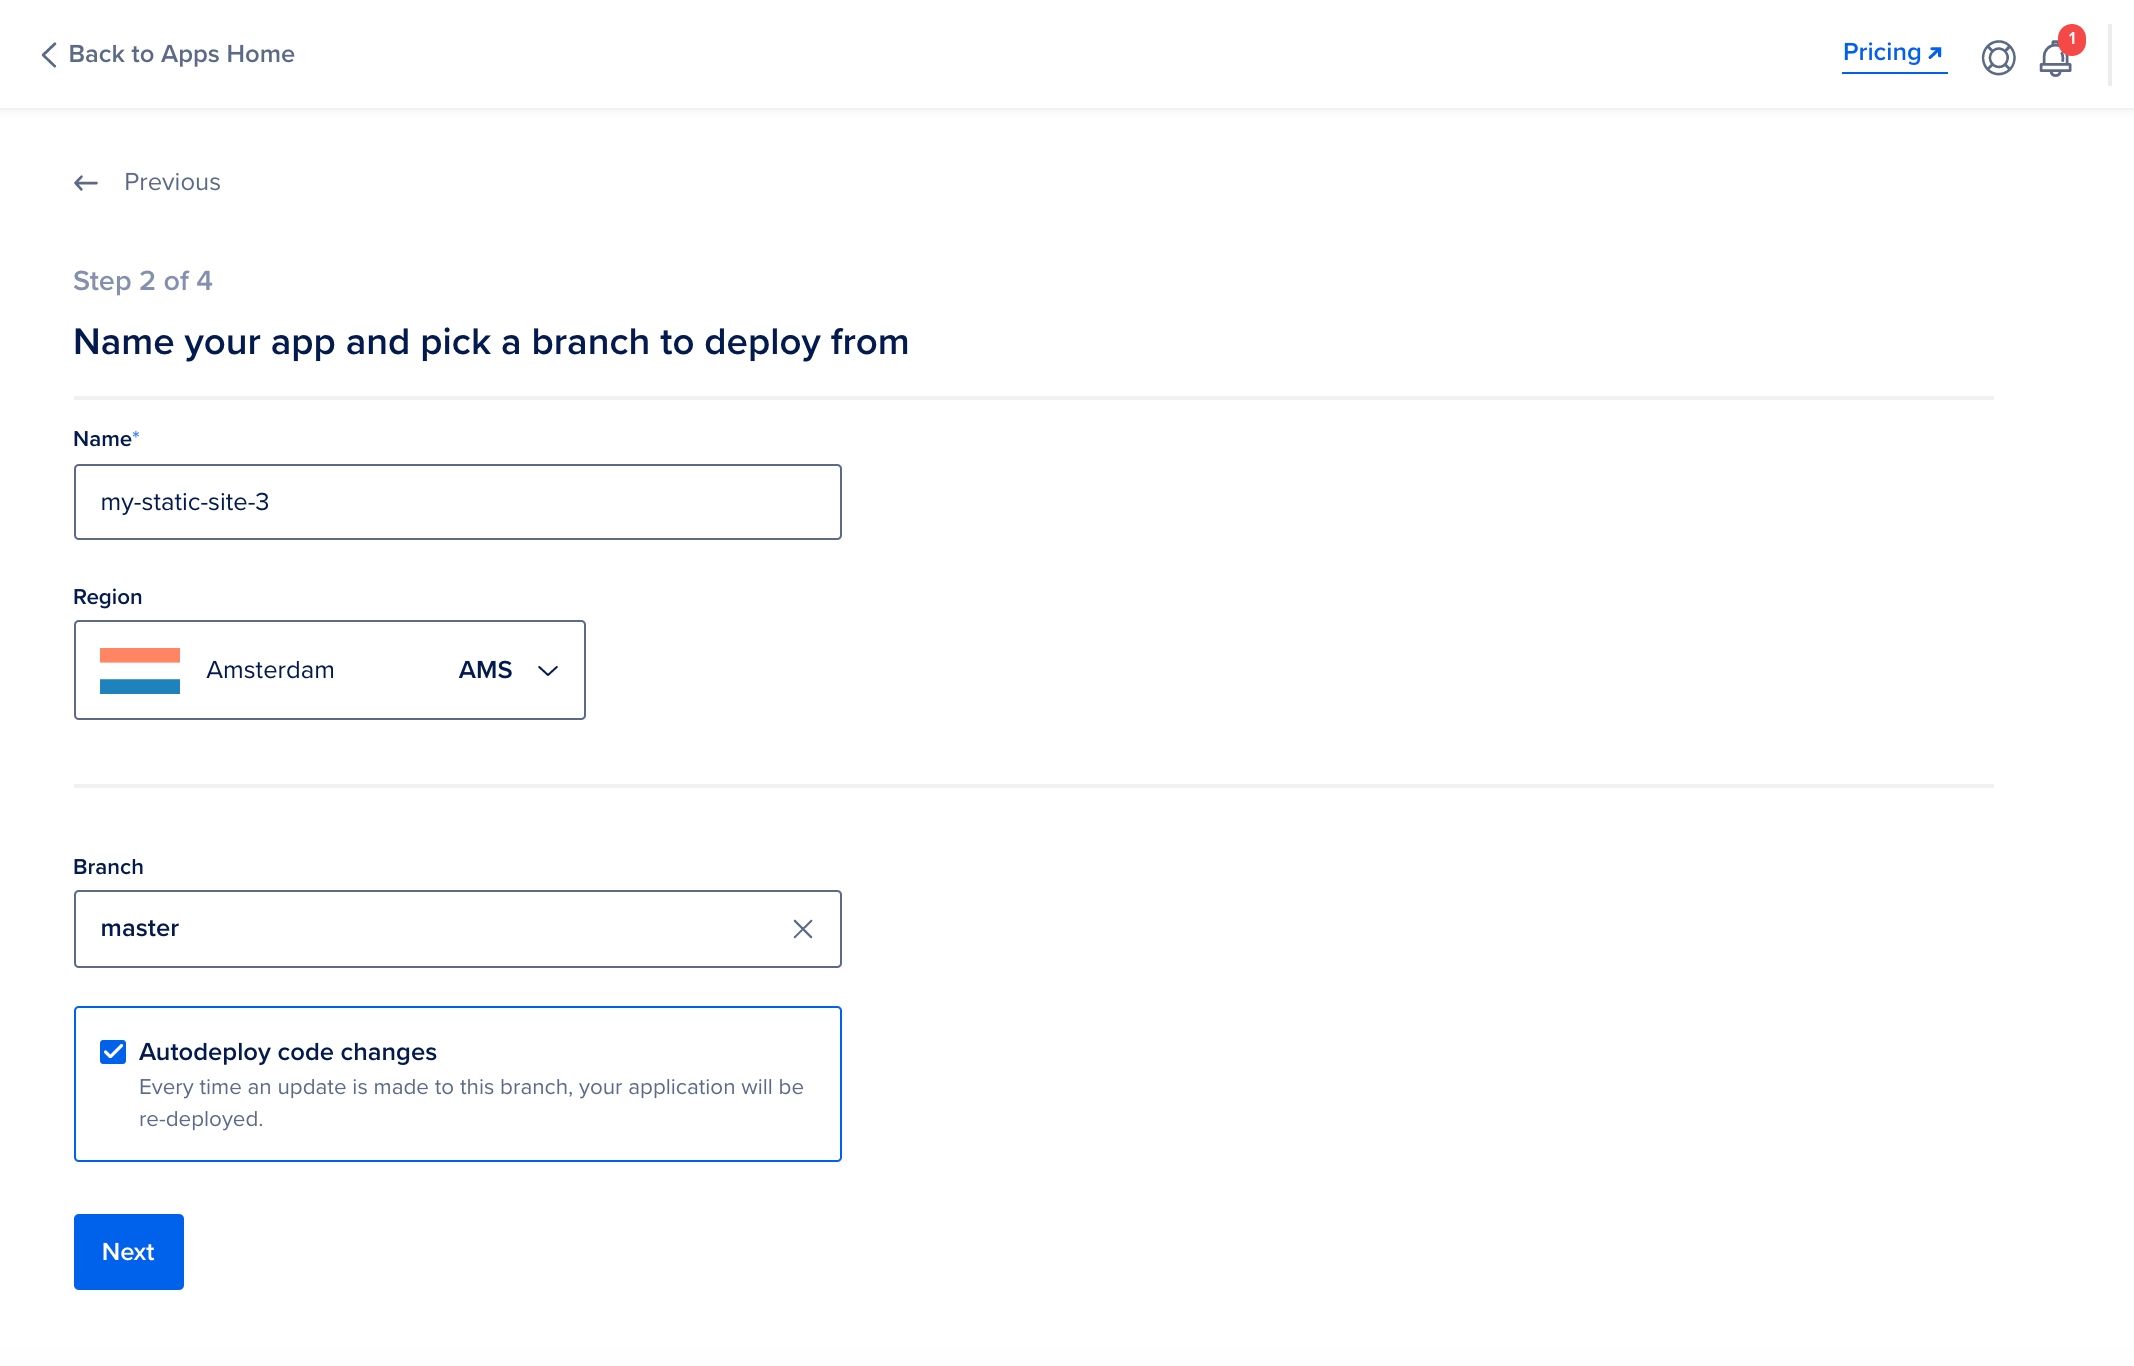
Next, you will be taken to a page where you can configure your App. This page should automatically detect your component type as a “Static Site":
You should not need to make any changes on this page. Scroll down and click the blue button “Next” at the bottom of the page. You will be directed to a new window where you can select the “Starter” plan if you’d like to deploy this site as one of your free three static sites:
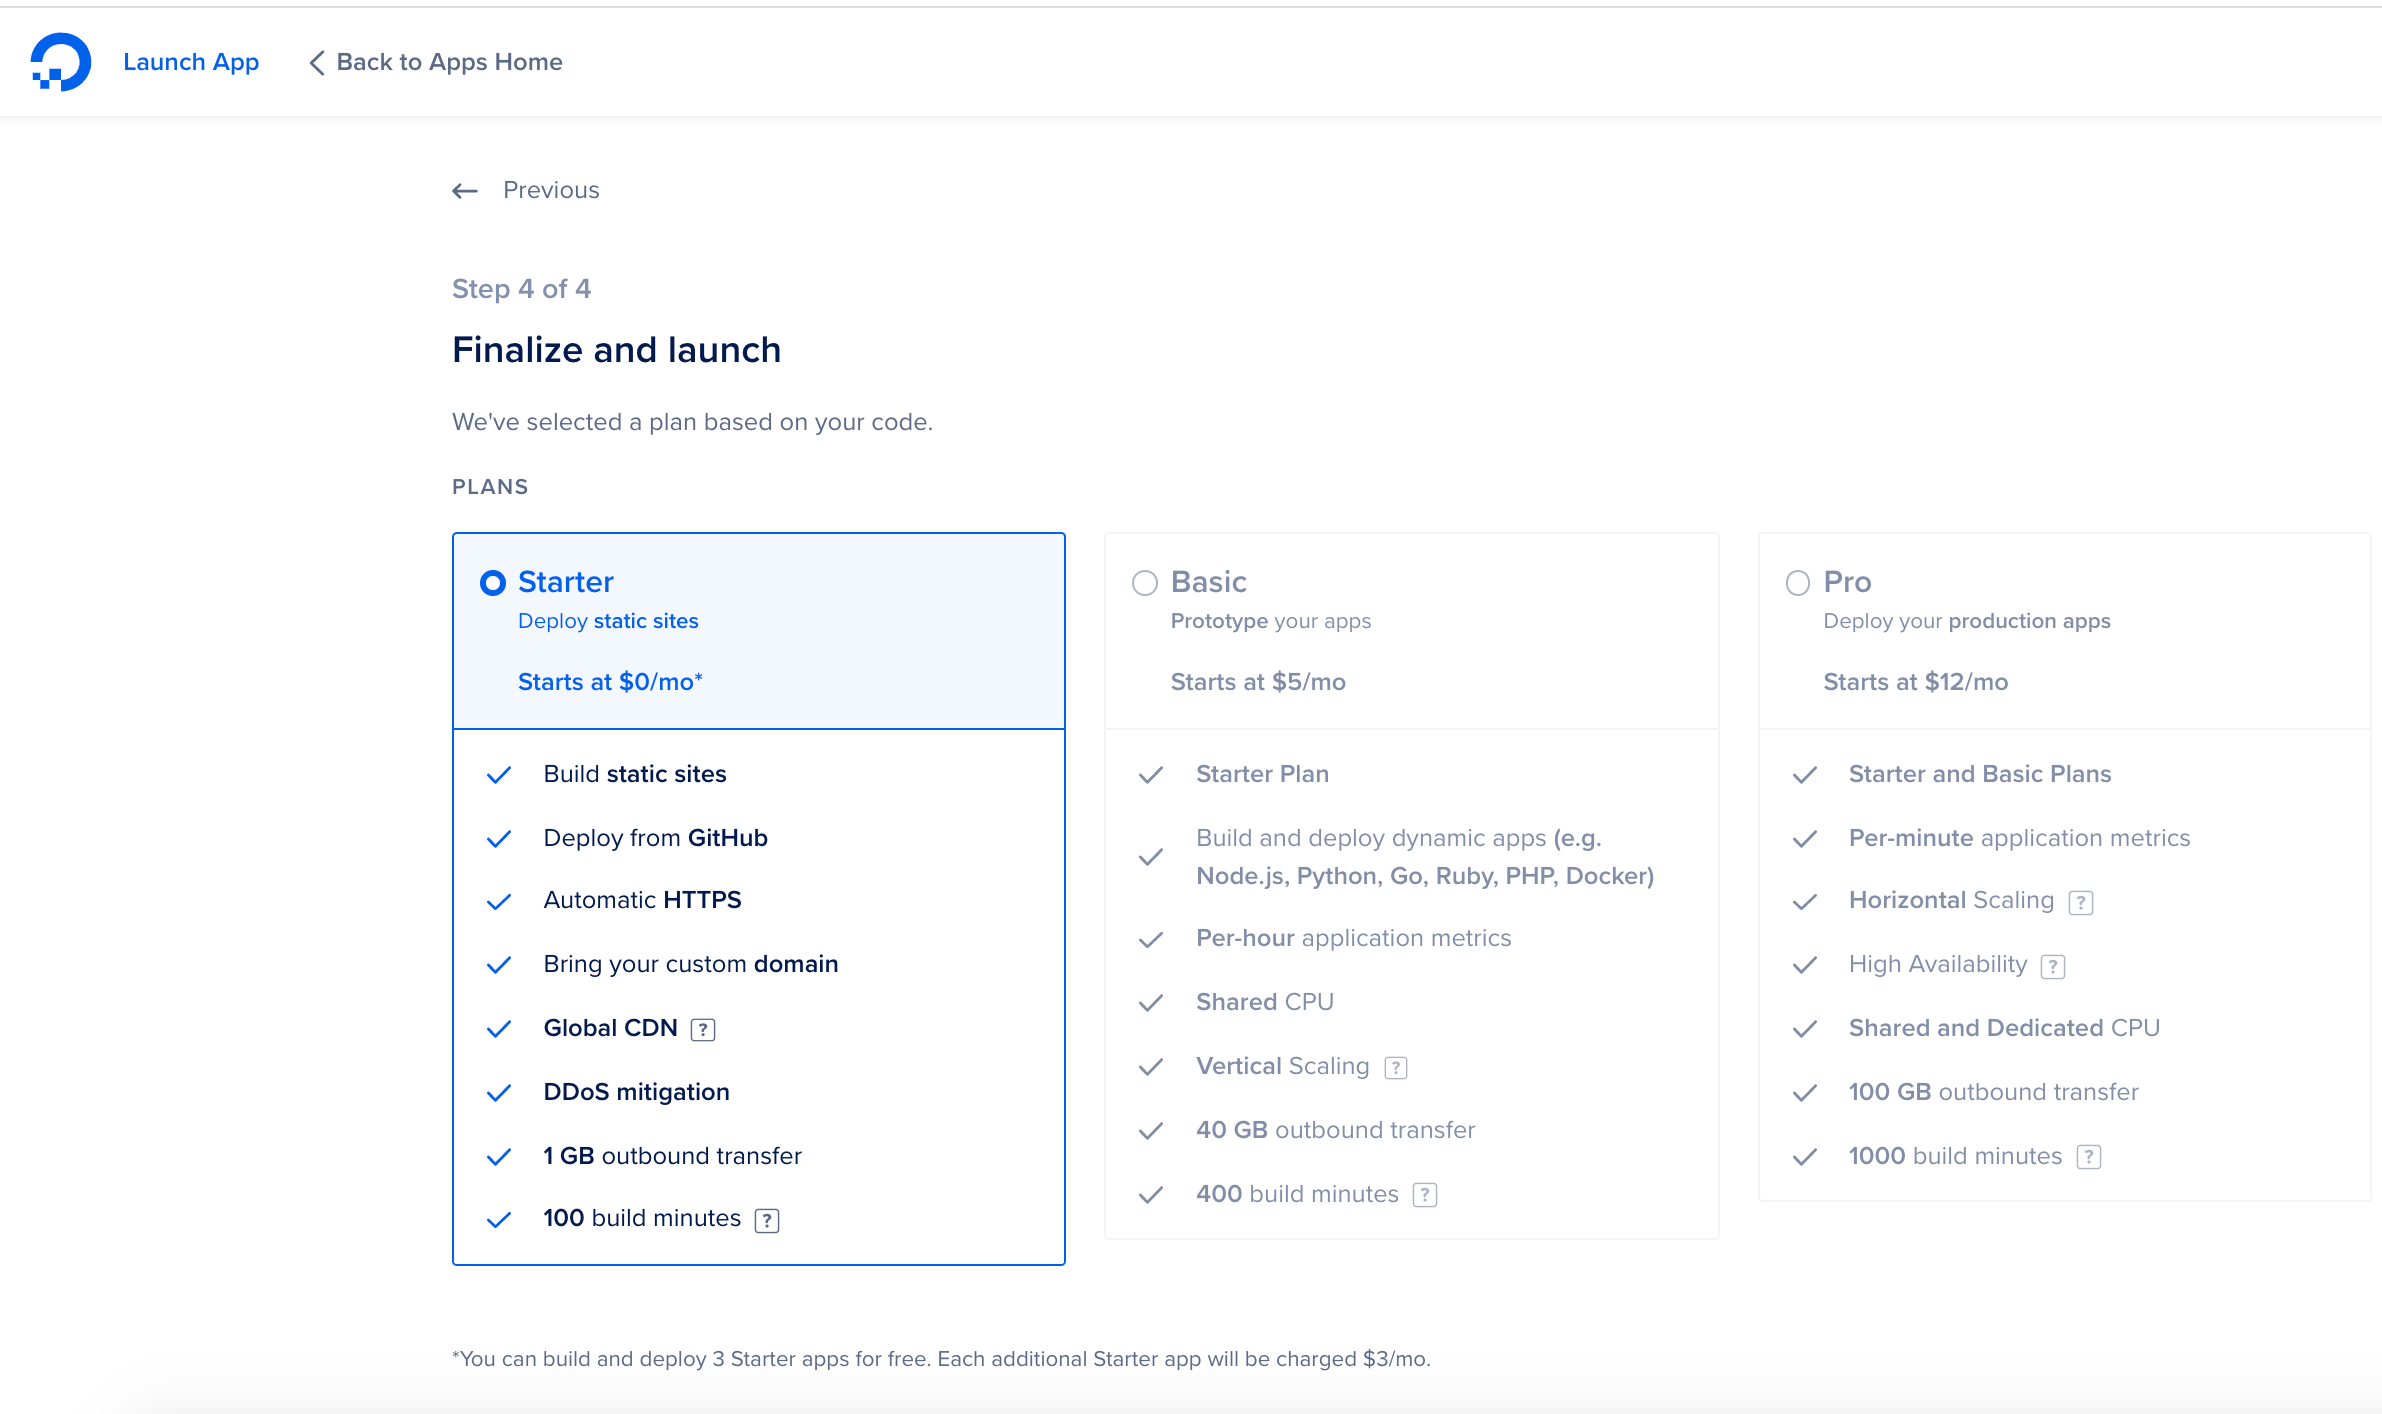
Select your desired plan and click the “Launch Your Starter App” button. You will be directed to your app’s admin page. When your app is finished deploying, you will see the “Deployed Successfully!” message:
 .
.
You will also see a link under your app’s name at the top of the page. Click on the link to make sure your site is working properly. You should be directed to a new web page with your published website. If your site is not appearing, go back and check for errors.
Your static site should now be published to the web through App Platform. Anyone with the app link will be able to access your site. If you’d like to add a custom domain to your site, please visit our How To Manage Custom Domains guide in App Platform product documentation.
Conclusion
In this tutorial, you have learned how to deploy a static site using App Platform, with a GitHub account, and the GitHub Desktop app. If you wish to make changes to your website, edit your files on your local machine and commit and push changes to your GitHub repository as instructed in Steps 4 and 5. Once your changes are pushed to your GitHub repository, they should automatically update on your site if you kept the “Automatically deploy on push” option selected in Step 7.
For further information about App Platform, please visit the official App Platform product documentation. Remember, you can host up to three free static sites. If you wish to delete your app, please follow the instructions in the section Destroy an App in the product documentation.
Thanks for learning with the DigitalOcean Community. Check out our offerings for compute, storage, networking, and managed databases.
About the author
Open source advocate and lover of education, culture, and community.
Still looking for an answer?
This textbox defaults to using Markdown to format your answer.
You can type !ref in this text area to quickly search our full set of tutorials, documentation & marketplace offerings and insert the link!
Please enable .gitignore and put there .DS_STORE. Seems like this tutorial is for management only, right :)?
Super helpful article. Roudtripping to GitHub is a PITA for these tiny little static sites. Thanks for making the process easy to understand.
Quite sad to see an “Open Source advocate” recommending a tool that only runs on propitiatory OSs.
Hi, My project is just an index.html, and a app.js file (this js I made by building npx webpack) I’m putting the website this way APP server, bit I’m getting error (server not found)
This comment has been deleted
This is for server-side apps as well.To deploy my website on Web I used DigitalOcean App Platform, it is really very easy to deploy with app platform.
An excellent information provided thanks for all the information. I’m so glad for all the information.
Hello, I get a problem when deploy static website into DigitalOcean App Platform. Detail: was loaded over HTTPS, but requested an insecure manifest
But this method has limits according to github/gitlab limits for upload for example. We need to serve static site and server from s3 compatible storage with cdn.
 This work is licensed under a Creative Commons Attribution-NonCommercial- ShareAlike 4.0 International License.
Become a contributor for community
Get paid to write technical tutorials and select a tech-focused charity to receive a matching donation.

DigitalOcean Documentation
Full documentation for every DigitalOcean product.

Resources for startups and AI-native businesses
The Wave has everything you need to know about building a business, from raising funding to marketing your product.
The developer cloud
Scale up as you grow — whether you're running one virtual machine or ten thousand.

Start building today
From GPU-powered inference and Kubernetes to managed databases and storage, get everything you need to build, scale, and deploy intelligent applications.
