By Chad Stovern and Sharon Campbell

Introduction
Python is an excellent language for web programming due to its flexibility and high-level functionality. Web frameworks can make programming web applications much simpler because they connect many of the components necessary for a robust web interface.
While some web frameworks attempt to provide everything, others try to stay out of the way while taking care of the important, difficult to implement issues. Bottle is a Python framework that falls into the second category. It is extremely lightweight, but also makes it easy to develop applications quickly.
In this guide, we will cover how to set up and use Bottle to create simple web applications on a Ubuntu 14.04 server.
Prerequisites
Before you begin this guide you’ll need the following:
- A Ubuntu 14.04 Droplet
- A working knowledge of how to edit text files from the command line
- A sudo user
Step 1 — Install a Virtual Environment for Python
Python, the programming language that Bottle is built for, comes installed on Ubuntu by default.
We will install the python-virtualenv package to isolate our Python project from the system’s Python environment. The virtualenv software allows us to create a separate, contained environment for our Python projects that will not affect the entire OS.
Update your package lists:
- sudo apt-get update
Install python-virtualenv from the repositories:
- sudo apt-get install python-virtualenv
We are going to create a projects folder in our home directory, and then create a virtual environment within this folder:
- mkdir ~/projects
- cd ~/projects
- virtualenv --no-site-packages venv
This creates a directory called venv within the projects directory. It installs some Python utilities within this folder and created a directory structure to install additional tools.
Step 2 — Activate the Virtual Environment for Python
We must activate the virtual environment before beginning to work on our project:
- source venv/bin/activate
The command prompt will change to reflect the fact that we are operating in a virtual environment now.
If you need to reconnect later, make sure you activate the environment again with these commands:
- cd ~/projects
- source venv/bin/activate
If you need to exit the virtual environment, you can type this at any time:
- deactivate
Do not deactivate your virtual environment at this point.
Step 3 — Install Bottle
One of the tools that the virtualenv program installed was pip.
This tool allows us to easily install Python packages from the Python package index, an online repository.
If we want to search for Python packages that have to do with Bottle, we can run:
- pip search bottle
We will start by installing the Bottle package:
- pip install bottle
After the process completes, we should have the ability to use the Bottle framework within our applications.
Step 4 — Create Your First Bottle Application
Bottle, like most frameworks, implements a version of the MVC software pattern. MVC stands for model, view, and controller, and it describes a decision to separate the different functions of a user interface.
The model is a representation of a set of data and is responsible for storing, querying, and updating data. The view describes how information should be rendered to the user. It is used to format and control the presentation of data. The controller is the main processing center of the app, which decides how to respond to user requests.
Bottle applications can be incredibly simple. In their most bare form, they can implement all of these components within a single file. We will create a “hello world” application to show how this is done.
With your favorite text editor, create a Python application called hello.py:
- nano ~/projects/hello.py
We’ll show you each line one a time, and include the final file at the end of this section.
Within this file, the first line we will add imports some functionality from the Bottle package. This will allow us to use the framework tools within our application:
from bottle import route, run
This line tells our program that we want to import the route and run modules from the Bottle package.
- The
runmodule that we are importing can be used to run the application on a development server, which is great for quickly seeing the results of your program - The
routemodule that we are importing is responsible for telling the application what URL requests get handled by which Python functions. Bottle applications implement routing by calling a single Python function for each URL requested. It then returns the results of the function to the user
We can add a route right now that will match the URL pattern /hello. Add one new line at the bottom of the file:
from bottle import route, run

@route('/hello')
This route decorator matches the URL /hello, so when that path is requested on the server, the function that directly follows will be executed. Add two more lines at the end of the file:
from bottle import route, run

@route('/hello')
def hello():
    return "<h1>Hello World!</h1>"
This function is very simple, but it completes the only requirement of a routing function: it returns a value that can be displayed in the web browser. In this case, the value is a simple HTML string. We could remove the h1 header tags and the same information would be displayed in an undecorated fashion.
Finally, we need to run our application using the development server. Add the final line, and now your file is complete:
from bottle import route, run

@route('/hello')
def hello():
    return "<h1>Hello World!</h1>"

run(host='0.0.0.0', port=8080)
This line will run the server instance.
- By passing the parameter
host='0.0.0.0', this will serve the content to any computer, not just the local machine. This is important since our application is being hosted remotely - The
portparameter specifies the port that this will be using
Save and close the file.
We can run this application with this command:
- python ~/projects/hello.py
You can visit this application in your web browser by going to your IP address, followed by the port we chose to run on (8080), followed by the route we created (/hello):
http://your_server_ip:8080/hello
It will look like this:
You can stop the server at any time by typing:
- CTRL-C
Step 5 — Create a Bottle Model
We have now implemented our first application. It was simple, but it didn’t really implement MVC principles, or do anything particularly interesting. Let’s create a slightly more sophisticated application this time.
We’ll start with our model. This is the portion of our program that handles the data storage. Bottle can easily implement a variety of backends for data through the use of plugins.
We will use an SQLite database file for our database. This is an extremely simple database designed for lightweight tasks.
Install SQLite with this command:
- sudo apt-get install sqlite
We also need to download and install the Bottle plugin that will allow us to use these databases:
- pip install bottle-sqlite
Now that we have the components, we will create a Python file that will generate a SQLite database with some data. We could do this in the Python interpreter, but making a file makes it easy to repeat.
Create the file:
- nano ~/projects/picnic_data.py
Add this content to the file. It will create a database filled with picnic inventory items:
import sqlite3
db = sqlite3.connect('picnic.db')
db.execute("CREATE TABLE picnic (id INTEGER PRIMARY KEY, item CHAR(100) NOT NULL, quant INTEGER NOT NULL)")
db.execute("INSERT INTO picnic (item,quant) VALUES ('bread', 4)")
db.execute("INSERT INTO picnic (item,quant) VALUES ('cheese', 2)")
db.execute("INSERT INTO picnic (item,quant) VALUES ('grapes', 30)")
db.execute("INSERT INTO picnic (item,quant) VALUES ('cake', 1)")
db.execute("INSERT INTO picnic (item,quant) VALUES ('soda', 4)")
db.commit()
In this file, we:
- Import the SQLite package
- Execute a command that creates our table and inserts data
- Finally, we commit the changes
Save and close the file.
Execute the file, which will create a database file called picnic.db within our current directory:
- python ~/projects/picnic_data.py
If you’d like, you can ls the directory to confirm that the database file was created.
The model portion of our program is now fairly complete. We can see that our model will dictate a little bit how our control portion must function to interact with our data.
6 — Create a Bottle Controller
Now that we have a database, we can start to develop our main application. This will mainly implement our controller functionality. It will also be the file that most closely resembles our first application.
Create a file called picnic.py to store our main application:
- nano ~/projects/picnic.py
Just like before, we’ll explain the file line by line, and show the completed file at the end of the step.
Within this file, we need to import some things from the Bottle package, just like before. We need some additional modules that we haven’t used before. In addition, we need to import the SQLite functionality:
import sqlite3
from bottle import route, run, template
Next, we’ll define a route that matches the URL path /picnic:
import sqlite3
from bottle import route, run, template

@route('/picnic')
We’ll implement the function that connects to our database, gets our data from the table, and calls our view to render the page.
import sqlite3
from bottle import route, run, template

@route('/picnic')
def show_picnic():
    db = sqlite3.connect('picnic.db')
    c = db.cursor()
    c.execute("SELECT item,quant FROM picnic")
    data = c.fetchall()
    c.close()
    output = template('bring_to_picnic', rows=data)
    return output
- The command that connects to the database is the
db = sqlite3.connect('picnic.db')command - We query the database, and select all of our values with the next four lines
- The line where we call the view to format our data is
output = template('bring_to_picnic', rows=data). This calls a template (view) calledbring_to_picnic.tplto format the data. It passes thedatavariable as the template variablerows - Finally, it returns formatted output to our user
Finally, we need to add our run command to run the actual server:
import sqlite3
from bottle import route, run, template

@route('/picnic')
def show_picnic():
    db = sqlite3.connect('picnic.db')
    c = db.cursor()
    c.execute("SELECT item,quant FROM picnic")
    data = c.fetchall()
    c.close()
    output = template('bring_to_picnic', rows=data)
    return output

run(host='0.0.0.0', port=8080)
Save and close the file.
We will create this template file bring_to_picnic.tpl in the next section.
Step 7 — Create a Bottle View
Now that we have our model and controller, the only thing left to create is our view. This is handled easily using Bottle’s built-in template engine.
The application will search for a template matching the name given in the template function, ending with .tpl. This can either be in the project’s main directory, or in a directory called view.
Create a file matching the one we called with the template function in the output line in the previous script:
- nano ~/projects/bring_to_picnic.tpl
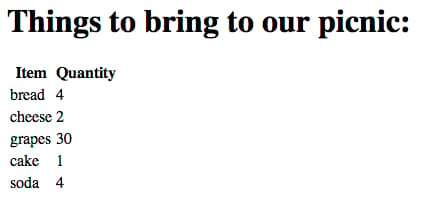
In this file, we can mix HTML and programming. Ours will be very simple. It will use a loop to create a table, which we will populate with our model data. Add all of these lines to the file:
<h1>Things to bring to our picnic</h1>

<table>
    <tbody>
        <tr><th>Item</th><th>Quantity</th></tr>
        %for row in rows:
        <tr>
        %for col in row:
            <td>{{col}}</td>
        %end
        </tr>
    %end
    <tbody>
</table>
This will render our page in HTML.
- The templating language that we see here is basically Python
- The
rowsvariable that we passed to the template is available to use when designing the output - We can type lines of Python by preceding them with
% - We can access variables within the HTML by using the
{{var}}syntax.
Save and close the file.
Step 8 — Start the Bottle Application
Our application is now complete.
We can start the program by calling Python on the main file:
- python ~/projects/picnic.py
We can see the results by visiting our IP address and port, followed by the URL route we created:
http://your_server_ip:8080/picnic
Your web page should look like this:
Press CTRL-C to stop the application. (CTRL-Z is a stronger stop signal.)
(Optional) Step 9 — Upload Your Own Application
To upload your own Bottle application, you’ll want to copy all the project files to this directory:
~/projects/
For example:
- scp myproject.py sammy@your_server_ip:~/projects/
Upload all the files associated with this project in a similar way. SFTP is a different way to upload files, if you’re not familiar with scp.
(Optional) Step 10 — Start Your Own Application
Activate your virtual environment (if you haven’t done so already).
- cd ~/projects/
- source venv/bin/activate
We’ll use the python command to start the application. We’ll make it slightly less rudimentary by starting the process in the background, which means you can close your terminal and the app will keep running:
- nohup python ~/projects/myproject.py &
In the output, you should see your process ID number and the following message:
[1] 20301
(venv)[sammy@bottle projects]$ nohup: ignoring input and appending output to ‘nohup.out’
Once you’re ready for production, we highly recommend making a more robust startup plan for your app. (Just starting it in the background means your app will stop after a server reboot.) Ubuntu 14.04 uses Upstart.
Conclusion
By now, you should be able to see how you can build complex applications using a simple, bare-bones micro-framework like Bottle. While our examples were simple, it is easy to take advantage of more advanced functionality.
Bottle’s plugin system is also an important asset. Plugins are actively shared within the community and it is easy to implement more complex behavior through the plugin system.
For example, one easy way to find Bottle-compatible plugins is by using the pip search bottle command. This will give you an idea of some of the more popular options.
Thanks for learning with the DigitalOcean Community. Check out our offerings for compute, storage, networking, and managed databases.
About the author(s)
Hi, I’m Chad. When I’m not enjoying time with my family, I work with technology @iDoneThis and explore virtual worlds with my internet pals.
Current fan and former Editorial Manager at DigitalOcean. Hi! Expertise in areas including Ubuntu, Docker, Rails, and more.
Still looking for an answer?
This textbox defaults to using Markdown to format your answer.
You can type !ref in this text area to quickly search our full set of tutorials, documentation & marketplace offerings and insert the link!
It’s impossible to find a tutorial on how to set up a production site with Bottle. Every tutorial on the internet is the SAME as this one (nearly exactly!) and they ALL describe setting up a local DEV environment
 This work is licensed under a Creative Commons Attribution-NonCommercial- ShareAlike 4.0 International License.
Become a contributor for community
Get paid to write technical tutorials and select a tech-focused charity to receive a matching donation.

DigitalOcean Documentation
Full documentation for every DigitalOcean product.

Resources for startups and AI-native businesses
The Wave has everything you need to know about building a business, from raising funding to marketing your product.
The developer cloud
Scale up as you grow — whether you're running one virtual machine or ten thousand.

Start building today
From GPU-powered inference and Kubernetes to managed databases and storage, get everything you need to build, scale, and deploy intelligent applications.
