By Roy Derks and Timothy Nolan

The author selected the Wikimedia Foundation to receive a donation as part of the Write for DOnations program.
Introduction
Over the last few years, open-source web frameworks have greatly simplified the process of coding an application. React, for example, has only added to the popularity of JavaScript by making the language more accessible to new developers and increasing the productivity of seasoned developers. Created by Facebook, React allows developers to quickly create high-end user interfaces for highly-scalable web-applications by supporting such features as declarative views, state management, and client-side rendering, each of which can greatly reduce the complexity of building an app in JavaScript.
You can leverage frameworks like React to load and display data from the DigitalOcean API, through which you can manage your Droplets and other products within the DigitalOcean cloud using HTTP requests. Although one can fetch data from an API with many other JavaScript frameworks, React provides useful benefits like lifecycles and local state management that make it particularly well-suited for the job. With React, the data retrieved from the API is added to the local state when the application starts and can go through various lifecycles as components mount and dismount. At any point, you can retrieve the data from your local state and display it accordingly.
In this tutorial, you will create a simple React application that interacts with the DigitalOcean API v2 to make calls and retrieve information about your Droplets. Your app will display a list containing your current Droplets and their details, like name, region, and technical specifications, and you will use the front-end framework Bootstrap to style your application.
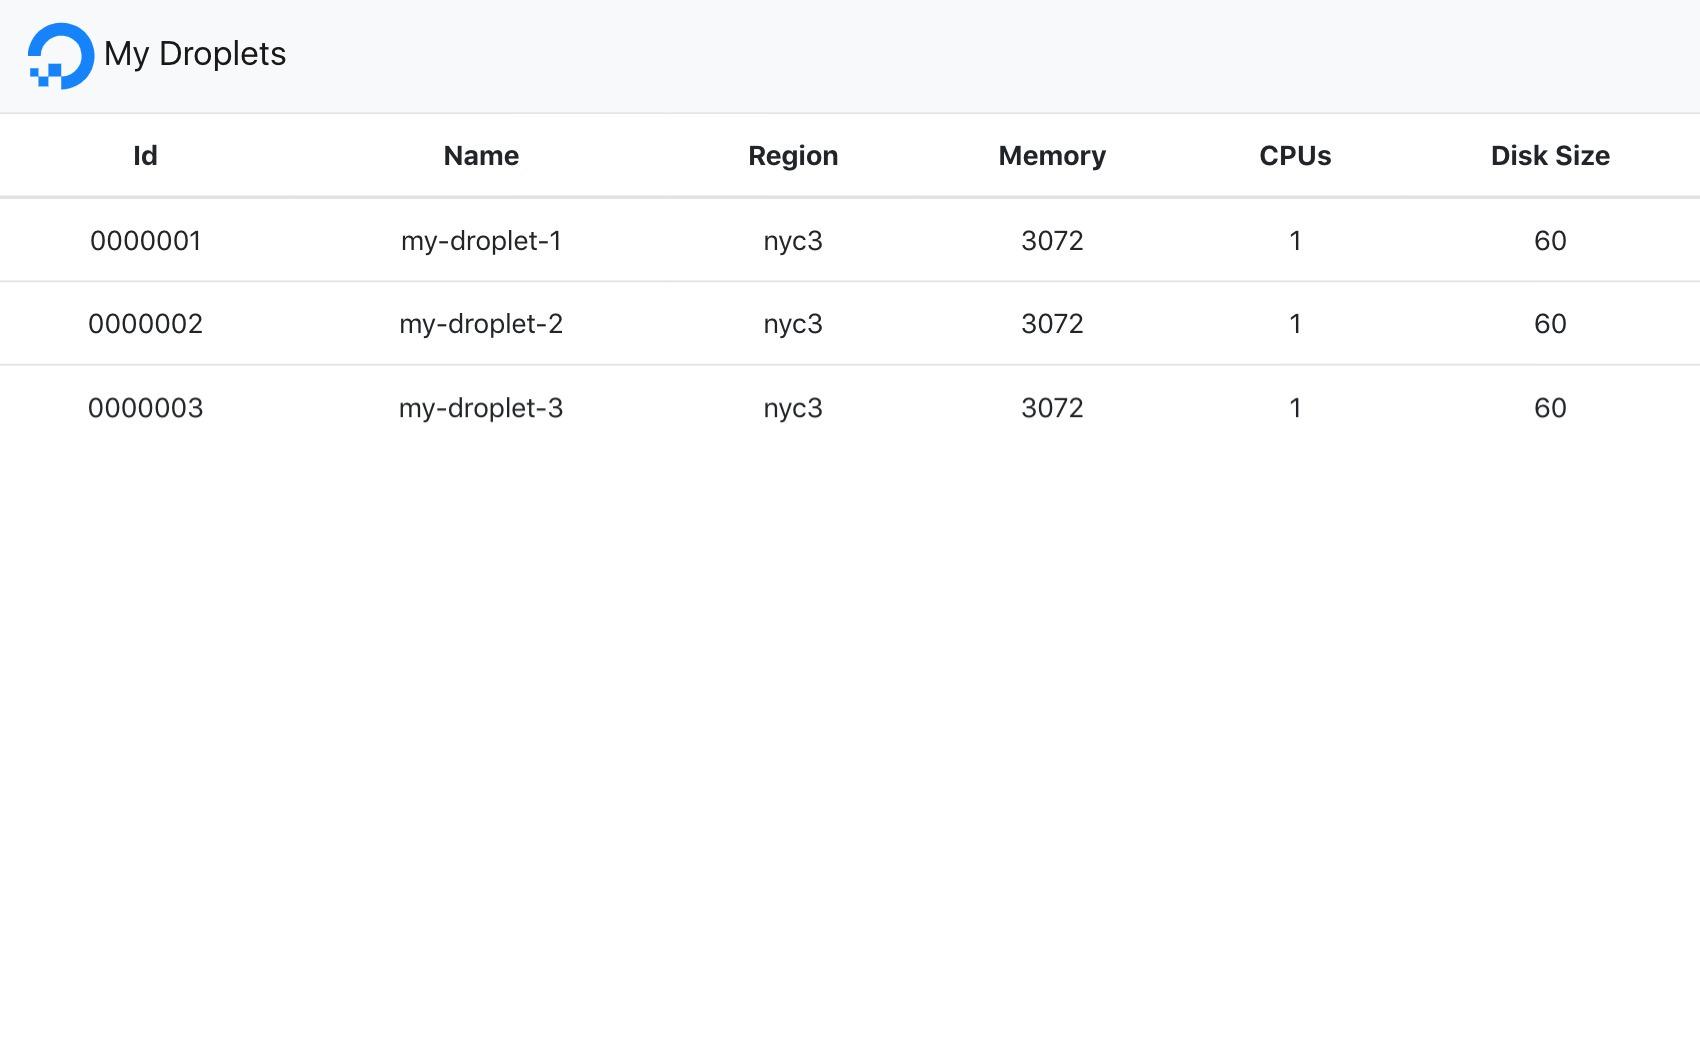
Once you have finished this tutorial, you will have a basic interface displaying a list of your DigitalOcean Droplets, styled to look like the following:
Prerequisites
Before you begin this guide, you’ll need a DigitalOcean account and at least one Droplet set up, in addition to the following:
-
A local installation of Node.js (at least v6) and npm (at least v5.2). Node.js is a JavaScript run-time environment that allows you to run your code outside of the browser. It comes with a pre-installed Package Manager called npm, which lets you install and update packages. To install these on macOS or Ubuntu 18.04, follow the steps in How to Install Node.js and Create a Local Development Environment on macOS or the “Installing Using a PPA” section of How To Install Node.js on Ubuntu 18.04.
-
A read-only personal access token for the DigitalOcean API. Make sure to record the token in a safe place; you’ll need it later on in this tutorial.
-
Familiarity with combining HTML and JavaScript. Learn more in How To Add JavaScript to HTML.
-
Familiarity with the JSON data format, which you can learn more about in How to Work with JSON in JavaScript.
-
Familiarity with making requests to APIs. For a comprehensive tutorial on working with APIs, take a look at How to Use Web APIs in Python3. While it’s written for Python, it will still help you understand the core concepts of working with APIs.
Step 1 — Creating a Basic React Application
In this first step, you’ll create a basic React application using the Create React App package from npm. This package automatically installs and configures the essential dependencies needed to run React, like the module builder Webpack and the JavaScript compiler Babel. After installing, you’ll run the Create React App package using the package runner npx, which comes pre-installed with Node.js.
To install Create React App and create the first version of your application, run the following command, replacing my-app with the name you want to give to your application:
- npx create-react-app my-app
After the installation is complete, move into the new project directory and start running the application using these commands:
- cd my-app
- npm start
The preceding command starts a local development server provided by Create React App, which disables the command line prompt in your terminal. To proceed with the tutorial, open up a new terminal window and navigate back to the project directory before proceeding to the next step.
You now have the first version of your React application running in development mode, which you can view by opening http://localhost:3000 in a web browser. At this point, your app will only display the welcome screen from Create React App:
Now that you have installed and created the first version of your React application, you can add a table component to your app that will eventually hold the data from the DigitalOcean API.
Step 2 — Creating a Component to Show the Droplet Data
In this step, you will create the first component that displays information about your Droplets. This component will be a table that lists all of your Droplets and their corresponding details.
The DigitalOcean API documentation states that you can retrieve a list containing all of your Droplets by sending a request to the following endpoint using cURL: https://api.digitalocean.com/v2/droplets. Using the output from this request, you can create a table component containing id, name, region, memory, vcpus, and disk for each Droplet. Later on in this tutorial, you’ll insert the data retrieved from the API into the table component.
To define a clear structure for your application, create a new directory called components inside the src directory where you’ll store all the code you write. Create a new file called Table.js inside the src/components directory and open it with nano or a text editor of your choice:
- mkdir src/components
- nano src/components/Table.js
Define the table component by adding the following code to the file:
import React from 'react';

const Table = () => {
  return (
    <table>
      <thead>
        <tr>
          <th>Id</th>
          <th>Name</th>
          <th>Region</th>
          <th>Memory</th>
          <th>CPUs</th>
          <th>Disk Size</th>
        </tr>
      </thead>
      <tbody>
        <tr>
          <td></td>
          <td></td>
          <td></td>
          <td></td>
          <td></td>
          <td></td>
        </tr>
      </tbody>
    </table>
  );
}

export default Table
The code block above imports the React framework and defines a new component called Table, which consists of a table with a heading and a body.
When you have added these lines of code, save and exit the file. With the nano text editor, you can do this by pressing CTRL+X, typing y, and pressing ENTER.
Now that you have created the table component, it is time to include this component in your application. You’ll do this by importing the component into the entry point of the application, which is in the file src/App.js. Open this file with the following command:
- nano src/App.js
Next, remove the boilerplate code that displays the Create React App welcome message in src/App.js, which is highlighted in the following code block.
import React, { Component } from 'react';
import logo from './logo.svg';
import './App.css';

class App extends Component {
  render() {
    return (
      <div className="App">
        <header className="App-header">
          <img src={logo} className="App-logo" alt="logo" />
          <p>
            Edit <code>src/App.js</code> and save to reload.
          </p>
          <a
            className="App-link"
            href="https://reactjs.org"
            target="_blank"
            rel="noopener noreferrer"
          >
            Learn React
          </a>
        </header>
      </div>
    );
  }
}

export default App;
After removing the lines that displayed the welcome message, include the table component inside this same file by adding the following highlighted lines:
import React, { Component } from 'react';
import Table from './components/Table.js';

class App extends Component {
  render() {
    return (
      <div className="App">
        <Table />
      </div>
    );
  }
}

export default App;
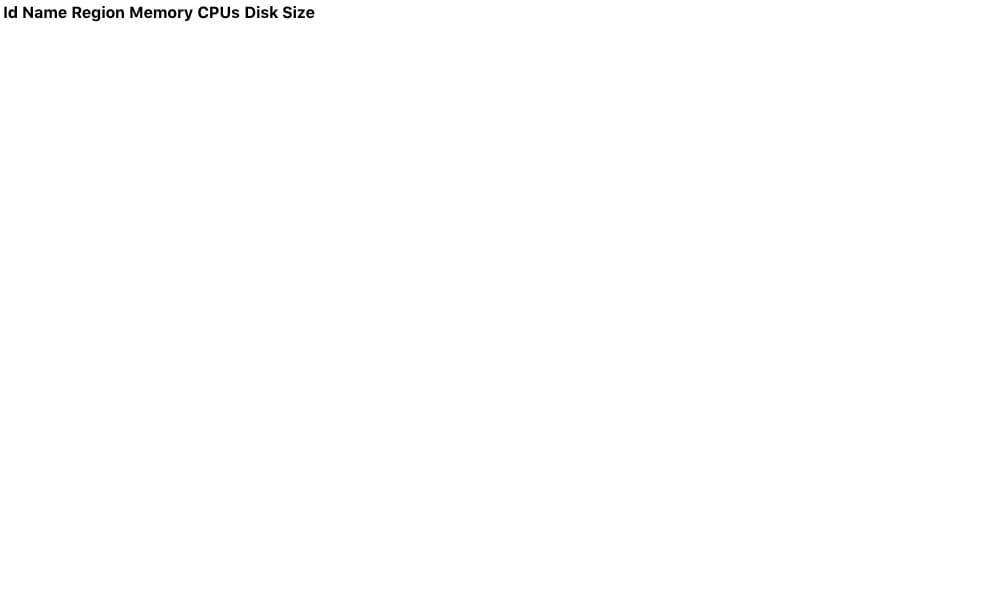
If you access http://localhost:3000 in your web browser again, your application will now display a basic table with table heads:
In this step, you have created a table component and included this component into the entry point of your application. Next, you will set up a connection to the DigitalOcean API, which you’ll use to retrieve the data that this table will display.
Step 3 — Securing Your API Credentials
Setting up a connection to the DigitalOcean API consists of several actions, starting with safely storing your Personal Access Token as an environment variable. This can be done by using dotenv, a package that allows you to store sensitive information in a .env file that your application can later access from the environment.
Use npm to install the dotenv package:
- npm install dotenv
After installing dotenv, create an environment file called .env in the root directory of your application by executing this command:
- nano .env
Add the following into .env, which contains your Personal Access Token and the URL for the DigitalOcean API :
DO_API_URL=https://api.digitalocean.com/v2
DO_ACCESS_TOKEN=YOUR_API_KEY
To ensure this sensitive data doesn’t get committed to a repository, add it to your .gitignore file with the following command:
- echo ".env" >> .gitignore
You have now created a safe and simple configuration file for your environment variables, which will provide your application with the information it needs to send requests to the DigitalOcean API. To ensure your API credentials aren’t visible on the client side, you will next set up a proxy server to forward requests and responses between your application server and the DigitalOcean API.
Install the middleware http-proxy-middleware by executing the following command:
- npm install http-proxy-middleware
After installing this, the next step is to set up your proxy. Create the setupProxy.js file in the src directory:
- nano src/setupProxy.js
Inside this file, add the following code to set up the proxy server:
const proxy = require('http-proxy-middleware')

module.exports = function(app) {

  require('dotenv').config()

  const apiUrl = process.env.DO_API_URL
  const apiToken = process.env.DO_ACCESS_TOKEN
  const headers  = {
    "Content-Type": "application/json",
    "Authorization": "Bearer " + apiToken
  }

  // define http-proxy-middleware
  let DOProxy = proxy({
    target: apiUrl,
    changeOrigin: true,
  pathRewrite: {
    '^/api/' : '/'
  },
    headers: headers,
  })

  // define the route and map the proxy
  app.use('/api', DOProxy)

};
In the preceding code block, const apiURL = sets the url for the DigitalOcean API as the endpoint, and const apiToken = loads your Personal Access Token into the proxy server. The option pathRewrite mounts the proxy server to /api rather than / so that it does not interfere with the application server but still matches the DigitalOcean API.
You’ve now successfully created a proxy server that will send all API requests made from your React application to the DigitalOcean API. This proxy server will make sure your Personal Access Token, which is safely stored as an environment variable, isn’t exposed on the client side. Next, you will create the actual requests to retrieve your Droplet data for your application.
Step 4 — Making API Calls to DigitalOcean
Now that your display component is ready and the connection details to DigitalOcean are stored and secured through a proxy server, you can start retrieving data from the DigitalOcean API. First, add the following highlighted lines of code to src/App.js just before and after you declare the class App:
import React, { Component } from 'react';
...
class App extends Component {
  constructor(props) {
    super(props);
    this.state = {
      droplets: []
    }
  }

	render() {
...
These lines of code call a constructor method in your class component, which in React initializes the local state by providing this.state with an object or objects. In this case, the objects are your Droplets. From the code block above, you can see that the array containing your Droplets is empty, making it possible to fill it with the results from the API call.
In order to display your current Droplets, you’ll need to fetch this information from the DigitalOcean API. Using the JavaScript function Fetch, you’ll send a request to the DigitalOcean API and update the state for droplets with the data you retrieve. You can do this using the componentDidMount method by adding the following lines of code after the constructor:
class App extends Component {
  constructor(props) {
    super(props);
    this.state = {
      droplets: []
    }
  }

  componentDidMount() {
  	fetch('http://localhost:3000/api/droplets')
  	.then(res => res.json())
  	.then(json => json.droplets)
  	.then(droplets => this.setState({ 'droplets': droplets }))
  }
...
With your Droplet data stored into the state, it’s time to retrieve it within the render function of your application and to send this data as a prop to the table component. Add the following highlighted statement to the table component in App.js:
...
class App extends Component {
  render() {
    return (
      <div className="App">
        <Table droplets={ this.state.droplets } />
      </div>
    );
  }
}
...
You have now created the functionality to retrieve data from the API, but you still need to make this data accessible via a web browser. In the next step, you will accomplish this by displaying your Droplet data in your table component.
Step 5 — Displaying Droplet Data in Your Table Component
Now that you have transferred the Droplet data to the table component, you can iterate this data over rows in the table. But since the application makes the request to the API after App.js is mounted, the property value for droplets will be empty at first. Therefore, you also need to add code to make sure droplets isn’t empty before you try to display the data. To do this, add the following highlighted lines to the tbody section of Table.js:
const Table = ({ droplets }) => {
  return (
    <table>
      <thead>
        <tr>
          <th>Id</th>
          <th>Name</th>
          <th>Region</th>
          <th>Memory</th>
          <th>CPUs</th>
          <th>Disk Size</th>
        </tr>
      </thead>
      <tbody>
        { (droplets.length > 0) ? droplets.map( (droplet, index) => {
           return (
            <tr key={ index }>
              <td>{ droplet.id }</td>
              <td>{ droplet.name }</td>
              <td>{ droplet.region.slug}</td>
              <td>{ droplet.memory }</td>
              <td>{ droplet.vcpus }</td>
              <td>{ droplet.disk }</td>
            </tr>
          )
         }) : <tr><td colSpan="5">Loading...</td></tr> }
      </tbody>
    </table>
  );
}
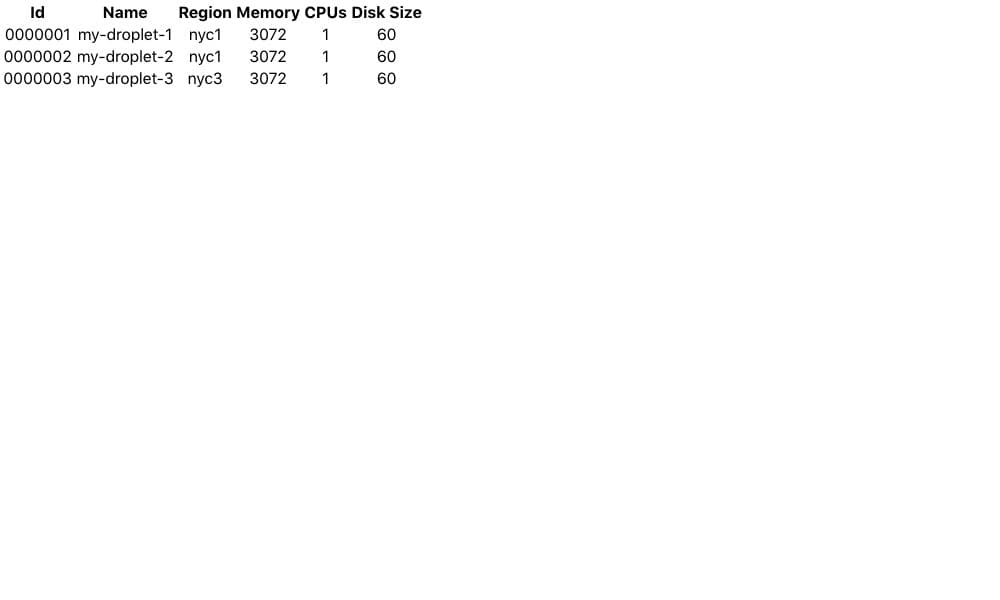
With the addition of the preceding code, your application will display a Loading... placeholder message when no Droplet data is present. When the DigitalOcean API does return Droplet data, your application will iterate it over table rows containing columns for each data type and will display the result to your web browser:
Note: If your web browser displays an error at http://localhost:3000, press CTRL+C in the terminal that is running your development server to stop your application. Run the following command to restart your application:
- npm start
In this step, you have modified the table component of your application to display your Droplet data in a web browser and added a placeholder message for when there are no Droplets found. Next, you will use a front-end web framework to style your data to make it more visually appealing and easier to read.
Step 6 — Styling Your Table Component Using Bootstrap
Your table is now populated with data, but the information is not displayed in the most appealing manner. To fix this, you can style your application by adding Bootstrap to your project. Bootstrap is an open-source styling and component library that lets you add responsive styling to a project with CSS templates.
Install Bootstrap with npm using the following command:
- npm install bootstrap
After Bootstrap has finished installing, import its CSS file into your project by adding the following highlighted line to src/App.js:
import React, { Component } from 'react';
import Table from './components/Table.js';
import 'bootstrap/dist/css/bootstrap.min.css';

class App extends Component {
...
Now that you have imported the CSS, apply the Bootstrap styling to your table component by adding the class table to the <table> tag in src/components/Table.js.
import React from 'react';

const Table = ({ droplets }) => {
  return (
    <table className="table">
      <thead>
...
Next, finish styling your application by placing a header above your table with a title and the DigitalOcean logo. Click on Download Logos in the Brand Assets section of DigitalOcean’s Press page to download a set of logos, pick your favorite from the SVG directory (this tutorial uses DO_Logo_icon_blue.svg), and add it to your project by copying the logo file into a new directory called assets within the src directory of your project. After uploading the logo, import it into the header by adding the highlighted lines to src/App.js:
import React, { Component } from 'react';
import Table from './components/Table.js';
import 'bootstrap/dist/css/bootstrap.min.css';
import logo from './assets/DO_Logo_icon_blue.svg';

class App extends Component {
...
  render() {
    return (
      <div className="App">
        <nav class="navbar navbar-light bg-light">
          <a class="navbar-brand" href="./">
            <img src={logo} alt="logo" width="40" /> My Droplets
          </a>
        </nav>
        <Table droplets={ this.state.droplets } />
      </div>
    );
  }
}

export default App;
In the preceding code block, the classes within the nav tag add a particular styling from Bootstrap to your header.
Now that you have imported Bootstrap and applied its styling to your application, your data will show up in your web browser with an organized and legible display:
Conclusion
In this article, you’ve created a basic React application that fetches data from the DigitalOcean API through a secured proxy server and displays it with Bootstrap styling. Now that you are familiar with the React framework, you can apply the concepts you learned here to more complicated applications, such as the one found in How To Build a Modern Web Application to Manage Customer Information with Django and React on Ubuntu 18.04. If you want to find out what other actions are possible with the DigitalOcean API, have a look at the API documentation on DigitalOcean’s website.
Thanks for learning with the DigitalOcean Community. Check out our offerings for compute, storage, networking, and managed databases.
About the author(s)
Former Senior Technical Editor at DigitalOcean, fiction writer and podcaster elsewhere, always searching for the next good nautical pun! Areas of expertise include Node.js, PostgreSQL, CSS, JavaScript.
Still looking for an answer?
This textbox defaults to using Markdown to format your answer.
You can type !ref in this text area to quickly search our full set of tutorials, documentation & marketplace offerings and insert the link!
Thank you for doing so clear step-by-step instruction! Our team from http://golfrecords.co.uk/ is much appreciated! We could do what we want following your tutorial.
 This work is licensed under a Creative Commons Attribution-NonCommercial- ShareAlike 4.0 International License.
Become a contributor for community
Get paid to write technical tutorials and select a tech-focused charity to receive a matching donation.

DigitalOcean Documentation
Full documentation for every DigitalOcean product.

Resources for startups and AI-native businesses
The Wave has everything you need to know about building a business, from raising funding to marketing your product.
The developer cloud
Scale up as you grow — whether you're running one virtual machine or ten thousand.

Start building today
From GPU-powered inference and Kubernetes to managed databases and storage, get everything you need to build, scale, and deploy intelligent applications.
