By FRANCIS NDUNGU and Kathryn Hancox

The author selected the the Apache Software Foundation to receive a donation as part of the Write for DOnations program.
Introduction
Pagination is the concept of constraining the number of returned rows in a recordset into separate, orderly pages to allow easy navigation between them, so when there is a large dataset you can configure your pagination to only return a specific number of rows on each page. For example, pagination can help to avoid overwhelming users when a web store contains thousands of products by reducing the number of items listed on a page, as it’s often unlikely a user will need to view every product. Another example is an application that shows records on a mobile device; enabling pagination in such a case would split records into multiple pages that can fit better on a screen.
Besides the visual benefits for end-users, pagination makes applications faster because it reduces the number of records that are returned at a time. This limits the data that needs to be transmitted between the client and the server, which helps preserve server resources such as RAM.
In this tutorial, you’ll build a PHP script to connect to your database and implement pagination to your script using the MySQL LIMIT clause.
Prerequisites
Before you begin, you will need the following:
- One Ubuntu 18.04 server set up by following the Initial Server Setup with Ubuntu 18.04, including a sudo non-root user.
- Apache, MySQL, and PHP installed on your system. You can follow the guide on How To Install Linux, Apache, MySQL, PHP (LAMP) stack on Ubuntu 18.04.
Step 1 — Creating a Database User and a Test Database
In this tutorial you’ll create a PHP script that will connect to a MySQL database, fetch records, and display them in an HTML page within a table. You’ll test the PHP script in two different ways from your web browser. First, creating a script without any pagination code to see how the records are displayed. Second, adding page navigation code in the PHP file to understand how pagination works practically.
The PHP code requires a MySQL user for authentication purposes and a sample database to connect to. In this step you’ll create a non-root user for your MySQL database, a sample database, and a table to test the PHP script.
To begin log in to your server. Then log in to your MySQL server with the following command:
- sudo mysql -u root -p
Enter the root password of your MySQL server and hit ENTER to continue. Then, you’ll see the MySQL prompt. To create a sample database, which we will call test_db in this tutorial, run the following command:
- Create database test_db;
You will see the following output:
OutputQuery OK, 1 row affected (0.00 sec)
Then, create a test_user and grant the user all privileges to the test_db. Replace PASSWORD with a strong value:
- GRANT ALL PRIVILEGES ON test_db.* TO 'test_user'@'localhost' IDENTIFIED BY 'PASSWORD';
OutputQuery OK, 1 row affected (0.00 sec)
Reload the MySQL privileges with:
- FLUSH PRIVILEGES;
OutputQuery OK, 1 row affected (0.00 sec)
Next, switch to the test_db database to start working directly on the test_db database:
- Use test_db;
OutputDatabase changed
Now create a products table. The table will hold your sample products—for this tutorial you’ll require only two columns for the data. The product_id column will serve as the primary key to uniquely identify each record. This column will be set to AUTO_INCREMENT to generate a new product_id for each item inserted. You’ll use the product_name field to differentiate each item by name:
- Create table products (product_id BIGINT PRIMARY KEY AUTO_INCREMENT, product_name VARCHAR(50) NOT NULL ) Engine = InnoDB;
OutputQuery OK, 0 rows affected (0.02 sec)
To add ten test products to the products table run the following SQL statements:
- Insert into products(product_name) values ('WIRELESS MOUSE');
- Insert into products(product_name) values ('BLUETOOTH SPEAKER');
- Insert into products(product_name) values ('GAMING KEYBOARD');
- Insert into products(product_name) values ('320GB FAST SSD');
- Insert into products(product_name) values ('17 INCHES TFT');
- Insert into products(product_name) values ('SPECIAL HEADPHONES');
- Insert into products(product_name) values ('HD GRAPHIC CARD');
- Insert into products(product_name) values ('80MM THERMAL PRINTER');
- Insert into products(product_name) values ('HDMI TO VGA CONVERTER');
- Insert into products(product_name) values ('FINGERPRINT SCANNER');
You’ll see this output:
OutputQuery OK, 1 row affected (0.02 sec)
Verify that the products were inserted to the table by running:
- select * from products;
You’ll see the products in your output within the two columns:
Output+------------+-----------------------+
| product_id | product_name          |
+------------+-----------------------+
|          1 | WIRELESS MOUSE        |
|          2 | BLUETOOTH SPEAKER     |
|          3 | GAMING KEYBOARD       |
|          4 | 320GB FAST SSD        |
|          5 | 17 INCHES TFT         |
|          6 | SPECIAL HEADPHONES    |
|          7 | HD GRAPHIC CARD       |
|          8 | 80MM THERMAL PRINTER  |
|          9 | HDMI TO VGA CONVERTER |
|         10 | FINGERPRINT SCANNER   |
+------------+-----------------------+
10 rows in set (0.00 sec)
Exit MySQL:
- quit;
With the sample database, table, and test data in place, you can now create a PHP script to display data on a web page.
Step 2 — Displaying MySQL Records Without Pagination
Now you’ll create a PHP script that connects to the MySQL database that you created in the previous step and list the products in a web browser. In this step, your PHP code will run without any form of pagination to demonstrate how non-split records show on a single page. Although you only have ten records for testing purposes in this tutorial, seeing the records without pagination will demonstrate why segmenting data will ultimately create a better user experience and put less burden on the server.
Create the PHP script file in the document root of your website with the following command:
- sudo nano /var/www/html/pagination_test.php
Then add the following content to the file. Remember to replace PASSWORD with the correct value of the password that you assigned to the test_user in the previous step:
<?php

try {
  $pdo = new PDO("mysql:host=localhost;dbname=test_db", "test_user", "PASSWORD");
  $pdo->setAttribute(PDO::ATTR_ERRMODE, PDO::ERRMODE_EXCEPTION);
  $pdo->setAttribute(PDO::ATTR_EMULATE_PREPARES,false);

  $sql = "select * from products";

  $stmt = $pdo->prepare($sql);

  $stmt -> execute();

  echo "<table border='1' align='center'>";

  while (($row = $stmt -> fetch(PDO::FETCH_ASSOC)) !== false) {
    echo "<tr>";
    echo "<td>".$row['product_id']."</td>";
    echo "<td>".$row['product_name']."</td>";
    echo "</tr>";
  }

  echo "</table>";

} catch(PDOException $e) {
  echo $e->getMessage();
}

?>
Save the file by pressing CTRL+X, Y, and ENTER.
In this script you’re connecting to the MySQL database using the PDO (PHP Data Object) library with the database credentials that you created in Step 1.
PDO is a light-weight interface for connecting to databases. The data access layer is more portable and can work on different databases with just minor code rewrites. PDO has greater security since it supports prepared statements—a feature for making queries run faster in a secure way.
Then, you instruct the PDO API to execute the select * from products statement and list products in an HTML table without pagination. The line $pdo->setAttribute(PDO::ATTR_EMULATE_PREPARES,false); ensures that the data types are returned as they appear in the database. This means that PDO will return the product_id as an integer and the product_name as a string. $pdo->setAttribute(PDO::ATTR_ERRMODE, PDO::ERRMODE_EXCEPTION); instructs PDO to throw an exception if an error is encountered. For easier debugging you’re catching the error inside the PHP try{}...catch{} block.
To execute the /var/www/html/pagination_test.php PHP script file that you’ve created, visit the following URL replacing your-server-IP with the public IP address of your server:
http://your-server-IP/pagination_test.php
You’ll see a page with a table of your products.
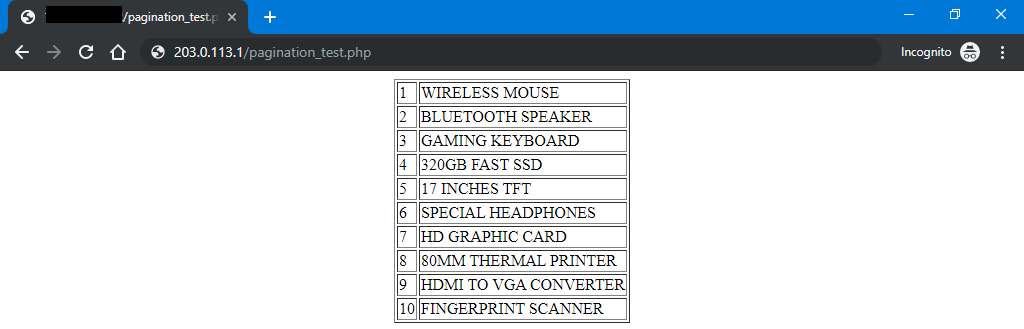
Your PHP script is working as expected; listing all products on one page. If you had thousands of products, this would result in a long loop as the products are fetched from the database and rendered on the PHP page.
To overcome this limitation, you will modify the PHP script and include the MySQL LIMIT clause and some navigation links at the bottom of the table to add pagination functionality.
Step 3 — Implementing Pagination with PHP
In this step your goal is to split the test data into multiple and manageable pages. This will not only enhance readability but also use the resources of the server more efficiently. You will modify the PHP script that you created in the previous step to accommodate pagination.
To do this, you’ll be implementing the MySQL LIMIT clause. Before adding this to the script, let’s see an example of the MySQL LIMIT syntax:
- Select [column1, column2, column n...] from [table name] LIMIT offset, records;
The LIMIT clause takes two arguments as shown toward the end of this statement. The offset value is the number of records to skip before the first row. records sets the maximum number of records to display per page.
To test pagination, you’ll display three records per page. To get the total number of pages, you must divide the total records from your table with the rows that you want to display per page. You then round the resulting value to the nearest integer using PHP Ceil function as shown in the following PHP code snippet example:
$total_pages=ceil($total_records/$per_page);
Following is the modified version of the PHP script with the full pagination code. To include the pagination and navigation codes, open the /var/www/html/pagination_test.php file:
- sudo nano /var/www/html/pagination_test.php
Then, add the following highlighted code to your file:
<?php

try {
  $pdo = new PDO("mysql:host=localhost;dbname=test_db", "test_user", "PASSWORD");
  $pdo->setAttribute(PDO::ATTR_ERRMODE, PDO::ERRMODE_EXCEPTION);
  $pdo->setAttribute(PDO::ATTR_EMULATE_PREPARES,false);

  /* Begin Paging Info */

  $page = 1;

  if (isset($_GET['page'])) {
    $page = filter_var($_GET['page'], FILTER_SANITIZE_NUMBER_INT);
  }

  $per_page = 3;

  $sqlcount = "select count(*) as total_records from products";
  $stmt = $pdo->prepare($sqlcount);
  $stmt->execute();
  $row = $stmt->fetch();
  $total_records = $row['total_records'];

  $total_pages = ceil($total_records / $per_page);

  $offset = ($page-1) * $per_page;

  /* End Paging Info */

  $sql = "select * from products limit :offset, :per_page";
  $stmt = $pdo->prepare($sql);
  $stmt->execute(['offset'=>$offset, 'per_page'=>$per_page]);

  echo "<table border='1' align='center'>";

  while ( ($row = $stmt->fetch(PDO::FETCH_ASSOC) ) !== false) {
    echo "<tr>";
    echo "<td>".$row['product_id']."</td>";
    echo "<td>".$row['product_name']."</td>";
    echo "</tr>";
  }

  echo "</table>";

  /* Begin Navigation */

  echo "<table border='1' align='center'>";

  echo "<tr>";

  if ($page-1 >= 1) {
    echo "<td><a href=".$_SERVER['PHP_SELF']."?page=".($page - 1).">Previous</a></td>";
  }

  if ($page+1 <= $total_pages) {
    echo "<td><a href=".$_SERVER['PHP_SELF']."?page=".($page + 1).">Next</a></td>";
  }

  echo "</tr>";

  echo "</table>";

  /* End Navigation */

} catch(PDOException $e) {
  echo $e->getMessage();
}

?>
In your file you’ve used additional parameters to execute paging:
$page: This variable holds the current page in your script. When moving between the pages, your script retrieves a URL parameter namedpageusing the$_GET['page']variable.$per_page: This variable holds the maximum records that you want to be displayed per page. In your case, you want to list three products on each page.$total_records: Before you list the products, you’re executing a SQL statement to get a total count of records in your target table and assigning it to the$total_recordsvariable.$offset: This variable represents the total records to skip before the first row. This value is calculated dynamically by your PHP script using the formula$offset=($page-1)*$per_page. You may adapt this formula to your PHP pagination projects. Remember you can change the$per_pagevariable to suit your needs. For instance, you might change it to a value of50to display fifty items per page if you’re running a website or another amount for a mobile device.
Again, visit your IP address in a browser and replace your_server_ip with the public IP address of your server:
http://your_server_ip/pagination_test.php
You’ll now see some navigation buttons at the bottom of the page. On the first page, you will not get a Previous button. The same case happens on the last page where you will not get the Next page button. Also, note how the page URL parameter changes as you visit each page.


The navigation links at the bottom of the page are achieved using the following PHP code snippet from your file:
. . .
if( $page-1>=1) {
  echo "<td><a href=".$_SERVER['PHP_SELF']."?page=".($page-1).">Previous</a></td>";
}

if( $page+1<=$total_pages) {
  echo "<td><a href=".$_SERVER['PHP_SELF']."?page=".($page+1).">Next</a></td>";
}
. . .
Here, the $page variable represents the current page number. Then, to get the previous page, the code will minus 1 from the variable. So, if you’re on page 2, the formula (2-1) will give you a result of 1 and this will be the previous page to appear in the link. However, keep in mind that it will only show the previous page if there is a result greater or equal to 1.
Similarly, to get to the next page, you add one to the $page variable and you must also make sure that the $page result that we append to the page URL parameter is not greater than the total pages that you’ve calculated in your PHP code.
At this point, your PHP script is working with pagination and you are able to implement the MySQL LIMIT clause for better record navigation.
Conclusion
In this tutorial, you implemented paging in MySQL with PHP on an Ubuntu 18.04 server. You can use these steps with a larger recordset using the PHP script to include pagination. By using pagination on your website or application you can create better user navigation and optimum resource utilization on your server.
From here you could consider further optimization for your database and other database tasks with these tutorials:
Thanks for learning with the DigitalOcean Community. Check out our offerings for compute, storage, networking, and managed databases.
About the author(s)
I am a professional software developer with great passion on cloud technologies.
Former Senior Technical Editor at DigitalOcean, with a strong focus on DevOps and System Administration content. Areas of expertise include Terraform, PyTorch, Python, and Django.
Still looking for an answer?
This textbox defaults to using Markdown to format your answer.
You can type !ref in this text area to quickly search our full set of tutorials, documentation & marketplace offerings and insert the link!
The example code is vulnerable to XSS.
http://localhost/pagination_test.php/'%22/%3E%3Cscript%3Ealert('XSS')%3C/script%3E
Fix:
Change $_SERVER['PHP_SELF'] to $_SERVER['SCRIPT_NAME']
 This work is licensed under a Creative Commons Attribution-NonCommercial- ShareAlike 4.0 International License.
Become a contributor for community
Get paid to write technical tutorials and select a tech-focused charity to receive a matching donation.

DigitalOcean Documentation
Full documentation for every DigitalOcean product.

Resources for startups and AI-native businesses
The Wave has everything you need to know about building a business, from raising funding to marketing your product.
The developer cloud
Scale up as you grow — whether you're running one virtual machine or ten thousand.

Start building today
From GPU-powered inference and Kubernetes to managed databases and storage, get everything you need to build, scale, and deploy intelligent applications.
