By Berka Šimon

Introduction
Aegir is massive hosting system for Drupal powered sites based on many Drupal itself (for Aegir core), Drupal deployment tools, and the Drush. Aegir makes it simple for you to host Drupal sites, as well as to manage and deploy them effectively. At the end of installation, you will get a hosting system controlled by web frontend with abillity to create new sites or transfer already existing websites into it very easily. This cool system is used by many companies that works with Drupal.
What do I need? Basic Linux system administration skills, root access, and time to experiment.
Start reading and go for it.
Installation
You need a clean installation of Debian 7 with at least 1GB of RAM memory for a smooth run (of course it is possible to install Aegir on other systems like Ubuntu. There are even ways to install it without root access, but it requires more complex Linux skills. Therefore, we will use the aegir package in this tutorial). Aegir can be installed by the apt packaging system, but first we need to make some changes to make sure that the installation will proceed without any errors.
Make sure your that your system and applications are up-to-date:
aptitude update
aptitude safe-upgrade
Once you are logged in your server as root, you need to add the project’s repository to your system with this command:
echo "deb http://debian.aegirproject.org stable main" >> /etc/apt/sources.list.d/aegir-stable.list
Since the Aegir package is self-signed, you need to add its key to the system as well:
wget -q http://debian.aegirproject.org/key.asc -O- | sudo apt-key add -
aptitude update
Aegir requires your server to have configured FQDN (Fully Qualified Domain Name). Basically, the hostname returned by hostname -f and uname -a should resolve to the IP address of your server.
Example: you want ‘aegir.example.com’ domain to be your FQDN, you need to put that into /etc/hostname file:
echo 'aegir.example.com' > /etc/hostname
You should also add this domain into your /etc/hosts file, so it will look similar to this example - remember to replace the second IP address with public IP address of your server! (you can use any text editor you like):
127.0.0.1 aegir.example.com localhost
222.222.222.222 aegir.example.com localhost
You should restart your server after those changes with the reboot command to make your changes take effect.
We can finally install Aegir. Just run this command. You will need to set the mysql root password and the aegir frontend URL (e. g. domain name used to access Aegir administration) during the installation process.
aptitude install -y aegir2
When the installation is finished, you will find a link to access Aegir for the first time (the link contains secure token to reset admin password, because we haven’t set any). Remember to use it!
CONGRATULATIONS! You have now fully operating aegir hosting system. But now what? We need to understand how Aegir works.
Aegir Basics
As you can see, the main ‘administration’ site looks like Drupal 6. Yes, it IS Drupal 6, because as we said earlier, Aegir is based on Drupal and Drush. Aegir consists of three basic elements - Server, Site, and Platform. Everything is represented as a node. One Site is one node, just as the Platform is one node.
Server - Aegir is capable of running your websites across many separate servers. For example, you can have the site files hosted on the same server as aegir and the MySql database hosted on another.
Platform - This is where your site files are stored. One platform can handle as many sites as you want - basically, it uses Drupal’s multi-site feature. It means one Drupal core itself plus site-specific files in the sites/web1.com or sites/web2.com folders.
Site - Finally, Site represents normal website. Nothing more, nothing less.
Now we can deploy our first site!
How to create a new site
As a first step, we need to create a Platform, which is the base for our site.
We must tell Aegir what our Platform should consist of using – a so called makefile. This file contains information about the Drupal version, modules, etc. Create it with a command as simple as the following: still logged in as root, you need to switch user from root to aegir, create the makefile and fill it with information.
su aegir
cd /var/aegir/platforms
mkdir makefiles && cd makefiles
touch d7.make
Now drop following text into the d7.make file (this file declares the download of Drupal core 7 and modules with same name as listed in the makefile).
api = 2
core = 7.x
projects[] = drupal
projects[] = views
projects[] = pathauto
projects[] = wysiwyg
projects[] = token
projects[] = admin_menu
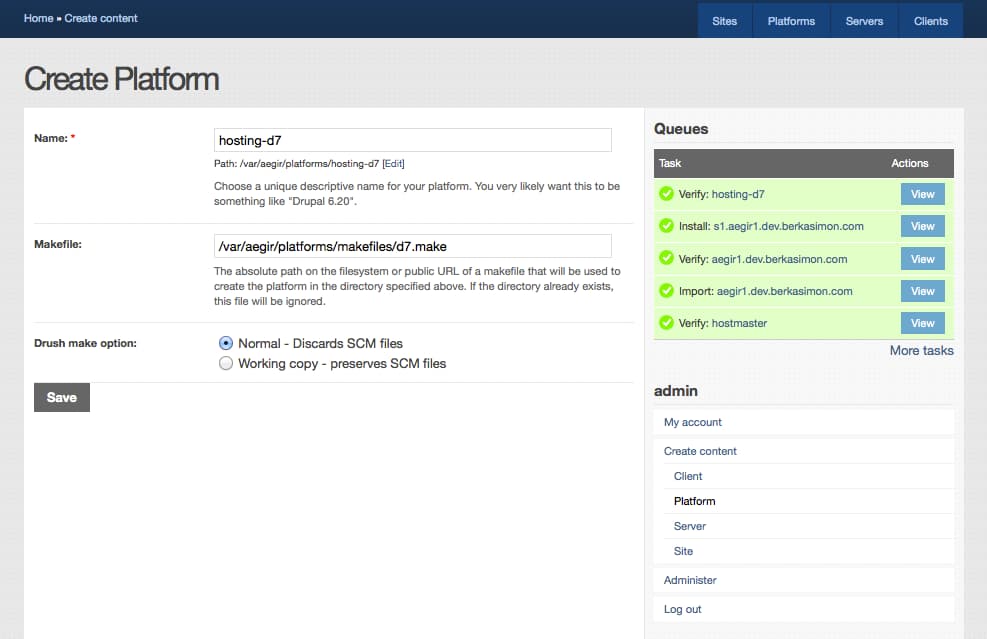
Now create a new Platform directly in Aegir. You can use the navigation bar on the top of screen (Content management->Create content->Platform) or access the creation form directly on yourweb.com/node/add/platform. Best practice is to have same name of platform and name of folder, too. In our example we use:
Name: hosting-d7
Path: /var/aegir/platforms/hosting-d7 (should be filled in automatically)
Makefile: /var/aegir/platforms/makefiles/d7.make
Drush make opton: Normal - Discards SCM files
Once you saved the form, you should wait for few minutes, until the task in Queue (on the right) goes green.
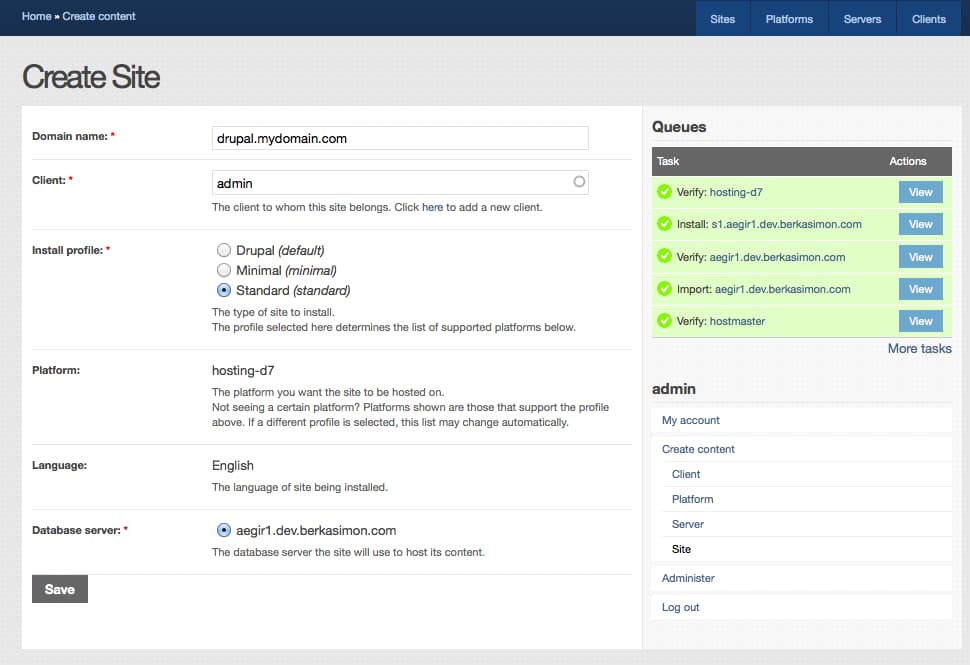
Now we are ready to create the site, which is as simple as submitting a form (Content management->Create content->Site or yourweb.com/node/add/site). Remember to choose Standard install profile.
After saving the form, your site should be ready within minutes. Use the button View next to the Install task to locate your reset password URL. Your site is up and running!
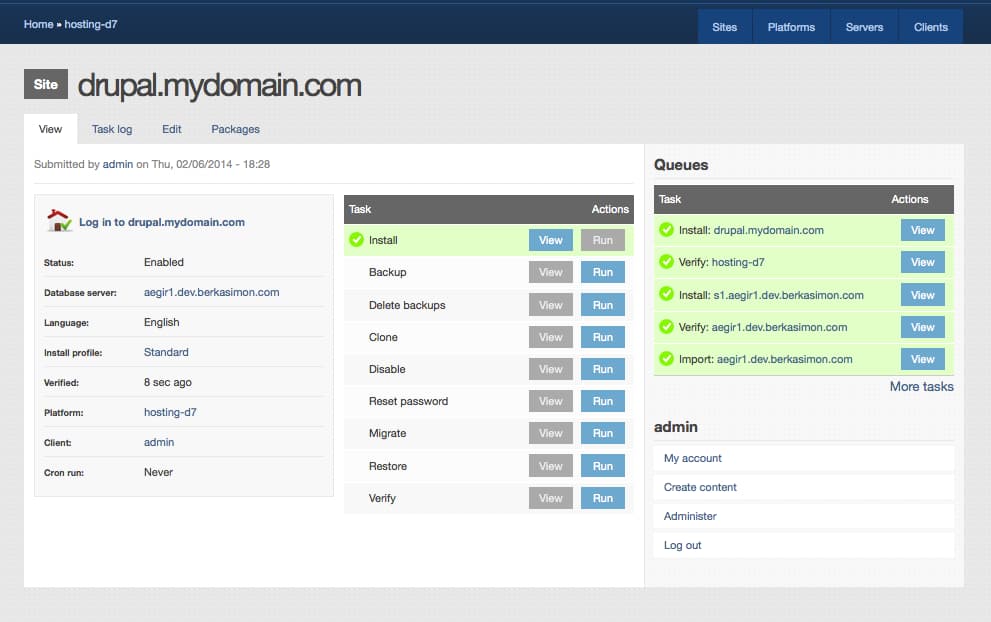
Great! Now lets see the site administration:
What’s next?
Our site certainly deserves more than just being installed. So what can Aegir core do with our site?
Backup - One-click manual backup system. Automatic backups can be set with this module.
Clone - Do you need to test new feature? This feature will make a separate clone of your site where you can safely test everything you want.
Migrate - Used mostly for updating site’s module, core, etc.
Disable - Is your site under attack or has your client not paid his invoice? Disable the site without touching any files!
You can get even more features (HTTP authentization, git support, Piwik integration, automated backups, etc.) by extending your Aegir installation with modules (just like normal Drupal). You can find a list of modules on this site.
<div class=“author”>Submitted By <a href=“http://www.berkasimon.com”>Berka Šimon</a></div>
Thanks for learning with the DigitalOcean Community. Check out our offerings for compute, storage, networking, and managed databases.
About the author
Still looking for an answer?
This textbox defaults to using Markdown to format your answer.
You can type !ref in this text area to quickly search our full set of tutorials, documentation & marketplace offerings and insert the link!
Does this tutorial assume that you have either aegir or * set as subdomain(s) in your DNS?
 This work is licensed under a Creative Commons Attribution-NonCommercial- ShareAlike 4.0 International License.
Become a contributor for community
Get paid to write technical tutorials and select a tech-focused charity to receive a matching donation.

DigitalOcean Documentation
Full documentation for every DigitalOcean product.

Resources for startups and AI-native businesses
The Wave has everything you need to know about building a business, from raising funding to marketing your product.
The developer cloud
Scale up as you grow — whether you're running one virtual machine or ten thousand.

Start building today
From GPU-powered inference and Kubernetes to managed databases and storage, get everything you need to build, scale, and deploy intelligent applications.
