By Brian Hogan and Brian Hogan

A previous version of this tutorial was written by Kevin Isaac
Introduction
Ghost is a light-weight open-source blogging platform. Ghost is fully customizable, with many themes available.
In this tutorial, you’ll set up a production-ready Ghost instance on Ubuntu 16.04 using the official ghost-cli installation wizard. This will install Ghost, configure Nginx to proxy requests to Ghost, secure it with a Let’s Encrypt certificate, and configure Ghost to run in the background as a system service.
Prerequisites
To complete this tutorial, you will need:
- One 1GB Ubuntu 16.04 server set up by following the Ubuntu 16.04 initial server setup guide, including a sudo non-root user and a firewall.
- Node.js installed using the official PPA, as explained in How To Install Node.js on Ubuntu 16.04.
- Nginx installed on your server, as shown in How To Install Nginx on Ubuntu 16.04.
- MySQL installed by following How to Install MySQL on Ubuntu 16.04.
- Optionally, a domain name configured to point to your server. You can learn how to point domains to DigitalOcean Droplets by following the How To Set Up a Host Name with DigitalOcean tutorial. You’ll need this to enable SSL support with Let’s Encrypt through Ghost’s installation wizard.
Step 1 — Installing the Ghost CLI application
We’ll install Ghost using the official ghost-cli program. This program will install Ghost, create the MySQL user and database, configure Nginx as a reverse proxy, and secure the site using SSL/TLS encryption.
First, download ghost-cli using npm:
- sudo npm i -g ghost-cli
We’ll place Ghost in the var/www/ghost directory, which is the recommended installation location. Create this directory:
- mkdir /var/www/ghost
Then ensure that your user owns this directory.
- sudo chown $USER:$USER /var/www/ghost
The /var/www/ghost directory must have full permissions for your user, and read and execute permissions for everyone else, so set the permissions with the following command:
sudo chmod 775 /var/www/ghost
With the CLI installed and the directory in place, we can set up our blog.
Step 2 — Installing and Configuring Ghost
The Ghost CLI app has an installation wizard that will walk you through all of the steps to configure a working Ghost blog.
Switch to the /var/www/ghost/ directory.
- cd /var/www/ghost/
Then use the ghost command to install Ghost. It will configure Ghost to use MySQL as the default database. While you can use other databases, MySQL is the recommended choice for production setups.
- ghost install
The installer will first ensure you have the necessary prerequisites installed, and will then download and install Ghost:
Output✔ Checking system Node.js version
✔ Checking logged in user
✔ Checking current folder permissions
✔ Checking operating system compatibility
✔ Checking for a MySQL installation
✔ Checking memory availability
✔ Checking for latest Ghost version
✔ Setting up install directory
✔ Downloading and installing Ghost v1.22.2
✔ Finishing install process
Once the install process completes, you’ll be prompted for your blog URL, along with your MySQL database information. Provide the root username and password in this step. For the database name, you can use the default of ghost_prod.
Output? Enter your blog URL: http://example.com
? Enter your MySQL hostname: localhost
? Enter your MySQL username: root
? Enter your MySQL password: [hidden]
? Enter your Ghost database name: ghost_prod
The configuration wizard will then create a ghost system user and will ask you if it should create a ghost MySQL user, which you should allow:
Output✔ Configuring Ghost
✔ Setting up instance
Running sudo command: useradd --system --user-group ghost
Running sudo command: chown -R ghost:ghost /var/www/ghost/content
✔ Setting up "ghost" system user
? Do you wish to set up "ghost" mysql user? Yes
✔ Setting up "ghost" mysql user
Next, it will ask you if you wish to configure Nginx. Confirm this and the installer will create the appropriate reverse-proxy server block for your blog:
Output? Do you wish to set up Nginx? Yes
✔ Creating nginx config file at /var/www/ghost/system/files/example.con.conf
Running sudo command: ln -sf /var/www/ghost/system/files/example.com.conf /etc/nginx/sites-available/example.com.conf
Running sudo command: ln -sf /etc/nginx/sites-available/example.com.conf /etc/nginx/sites-enabled/example.com.conf
Running sudo command: nginx -s reload
✔ Setting up Nginx
Next, you’ll be prompted to set up SSL support. If you are using a registered fully-qualified domain name and have configured your DNS settings to point to your server’s IP address, then press Y to continue.
Output? Do you wish to set up SSL? Yes
You’ll be prompted for your email address, and then the certificate will be installed.
Output? Enter your email (used for Let's Encrypt notifications) you@example.com
Running sudo command: mkdir -p /etc/letsencrypt
Running sudo command: ./acme.sh --install --home /etc/letsencrypt
Running sudo command: /etc/letsencrypt/acme.sh --issue --home /etc/letsencrypt --domain example.com --webroot /var/www/ghost/system/nginx-root --reloadcmd "nginx -s reload" --accountemail you@example.com
Running sudo command: openssl dhparam -out /etc/nginx/snippets/dhparam.pem 2048
Running sudo command: openssl dhparam -out /etc/nginx/snippets/dhparam.pem 2048
Running sudo command: mv /tmp/ssl-params.conf /etc/nginx/snippets/ssl-params.conf
✔ Creating ssl config file at /var/www/ghost/system/files/example.com-ssl.conf
Running sudo command: ln -sf /var/www/ghost/system/files/example.com-ssl.conf /etc/nginx/sites-available/example.com-ssl.conf
Running sudo command: ln -sf /etc/nginx/sites-available/example.com-ssl.conf /etc/nginx/sites-enabled/example.com-ssl.conf
Running sudo command: nginx -s reload
✔ Setting up SSL
Next, the configuration wizard will prompt you to set up a systemd service. Press Y to continue and the wizard will create a new systemd service called ghost_example-com and enable it to start on boot:
Output? Do you wish to set up Systemd? Yes
✔ Creating systemd service file at /var/www/ghost/system/files/ghost_example-com.service
Running sudo command: ln -sf /var/www/ghost/system/files/ghost_example-com.service /lib/systemd/system/ghost_example-com.service
Running sudo command: systemctl daemon-reload
✔ Setting up Systemd
Finally, the wizard will configure your database and ask if it should start Ghost, which you should allow by pressing Y:
OutputRunning sudo command: /var/www/ghost/current/node_modules/.bin/knex-migrator-migrate --init --mgpath /var/www/ghost/current
✔ Running database migrations
? Do you want to start Ghost? Yes
Running sudo command: systemctl is-active ghost_example-com
✔ Ensuring user is not logged in as ghost user
✔ Checking if logged in user is directory owner
✔ Checking current folder permissions
Running sudo command: systemctl is-active ghost_example-com
✔ Validating config
✔ Checking folder permissions
✔ Checking file permissions
✔ Checking content folder ownership
✔ Checking memory availability
Running sudo command: systemctl start ghost_example-com
✔ Starting Ghost
Running sudo command: systemctl is-enabled ghost_example-com
Running sudo command: systemctl enable ghost_example-com --quiet
✔ Starting Ghost
Your Ghost blog is now installed and ready for use. You can access your blog at http://example.com. Now let’s create an account so you can create your first post.
Step 3 — Creating an Account and Configuring your Blog
To log in and configure your blog, visit http://example.com/login. You’ll be greeted with the following screen:

Press the Create your account button to get started.
You’ll see the Create your account screen, which asks you for your blog title, as well as your name, email address, and a password:
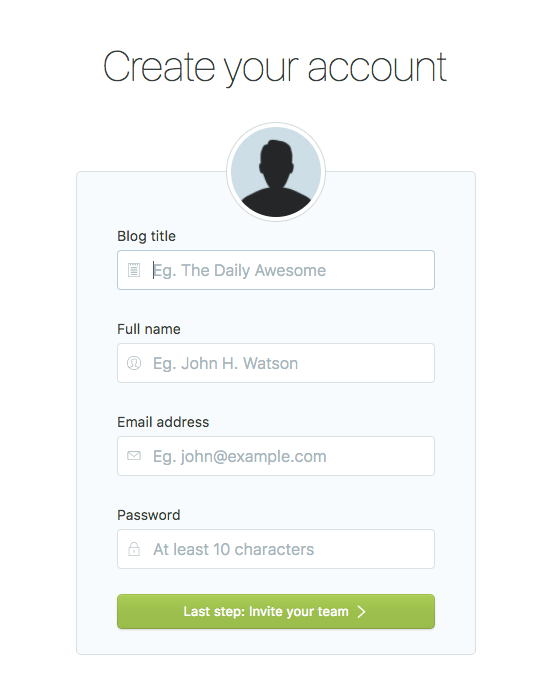
Fill in the details and press the Last step: Invite your team button.
The wizard will ask you to enter email addresses of other collaborators, but you can select the link I’ll do this later at the bottom of the screen.
You’ll then see a list of posts, which Ghost calls stories:
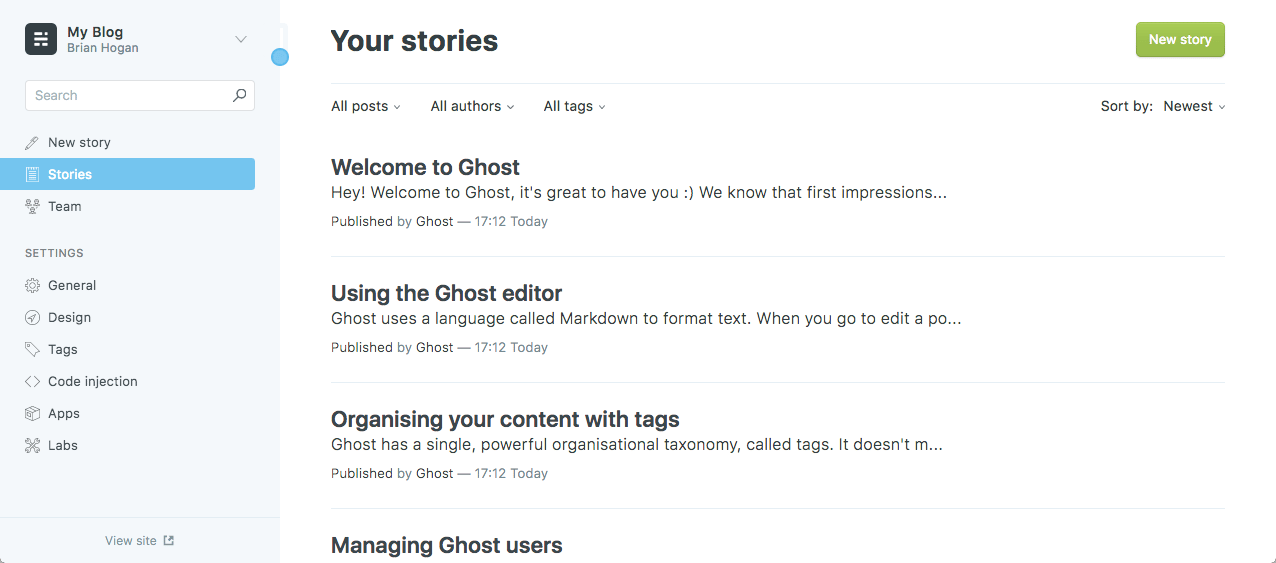
The menu on the left lets you create a new story or manage your blog’s other settings. Consult the official documentation to learn more.
Conclusion
In this tutorial, you installed Ghost, configured Nginx to proxy requests to Ghost, and ensured that Ghost runs as a system service. There is a lot more you can do with Ghost, though. Take a look at these tutorials to learn more about how to use your new blog:
Thanks for learning with the DigitalOcean Community. Check out our offerings for compute, storage, networking, and managed databases.
About the author(s)
Managed the Write for DOnations program, wrote and edited community articles, and makes things on the Internet. Expertise in DevOps areas including Linux, Ubuntu, Debian, and more.
Managed the Write for DOnations program, wrote and edited community articles, and makes things on the Internet. Expertise in DevOps areas including Linux, Ubuntu, Debian, and more.
Still looking for an answer?
This textbox defaults to using Markdown to format your answer.
You can type !ref in this text area to quickly search our full set of tutorials, documentation & marketplace offerings and insert the link!
Just noticed a small typo in
sytemctl start ghost.service
The above line should be
systemctl start ghost.service
Just curious since I’m new to all this. You say to put ghost in /var/www/ghost but it seems like the webroot on my droplet is a newer path of /var/www/html so I’m not sure where I should be unzipping ghost to. Any insight?
It might be helpful in the beginning of Step 5 to specify if/when the user should exit the sudo - ghost shell - it appears that Step 5 should continue in user ghost - when in fact, one should likely exit that shell.
Further, it would likely also be helpful to add sudo before the command that edit files in /etc/systemd/system
Hi,
I think I am missing something. I have followed the steps to install ghost up to
npm --install production
However, I see no config.example.js to work with from there. The contents of /var/www/ghost:
/var/www/ghost$ ls
content  Gruntfile.js  LICENSE            package.json  README.md
core     index.js      MigratorConfig.js  PRIVACY.md    yarn.lock
What did I do wrong?
 This work is licensed under a Creative Commons Attribution-NonCommercial- ShareAlike 4.0 International License.
Become a contributor for community
Get paid to write technical tutorials and select a tech-focused charity to receive a matching donation.

DigitalOcean Documentation
Full documentation for every DigitalOcean product.

Resources for startups and AI-native businesses
The Wave has everything you need to know about building a business, from raising funding to marketing your product.
The developer cloud
Scale up as you grow — whether you're running one virtual machine or ten thousand.

Start building today
From GPU-powered inference and Kubernetes to managed databases and storage, get everything you need to build, scale, and deploy intelligent applications.
