By Alex Wafula and Matt Abrams

The author selected the COVID-19 Relief Fund to receive a donation as part of the Write for DOnations program.
Introduction
Mahara is an open-source ePortfolio and social networking system that bills itself as a “learner-centered personal learning environment.” Mahara is especially popular in academic institutions where it provides learners a platform to curate and share their knowledge and growth. In a remote learning environment, Mahara can help educators foster a digital classroom and organize a student’s progress. Unlike more a traditional Learning Management Systems (LMS), Mahara is more distributed and user-focused. This amount of user creativity contrasts other, more institutional systems.
Mahara also has many non-student applications. You can use it to build a blog, a resume-builder, a file-repository, or a competency framework.
In this guide, you will install Mahara and configure it to use a Postgres database as an authentication source. Upon completion, you will have administrative access to a server-based ePortfolio.
Prerequisites
- One Ubuntu 18.04 server with a non-root
sudouser and a firewall. You can follow our Ubuntu 18.04 initial server setup guide for instructions. - The Postgres relational database management system installed. You can follow our How To Install and Use PostgreSQL on Ubuntu 18.04 guide for instructions. Step 1 — Installing PostgreSQL should be enough.
- Apache and PHP installed. You can follow our How To Install Linux, Apache, MySQL, PHP (LAMP stack) on Ubuntu 18.04 guide for instructions. Note that Mahara recommends using Postgres and not MySQL, but you can follow Step 2 of this guide to install and use MySQL instead.
- A domain name configured to point to your server. To point domains to DigitalOcean Droplets, follow our How To Point to DigitalOcean Nameservers From Common Domain Registrars guide. This tutorial will use
mahara.your_domainas an example. - A Virtual Host configured for the domain using the
ServerNamedirective. For a guide, jump to Step 5 — Setting Up Virtual Hosts (Recommended) in How To Install the Apache Web Server on Ubuntu 18.04. - A Let’s Encrypt certificate set up for the domain you’ve configured by following the How To Secure Apache with Let’s Encrypt on Ubuntu 18.04 guide.
Step 1 — Creating a Database and User for Mahara
Your first step is to create a Postgres database and user for Mahara.
From your server’s command line, switch to the postgres user:
- sudo -i -u postgres
The -i switch provides an interactive shell, while sudo used with the -u switch allows you to switch users.
Now create a Postgres user; make sure to replace mahara with your preferred username:
- createuser -SRDP mahara
Postgres will prompt you to Enter password for a new role:. role here refers to the new user you are trying to create. Provide a password of your choosing, and then reenter the password when prompted.
Now create a database for your Mahara installation. Use the following command, replacing maharadb with a preferred name for your new database and mahara with the new user you just created:
- createdb -O mahara -EUTF8 maharadb
You can now exit from the postgres user:
- exit
Note: It is recommended to use Postgres for your Mahara database, but if you decide to use MySQL, you’ll need to set up a new user and database for Mahara. To do so, log in to your MySQL root account using the following command:
- mysql -u root -p
Provide your MySQL root password to gain access. Now create your Mahara database. Replace maharadb with another name:
- create database maharadb character set UTF8;
Next, create a new MySQL user for Mahara, set a password, and grant it access to your maharadb database. Remember to provide a strong password in place of password and replace mahara with your desired username:
- grant all on maharadb .* to 'mahara '@'localhost' identified by 'password';
You have now created a database for Mahara and created a role. Now you can install and configure Mahara.
Step 2 — Downloading Mahara
Now that you have a database created and configured for Mahara, let’s download Mahara itself. You can download a standard build from Mahara’s server, and you can find the latest Mahara build here.
Once you have a .tar.gz link to the latest stable release, download it using the wget command. Make sure to replace /19.10/19.10.2/+download/mahara-19.10.2.tar.gz with the release you selected:
- wget https://launchpad.net/mahara/19.10/19.10.2/+download/mahara-19.10.2.tar.gz
This will download a compressed file labeled mahara-19.10.2.tar.gz. Extract the compressed file to create the Mahara directory structure:
- tar xzvf mahara-19.10.2.tar.gz
- ls
The ls command checks the extraction. You will now see the new mahara-19.10.2 directory:
Outputmahara-19.10.2.tar.gz mahara-19.10.2
Let’s copy Mahara to /var/www/mahara.your_domain. mahara.your_domain should match the directory you created during the Virtual Host configuration step in the Prerequisite section.
Note: Mahara must install into an empty directory. If you have files here already, consider changing your DocumentRoot and using a new directory.
Now copy the Mahara directory:
- sudo cp -a mahara-19.10.2/. /var/www/mahara.your_domain/
The -a switch ensures that the system copies the file permissions along with the files and folders. The . at the end of the source file ensures that everything in the source directory, including hidden files, gets copied to the destination directory.
Mahara requires additional PHP extensions to function correctly.
Run the following commands to install all the necessary dependencies:
- sudo apt update
- sudo apt install php-gd php-pgsql php-xmlrpc php-xml php-curl php-mbstring
Type y for any prompts to finish the installation.
You have installed Mahara on your server. Next, you will create the dataroot directory.
Step 3 — Creating the Dataroot Directory
Now that you have your Mahara code set up let’s create a dataroot directory. This is where Mahara will write uploaded files as well as some other files it needs to run. Therefore, the web server needs to be able to write to it.
The dataroot directory should also be outside the directory where you have your Mahara code. You should avoid having it inside your public_html directory altogether.
Let’s create the directory in /var/maharadata:
- sudo mkdir /var/maharadata
Update the ownership with chown:
- sudo chown -R www-data:www-data /var/maharadata
This allows the web server to write in the directory. Now we can finish configuring Mahara.
Step 4 — Setting Up the Mahara Configuration File
In this step you will make some final adjustments to Mahara’s config.php file. These adjustments will connect your database and encrypt your password.
Switch to the Mahara code directory:
- cd /var/www/mahara.your_domain/htdocs
Create your config.php file by copying the config-dist.php file in the htdocs directory.
Change directories and copy the file:
- cp config-dist.php config.php
Now open config.php using nano or your preferred text editor:
- nano config.php
Locate the following section in the file and make the required changes. Leave $cfg->dbtype as postgres unless you’re using MySQL, in which case change it to mysql. Change maharadb, mahara, and dbpassword to match the values you used in Step 1 for the database name, user, and password, respectively:
...
$cfg->dbtype   = 'postgres';
$cfg->dbhost   = 'localhost';
$cfg->dbport   = null; // Change if you are using a non-standard port number for your database
$cfg->dbname   = 'maharadb';
$cfg->dbuser   = 'mahara';
$cfg->dbpass   = 'dbpassword';
...
In the same file, locate the following section:
...
$cfg->dataroot = '/path/to/uploaddir';
...
Change it to point to Mahara’s dataroot directory as you set it in Step 3:
...
$cfg->dataroot = '/var/maharadata';
...
Finally, let’s update the passwordsaltmain with a random secret string. This encrypts stored user passwords. Locate and uncomment the following line:
...
// $cfg->passwordsaltmain = 'some long random string here with lots of characters';
...
You can use the OpenSSL rand function to generate a random string to use as your secret salt string. Open a new terminal, connect to your server again, and run the following command to generate this string:
- openssl rand -base64 32
The -base64 32 option ensures a Base64 encoded string that is 32 characters long. Update the value for passwordsaltmain to your_generated_salt:
...
$cfg->passwordsaltmain = 'your_generated_salt';
...
Warning: Once set, you must not lose this string or you will need to reset all user passwords. It’s good practice to keep a secure backup of your config.php file
Note: You may wish to set productionmode to false when using Mahara as a development or test site. Setting this to false will enable the on-screen display of warnings and error messages to aid in testing.
Save and close the file.
With Mahara configured, you are ready to serve Mahara using the Apache web server.
Step 5 — Configuring Apache
In the prerequisites, you configured a domain and pointed it to this server. You also installed Apache and set up HTTPS using Let’s Encrypt. Let’s now use Apache to serve Mahara.
If your Virtual Host configuration file is named mahara.your_domain.conf Let’s Encrypt created a new configuration file called mahara.your_domain-le-ssl.conf that handles HTTPS requests for your domain.
Open that file. Be sure to replace mahara.your_domain with the actual name of your file:
- sudo nano /etc/apache2/sites-available/mahara.your_domain-le-ssl.conf
The file will look similar to this:
...
<IfModule mod_ssl.c>
<VirtualHost *:443>
        ServerAdmin webmaster@localhost
        ServerName mahara.your_domain
        DocumentRoot /var/www/mahara.your_domain
        ErrorLog ${APACHE_LOG_DIR}/error.log
        CustomLog ${APACHE_LOG_DIR}/access.log combined

SSLCertificateFile /etc/letsencrypt/live/mahara.your_domain/fullchain.pem
SSLCertificateKeyFile /etc/letsencrypt/live/mahara.your_domain/privkey.pem
Include /etc/letsencrypt/options-ssl-apache.conf
</VirtualHost>
</IfModule>
...
The ServerName directive defines the base domain that should match for this virtual host definition. This should also be the domain name you chose to secure with an SSL certificate in the Prerequisites section.
Note: Your Apache configuration should contain no ServerAliases. Mahara expects to be accessed through one url. If you use a server alias, you’ll experience issues like having to log in twice and breaking Single Sign On (SSO) features.
However, if you do need an alias for some reason, you can set up a separate second VirtualHost directive in addition to the one above.
Make the following additions to the file:
...
<IfModule mod_ssl.c>
<VirtualHost *:443>
        ServerAdmin webmaster@localhost
        ServerName mahara.your_domain
        DocumentRoot /var/www/mahara.your_domain/htdocs

        <Directory />
            Options FollowSymLinks
            AllowOverride None
        </Directory>

        <Directory /var/www/your_domain/htdocs>
            Options Indexes FollowSymLinks MultiViews
            AllowOverride None
            Order allow,deny
            allow from all
        </Directory>

        ErrorLog ${APACHE_LOG_DIR}/error.log
        CustomLog ${APACHE_LOG_DIR}/access.log combined

SSLCertificateFile /etc/letsencrypt/live/mahara.your_domain/fullchain.pem
SSLCertificateKeyFile /etc/letsencrypt/live/mahara.your_domain/privkey.pem
Include /etc/letsencrypt/options-ssl-apache.conf
</VirtualHost>
</IfModule>
...
First, you update the DocumentRoot to include /htdocs. Then you add two new blocks.
The <Directory /> block refers to the filesystem root. It specifies directives applying to all files and directories anywhere on the server. Specifying directives for this block allows us to protect your server from intrusions by placing default directives such as AllowOverride None.
The <Directory /var/www/mahara.your_domain/htdocs> block refers to the document root for Mahara. Directives declared here override ones declared on the <Directory /> block. These directives are the fundamental requirements for an Apache configuration to serve Mahara.
Save and close the file.
You are now ready to configure your PHP service.
Step 6 — Adjusting PHP Settings
Our final step is to update Apache’s php.ini file. This will change our logging verbosity and resize maximum upload and POST sizes.
Open the file:
- sudo nano /etc/php/7.2/apache2/php.ini
This is a large file. Let’s go through the updates one by one.
Find the log_errors line and make sure it matches the highlighted code:
. . .
log_errors = On
. . .
Setting log_errors to On will enable PHP to log errors encountered while running Mahara to aid in debugging.
Now find the line beginning upload_max_filesize = 2M. Replace 2M with 50M:
. . .
upload_max_filesize = 50M
. . .
This will increase the max upload file size to 50 megabytes.
Now find the line beginning post_max_size = 8M. Replace 8M with 100M:
. . .
post_max_size = 100M
. . .
upload_max_filesize accounts for the maximum size allowed for files posted, while post_max_size is the maximum size allowed for all POST body data. So you’ll always want to have this second number higher. These settings will enable Mahara to accept file uploads at the set maximums.
Now move to the end of the file and add the following directives:
...
register_globals = Off
magic_quotes_runtime = Off
magic_quotes_sybase = Off
magic_quotes_gpc = Off
allow_call_time_pass_reference = Off
register_globals = Off disables register_globals. Enabling it has security implications as highlighted on PHP’s Manual.
Setting magic_quotes_runtime to Off stops PHP from automatically escaping quotes with a backslash from any functions coming in from an external source (POST/GET). magic_quotes_runtime, magic_quotes_sybase, and magic_quotes_gpc are deprecated.
allow_call_time_pass_reference is also deprecated.
Save and close the file.
Now restart Apache:
- sudo systemctl restart apache2
This completes your server setup. You are now ready to run the Mahara installer and enter your ePortfolio through a web browser.
Step 7 — Running the Mahara Installer
With Apache and PHP properly configured, let’s proceed to finish up Mahara’s installation through its web-based installer.
In your browser, navigate to your server’s domain name. A screen will appear displaying Mahara’s licensing information and a button to continue installation.
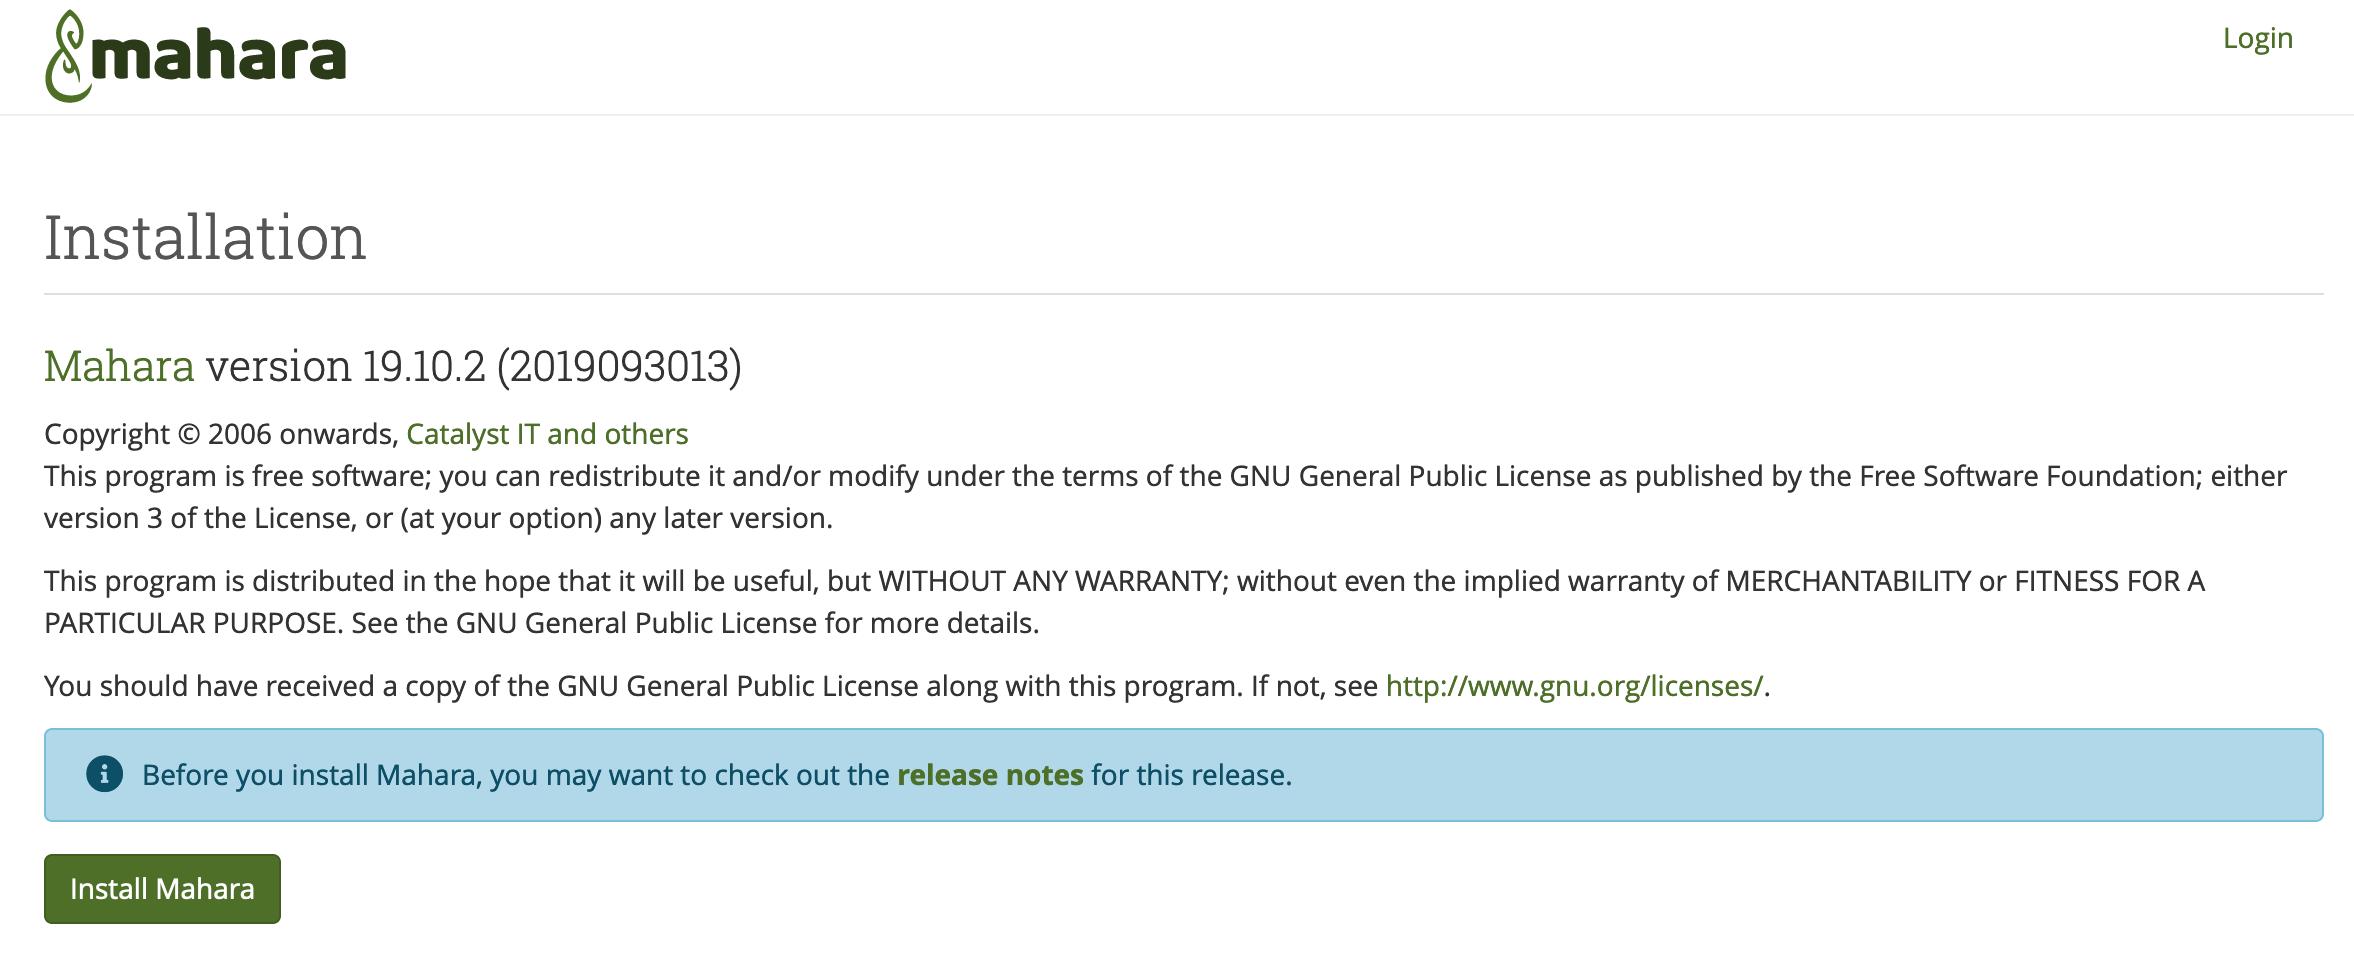
Click the Install Mahara button and wait until the installer finishes performing all installations. Once done, scroll down. You will see a section that says Successfully installed Mahara. Continue. Click on Continue to proceed.
Mahara will prompt you to enter a new password and a primary email address. Go ahead and submit the form.
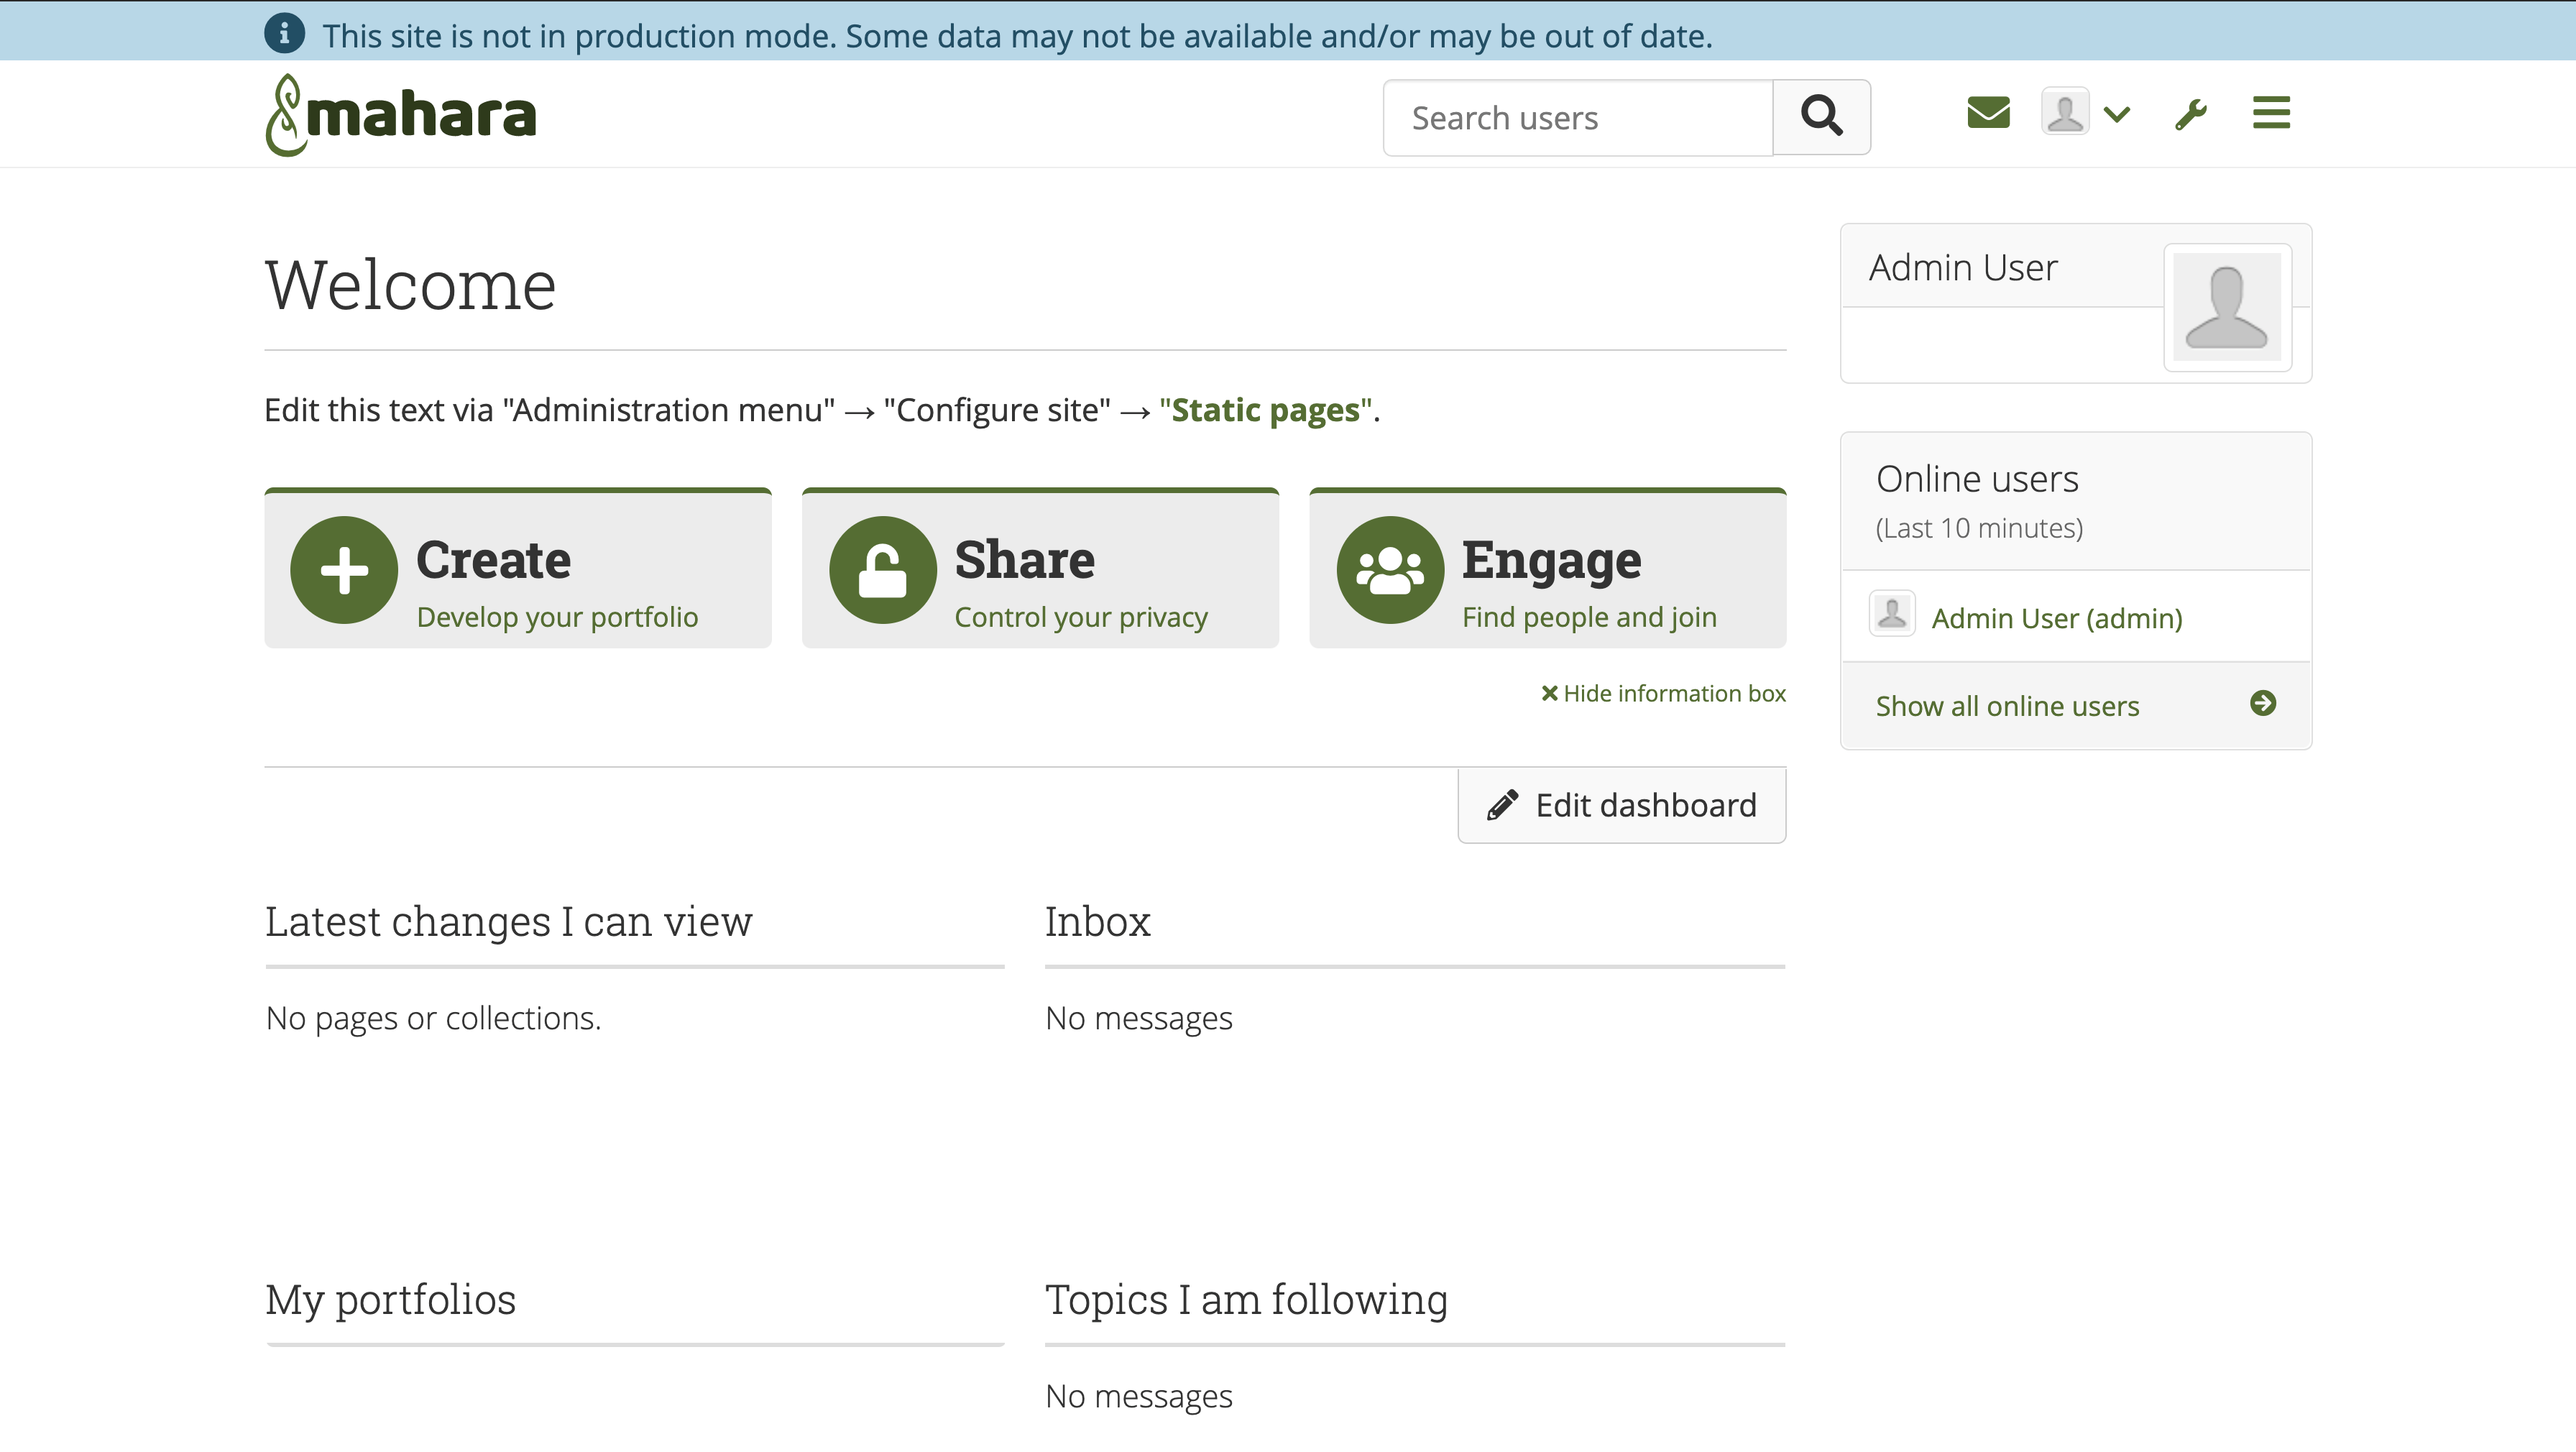
You are ready to start using Mahara. But before you start exploring your new ePortfolio, you might want to set up a few final features.
Set up Email
For production settings, make sure that Mahara can send out emails. This is useful for sending out notifications such as confirmation emails after users register on the site. You can specify an outgoing SMTP server with admin settings. Click on the drop-down menu on the upper-right and choose Configure Site -> Site options -> Email.
Set up a Cron Job
Lastly, consider setting up a cron job to hit htdocs/lib/cron.php every minute. Without setting this up, you will find that RSS feeds will not update and some email notifications won’t get sent out. Go ahead and enter the following command. You’ll get an option to select the editor of your choice. In this example, we’re proceeding with the nano editor:
- sudo crontab -e
Add the following line at the bottom of the file replacing mahara.your_domain with the name of the directory where you installed Mahara on Step 2:
* * * * * php /var/www/mahara.your_domain/htdocs/lib/cron.php
With your email and cron job configured, you are now ready to use Mahara.
Conclusion
Mahara is a powerful and popular platform. It is a great resource for teacher and learners, particularly within remote-learning environments. Mahara is also popular outside of education, where users create blogs and resume builders.
Users can also choose from numerous themes while admins can explore a large library of plugins.
After familiarizing yourself with the user interface, consider following the Next Steps article on Mahara’s website for more ideas.
Thanks for learning with the DigitalOcean Community. Check out our offerings for compute, storage, networking, and managed databases.
About the author(s)
Supporting the open-source community one tutorial at a time. Former Technical Editor at DigitalOcean. Expertise in topics including Ubuntu 22.04, Ubuntu 20.04, CentOS, and more.
Still looking for an answer?
This textbox defaults to using Markdown to format your answer.
You can type !ref in this text area to quickly search our full set of tutorials, documentation & marketplace offerings and insert the link!
 This work is licensed under a Creative Commons Attribution-NonCommercial- ShareAlike 4.0 International License.
Become a contributor for community
Get paid to write technical tutorials and select a tech-focused charity to receive a matching donation.

DigitalOcean Documentation
Full documentation for every DigitalOcean product.

Resources for startups and AI-native businesses
The Wave has everything you need to know about building a business, from raising funding to marketing your product.
The developer cloud
Scale up as you grow — whether you're running one virtual machine or ten thousand.

Start building today
From GPU-powered inference and Kubernetes to managed databases and storage, get everything you need to build, scale, and deploy intelligent applications.
