Not using CentOS 7?
Choose a different version or distribution.
Introduction
Relational database management systems like MySQL and MariaDB are needed for a significant portion of web sites and applications. However, not all users feel comfortable administering their data from the command line.
To solve this problem, a project called phpMyAdmin was created in order to offer an alternative in the form of a web-based management interface. In this guide, we will demonstrate how to install and secure a phpMyAdmin configuration on a CentOS 7 server. We will build this setup on top of the Nginx web server, which has a good performance profile and can handle heavy loads better than some other web servers.
Prerequisites
Before we begin, there are a few requirements that need to be settled.
To ensure that you have a solid base to build this system upon, you should run through our initial server setup guide for CentOS 7. Among other things, this will walk you through setting up a non-root user with sudo access for administrative commands.
The second prerequisite that must be fulfilled in order to start on this guide is to install a LEMP (Linux, Nginx, MariaDB, and PHP) stack on your CentOS 7 server. This is the platform that we will use to serve our phpMyAdmin interface (MariaDB is also the database management software that we are wishing to manage). If you do not yet have a LEMP installation on your server, follow our tutorial on installing LEMP on CentOS 7.
When your server is in a properly functioning state after following these guides, you can continue on with the rest of this page.
Step One — Install phpMyAdmin
With our LEMP platform already in place, we can begin right away with installing the phpMyAdmin software. Unfortunately, phpMyAdmin is not available in CentOS 7’s default repository.
To get the packages we need, we’ll have to add an additional repo to our system. The EPEL repo (Extra Packages for Enterprise Linux) contains many additional packages, including the phpMyAdmin package we are looking for.
Luckily, the procedure for adding the EPEL repository has gotten a lot easier. There is actually a package called epel-release that reconfigures our package manager to use the EPEL repos.
We can install that now by typing:
sudo yum install epel-release
Now that you have access to the EPEL repository, you can install phpMyAdmin through yum:
sudo yum install phpmyadmin
The installation will now complete. For the Nginx web server to find and serve the phpMyAdmin files correctly, we just need to create a symbolic link from the installation files to our Nginx document root directory by typing this:
sudo ln -s /usr/share/phpMyAdmin /usr/share/nginx/html
We should also restart our PHP processor to be sure that it can load the additional PHP modules that we installed:
sudo systemctl restart php-fpm
With that, our phpMyAdmin installation is now operational. To access the interface, go to your server’s domain name or public IP address followed by /phpMyAdmin, in your web browser:
http://server_domain_or_IP/phpMyAdmin
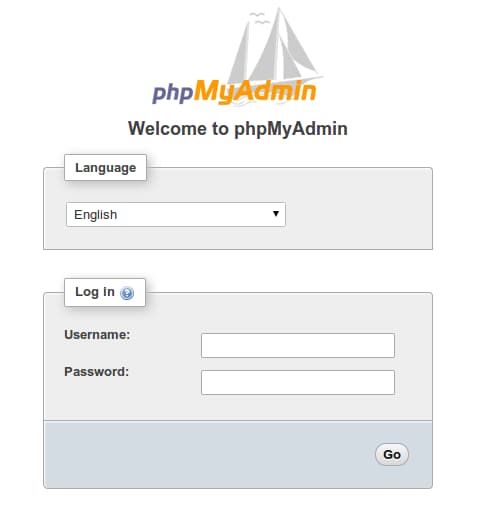
To sign in, use a username/password pair of a valid MariaDB user. The root user and the MariaDB administrative password is a good choice to get started. You will then be able to access the administrative interface:
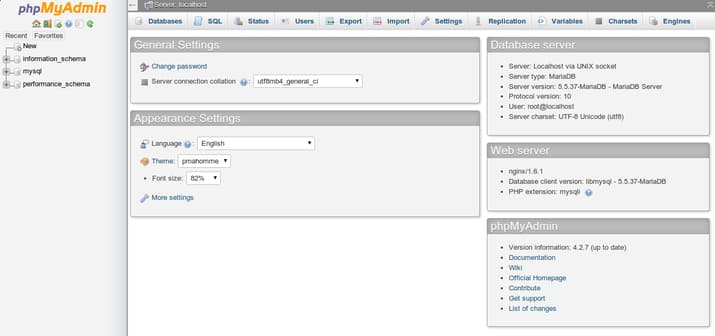
Click around to get familiar with the interface. In the next section, we will take steps to secure our new interface.
Step Two — Secure your phpMyAdmin Instance
The phpMyAdmin instance installed on our server should be completely usable at this point. However, by installing a web interface, we have exposed our MySQL system to the outside world.
Even with the included authentication screen, this is quite a problem. Because of phpMyAdmin’s popularity combined with the large amount of data it provides access to, installations like these are common targets for attackers.
We will implement two simple strategies to lessen the chances of our installation being targeted and compromised. We will change the location of the interface from /phpMyAdmin to something else to sidestep some of the automated bot brute-force attempts. We will also create an additional, web server-level authentication gateway that must be passed before even getting to the phpMyAdmin login screen.
Changing the Application’s Access Location
In order for our Nginx web server to find and serve our phpMyAdmin files, we created a symbolic link from the phpMyAdmin directory to our document root in an earlier step.
To change the URL where our phpMyAdmin interface can be accessed, we simply need to rename the symbolic link. Move into the Nginx document root directory to get a better idea of what we are doing:
cd /usr/share/nginx/html
ls -l
-rw-r--r-- 1 root root 537 Aug  5 08:15 50x.html
-rw-r--r-- 1 root root 612 Aug  5 08:15 index.html
lrwxrwxrwx 1 root root  21 Aug  6 17:29 phpMyAdmin -> /usr/share/phpMyAdmin
As you can see, we have a symbolic link called phpMyAdmin in this directory. We can change this link name to whatever we would like. This will change the location where phpMyAdmin can be accessed from a browser, which can help obscure the access point from hard-coded bots.
Choose a name that does not indicate the purpose of the location. In this guide, we will name our access location /nothingtosee. To accomplish this, we will just rename the link:
sudo mv phpMyAdmin nothingtosee
ls -l
total 8
-rw-r--r-- 1 root root 537 Aug  5 08:15 50x.html
-rw-r--r-- 1 root root 612 Aug  5 08:15 index.html
lrwxrwxrwx 1 root root  21 Aug  6 17:29 nothingtosee -> /usr/share/phpMyAdmin
Now, if you go to the previous location of your phpMyAdmin installation, you will get a 404 error:
http://server_domain_or_IP/phpMyAdmin
However, your phpMyAdmin interface will be available at the new location we selected:
http://server_domain_or_IP/nothingtosee
Setting up a Web Server Authentication Gate
The next feature we wanted for our installation was an authentication prompt that a user would be required to pass before ever seeing the phpMyAdmin login screen.
Fortunately, most web servers, including Nginx, provide this capability natively. We will just need to modify our Nginx configuration file with the details.
Before we do this, we will create a password file that will store our the authentication credentials. Nginx requires that passwords be encrypted using the crypt() function. The OpenSSL suite, which should already be installed on your server, includes this functionality.
To create an encrypted password, type:
openssl passwd
You will be prompted to enter and confirm the password that you wish to use. The utility will then display an encrypted version of the password that will look something like this:
O5az.RSPzd.HE
Copy this value, as you will need to paste it into the authentication file we will be creating.
Now, create an authentication file. We will call this file pma_pass and place it in the Nginx configuration directory:
sudo nano /etc/nginx/pma_pass
Within this file, you simply need to specify the username you would like to use, followed by a colon (:), followed by the encrypted version of your password you received from the openssl passwd utility.
We are going to name our user demo, but you should choose a different username. The file for this guide looks like this:
demo:O5az.RSPzd.HE
Save and close the file when you are finished.
Now, we are ready to modify our Nginx configuration file. Open this file in your text editor to get started:
sudo nano /etc/nginx/conf.d/default.conf
Within this file, we need to add a new location section. This will target the location we chose for our phpMyAdmin interface (we selected /nothingtosee in this guide).
Create this section within the server block, but outside of any other blocks. We will put our new location block below the location / block in our example:
server {
    . . .

    location / {
        try_files $uri $uri/ =404;
    }

    location /nothingtosee {
    }

    . . .
}
Within this block, we need to set the value of a directive called auth_basic to an authentication message that our prompt will display to users. We do not want to indicate to unauthenticated users what we are protecting, so do not give specific details. We will just use “Admin Login” in our example.
We then need to use a directive called auth_basic_user_file to point our web server to the authentication file that we created. Nginx will prompt the user for authentication details and check that the inputted values match what it finds in the specified file.
After we are finished, the file should look like this:
server {
    . . .

    location / {
        try_files $uri $uri/ =404;
    }

    location /nothingtosee {
        auth_basic "Admin Login";
        auth_basic_user_file /etc/nginx/pma_pass;
    }

    . . .
}
Save and close the file when you are finished.
To implement our new authentication gate, we must restart the web server:
sudo systemctl restart nginx
Now, if we visit our phpMyAdmin location in our web browser (you may have to clear your cache or use a different browser session if you have already been using phpMyAdmin), you should be prompted for the username and password you added to the pma_pass file:
http://server_domain_or_IP/nothingtosee
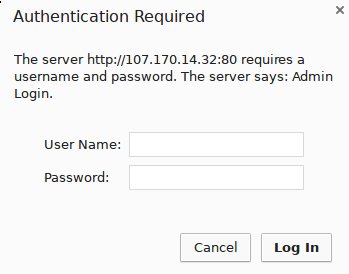
Once you enter your credentials, you will be taken to the normal phpMyAdmin login page. This added layer of protection will help keep your MySQL logs clean of authentication attempts in addition to the added security benefit.
Conclusion
You can now manage your MySQL databases from a reasonably secure web interface. This UI exposes most of the functionality that is available from the MySQL command prompt. You can view databases and schema, execute queries, and create new data sets and structures.
Thanks for learning with the DigitalOcean Community. Check out our offerings for compute, storage, networking, and managed databases.
About the author
Former Senior Technical Writer at DigitalOcean, specializing in DevOps topics across multiple Linux distributions, including Ubuntu 18.04, 20.04, 22.04, as well as Debian 10 and 11.
Still looking for an answer?
This textbox defaults to using Markdown to format your answer.
You can type !ref in this text area to quickly search our full set of tutorials, documentation & marketplace offerings and insert the link!
@kimmie: I’m not sure I understand what you mean, can you please clarify your question?
Kamal Nasser, after installing phpmyadmin on my centos server with nginx, I’ve tried to access it, but it gives the following errors, and I can’t do anything when I login
Default theme pmahomme not found!
Theme pmahomme not found!
Thanks for this article and I successfully made it. But how cam I edit and found the max_allowed_packet?
THANKS!
http://download.fedoraproject.org/pub/epel/beta/7/x86_64/epel-release-7-0.2.noarch.rpm
Link dead. Please renew rpm link.
Note: Repository link http://fedora.mirror.nexicom.net/epel/7/x86_64/e/epel-release-7-1.noarch.rpm
When I type yum install phpmyadmin its says “No package phpmyadmin available. Error: Nothing to do” and I did install EPEL 7-1.
any ideas?
I have installed the phpmyadmin and when I access it via browser, the page doesnt go past login. After typing in mariadb root username and password, the page goes back to the phpmyadmin login page once again. However the url is updated with a token added to it. The Nginx error.log shows this: nginx an upstream response is buffered to a temporary file... I have already followed the other article for LEMP set-up with the given vhost configuration. Other php files work. But only the phpmyadmin login page is showing and doesnt go past it login page… MySql user has all privileges. What am i missing?
 This work is licensed under a Creative Commons Attribution-NonCommercial- ShareAlike 4.0 International License.
Become a contributor for community
Get paid to write technical tutorials and select a tech-focused charity to receive a matching donation.

DigitalOcean Documentation
Full documentation for every DigitalOcean product.

Resources for startups and AI-native businesses
The Wave has everything you need to know about building a business, from raising funding to marketing your product.
The developer cloud
Scale up as you grow — whether you're running one virtual machine or ten thousand.

Start building today
From GPU-powered inference and Kubernetes to managed databases and storage, get everything you need to build, scale, and deploy intelligent applications.
