By Cees-Jan Kiewiet

Status: Deprecated
This article covers a version of Ubuntu that is no longer supported. If you are currently operate a server running Ubuntu 12.04, we highly recommend upgrading or migrating to a supported version of Ubuntu:
- Upgrade to Ubuntu 14.04.
- Upgrade from Ubuntu 14.04 to Ubuntu 16.04
- Migrate the server data to a supported version
Reason: Ubuntu 12.04 reached end of life (EOL) on April 28, 2017 and no longer receives security patches or updates. This guide is no longer maintained.
See Instead:
This guide might still be useful as a reference, but may not work on other Ubuntu releases. If available, we strongly recommend using a guide written for the version of Ubuntu you are using. You can use the search functionality at the top of the page to find a more recent version.
Introduction
Jenkins is an open source Continuous Integration tool. Originally started as Hudson in 2004 but due to a dispute in 2011 they forked and continued under the name, Jenkins. It can be used to build software, deploy software, or websites to various endpoints or to run unit/behaviour-driven software tests. This article will demonstrate how to install, configure Jenkins, and create your first job. After setting up the basics, you'll schedule the build on specific times and install a plugin.
Assumptions
- You have a VPS running and you are logged-in as root.
- This article is written for Ubuntu 13.04 x64 but the instructions are universal and should run on at least Ubuntu 12.04 and up.
- It's assumed that ci.company.net points to the box you're installing Jenkins on.
Installing Jenkins
Before we can install Jenkins, we have to add the key and source list to apt. This is done in 2 steps, first we'll add the key.
wget -q -O - http://pkg.jenkins-ci.org/debian/jenkins-ci.org.key | apt-key add -
Secondly, we'll create a sources list for Jenkins.
echo deb http://pkg.jenkins-ci.org/debian binary/ > /etc/apt/sources.list.d/jenkins.list
Now, we only have to update apt's cache before we can install Jenkins.
apt-get update
As the cache has been updated we can proceed installing Jenkins. Note that Jenkins has a big bunch of dependencies, so it might take a few moments to install them all.
apt-get install jenkins
Configuring Jenkins
Now that Jenkins is running, go to ci.company.net:8080. You'll be welcomed by the default Jenkins screen.

Currently, the installation is insecure and everyone can access it. Lets fix that! First, go to Manage Jenkins (in the left menu) then click Setup Security on the page loaded:

Then enable the security by checking:

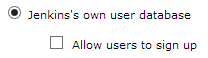
Set it to use Jenkins's own user database and disable sign ups:
Next, go for the Matrix-based security:

Make sure Anonymous only has the Read right under the View group (Jenkins crashes when it doesn't have that set):

Click save at the bottom of the page. After the page load, you'll see a login form, ignore that, go to ci.company.net:8080 again instead. You'll see this sign up form:
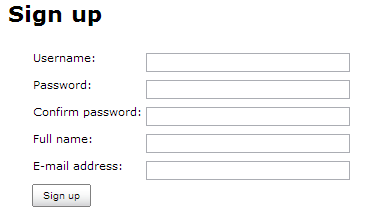
Sign up with the username hudson (or any other name to your liking, since Jenkins is assuming a lower case username I strongly suggest you choose as such to avoid confusion) and you'll be administrator of this fresh Jenkins install.
Adding Your First Job
Now that everything is up and running, it's time to create our first job. Click the New Job link:

Create a freestyle project named uptime:
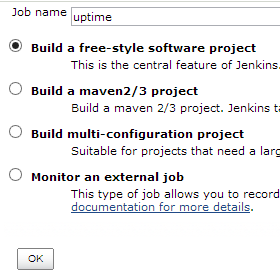
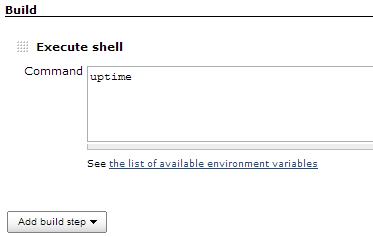
Press Ok and on the next page, add a Execute shell build step:
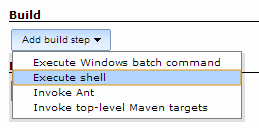
For the Command field, fill in uptime:
Click the save button at the bottom of the screen. Once the next page is finished, loading click the Build Now button.

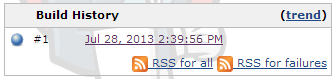
Very shortly after click, you'll see the build show up in the build history block:
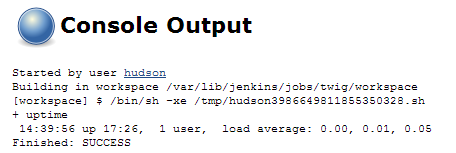
Click the blue sphere for the console output:
Schedule Your Job
Jenkins can run your job on-demand or at a specific time. Now that we've set up the basic build, it's time to configure a build schedule. First, click the back to project link to return to the job overview:

Once you're back on the overview, click the Configure button:

This leads you to the configuration page as shown when you first set up the job. Now look for Build Triggers and check Build periodically:
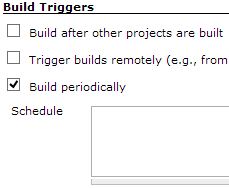
Now this input field accepts the Crontab syntax, so setting it to @hourly runs it every hour and * * * * * runs it every minute. If you want to do old school nightly builds like Firefox or WebKit, set it to @midnight to start it between midnight and 2:59 AM. We'll set it to 0 */6 * * *, starting it every 6 hours providing you a fresh build 4 times per day. When the job is saved, the scheduler will start the job at its designated times.
There are a few special extras that come with Jenkins's scheduler. Check the blue question mark at the right of the input field to find out what exactly.

Installing Plugins
There is a vast amount of plugins available for Jenkins. Ranging from build tools to FTP and SSH publishers to test coverage reports to Chuck Norris. We're going to install a plugin that keeps track of the disk space used by different builds and jobs. This makes it easier to look for space eaters. To get started, go to Manage Jenkins again. And click on Manage Plugins:

Look for the Disk Usage Plugin and select it:

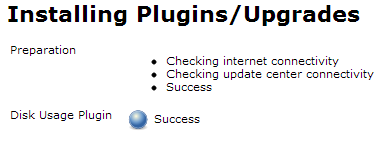
Once your done, click on the Install without the restart button at the bottom of your screen:

Just wait until the plugin has been installed and it's ready for use.
While this is a fairly simple plugin with no settings, there are plugins, such as the SSH plugin, that require some configuration after installing before you can use them properly.
Conclusion
Congratulations, you have just created and built your first job! Scheduled it to run every six hours providing around the clock builds. You also installed a plugin to keep track of all your jobs disk usage. While the job is completely useless and only displays the uptime and current load, it does show Jenkins's power available when crafting jobs. Especially combined with plugins, Jenkins is an incredible powerful tool.
Thanks for learning with the DigitalOcean Community. Check out our offerings for compute, storage, networking, and managed databases.
About the author
Still looking for an answer?
This textbox defaults to using Markdown to format your answer.
You can type !ref in this text area to quickly search our full set of tutorials, documentation & marketplace offerings and insert the link!
I didn’t get the assumption: It’s assumed that ci.company.net points to the box you’re installing Jenkins on. Where can I get more information?
@aramis001: You basically have to replace <strong>ci.company.net</strong> with the domain name that you are going to host Jenkins on.
Good work. I’d just recommend using the stable releases of Jenkins available at http://pkg.jenkins-ci.org/debian-stable/
Also, the article is written for Ubuntu 13.04, but the title still says 12.04.
Cheers.
@jcmuller Thanks! I’ve written and completely tested the article through on a 13.04 VPS but been using Jenkins on Ubuntu as early as 12.04 so I know it also works from there and up. Also thanks for the tip about the stable release. I’ll get in touch with Etel to include that in the article.
It would be cool to see this updated to include configuring Jenkins to be using SSL, such as running a nginx server in front of it with an SSL certificate for the site.
Just a heads up to would-be users of the smallest droplet for this tutorial: Jenkins is likely to fail with OutOfMemory errors with only 512MB allocated to your droplet. The symptom for this is if you’ve gotten past the apt-get install jenkins step but cannot reach the page via your browser, and you can see the error output by taking a look at the Jenkins log file at /var/log/jenkins/jenkins.log.
I got around this by resizing up to a 2GB instance, but YMMV.
Great guide, but it doesn’t seem to work for me. Whenever I go to {my-ip}:8080, I get a timeout saying the host takes too long to respond.
@nickgobee0122: Can you check "/var/log/jenkins/jenkins.log " and post any relevant errors?
 This work is licensed under a Creative Commons Attribution-NonCommercial- ShareAlike 4.0 International License.
Become a contributor for community
Get paid to write technical tutorials and select a tech-focused charity to receive a matching donation.

DigitalOcean Documentation
Full documentation for every DigitalOcean product.

Resources for startups and AI-native businesses
The Wave has everything you need to know about building a business, from raising funding to marketing your product.
The developer cloud
Scale up as you grow — whether you're running one virtual machine or ten thousand.

Start building today
From GPU-powered inference and Kubernetes to managed databases and storage, get everything you need to build, scale, and deploy intelligent applications.
