 Command Line Interface")
Introduction
Visual Studio Code is a free, open-source, and cross-platform text editor developed primarily by Microsoft. It uses web technologies such as JavaScript and CSS, which has helped facilitate a large ecosystem of community-created plugins to extend its functionality into many different programming languages and features.
In this tutorial, you’ll install the Visual Studio Code command line interface and learn how to use it to open files and directories, compare changes between files, and install extensions.
Prerequisites
To complete this tutorial, you’ll need to have Visual Studio Code installed. Please refer to the official Setting up Visual Studio Code documentation to find out how to install Code for your platform.
Installing the Visual Studio Code Command Line Interface
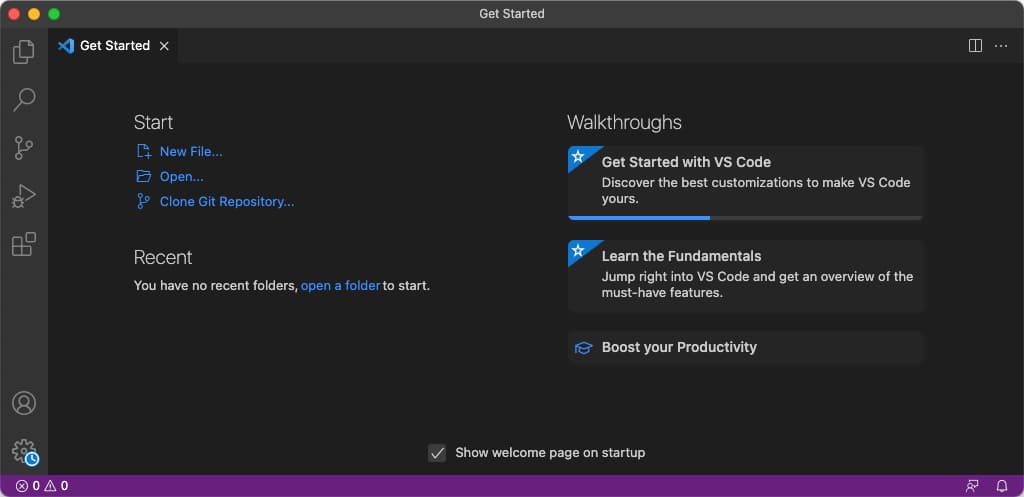
You may need to install the Visual Studio Code command line interface before using it. To do so, first launch the normal Visual Studio Code graphical interface. If this is your first time opening the app, the default screen will have a icon bar along the left, and a default welcome tab:
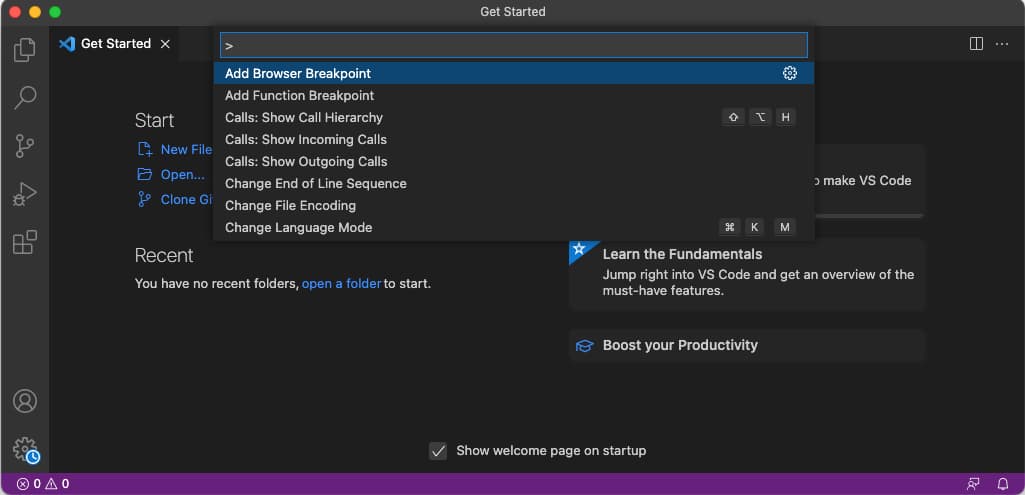
Visual Studio Code provides a built-in command to install its command line interface. Bring up Code’s Command Palette by typing Command+Shift+P on Mac, or Control+Shift+P on Windows and Linux:
This will open a prompt near the top of your Code window. Type shell command into the prompt. It should autocomplete to the correct command which will read Shell Command: Install 'code' command in PATH:
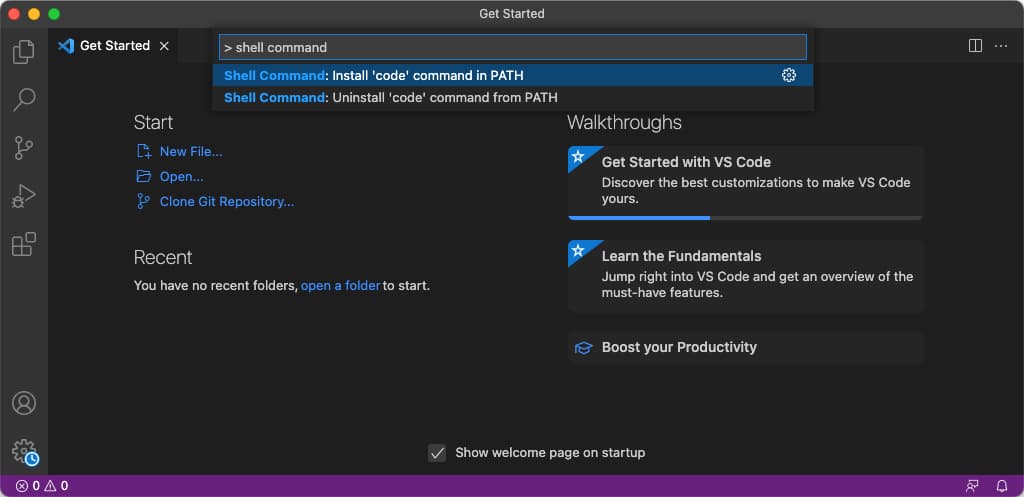
Press ENTER to run the highlighted command. You may be prompted to enter your administrator credentials to finish the installation process.
You now have the code command line command installed.
Verify that the install was successful by running code with the --version flag:
- code --version
Output1.62.1
f4af3cbf5a99787542e2a30fe1fd37cd644cc31f
x64
If your output includes a version string, you’ve successfully installed the Visual Studio Code command line interface. The next few sections will show you a few ways to use it.
Opening Files with the code Command
code CommandRunning the code command with one or more filenames will open those files in the Visual Studio Code GUI:
- code file1
This will open the file1 file in Code.
- code *.md
This will open all markdown (.md) files in the current directory in Code.
By default, the files will be opened in an existing Code window if one is available. Use the --new-window flag to force Visual Studio Code to open a new window for the specified files.
Opening a Directory with the code Command
code CommandUse the code command followed by one or more directory names to open the directories in a new Visual Studio Code window:
- code directory1 directory2
Code will open a new window for the directories. Use the --reuse-window flag to tell Code to reuse the existing frontmost window instead.
Opening a .code-workspace Workspace File with the code Command
.code-workspace Workspace File with the code CommandOpening a workspace file with the code command works similar to opening directories:
- code example.code-workspace
This will open the example workspace in a new window, unless you reuse an existing window by adding the --reuse-window flag.
Installing an Extension Using the code Command
code CommandYou can install Visual Studio Code extensions using the code command line tool as well. To do so, you’ll first need to know the extension’s unique identifier. To find this information, first navigate to the extension’s page on the Visual Studio Marketplace.
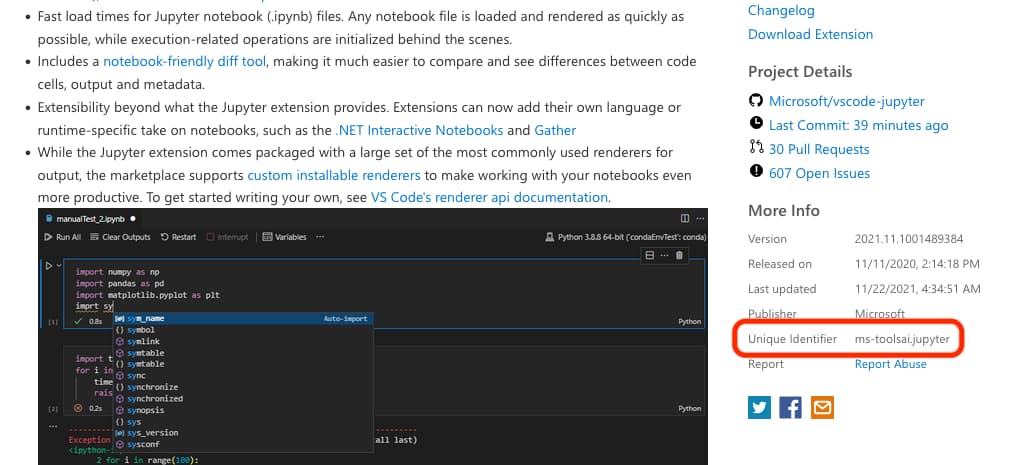
For instance, here is the page for the Jupyter Notebook extension:
https://marketplace.visualstudio.com/items?itemName=ms-toolsai.jupyter
Notice the itemName parameter in the address. This parameter’s value, ms-toolsai.jupyter, is this extension’s unique identifier.
You can also find this information on the Marketplace page itself, towards the bottom of the right-hand column in the More info section:
Once you have this unique id, you can use it with code --install-extension to install the extension:
- code --install-extension ms-toolsai.jupyter
OutputInstalling extension 'ms-toolsai.jupyter'...
Extension 'ms-toolsai.jupyter' v2021.11.1001489384 was successfully installed.
Use the same id with the --uninstall-extension flag to uninstall the extension.
Showing the Differences Between Two Files Using the code Command
code CommandTo show a standard split-screen diff that will highlight the additions, deletions, and changes between two files, use the --diff flag:
- code --diff file1 file2
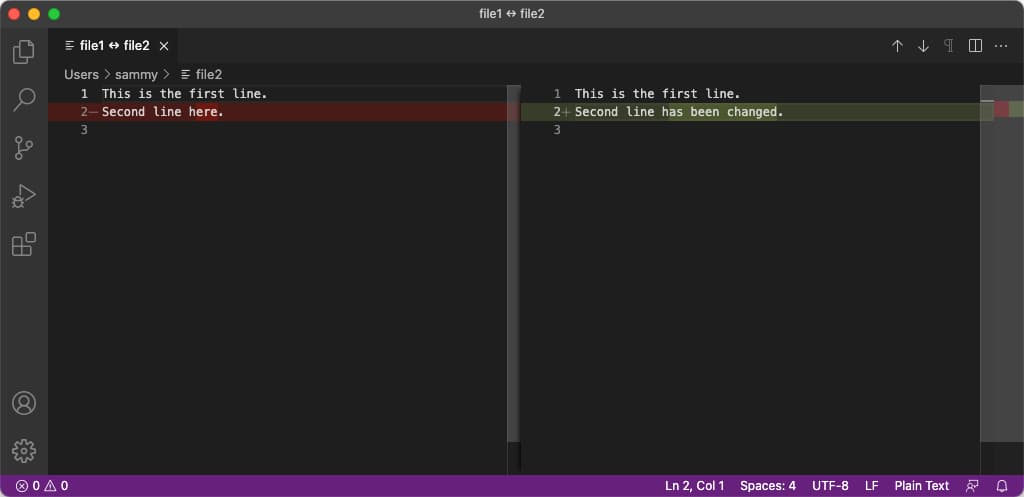
Similar to opening files, this will reuse the frontmost window by default, if one exists. To force a new window to open, use the --new-window flag.
Piping stdin Into Visual Studio Code Using the code Command
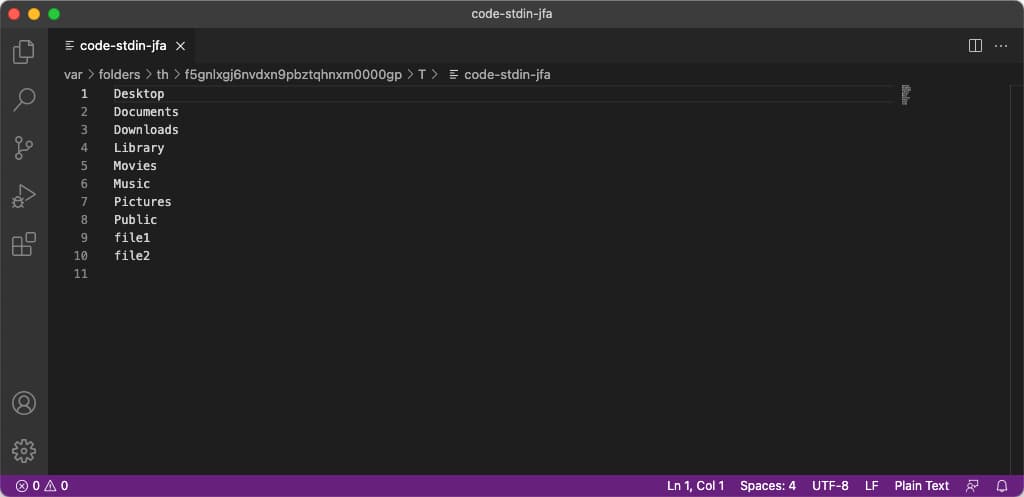
stdin Into Visual Studio Code Using the code CommandAn important feature of most command line shells is the ability to pipe (or send) the output of one command to the input of the next. In the following command line, notice the | pipe character connecting the ls ~ command to code -:
- ls ~ | code -
This will execute the ls command on the ~ directory, which is a shortcut for the current user’s home directory. The output from ls will be a list of files and directories in your home directory. This will be sent to the code command, where the single - indicates that it should read the piped in text instead of a file.
code will output some information about the temporary file that it has created to hold the input:
OutputReading from stdin via: /var/folders/dw/ncv0fr3x0xg7tg0c_cvfynvh0000gn/T/code-stdin-jfa
Then this file will open up in the Code GUI interface:
This command will continue to wait indefinitely for more input. Press CTRL+C to have code stop listening and return you to your shell.
Add the --new-window flag to force Code to open a new window for the input.
Conclusion
In this tutorial you installed Visual Studio Code’s code command line tool, and used it to open files and directories, compare files, and install extensions.
To learn more about the code command, you can run its --help function:
- code --help
You can also refer to the official Visual Studio Code command line documentation or take a look at our VS Code tag page for more Visual Studio Code tutorials, tech talks, and Q&A.
Thanks for learning with the DigitalOcean Community. Check out our offerings for compute, storage, networking, and managed databases.
About the author
Senior Technical Writer at DigitalOcean
Still looking for an answer?
This textbox defaults to using Markdown to format your answer.
You can type !ref in this text area to quickly search our full set of tutorials, documentation & marketplace offerings and insert the link!
 This work is licensed under a Creative Commons Attribution-NonCommercial- ShareAlike 4.0 International License.
Become a contributor for community
Get paid to write technical tutorials and select a tech-focused charity to receive a matching donation.

DigitalOcean Documentation
Full documentation for every DigitalOcean product.

Resources for startups and AI-native businesses
The Wave has everything you need to know about building a business, from raising funding to marketing your product.
The developer cloud
Scale up as you grow — whether you're running one virtual machine or ten thousand.

Start building today
From GPU-powered inference and Kubernetes to managed databases and storage, get everything you need to build, scale, and deploy intelligent applications.
