By Theo B and Brian Hogan
Not using CentOS 7?
Choose a different version or distribution.
Introduction
Webmin is a modern, web control panel for any Linux machine. It allows you to administer your server through an simple interface. With Webmin, you can change settings for common packages on the fly.
In this tutorial, you’ll install and configure Webmin on your server and secure access to the interface with a valid certificate using Let’s Encrypt. You’ll then use Webmin to add new user accounts, and update all packages on your server from the dashboard.
Prerequisites
To complete this tutorial, you will need:
- One CentOS 7 server set up by following the CentOS 7 initial server setup guide, including a sudo non-root user.
- A password set for the root user on your system. You’ll need to use the root user and password to log in to Webmin the first time. Use
sudo passwdto set this password. - Apache installed by following How To Install Linux, Apache, MySQL, PHP (LAMP) stack on CentOS 7. We’ll use Apache to perform Let’s Encrypt’s domain verification.
- A Fully-Qualified Domain Name (FQDN), with a DNS A record pointing to the IP address of your server. To configure this, follow the tutorial How To Set Up a Host Name with DigitalOcean.
Step 1 — Installing Webmin
First, we need to add the Webmin repository so that we can easily install and update Webmin using our package manager. We do this by adding a new file called /etc/yum.repos.d/webmin.repo that contains information about the new repository.
Create and open this new file using your text editor:
- sudo vi /etc/yum.repos.d/webmin.repo
Then add these lines to the file to define the new repository:
[Webmin]
name=Webmin Distribution Neutral
#baseurl=http://download.webmin.com/download/yum
mirrorlist=http://download.webmin.com/download/yum/mirrorlist
enabled=1
Save the file and exit the editor.
Next, add the Webmin author’s PGP key so that your system will trust the new repository:
- wget http://www.webmin.com/jcameron-key.asc
- sudo rpm --import jcameron-key.asc
Note: Before you install Webmin, make sure you have set a password for the root user by running sudo passwd, as you will need this to log in to Webmin later.
You can now install Webmin:
- sudo yum install webmin
Once the installation finishes, you will see the following message in the output:
OutputWebmin install complete. You can now login to https://your_domain:10000/
as root with your root password.
Now, let’s secure access to Webmin by adding a valid certificate.
Step 2 — Adding a Valid Certificate with Let’s Encrypt
Webmin is already configured to use HTTPS, but it uses a self-signed, untrusted certificate. Let’s replace it with a valid certificate from Let’s Encrypt.
Navigate to https://your_domain:10000 in your web browser, replacing your_domain with the domain name you pointed at your server.
Note: When logging in for the first time, you will see an “Invalid SSL” error. This is because the server has generated a self-signed certificate. Allow the exception to continue so you can replace the self-signed certificate with one from Let’s Encrypt.
You’ll be presented with a login screen. Sign in with the username root and your current password for the root user.
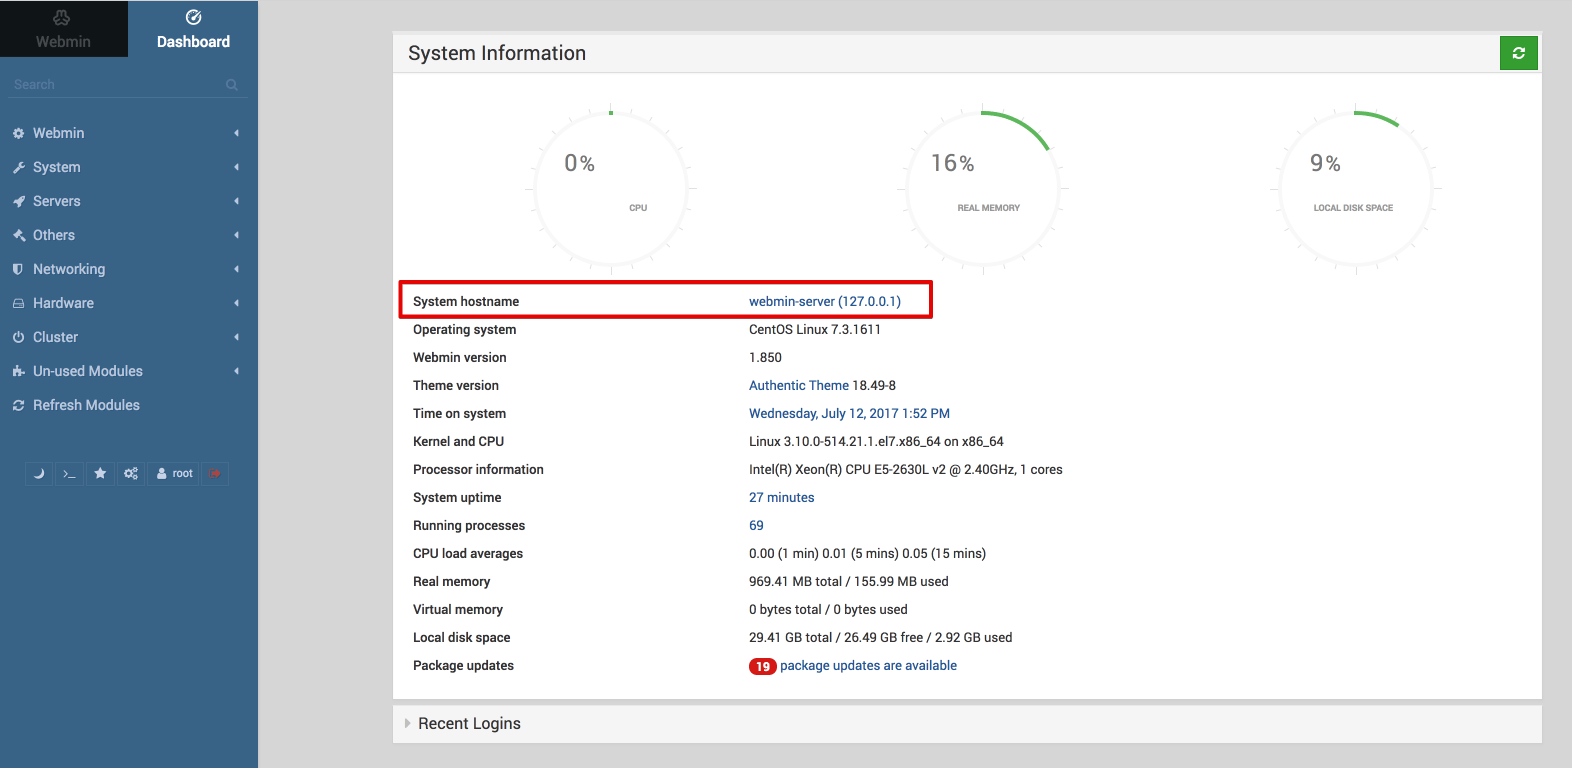
Once you log in, the first screen you will see is the Webmin dashboard. Before you can apply a valid certificate, you have to set the server’s hostname. Look for the System hostname field and lick on the link to the right, as shown in the following figure:
This will take you to the Hostname and DNS Client page. Locate the Hostname field, and enter your Fully-Qualified Domain Name into the field. Then press the Save button at the bottom of the page to apply the setting.
After you’ve set your hostname, click on Webmin on the left navigation bar, and then click on Webmin Configuration.
Then, select SSL Encryption from the list of icons, and then select the Let’s Encrypt tab. You’ll see a screen like the following figure:

Using this screen, you’ll tell Webmin how to obtain and renew your certificate. Let’s Encrypt certificates expire after 3 months, but we can instruct Webmin to automatically attempt to renew the Let’s Encrypt certificate every month. Let’s Encrypt looks for a verification file on our server, so we’ll configure Webmin to place the verification file inside the folder /var/www/html, which is the folder that the Apache web server you configured in the prerequisites uses. Follow these steps to set up your certificate:
- Fill in Hostnames for certificate with your FQDN.
- For Website root directory for validation file, select the Other Directory button and enter
/var/www/html. - For Months between automatic renewal section, deselect the Only renew manually option by typing
1into the input box, and selecting the radio button to the left of the input box. - Click the Request Certificate button. After a few seconds, you will see a confirmation screen.
To use the new certificate, simply reload the page. Your browser should now indicate that the certificate is valid.
Step 3 – Using Webmin
You’ve now set up a secured, working instance of Webmin. Let’s look at how to use it.
Webmin has many different modules that can control everything from the BIND DNS Server to something as simple as adding users to the system. Let’s look at how to create a new user, and then explore how to update the operating system using Webmin.
Managing Users and Groups
Let’s explore how to manage users and groups with Webmin.
First, we’ll manage the users that are allowed to access Webmin. That way we won’t have to log in with the root user.
Click the Webmin tab, and then click the Webmin Users button. This interface lets you manage users that can log in to Webmin.
Click the Create a new Webmin user button, which is located at the top of the users table. This displays the Create Webmin User screen, where you can supply the username, password, modules the user can access and other options. Follow these steps to create the user:
- Fill in Username with
sammy. - Fill in Password with the password that you would like to use.
- Fill in Real Name with
Sammy the Shark. - Click Create.
When creating a user, you can also select options that limit the modules a user can access, as well as the language Webmin’s interface should use.
You now have a sammy user for Webmin; you no longer need to use the root user to log in.
Next, let’s look at how to add new users to the system. We’ll create a system user called deploy which would be used for hosting web applications.
First, click the System tab, and then click the Users and Groups button. You can use this interface to add and manage users and groups.
To add a user, click Create a new user, which is located at the top of the users table. This displays the Create User screen, where you can supply the username, password, groups and other options. Follow these instructions to create the user:
- Fill in Username with
deploy. - Select Automatic for User ID.
- Fill in Real Name with a descriptive name like
Deployment user. - For Home Directory, select Automatic.
- For Shell, select /bin/bash from the dropdown list.
- For Password, select Normal Password and type in a password of your choice.
- For Primary Group, select New group with same name as user.
- For Secondary Group, select wheel from the All groups list, and press the -> button to add the group to the in groups list. This will give the new user access to use
sudo. - Press Create to create this new user.
When creating a user, you can set options for password expiry, the user’s shell, or whether they are allowed a home directory.
Next, let’s look at how to install updates to our system.
Updating Packages
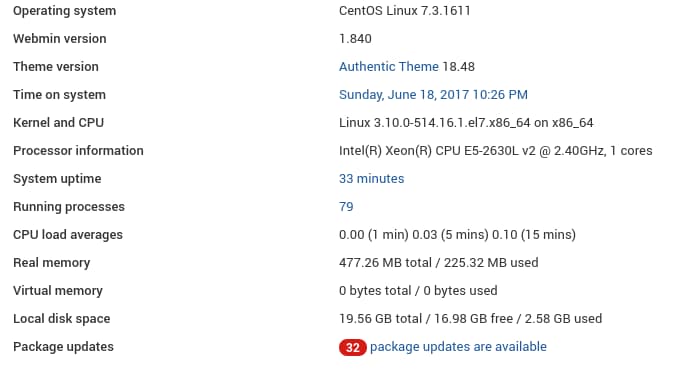
Webmin lets you update all of your packages through its user interface. To update all of your packages, first, go to the Dashboard link, and then locate the Package updates field. If there are updates available, you’ll see a link that states the number of available updates, as shown in the following figure:
Click this link, and then press Update selected packages to start the update. You may be asked to reboot the server, which you can also do through the Webmin interface.
Conclusion
You now have a secured, working instance of Webmin and you’ve used the interface to create a user and update packages. Webmin gives you access to many things you’d normally need to access through the console, and it organizes them in an intuitive way. For example, if you have Apache installed, you would find the configuration tab for it under Servers, and then Apache.
Explore the interface, or read the Official Webmin wiki to learn more about managing your system with Webmin.
Thanks for learning with the DigitalOcean Community. Check out our offerings for compute, storage, networking, and managed databases.
About the author(s)
I like tech.
Managed the Write for DOnations program, wrote and edited community articles, and makes things on the Internet. Expertise in DevOps areas including Linux, Ubuntu, Debian, and more.
Still looking for an answer?
This textbox defaults to using Markdown to format your answer.
You can type !ref in this text area to quickly search our full set of tutorials, documentation & marketplace offerings and insert the link!
I want to thank you guys first off for creating such a great and easy to use product. Secondly and as importantly for creating these very easy to follow tutorials. My company has been hosted on dedicated servers for the past 12 years and we are now in the process of migrating. Trying to understand the world of Amazon has been (now was) incredibly daunting. You guys make it easy and actually fun. Kudos.
Thank you for the install instructions. I found that the perl-Digest-MD5 package needs to be installed in order for the “Dashboard” to load. You’ll want to run “sudo yum install perl-Digest-MD5” to have this available.
Finished with installing webmin, yet the dashboard still cannot open on https://domain:10000. Please assist.
Thanks - good guide, except I needed to: yum install -y ca-certificates in order to get the jcameron-key.asc downloaded as it gave me an error message that the certificate had expired. I was then able to wget the PGP key as expected.
 This work is licensed under a Creative Commons Attribution-NonCommercial- ShareAlike 4.0 International License.
Become a contributor for community
Get paid to write technical tutorials and select a tech-focused charity to receive a matching donation.

DigitalOcean Documentation
Full documentation for every DigitalOcean product.

Resources for startups and AI-native businesses
The Wave has everything you need to know about building a business, from raising funding to marketing your product.
The developer cloud
Scale up as you grow — whether you're running one virtual machine or ten thousand.

Start building today
From GPU-powered inference and Kubernetes to managed databases and storage, get everything you need to build, scale, and deploy intelligent applications.
