By Ryan Laverdiere

Introduction
Apache mod_spdy is an open source Apache module that allows Apache web servers to serve HTTPS requests using the SPDY protocol. SPDY (pronounced as “SPeeDY”) is a new protocol created to address speed related problems with the HTTP protocol; it allows the client and server to pass multiple requests over a single connection, compress request and response headers, and all the server to push site resources to the client without the client requesting them. Setting up SPDY on your server can reduce bandwidth usage, and decrease page load times. Please note that currently mod_spdy only works with HTTPS connections, and will not work with regular non-encrypted HTTP connections.
Prerequisites
-
Debian Droplet (VPS). This guide has only been tested on Debian 7.
-
Apache HTTP Server version 2.2.4 or greater. To install Apache please follow the setup and step #1 of the How To Install Linux, Apache, MySQL, PHP (LAMP) stack on Debian article.
-
Apache mod_ssl enabled and configured. To configure Apache mod_ssl please follow the instructions for creating a self-signed SSL certificate, or the instructions for configuring a free signed SSL certificate.
Installing mod_spdy
Step 1: Install mod_spdy
To install mod_spdy you will need to download the appropriate package for the operating system.
All of the commands below should be executed as the root user.
For Debian 6 & 7 32-bit users
wget https://dl-ssl.google.com/dl/linux/direct/mod-spdy-beta_current_i386.deb
For Debian 6 & 7 64-bit users
wget https://dl-ssl.google.com/dl/linux/direct/mod-spdy-beta_current_amd64.deb
Once you have the installer package downloaded, you can proceed to instruct the Debian package manager to install your newly downloaded package.
dpkg -i mod-spdy-*.deb
Once the package has been installed, instruct the package manager to make sure that all dependencies required by mod_spdy are installed.
apt-get -f install
Now you can delete the .deb package that you just downloaded.
rm -f mod-spdy-*.deb
In order for your changes to take effect, you must restart Apache.
service apache2 restart
Step 2: Test
Launch a web browser on your machine, and navigate to http://spdycheck.org/, a free web tool provided by Zoompf, that will tell if your website is configured to use SPDY correctly. In the text box enter either the IP address or the hostname of your droplet, and click on the check button.
Within a few seconds, SPDYCheck will deliver your results. They should appear similar to the results shown below.
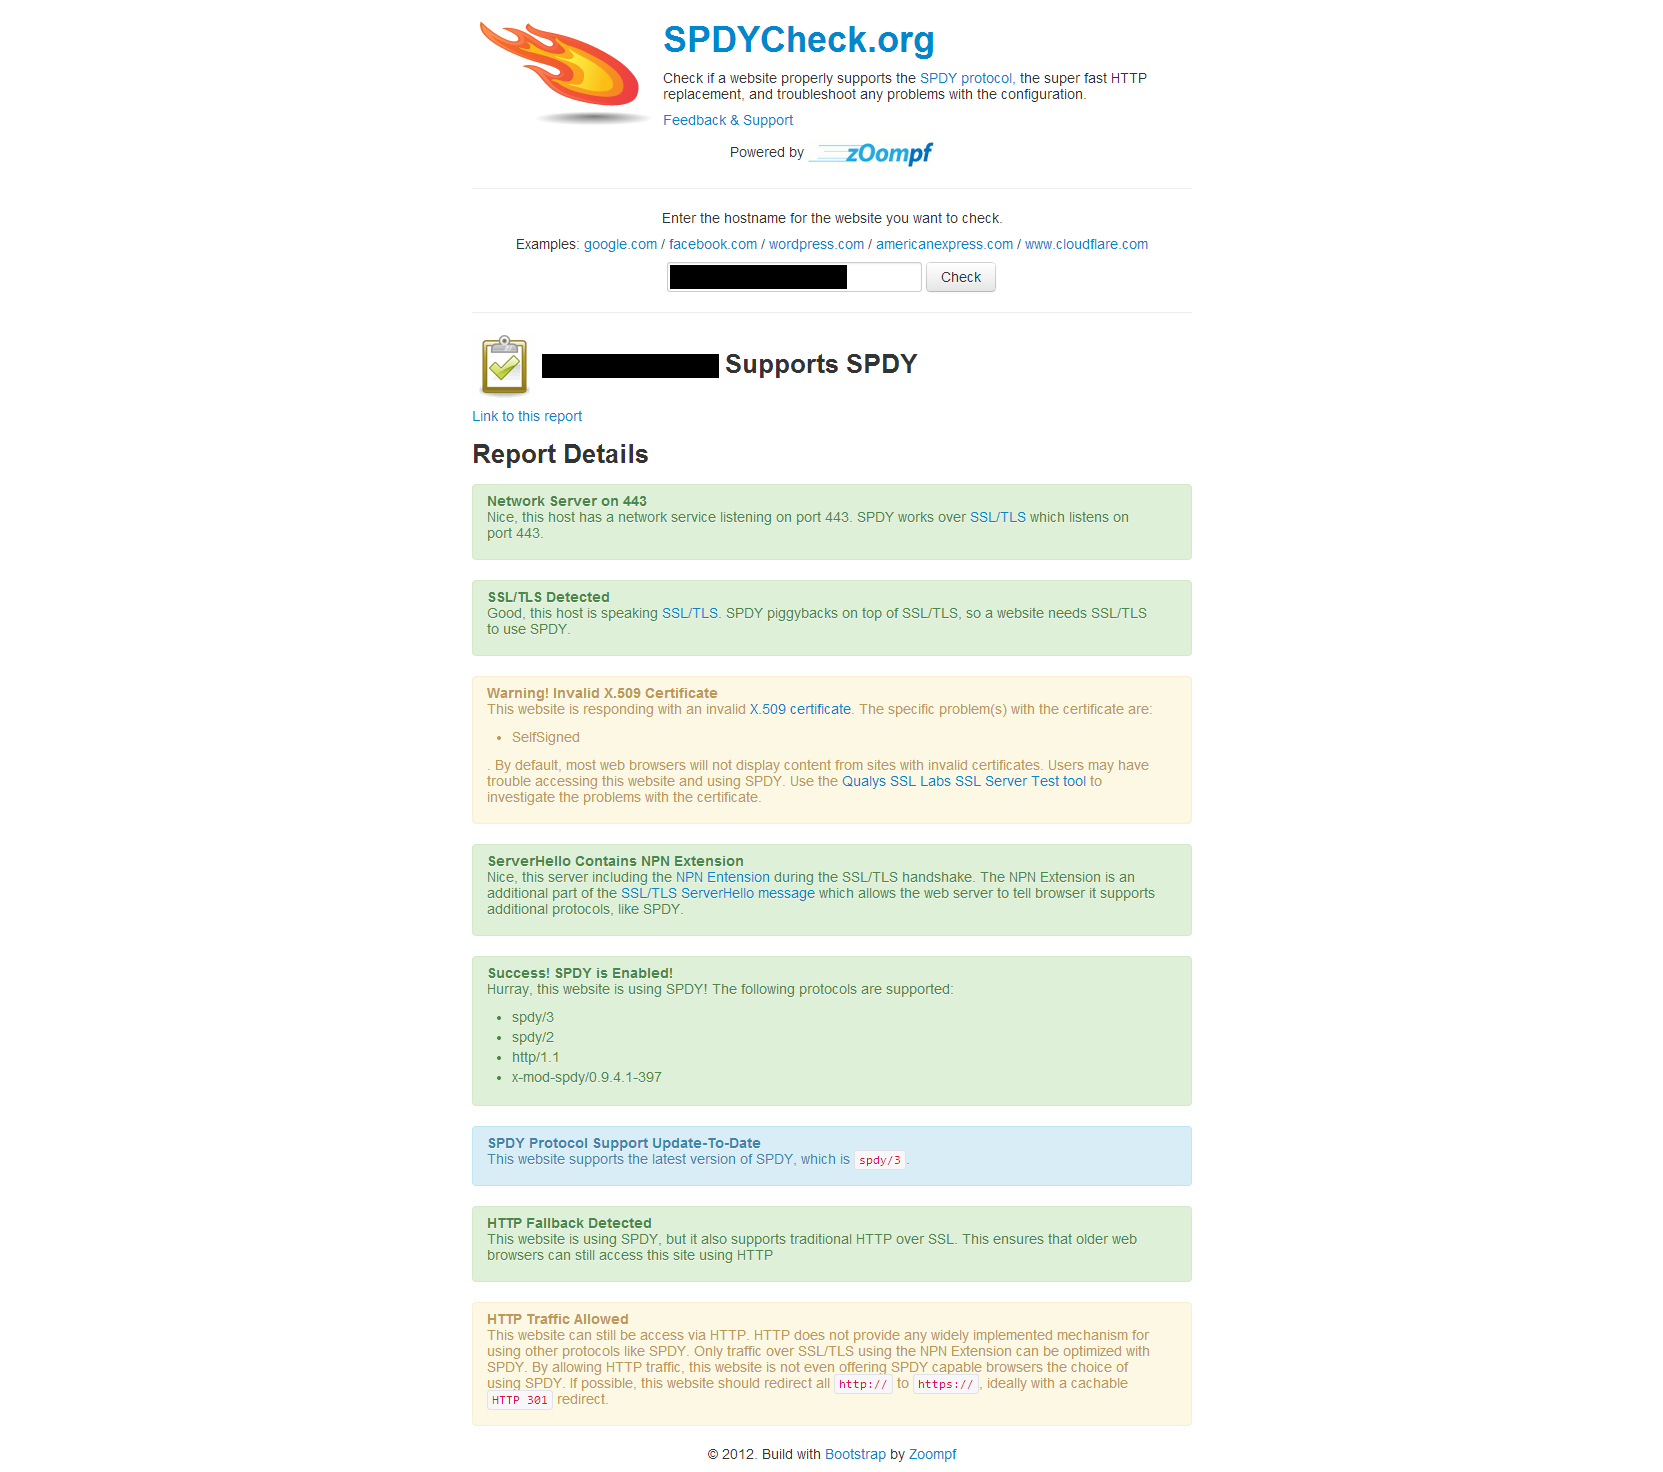
If the tool returns “Success! SPDY is Enabled!”, you have successfully enabled SPDY on your Apache server!
Step 3: Only For PHP Users
For performance and security reasons, I highly recommend that you use mod FastCGI with PHP5-FPM instead of Apache mod_php. Switching from mod_php to FastCGI & PHP-FPM should be seamless unless you have made changes to your Apache php.ini file, which contains all of your PHP settings.
PHP5-FPM and FastCGI can be installed and updated through the package manager. Before you can install the libapache2-mod-fastcgi package on your system, you must add the non-free Debian repository to your systems list of package sources.
nano /etc/apt/sources.list
Change the two lines in that file to match mine below and save your changes.
deb http://ftp.us.debian.org/debian wheezy main non-free
deb http://security.debian.org/ wheezy/updates main non-free
Update your systems package list.
apt-get update
Install PHP5-FPM & FastCGI
apt-get install apache2-mpm-worker libapache2-mod-fastcgi php5-fpm php-apc
Once the packages are installed, make sure that required Apache modules are enabled.
a2enmod actions alias fastcgi rewrite
Once the required Apache modules have been enabled, open up your /etc/apache2/apache2.conf file.
nano /etc/apache2/apache2.conf
Add the following lines to the very bottom of the file.
<IfModule mod_fastcgi.c>
FastCgiExternalServer /var/www/php5.external -socket /var/run/php5-fpm.sock
AddHandler php5-fcgi .php
Action php5-fcgi /usr/lib/cgi-bin/php5.external
Alias /usr/lib/cgi-bin/ /var/www/
</IfModule>
Disable mod_php
a2dismod php5
Restart Apache
service apache2 restart
Now PHP-FPM and FastCGI have been installed.
Note: PHP5-FPM uses a different php.ini file than mod_php. Your new php.ini file is located at /etc/php5/fpm/php.ini. If you made any changes to your old php.ini file located at /etc/php5/apache2/php.ini, then you will want to make the appropriate changes in the new php.ini file.
Then restart PHP5-FPM and Apache.
service php5-fpm restart
service apache2 restart
Updating Your mod_spdy Installation
During the installation process, the Google mod_spdy repository is automatically added to your system. Updating mod_spdy is as simple as updating other Debian packages.
First update your droplets package list.
apt-get update
Then find and update any packages that are in need of updating.
apt-get upgrade
<div class=“author”>Submitted by: <a href=“http://ryanontech.com”>Ryan Laverdiere</a></div>
Thanks for learning with the DigitalOcean Community. Check out our offerings for compute, storage, networking, and managed databases.
About the author
Still looking for an answer?
This textbox defaults to using Markdown to format your answer.
You can type !ref in this text area to quickly search our full set of tutorials, documentation & marketplace offerings and insert the link!
I get an error when I try to de-package the file:
Preparing to replace mod-spdy-beta 0.9.4.1-r397 (using mod-spdy-beta_current_amd64.deb) … Unpacking replacement mod-spdy-beta … dpkg: dependency problems prevent configuration of mod-spdy-beta: mod-spdy-beta depends on apache2.2-common; however: Package apache2.2-common is not installed.
dpkg: error processing mod-spdy-beta (–install): dependency problems - leaving unconfigured Errors were encountered while processing: mod-spdy-beta
 This work is licensed under a Creative Commons Attribution-NonCommercial- ShareAlike 4.0 International License.
Become a contributor for community
Get paid to write technical tutorials and select a tech-focused charity to receive a matching donation.

DigitalOcean Documentation
Full documentation for every DigitalOcean product.

Resources for startups and AI-native businesses
The Wave has everything you need to know about building a business, from raising funding to marketing your product.
The developer cloud
Scale up as you grow — whether you're running one virtual machine or ten thousand.

Start building today
From GPU-powered inference and Kubernetes to managed databases and storage, get everything you need to build, scale, and deploy intelligent applications.
