Tutorial
How To Install Apache Tomcat 8 on CentOS 7

Not using CentOS 7?Choose a different version or distribution.
Introduction
Apache Tomcat is a web server and servlet container that is used to serve Java applications. Tomcat is an open source implementation of the Java Servlet and JavaServer Pages technologies, released by the Apache Software Foundation. This tutorial covers the basic installation and some configuration of the latest release of Tomcat 8 on your CentOS 7 server.
Prerequisites
Before you begin with this guide, you should have a separate, non-root user account set up on your server. You can learn how to do this by completing steps 1-3 in the initial server setup for CentOS 7. We will be using the demo user created here for the rest of this tutorial.
Install Java
Tomcat requires that Java is installed on the server, so any Java web application code can be executed. Let’s satisfy that requirement by installing OpenJDK 7 with yum.
To install OpenJDK 7 JDK using yum, run this command:
Answer y at the prompt to continue installing OpenJDK 7.
Note that a shortcut to the JAVA_HOME directory, which we will need to configure Tomcat later, can be found at /usr/lib/jvm/jre.
Now that Java is installed, let’s create a tomcat user, which will be used to run the Tomcat service.
Create Tomcat User
For security purposes, Tomcat should be run as an unprivileged user (i.e. not root). We will create a new user and group that will run the Tomcat service.
First, create a new tomcat group:
Then create a new tomcat user. We’ll make this user a member of the tomcat group, with a home directory of /opt/tomcat (where we will install Tomcat), and with a shell of /bin/false (so nobody can log into the account):
Now that our tomcat user is set up, let’s download and install Tomcat.
Install Tomcat
The easiest way to install Tomcat 8 at this time is to download the latest binary release then configure it manually.
Download Tomcat Binary
Find the latest version of Tomcat 8 at the Tomcat 8 Downloads page. At the time of writing, the latest version is 8.5.37. Under the Binary Distributions section, then under the Core list, copy the link to the “tar.gz”.
Let’s download the latest binary distribution to our home directory using wget.
First, install wget using the yum package manager:
Then, change to your home directory:
Now, use wget and paste in the link to download the Tomcat 8 archive, like this (your mirror link will probably differ from the example):
We’re going to install Tomcat to the /opt/tomcat directory. Create the directory, then extract the the archive to it with these commands:
Now we’re ready to set up the proper user permissions.
Update Permissions
The tomcat user that we set up needs to have the proper access to the Tomcat installation. We’ll set that up now.
Change to the Tomcat installation path:
Give the tomcat group ownership over the entire installation directory:
Next, give the tomcat group read access to the conf directory and all of its contents, and execute access to the directory itself:
Then make the tomcat user the owner of the webapps, work, temp, and logs directories:
Now that the proper permissions are set up, let’s set up a Systemd unit file.
Install Systemd Unit File
Because we want to be able to run Tomcat as a service, we will set up a Tomcat Systemd unit file .
Create and open the unit file by running this command:
Paste in the following script. You may also want to modify the memory allocation settings that are specified in CATALINA_OPTS:
# Systemd unit file for tomcat
[Unit]
Description=Apache Tomcat Web Application Container
After=syslog.target network.target

[Service]
Type=forking

Environment=JAVA_HOME=/usr/lib/jvm/jre
Environment=CATALINA_PID=/opt/tomcat/temp/tomcat.pid
Environment=CATALINA_HOME=/opt/tomcat
Environment=CATALINA_BASE=/opt/tomcat
Environment='CATALINA_OPTS=-Xms512M -Xmx1024M -server -XX:+UseParallelGC'
Environment='JAVA_OPTS=-Djava.awt.headless=true -Djava.security.egd=file:/dev/./urandom'

ExecStart=/opt/tomcat/bin/startup.sh
ExecStop=/bin/kill -15 $MAINPID

User=tomcat
Group=tomcat
UMask=0007
RestartSec=10
Restart=always

[Install]
WantedBy=multi-user.target
Save and exit. This script tells the server to run the Tomcat service as the tomcat user, with the settings specified.
Now reload Systemd to load the Tomcat unit file:
Now you can start the Tomcat service with this systemctl command:
Check that the service successfully started by typing:
If you want to enable the Tomcat service, so it starts on server boot, run this command:
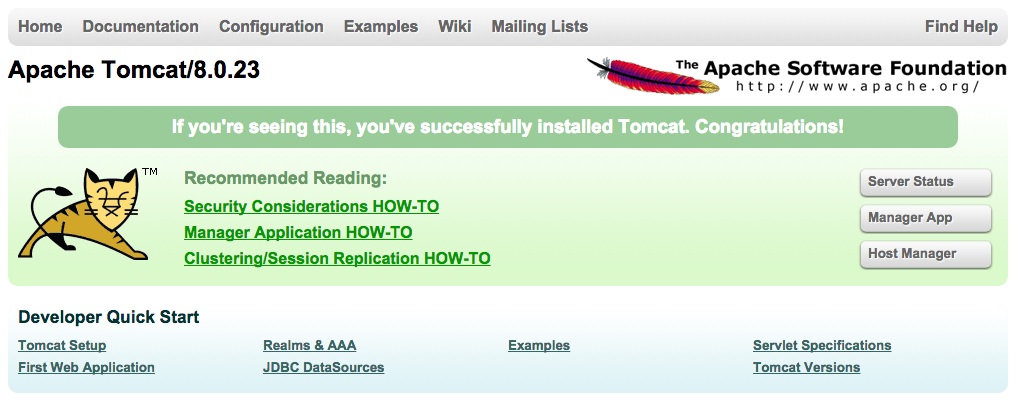
Tomcat is not completely set up yet, but you can access the default splash page by going to your domain or IP address followed by :8080 in a web browser:
Open in web browser:http://server_IP_address:8080
You will see the default Tomcat splash page, in addition to other information. Now we will go deeper into the installation of Tomcat.
Configure Tomcat Web Management Interface
In order to use the manager webapp that comes with Tomcat, we must add a login to our Tomcat server. We will do this by editing the tomcat-users.xml file:
This file is filled with comments which describe how to configure the file. You may want to delete all the comments between the following two lines, or you may leave them if you want to reference the examples:
<tomcat-users>
...
</tomcat-users>
You will want to add a user who can access the manager-gui and admin-gui (webapps that come with Tomcat). You can do so by defining a user similar to the example below. Be sure to change the username and password to something secure:
<tomcat-users>
    <user username="admin" password="password" roles="manager-gui,admin-gui"/>
</tomcat-users>
Save and quit the tomcat-users.xml file.
By default, newer versions of Tomcat restrict access to the Manager and Host Manager apps to connections coming from the server itself. Since we are installing on a remote machine, you will probably want to remove or alter this restriction. To change the IP address restrictions on these, open the appropriate context.xml files.
For the Manager app, type:
For the Host Manager app, type:
Inside, comment out the IP address restriction to allow connections from anywhere. Alternatively, if you would like to allow access only to connections coming from your own IP address, you can add your public IP address to the list:
<Context antiResourceLocking="false" privileged="true" >
  <!--<Valve className="org.apache.catalina.valves.RemoteAddrValve"
         allow="127\.\d+\.\d+\.\d+|::1|0:0:0:0:0:0:0:1" />-->
</Context>
Save and close the files when you are finished.
To put our changes into effect, restart the Tomcat service:
Access the Web Interface
Now that Tomcat is up and running, let’s access the web management interface in a web browser. You can do this by accessing the public IP address of the server, on port 8080:
Open in web browser:http://server_IP_address:8080
You will see something like the following image:
As you can see, there are links to the admin webapps that we configured an admin user for.
Let’s take a look at the Manager App, accessible via the link or http://server_IP_address:8080/manager/html:
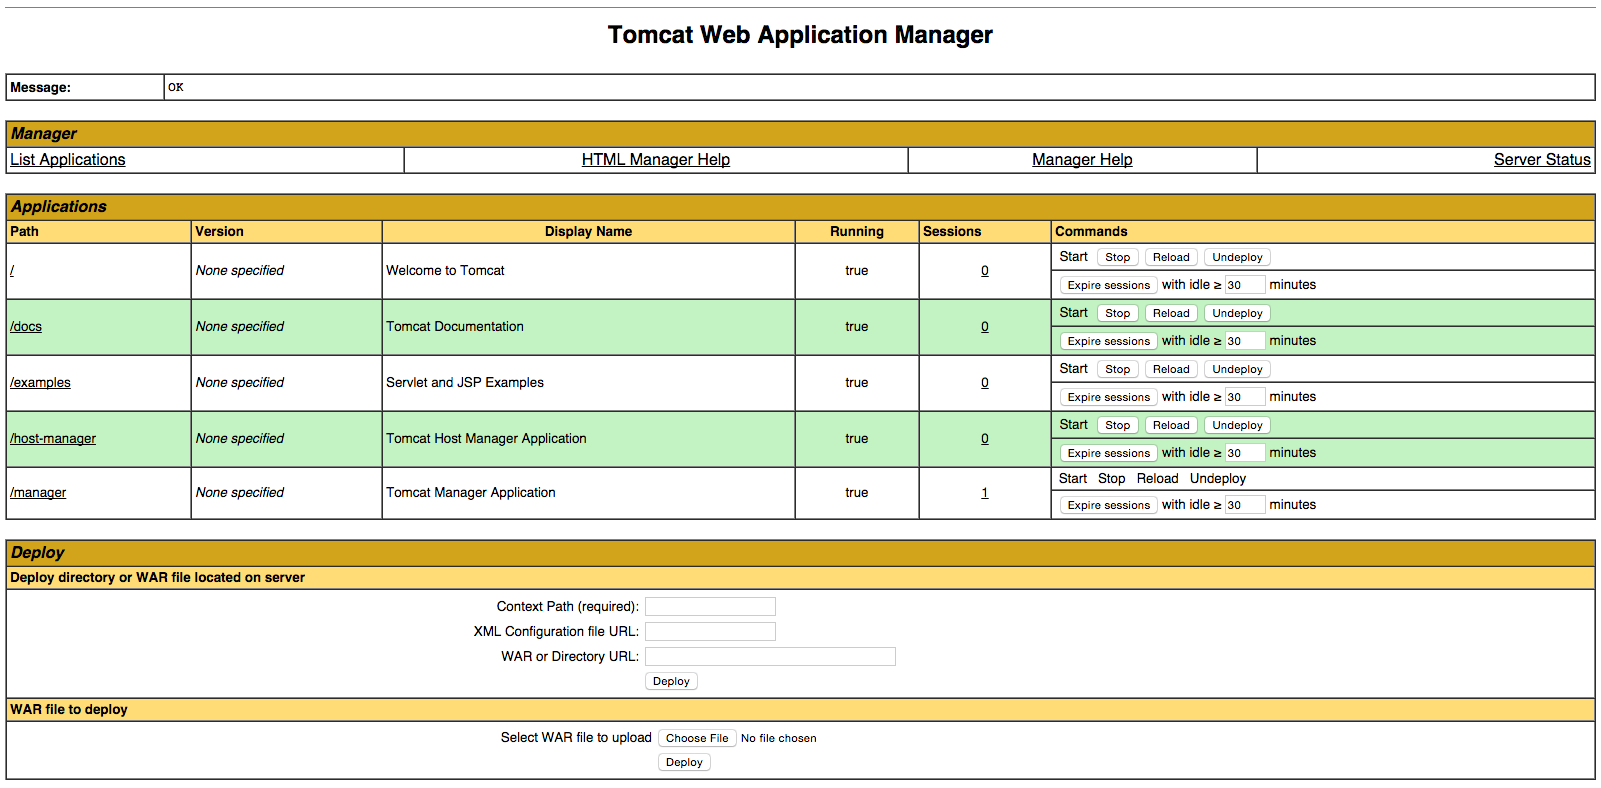
The Web Application Manager is used to manage your Java applications. You can Start, Stop, Reload, Deploy, and Undeploy here. You can also run some diagnostics on your apps (i.e. find memory leaks). Lastly, information about your server is available at the very bottom of this page.
Now let’s take a look at the Host Manager, accessible via the link or http://server_IP_address:8080/host-manager/html/:
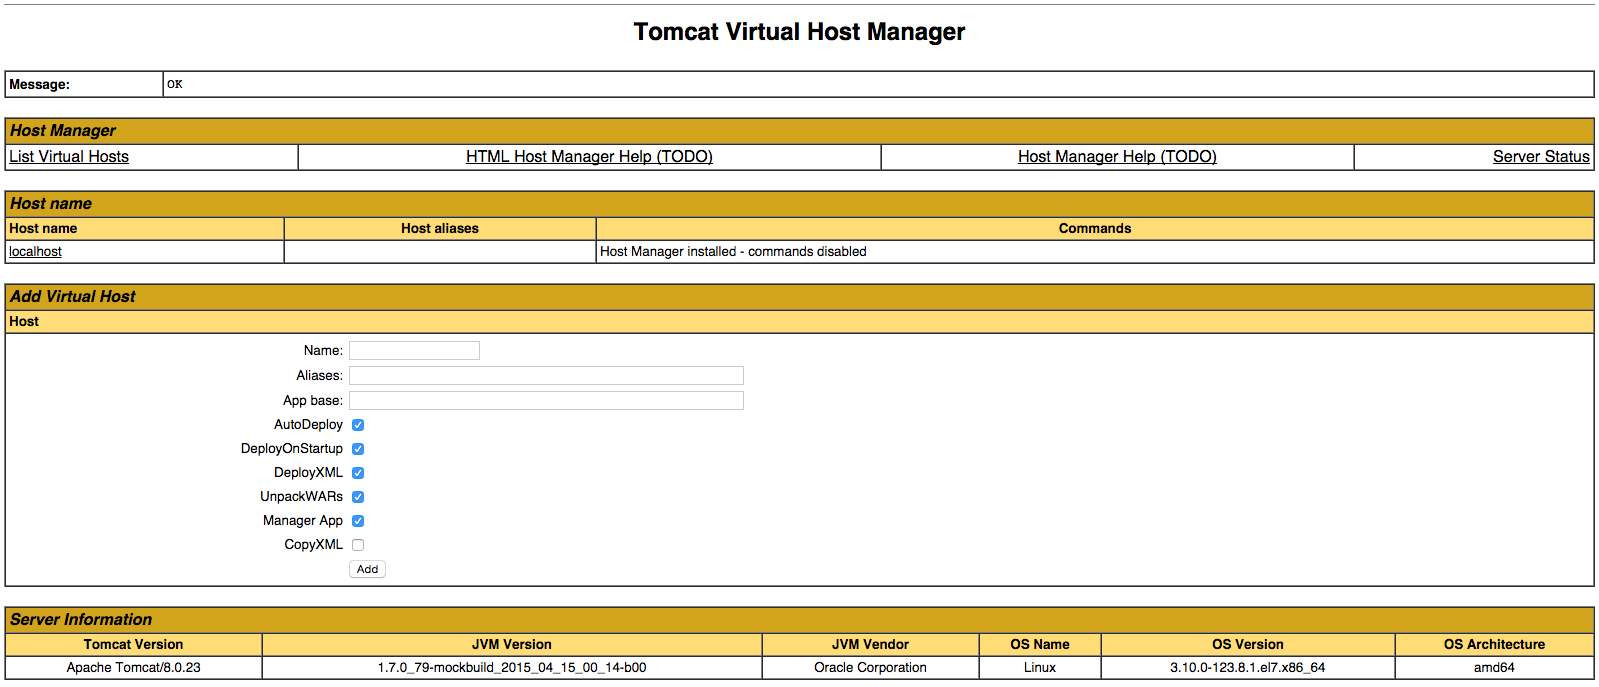
From the Virtual Host Manager page, you can add virtual hosts to serve your applications from.
Conclusion
Your installation of Tomcat is complete! Your are now free to deploy your own Java web applications!
Thanks for learning with the DigitalOcean Community. Check out our offerings for compute, storage, networking, and managed databases.
About the author(s)
This textbox defaults to using Markdown to format your answer.
You can type !ref in this text area to quickly search our full set of tutorials, documentation & marketplace offerings and insert the link!

Become a contributor for community
Get paid to write technical tutorials and select a tech-focused charity to receive a matching donation.

DigitalOcean Documentation
Full documentation for every DigitalOcean product.

Resources for startups and SMBs
The Wave has everything you need to know about building a business, from raising funding to marketing your product.
Get our newsletter
Stay up to date by signing up for DigitalOcean’s Infrastructure as a Newsletter.
New accounts only. By submitting your email you agree to our Privacy Policy
The developer cloud
Scale up as you grow — whether you're running one virtual machine or ten thousand.

Get started for free
Sign up and get $200 in credit for your first 60 days with DigitalOcean.*

*This promotional offer applies to new accounts only.
Hi,thanks your blog. I have followed your instruction exactly and ip:8080 works. But, I changed the tomcat’s listen port from 8080 to 80 in the tomcat home directory/conf/server.xml, after :sudo systemctl restart tomcat.service. I can’t access ip:80. and find that tomcat does not listen at port 80 by :netstat an | grep 80 but I use the script:tomcat_home/bin/start.sh , ip:80 works again. Please tell me where I did wrong. THANKS.
Do you know if the user you are running Tomcat as has permission to bind to ports < 1024?
How can I check Tomcat user has permission to bind to ports < 1024. Also why user Tomcat don’t have permission to cd tomcat\bin directory?
This comment has been deleted
thanks you reply. My /etc/systemd/system/tomcat.service:
so I guess the user who are running Tomcat is ‘tomcat’. I donot know if ‘tomcat’ has the permission to bind to port < 1024? I just add the user : tomcat to system with command:
I did nothing else to tell the centos 7 if the user :tomcat should has the permission to bind port < 1024.
I followed all the instructions with just a few tweaks I changed the group name from tomcat to tomcatGP (just to make it clear which was the group and which was the user.)
and I installed jave 8u60 via “yum -y install java-1.8.0-openjdk.x86_64”
I have the page up and running on 8080 but when I tested deploying a war file via the manager web app I got a permission error.
this is just one part in getting my gauc server going, I want to get tomcat 8 w/ java 8, on centOS7 with the ARP listener using my 16,384bit wildcard cert working and then work on the other parts of getting guac running.
Also can you add info for installing APR support? since I (and most people) would want to have the higher performance/more secure APR listener for SSL I think it would be reasonable.
This comment has been deleted
Got stuck trying to deploy a war. Had to make the tomcat user also own the webapps folder in order to get this going.
This was excellent help for me.
I have a suggestion and an issue.
To search for what Java versions are available, use: $sudo yum search java | grep openjdk | more
One issue: I could not access the default Tomcat website on port 8080.
This is what I did:
Open the firewall: $ sudo firewall-cmd --zone=public --add-port=8080/tcp --permanent $ sudo firewall-cmd --reload
The first command uses --permanent. You are defining this port to be open after a reboot or reload. The second command reload the firewall. You can check on the status of the ports by using: $ sudo firewall-cmd --zone=public --list-ports On my system, I get: 80/tcp 8080/tcp
Environment: Tomcat 8.0.28, Java 1.8.0.
For someone when start tomcat 8 on Oracle JDK 8 and tomcat 8 hangout at “Deploying web application directory /opt/tomcat/webapps/ROOT” You should edit file /usr/java/jdk1.8.0_66/jre/lib/security/java.security and change line securerandom.source=file:/dev/random by securerandom.source=file:/dev/./urandom
I have installed but not able to login. I tried every thing.
Getting error
28-Mar-2016 01:01:40.238 SEVERE [main] org.apache.catalina.realm.CombinedRealm.startInternal Failed to start “org.apache.catalina.realm.UserDatabaseRealm” realm org.apache.catalina.LifecycleException: Failed to start component [Realm[UserDatabaseRealm]] at org.apache.catalina.util.LifecycleBase.start(LifecycleBase.java:153) at org.apache.catalina.realm.CombinedRealm.startInternal(CombinedRealm.java:250) at org.apache.catalina.realm.LockOutRealm.startInternal(LockOutRealm.java:120) at org.apache.catalina.util.LifecycleBase.start(LifecycleBase.java:147) at org.apache.catalina.core.ContainerBase.startInternal(ContainerBase.java:904) at org.apache.catalina.core.StandardEngine.startInternal(StandardEngine.java:262) at org.apache.catalina.util.LifecycleBase.start(LifecycleBase.java:147) at org.apache.catalina.core.StandardService.startInternal(StandardService.java:441) at org.apache.catalina.util.LifecycleBase.start(LifecycleBase.java:147) at org.apache.catalina.core.StandardServer.startInternal(StandardServer.java:787) at org.apache.catalina.util.LifecycleBase.start(LifecycleBase.java:147) at org.apache.catalina.startup.Catalina.start(Catalina.java:629) at sun.reflect.NativeMethodAccessorImpl.invoke0(Native Method) at sun.reflect.NativeMethodAccessorImpl.invoke(NativeMethodAccessorImpl.java:62) at sun.reflect.DelegatingMethodAccessorImpl.invoke(DelegatingMethodAccessorImpl.java:43) at java.lang.reflect.Method.invoke(Method.java:498) at org.apache.catalina.startup.Bootstrap.start(Bootstrap.java:351) at org.apache.catalina.startup.Bootstrap.main(Bootstrap.java:485) Caused by: org.apache.catalina.LifecycleException: No UserDatabase component found under key UserDatabase at org.apache.catalina.realm.UserDatabaseRealm.startInternal(UserDatabaseRealm.java:241) at org.apache.catalina.util.LifecycleBase.start(LifecycleBase.java:147)
while my server.xml file
<?xml version=‘1.0’ encoding=‘utf-8’?>
Unless required by applicable law or agreed to in writing, software distributed under the License is distributed on an “AS IS” BASIS, WITHOUT WARRANTIES OR CONDITIONS OF ANY KIND, either express or implied. See the License for the specific language governing permissions and limitations under the License. –> <Server port=“8005” shutdown=“SHUTDOWN”> <Listener className=“org.apache.catalina.startup.VersionLoggerListener” /> <Listener className=“org.apache.catalina.core.AprLifecycleListener” SSLEngine=“on” /> <Listener className=“org.apache.catalina.core.JasperListener” /> <Listener className=“org.apache.catalina.core.JreMemoryLeakPreventionListener” /> <Listener className=“org.apache.catalina.mbeans.GlobalResourcesLifecycleListener” /> <Listener className=“org.apache.catalina.core.ThreadLocalLeakPreventionListener” />
<GlobalNamingResources> <Resource name=“UserDatabase” auth=“Container” type=“org.apache.catalina.UserDatabase” description=“User database that can be updated and saved” factory=“org.apache.catalina.users.MemoryUserDatabaseFactory” pathname=“conf/tomcat-users.xml” /> </GlobalNamingResources>
<Service name=“Catalina”>
</Service> </Server>
Hello, i cant start Tomcat.
Errorcode
I use CentOS 14.
Where can help me? :-)
See http://unix.stackexchange.com/questions/235891/tomcat-8-will-not-start-after-initial-install
In case anyone is having a hard time getting this to start:
Tomcat 7+ relies heavily on entropy. I couldn’t get Tomcat 7 or 8 to start at all, it kept hanging on deploying the webapps. This was because it was waiting on increased entropy. To solve this I enabled epel then:
yum install haveged systemctl start haveged systemctl enable haveged
it’s very good for me
Question 1) Why the “kill -15” and not “shutdown.sh” in the “/etc/systemd/system/tomcat.service” file?
Question 2) Where is MAINPID defined? It is used in “/etc/systemd/system/tomcat.service” file, but not defined there?
First of all, let me say that this is was a great starting point for what I needed (not so many good guides out there on this topic and Apache doesn’t invest too much to deliver template scripts to achieve this).
Regarding question 1, I had the same feeling - I used the shutdown script since it presumably is a cleaner way to shutdown tomcat. This is the line:
Also, this guide doesn’t cover the installation of the apache tomcat native library. One should consider that as well (or at least mention about it). As a last remark, a good practice that should be mentioned is the separation between CATALINA_HOME and CATALINA_BASE (this allows to deploy multiple tomcat services reusing the same binaries and keeping them isolated).
I am forced to use ExecStop=/bin/kill -15 $MAINPID. For reason I could not discover, the use of the shutdown.sh script fails. The errors give no details. I was hoping to learn why by asking the question.
While I do agree there is not much documentation on the topic I fail to understand how your post answered the questions.
Hi you. I have installed tomcat follow you. It work. I have a problem about " Too many open files". I have configure in "/etc/security/limits.conf " with
some add, you must set permission for directory /bin too, before i do this im have error “Failed at step EXEC spawning /usr/share/tomcat8/bin/startup.sh: Permission denied”
In my case, it was necessary to change owner and group for everything in /opt/tomcat .
i have the following error “/etc/systemd/system/tomcat.service” E212: Can’t open file for writing
This comment has been deleted
I get:
Failed to execute operation: Bad message
when I try to enable tomcat: sudo systemctl enable tomcat
Any suggestions? I followed all tutorials on installing CentOS and enabling firewalld.
Hi, Thanks for your blog. I just want to add something more.
If anyone is having problem accessing with http://server_IP_address:8080/manager/html and it says “Access Denied” still, then do the following steps:
vi CATALINA_HOME/webapps/manager/META-INF/context.xml
Comment this line:
sudo systemctl restart tomcat
Now you are ready to go.
helpful. thanks
Hi, the blog is really good, but I have a little problem, I followed all the instructions, but when i arrive at the step to start tomcat whit the instruction "
$ sudo systemctl start tomcatand than check the status, it says that is inactive. What can I do?? Thanks for helping meHi, tomcat service is not getting started. How can I check whats going wrong here. sudo systemctl status tomcat ● tomcat.service - Apache Tomcat Web Application Container Loaded: loaded (/etc/systemd/system/tomcat.service; enabled; vendor preset: disabled) Active: activating (auto-restart) (Result: exit-code) since Mon 2017-04-17 15:54:56 UTC; 4s ago Process: 379 ExecStop=/bin/kill -15 $MAINPID (code=exited, status=1/FAILURE) Process: 367 ExecStart=/opt/tomcat/bin/startup.sh (code=exited, status=0/SUCCESS) Main PID: 378 (code=exited, status=127)
Apr 17 15:54:56 martmonkey systemd[1]: tomcat.service: control process exited, code=exited status=1 Apr 17 15:54:56 martmonkey systemd[1]: Unit tomcat.service entered failed state. Apr 17 15:54:56 martmonkey systemd[1]: tomcat.service failed. [admin@martmonkey tomcat]$
I am also getting permission denied with tomcat user. tomcat]$ cd bin -bash: cd: bin: Permission denied
Same here, found anything? And when i do su - tomcat it asks for password
I follow all the steps and my tomcat server run fine,
i have problem with the latin characters ‘Ñáéí…’ they can not display ok.
I suggest changing the ExecStop command with:
/opt/tomcat/bin/catalina.sh stopFor a clean shutdown.
Hi,
Thanks for the tutorial. Works like a charm… (we are using java 1.8)
Is there anyway you can setup 2 tomcat instances in 1 machine ?
Regards
If anyone has trouble with tomcat not starting after
You should comment out or change CATALINA_OPTS in tomcat.service.
Source: https://unix.stackexchange.com/a/275160
I deployed Tomcat as described, but i ran in problems.
Tomcat didn’t start as a service. I only got an empty log file “catalina.out”.
Okay, let’s start Tomcat in the shell. I ran “./startup.sh” (Which is “./catalina.sh start”) as root. I got the return from the script:
Looks good, but it isn’t true, Tomcat was not started. Again, i got an empty log file.
Next, i tried “./catalina.sh run” and Tomcat started in the actual window. It looked very good. My configuration from “setenv.sh” was working and the Web UI was working too.
Later on i executed “./startup.sh” with Midnight Commander by mistake and Tomcat started!
Any idea?
Thanks!
I asked the same question at Stackoverflow with no repsonse ;-) Stackoverflow
good explanation