By Arpit Jalan and Sharon Campbell
Not using Ubuntu 14.04?
Choose a different version or distribution.
Warning: This article is out of date and no longer works. Please read the updated Discourse article instead.
An Article from Discourse
Introduction
Discourse is an open source discussion platform built for the next decade of the Internet. We’ll walk through all of the steps required to get Discourse running on your DigitalOcean Droplet.
Prerequisites
Before we get started, there are a few things we need to set up first:
-
Ubuntu 14.04 Droplet (64 bit) with a minimum of 2 GB of RAM. If you need help with this part, this tutorial will get you started.
Discourse recommends 1 GB of RAM for small communities and 2 GB of RAM for larger communities. It also requires a swap file if you are using 1 GB of RAM. Although swap is generally recommended for systems utilizing traditional spinning hard drives, using swap with SSDs can cause issues with hardware degradation over time. Due to this consideration, we do not recommend enabling swap on DigitalOcean or any other provider that utilizes SSD storage. Doing so can impact the reliability of the underlying hardware for you and your neighbors. Hence, we recommend a minimum of 2 GB of RAM to run Discourse on a DigitalOcean Droplet. Refer to How To Add Swap on Ubuntu 14.04 for details on using swap.
If you need to improve the performance of your server, we recommend upgrading your Droplet. This will lead to better results in general and will decrease the likelihood of contributing to hardware issues that can affect your service.
- You can use an IP address as your domain for testing, but for a production server, you should have a domain that resolves to your Droplet. This tutorial can help.
-
Non-root user with sudo privileges (Initial Server Setup with Ubuntu 14.04 explains how to set this up.)
-
Free account on Mandrill and get SMTP credentials. It wouldn’t hurt to test the validity of these credentials beforehand, although you can use them for the first time with Discourse.
All the commands in this tutorial should be run as a non-root user. If root access is required for the command, it will be preceded by sudo. Initial Server Setup with Ubuntu 14.04 explains how to add users and give them sudo access.
Step 1 — Install Git
In this section we will install Git to download the Discourse source files. Git is an open source distributed version control and source code management system.
Before we get started, it is highly recommend to make sure that your system is up to date. SSH into your Droplet as the root user:
Execute the following commands on your Droplet to update the system:
Once that is complete, install Git by running following command:
Step 2 — Install Docker
In this section we will install Docker so that Discourse will have an isolated environment in which to run. Docker is an open source project that can pack, ship, and run any application in a lightweight container. For more introductory information about Docker, please see this tutorial.
Docker provides a public script to get Docker installed:
You need to add your non-root user to the docker group to be able to run a Docker container as this user:
You also have to log out and log back in as that user to enable the change:
Step 3 — Download Discourse
In this section we will download Discourse.
Create a /var/discourse folder, where all the Discourse-related files will reside:
Clone the official Discourse Docker Image into this /var/discourse folder:
Step 4 — Configure Discourse
In this section we will configure your initial Discourse settings.
Switch to the /var/discourse directory:
Copy the samples/standalone.yml file into the containers folder as app.yml:
Edit the Discourse configuration in the app.yml file:
The configuration file will open in the nano text editor.
Locate the env section and update it with your custom email, domain, and SMTP server information, as shown below. The individual lines are explained after the example block:
...
env:
  LANG: en_US.UTF-8
  ## TODO: How many concurrent web requests are supported?
  ## With 2GB we recommend 3-4 workers, with 1GB only 2
  #UNICORN_WORKERS: 3
  ##
  ## TODO: List of comma delimited emails that will be made admin and developer
  ## on initial signup example 'user1@example.com,user2@example.com'
  DISCOURSE_DEVELOPER_EMAILS: 'me@example.com'
  ##
  ## TODO: The domain name this Discourse instance will respond to
  DISCOURSE_HOSTNAME: 'discourse.example.com'
  ##
  ## TODO: The mailserver this Discourse instance will use
  DISCOURSE_SMTP_ADDRESS: smtp.mandrillapp.com         # (mandatory)
  DISCOURSE_SMTP_PORT: 587                        # (optional)
  DISCOURSE_SMTP_USER_NAME: login@example.com      # (optional)
  DISCOURSE_SMTP_PASSWORD: 9gM5oAw5pBB50KvjcwAmpQ               # (optional)
  ##
  ## The CDN address for this Discourse instance (configured to pull)
  #DISCOURSE_CDN_URL: //discourse-cdn.example.com
  ...
Here are the individual lines that need to be changed:
- Set Admin Email
Choose the email address that you want to use for the Discourse admin account. It can be totally unrelated to your Discourse domain and can be any email address you find convenient. Set this email address in the DISCOURSE_DEVELOPER_EMAILS line. This email address will be made the Discourse admin by default, once a user registers with that email. You’ll need this email address later when you set up Discourse from its web control panel.
DISCOURSE_DEVELOPER_EMAILS: 'me@example.com'
Replace me@example.com with your email.
Developer Email setup is required for creating and activating your initial administrator account.
- Set Domain
Set DISCOURSE_HOSTNAME to discourse.example.com. This means you want your Discourse forum to be available at http://discourse.example.com/. You can use an IP address here instead if you don’t have a domain pointing to your server yet. Only one domain (or IP) can be listed here.
DISCOURSE_HOSTNAME: 'discourse.example.com'
Replace discourse.example.com with your domain. A hostname is required to access your Discourse instance from the web.
- Set Mail Credentials
We recommend Mandrill for your SMTP mail server. Get your SMTP credentials from Mandrill.
Enter your SMTP credentials in the lines for DISCOURSE_SMTP_ADDRESS, DISCOURSE_SMTP_PORT, DISCOURSE_SMTP_USER_NAME, and DISCOURSE_SMTP_PASSWORD. (Be sure you remove the comment # character from the beginnings of these lines as necessary.)
DISCOURSE_SMTP_ADDRESS: smtp.mandrillapp.com         # (mandatory)
DISCOURSE_SMTP_PORT: 587                        # (optional)
DISCOURSE_SMTP_USER_NAME: login@example.com      # (optional)
DISCOURSE_SMTP_PASSWORD: 9gM5oAw5pBB50KvjcwAmpQ               # (optional)
The SMTP settings are required to send mail from your Discourse instance; for example, to send registration emails, password reset emails, reply notifications, etc.
Having trouble setting up mail credentials? See the Discourse Email Troubleshooting guide.
Setting up mail credentials is required, or else you will not be able to bootstrap your Discourse instance. The credentials must be correct, or else you will not be able to register users (including the admin user) for the forum.
- Optional: Tune Memory Settings (preferred for 1 GB Droplet)
Also in the env section of the configuration file, set db_shared_buffers to 128MB and UNICORN_WORKERS to 2 so you have more memory room.
db_shared_buffers: "128MB"
and
UNICORN_WORKERS: 2
Tuning these memory settings will optimize Discourse performance on a 1 GB Droplet.
NOTE: The above changes are mandatory and should not be skipped, or else you will have a broken Discourse forum.
Save the app.yml file, and exit the text editor.
Step 5 — Bootstrap Discourse
In this section we will bootstrap Discourse.
First, we need to make sure that Docker can access all of the outside resources it needs. Open the Docker settings file /etc/default/docker:
Uncomment the DOCKER_OPTS line so Docker uses Google’s DNS:
...

# Use DOCKER_OPTS to modify the daemon startup options.
DOCKER_OPTS="--dns 8.8.8.8 --dns 8.8.4.4"

...
Restart Docker to apply the new settings:
Note: If you don’t change Docker’s DNS settings before running the bootstrap command, you may get an error like “fatal: unable to access ‘https://github.com/SamSaffron/pups.git/’: Could not resolve host: github.com”.
Now use the bootstrap process to build Discourse and initialize it with all the settings you configured in the previous section. This also starts the Docker container. You must be in the /var/discourse directory:
Bootstrap Discourse:
This command will take about 8 minutes to run while it configures your Discourse environment. (Early in this process you will be asked to generate a SSH key; press Y to accept.)
After the bootstrap process completes, start Discourse:
Congratulations! You now have your very own Discourse instance!
Step 6 — Access Discourse
Visit the domain or IP address (that you set for the Discourse hostname previously) in your web browser to view the default Discourse web page.

If you receive a 502 Bad Gateway error, try waiting a minute or two and then refreshing so Discourse can finish starting.
Step 7 — Sign Up and Create Admin Account
Use the Sign Up button at the top right of the page to register a new Discourse account. You should use the email address you provided in the DISCOURSE_DEVELOPER_EMAILS setting previously. Once you confirm your account, that account will automatically be granted admin privileges.

Once you sign up and log in, you should see the Staff topics and the Admin Quick Start Guide. It contains the next steps for further configuring and customizing your Discourse installation.
You can access the admin dashboard by visting /admin.

If you don’t get any email from signing up, and are unable to register a new admin account, please see the Discourse email troubleshooting checklist.
If you are still unable to register a new admin account via email, see the Create Admin Account from Console walkthrough, but please note that you will have a broken site until you get normal SMTP email working.
That’s it! You can now let users sign up and start managing your Discourse forum.
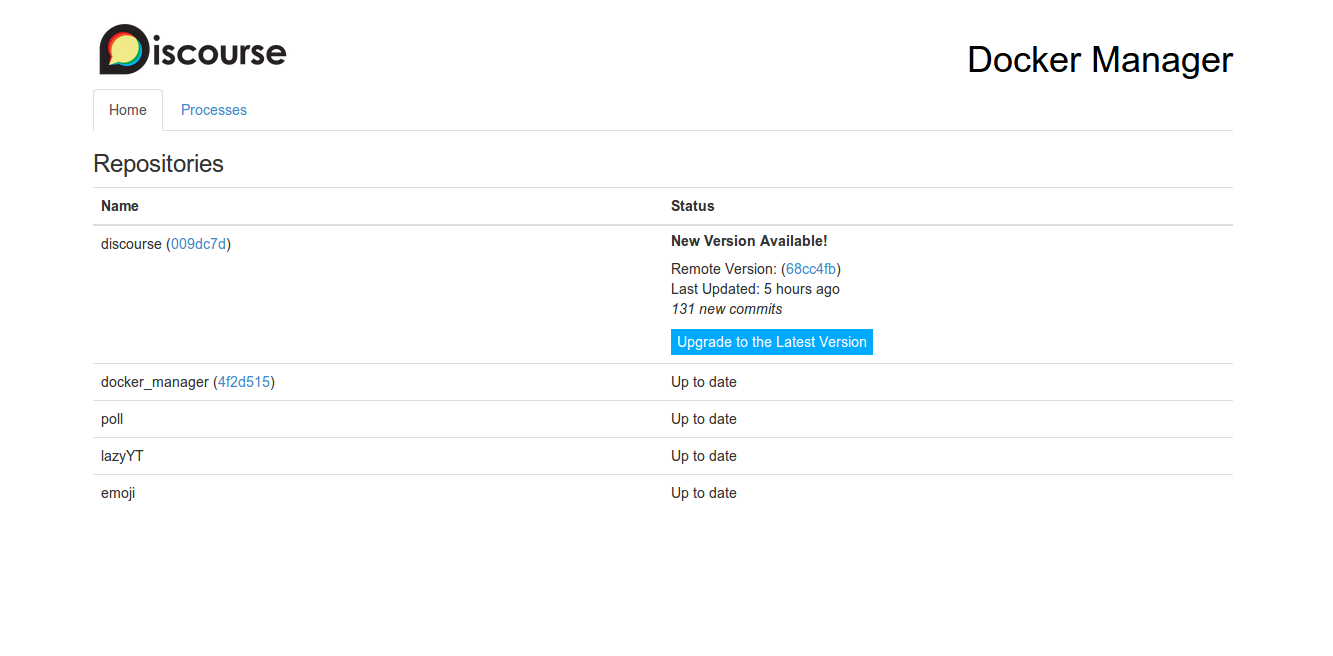
Post-Installation Upgrade
To upgrade Discourse to the latest version, visit /admin/upgrade and follow the instructions.
Thanks for learning with the DigitalOcean Community. Check out our offerings for compute, storage, networking, and managed databases.
About the author(s)
Programmer at Discourse. Technology enthusiast.
Current fan and former Editorial Manager at DigitalOcean. Hi! Expertise in areas including Ubuntu, Docker, Rails, and more.
Still looking for an answer?
This textbox defaults to using Markdown to format your answer.
You can type !ref in this text area to quickly search our full set of tutorials, documentation & marketplace offerings and insert the link!
Successfully installed Discourse according to the above directions and have been running it for a week.
My problem now is I am trying to install a Discourse plugin and rebuild the app according to their instructions: https://meta.discourse.org/t/advanced-troubleshooting-with-docker/15927
The expected directory structure seems totally different however in my install according to the instructions above compared to their install. For a simple example, they say this should exist: /var/docker, which does now, only /var/discourse.
So my initial question would be, how would you login to the Docker container using the instructions above to install Discourse.
(I actually did try and improvise plugin installation using /var/discourse but now my discourse instance is throwing a server error).
Step 5.4 - You write that db_shared_buffers should be 128MB but the snippet is 256MB - Which should I choose?
@kopeboy I have it set to 128MB and it’s been running fine on my 1GB droplet so far.
I get an error trying to launch the bootstrap. I am running Ubuntu 14.04 LTS and not using digitalocean.
root@mydiscourse:/var/discourse# ./launcher bootstrap app
WARNING: No swap limit support
Calculated ENV: -e LANG=en_US.UTF-8
cd /pups && git pull && /pups/bin/pups --stdin
Already up-to-date.
I, [2015-03-05T16:24:09.191064 #37] INFO – : Loading --stdin
/pups/lib/pups/merge_command.rb:45:in merge': no implicit conversion of Symbol into Hash (TypeError) from /pups/lib/pups/merge_command.rb:45:in deep_merge’
from /pups/lib/pups/cli.rb:21:in block in run' from /pups/lib/pups/cli.rb:18:in each’
from /pups/lib/pups/cli.rb:18:in run' from /pups/bin/pups:8:in <main>’
39df8c6a9e6133be35601b5f28c3a5085d168cec65fd566c86a9bfade6eb82bd
FAILED TO BOOTSTRAP
root@mydiscourse:/var/discourse# /pups/lib/pups/merge_command.rb:45:in `merge’: no implicit conversion of Symbol into Hash (TypeError)
I’m using digitalocean, but I’ve the same error building the discourse standalone sample with bootstrap:
Fast-forward
 README.md | 10 +++++++++-
 1 file changed, 9 insertions(+), 1 deletion(-)
I, [2015-03-22T17:05:35.932988 #43]  INFO -- : Loading --stdin
/pups/lib/pups/merge_command.rb:45:in `merge': no implicit conversion of String into Hash (TypeError)
	from /pups/lib/pups/merge_command.rb:45:in `deep_merge'
	from /pups/lib/pups/cli.rb:21:in `block in run'
	from /pups/lib/pups/cli.rb:18:in `each'
	from /pups/lib/pups/cli.rb:18:in `run'
	from /pups/bin/pups:8:in `<main>'
When I try starting my Discourse instance I get a error:
FATA[0000] Error response from daemon: Cannot start container 818be5462784063a12e2f167e3ea50c9110cbe612dd5a8007ed0f0ecd94b6b54: Error starting userland proxy: listen tcp 0.0.0.0:80: bind: address already in use
:(
Hi for droplet with 1 gb, can I still use it for 2 small Wordpress sites and very small community Discourse?
 This work is licensed under a Creative Commons Attribution-NonCommercial- ShareAlike 4.0 International License.
Become a contributor for community
Get paid to write technical tutorials and select a tech-focused charity to receive a matching donation.

DigitalOcean Documentation
Full documentation for every DigitalOcean product.

Resources for startups and SMBs
The Wave has everything you need to know about building a business, from raising funding to marketing your product.
The developer cloud
Scale up as you grow — whether you're running one virtual machine or ten thousand.

Get started for free
Sign up and get $200 in credit for your first 60 days with DigitalOcean.*

*This promotional offer applies to new accounts only.