By Peeyush Gupta and Matt Abrams

The author selected the COVID-19 Relief Fund to receive a donation as part of the Write for DOnations program.
Introduction
Continuous Integration/Continuous Deployment (CI/CD) pipelines are one of the core components of the DevOps environment. They help streamline the workflow between multiple teams and increase productivity. Jenkins is a widely-used open source automation server that can set up CI/CD pipelines.
In this tutorial, you will install Jenkins on Kubernetes. You will then access the Jenkins UI and run a sample pipeline.
If you’re looking for a managed Kubernetes hosting service, check out our simple, managed Kubernetes service built for growth.
Prerequisites
To follow this tutorial, you will need:
- A working Kubernetes cluster and
kubectlset up on your workstation. Follow our Kubernetes Quickstart to set up a Kubernetes cluster on DigitalOcean.
Step 1 — Installing Jenkins on Kubernetes
Kubernetes has a declarative API and you can convey the desired state using either a YAML or JSON file. For this tutorial, you will use a YAML file to deploy Jenkins. Make sure you have the kubectl command configured for the cluster.
First, use kubectl to create the Jenkins namespace:
- kubectl create namespace jenkins
Next, create the YAML file that will deploy Jenkins.
Create and open a new file called jenkins.yaml using nano or your preferred editor:
- nano jenkins.yaml
Now add the following code to define the Jenkins image, its port, and several more configurations:
apiVersion: apps/v1
kind: Deployment
metadata:
  name: jenkins
spec:
  replicas: 1
  selector:
    matchLabels:
      app: jenkins
  template:
    metadata:
      labels:
        app: jenkins
    spec:
      containers:
      - name: jenkins
        image: jenkins/jenkins:lts
        ports:
          - name: http-port
            containerPort: 8080
          - name: jnlp-port
            containerPort: 50000
        volumeMounts:
          - name: jenkins-vol
            mountPath: /var/jenkins_vol
      volumes:
        - name: jenkins-vol
          emptyDir: {}
This YAML file creates a deployment using the Jenkins LTS image and also opens port 8080 and 50000. You use these ports to access Jenkins and accept connections from Jenkins workers respectively.
Now create this deployment in the jenkins namespace:
- kubectl create -f jenkins.yaml --namespace jenkins
Give the cluster a few minutes to pull the Jenkins image and get the Jenkins pod running.
Use kubectl to verify the pod’s state:
- kubectl get pods -n jenkins
You will receive an output like this:
NAME                       READY   STATUS    RESTARTS   AGE
jenkins-6fb994cfc5-twnvn   1/1     Running   0          95s
Note that the pod name will be different in your environment.
Once the pod is running, you need to expose it using a Service. You will use the NodePort Service type for this tutorial. Also, you will create a ClusterIP type service for workers to connect to Jenkins.
Create and open a new file called jenkins-service.yaml:
- nano jenkins-service.yaml
Add the following code to define the NodePort Service:
apiVersion: v1
kind: Service
metadata:
  name: jenkins
spec:
  type: NodePort
  ports:
    - port: 8080
      targetPort: 8080
      nodePort: 30000
  selector:
    app: jenkins

---

apiVersion: v1
kind: Service
metadata:
  name: jenkins-jnlp
spec:
  type: ClusterIP
  ports:
    - port: 50000
      targetPort: 50000
  selector:
    app: jenkins
In the above YAML file, you define your NodePort Service and then expose port 8080 of the Jenkins pod to port 30000.
Now create the Service in the same namespace:
- kubectl create -f jenkins-service.yaml --namespace jenkins
Check that the Service is running:
- kubectl get services --namespace jenkins
You will receive an output like this:
OutputNAME      TYPE       CLUSTER-IP      EXTERNAL-IP   PORT(S)          AGE
jenkins   NodePort   your_cluster_ip   <none>        8080:30000/TCP   15d
With NodePort and Jenkins operational, you are ready to access the Jenkins UI and begin exploring it.
Step 2 — Accessing the Jenkins UI
In this step, you will access and explore the Jenkins UI. Your NodePort service is accessible on port 30000 across the cluster nodes. You need to retrieve a node IP to access the Jenkins UI.
Use kubectl to retrieve your node IPs:
- kubectl get nodes -o wide
kubectl will produce an output with your external IPs:
OutputNAME        STATUS   ROLES    AGE   VERSION    INTERNAL-IP        EXTERNAL-IP        OS-IMAGE                       KERNEL-VERSION          CONTAINER-RUNTIME
your_node   Ready    <none>   16d   v1.18.8   your_internal_ip   your_external_ip   Debian GNU/Linux 10 (buster)   4.19.0-10-cloud-amd64   docker://18.9.9
your_node   Ready    <none>   16d   v1.18.8   your_internal_ip   your_external_ip   Debian GNU/Linux 10 (buster)   4.19.0-10-cloud-amd64   docker://18.9.9
your_node   Ready    <none>   16d   v1.18.8   your_internal_ip   your_external_ip   Debian GNU/Linux 10 (buster)   4.19.0-10-cloud-amd64   docker://18.9.9
Copy one of the your_external_ip values.
Now open a web browser and navigate to http://your_external_ip:30000.
A page will appear asking for an administrator password and instructions on retrieving this password from the Jenkins Pod logs.
Let’s use kubectl to pull the password from those logs.
First, return to your terminal and retrieve your Pod name:
- kubectl get pods -n jenkins
You will receive an output like this:
NAME                       READY   STATUS    RESTARTS   AGE
jenkins-6fb994cfc5-twnvn   1/1     Running   0          9m54s
Next, check the Pod’s logs for the admin password. Replace the highlighted section with your pod name:
- kubectl logs jenkins-6fb994cfc5-twnvn -n jenkins
You might need to scroll up or down to find the password:
Running from: /usr/share/jenkins/jenkins.war
webroot: EnvVars.masterEnvVars.get("JENKINS_HOME")
. . .

Jenkins initial setup is required. An admin user has been created and a password generated.
Please use the following password to proceed to installation:

your_jenkins_password

This may also be found at: /var/jenkins_home/secrets/initialAdminPassword
. . .
Copy your_jenkins_password. Now return to your browser and paste it into the Jenkins UI.
Once you enter the password, Jenkins will prompt you to install plugins. Because you are not doing anything unusual, select Install suggested plugins.
After installation, Jenkins will load a new page and ask you to create an admin user. Fill out the fields, or skip this step by pressing the skip and continue as admin link. This will leave your username as admin and your password as your_jenkins_password.
Another screen will appear asking about instance configuration. Click the Not now link and continue.
After this, Jenkins will create a summary of your choices and print Jenkins is ready! Click on start using Jenkins and the Jenkins home page will appear.
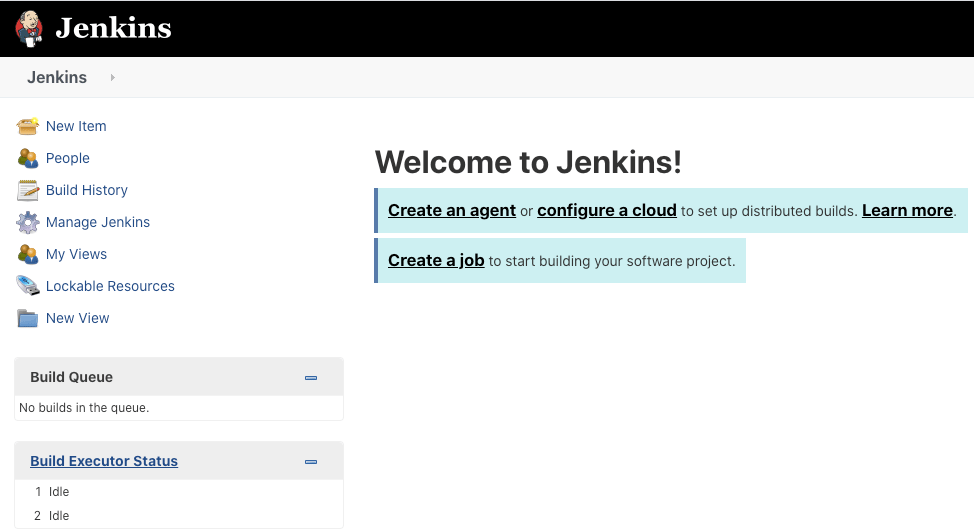
Now that you have installed and configured Jenkins on your cluster let’s demonstrate its capabilities and run a sample pipeline.
Step 3 — Running a Sample Pipeline
Jenkins excels at creating pipelines and managing CI/CD workflows. In this step we will build one of Jenkins’ sample pipelines.
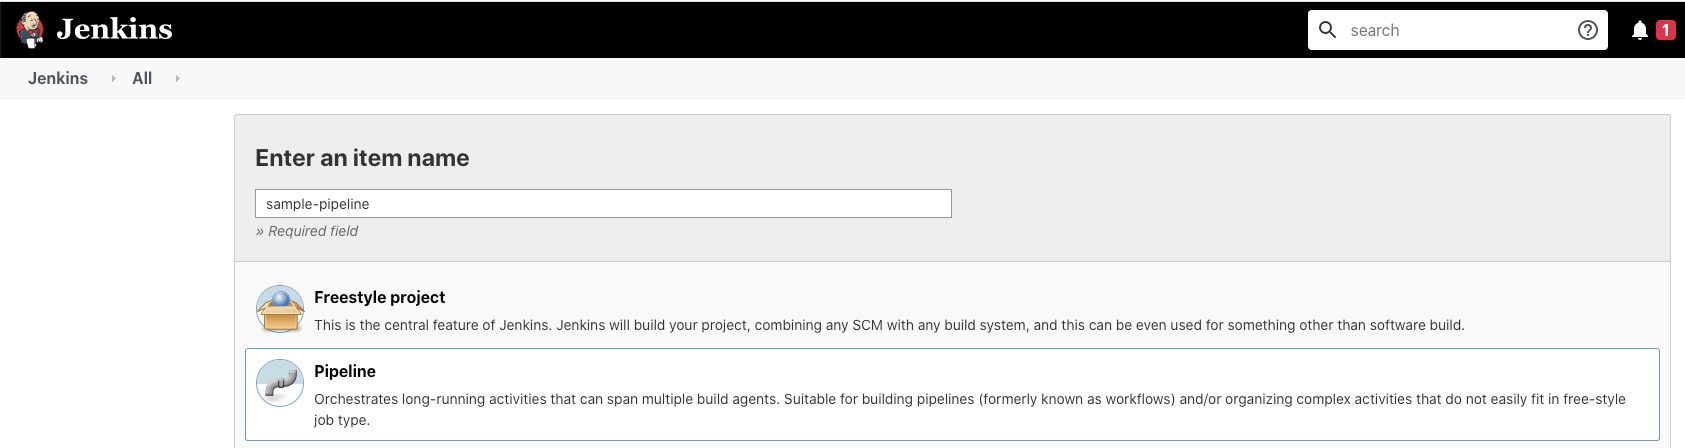
From the Jenkins home page, click on the New item link on the left-hand menu.
A new page will appear. Choose Pipeline and press OK.
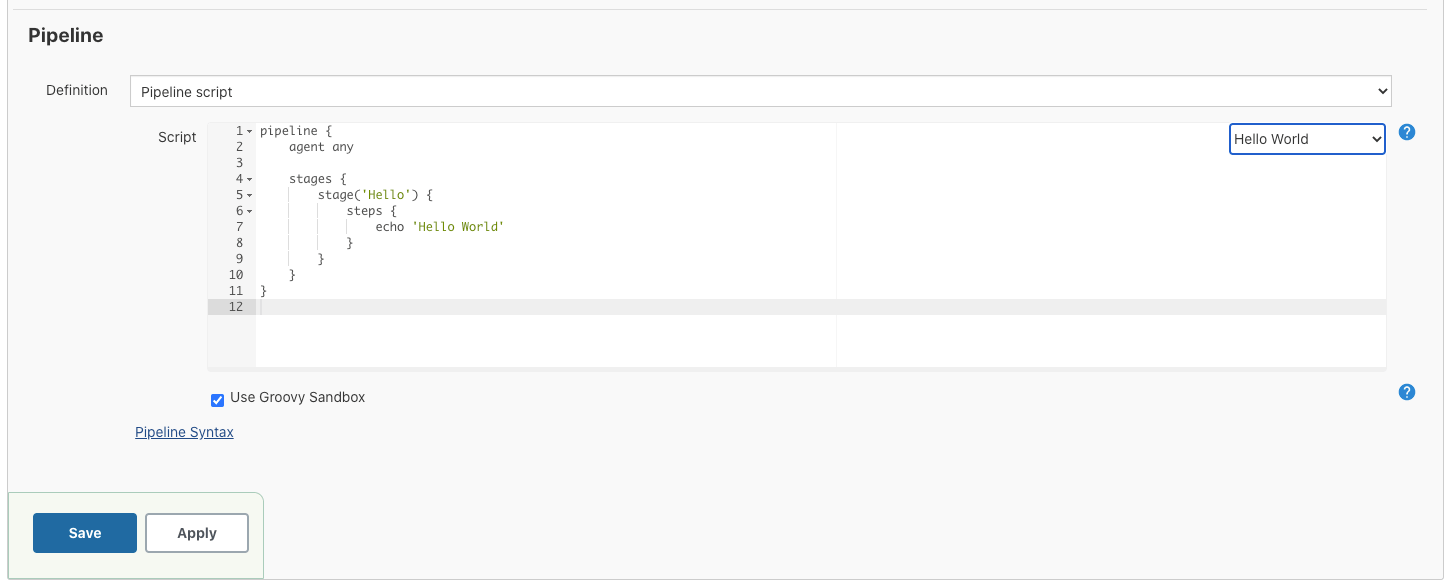
Jenkins will redirect you to the pipeline’s configuration. Find the Pipeline section and select Hello World from the try sample pipeline dropdown menu. This menu appears on the right-hand side. After selecting Hello World, click the Save button.
Jenkins will redirect you to the pipeline home page. Click on build now from the left-hand menu and watch the pipeline begin to run. The #1 signifies that this is the first build. Once the task completes, you will see some stats about the build.
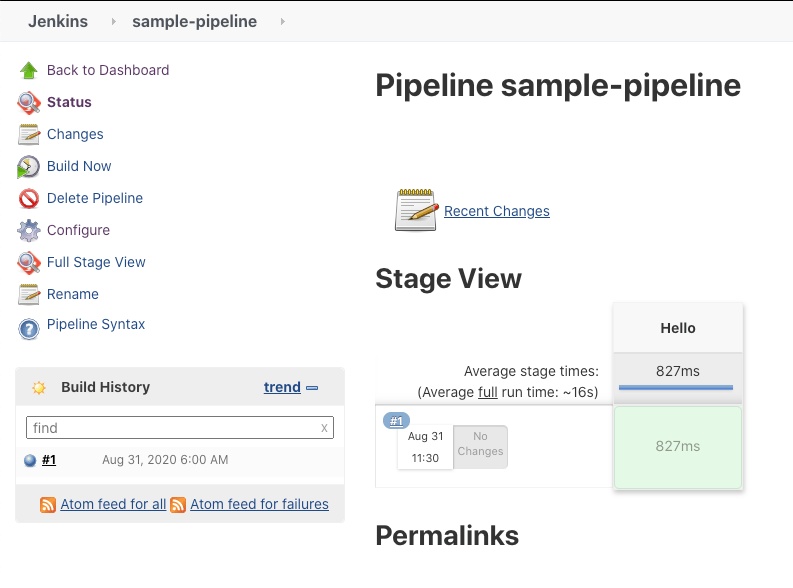
You can also check the console output to see what happened while the pipeline was running. Hover over #1 and a dropdown menu will appear. Choose console output to view the build’s details.
Your Hello World pipeline is not very sophisticated, but it does demonstrate just how well Jenkins can create and manage CI/CD workflows.
Conclusion
In this tutorial, you installed and configured Jenkins on a Kubernetes cluster and then you ran a sample pipeline. Jenkins has a large repository of plugins that can help you perform very complex operations. You can also add your GitHub repositories, multiple types of worker instances, and more. To learn more about using Jenkins, explore the official Jenkins documentation.
Thanks for learning with the DigitalOcean Community. Check out our offerings for compute, storage, networking, and managed databases.
About the author(s)
Supporting the open-source community one tutorial at a time. Former Technical Editor at DigitalOcean. Expertise in topics including Ubuntu 22.04, Ubuntu 20.04, CentOS, and more.
Still looking for an answer?
This textbox defaults to using Markdown to format your answer.
You can type !ref in this text area to quickly search our full set of tutorials, documentation & marketplace offerings and insert the link!
 This work is licensed under a Creative Commons Attribution-NonCommercial- ShareAlike 4.0 International License.
Become a contributor for community
Get paid to write technical tutorials and select a tech-focused charity to receive a matching donation.

DigitalOcean Documentation
Full documentation for every DigitalOcean product.

Resources for startups and AI-native businesses
The Wave has everything you need to know about building a business, from raising funding to marketing your product.
The developer cloud
Scale up as you grow — whether you're running one virtual machine or ten thousand.

Start building today
From GPU-powered inference and Kubernetes to managed databases and storage, get everything you need to build, scale, and deploy intelligent applications.
