By Jamon Camisso and Manikandan Kurup
Not using Ubuntu 22.04?
Choose a different version or distribution.
Introduction
Jenkins is an open-source CI/CD automation server used to automate building, testing, and deploying applications. As a Java-based service, Jenkins runs continuously and integrates with a wide range of development and DevOps tools.
In this tutorial, you will install Jenkins on Ubuntu using the official Jenkins APT repository, start and verify the Jenkins service, open firewall access on port 8080, and complete the initial web-based setup by creating an administrative user. You will also learn how to troubleshoot common issues such as Java version incompatibilities, service startup failures, and port conflicts.
By the end of this guide, you will have a working Jenkins installation for development and testing. Because Jenkins is not secure by default, the tutorial also highlights key security considerations to address before using Jenkins in production environments.
Key Takeaways:
- Jenkins is a Java-based CI/CD automation server, and Java 17 or later is required for Jenkins to install and run correctly on Ubuntu.
- To install the latest stable Jenkins version on Ubuntu, you should add the official Jenkins APT repository, as Ubuntu’s default repository often provides outdated releases.
- Jenkins runs as a
systemdservice on Ubuntu, allowing administrators to manage it easily usingsystemctl start,stop,restart, andstatus. - By default, Jenkins listens on port
8080, which must be opened in the UFW firewall to access the Jenkins web interface from a browser. - During first-time setup, Jenkins must be unlocked using the initial admin password located at
/var/lib/jenkins/secrets/initialAdminPassword. - Installing the recommended Jenkins plugins during setup provides essential functionality and is the fastest way to get a working CI/CD environment.
- A default Jenkins installation on Ubuntu is not secure for production use and should be hardened with authentication, HTTPS via a reverse proxy, and restricted network access.
- Most Jenkins installation and startup issues, such as service failures, port conflicts, or inaccessible web UI can be resolved by checking Java compatibility, firewall rules, and Jenkins system logs.
Prerequisites
To follow this tutorial, you will need:
-
One Ubuntu server configured with a non-root sudo user and firewall by following the Initial Server Setup with Ubuntu guide. We recommend starting with at least 1 GB of RAM. Visit Jenkins’s “Hardware Recommendations” for guidance in planning the capacity of a production-level Jenkins installation.
-
OpenJDK 17 or higher installed, following our guidelines on installing specific versions of OpenJDK on Ubuntu.
Step 1 — Installing Jenkins
The version of Jenkins available in the default Ubuntu repositories is often behind the version maintained by the Jenkins project. To install a more current and actively maintained release, we will add the official Jenkins repository and install Jenkins from there.
Start by downloading the Jenkins repository signing key and storing it in the system keyrings directory:
- sudo mkdir -p /etc/apt/keyrings
- sudo wget -O /etc/apt/keyrings/jenkins-keyring.asc https://pkg.jenkins.io/debian-stable/jenkins.io-2026.key
This command retrieves the Jenkins GPG key and saves it in /etc/apt/keyrings, which is the recommended location for repository keys on modern Ubuntu systems.
Next, add the Jenkins Debian repository to your APT sources:
- echo "deb [signed-by=/etc/apt/keyrings/jenkins-keyring.asc]" https://pkg.jenkins.io/debian-stable binary/ | sudo tee /etc/apt/sources.list.d/jenkins.list > /dev/null
The signed-by option instructs apt to verify packages from this repository using the specific GPG key you downloaded earlier. This limits trust to only this repository and avoids using a system-wide key.
After adding the repository, update the local package index so apt can recognize the new source:
- sudo apt update
Finally, install Jenkins and its required dependencies:
- sudo apt install jenkins
Once the installation completes, Jenkins is installed on the system but the service is not yet running. In the next step, you will start the Jenkins service and verify that it is working correctly.
Step 2 — Starting Jenkins
Now that Jenkins is installed, start it using systemctl:
- sudo systemctl start jenkins.service
Since systemctl does not display status output, we’ll use the status command to verify that Jenkins started successfully:
- sudo systemctl status jenkins
If everything went well, the beginning of the status output shows that the service is active and configured to start at boot:
Output● jenkins.service - Jenkins Continuous Integration Server
     Loaded: loaded (/usr/lib/systemd/system/jenkins.service; enabled; preset: enabled)
     Active: active (running) since Thu 2026-02-05 06:20:00 UTC; 29s ago
   Main PID: 2292 (java)
      Tasks: 50 (limit: 4655)
     Memory: 718.8M (peak: 719.6M)
        CPU: 27.378s
     CGroup: /system.slice/jenkins.service
             └─2292 /usr/bin/java -Djava.awt.headless=true -jar /usr/share/java/jenkins.war
Now that Jenkins is up and running, adjust your firewall rules so that you can reach it from a web browser to complete the initial setup.
Step 3 — Opening the Firewall
To set up a UFW firewall, check out Step 4 - Setting up a Basic Firewall of our Initial Server Setup with Ubuntu guide. By default, Jenkins runs on port 8080. Open that port using ufw:
- sudo ufw allow 8080
Note: If the firewall is inactive, the following commands will allow OpenSSH and enable the firewall:
- sudo ufw allow OpenSSH
- sudo ufw enable
Check ufw’s status to confirm the new rules:
- sudo ufw status
You’ll notice that traffic is allowed to port 8080 from anywhere:
OutputStatus: active

To                         Action      From
--                         ------      ----
OpenSSH                    ALLOW       Anywhere
8080                       ALLOW       Anywhere
OpenSSH (v6)               ALLOW       Anywhere (v6)
8080 (v6)                  ALLOW       Anywhere (v6)
With Jenkins installed and a firewall configured, you have completed the installation stage and can continue with configuring Jenkins.
Step 4 — Setting Up Jenkins
To set up your installation, visit Jenkins on its default port, 8080, using your server domain name or IP address: http://your_server_ip_or_domain:8080
You should receive the Unlock Jenkins screen, which displays the location of the initial password:
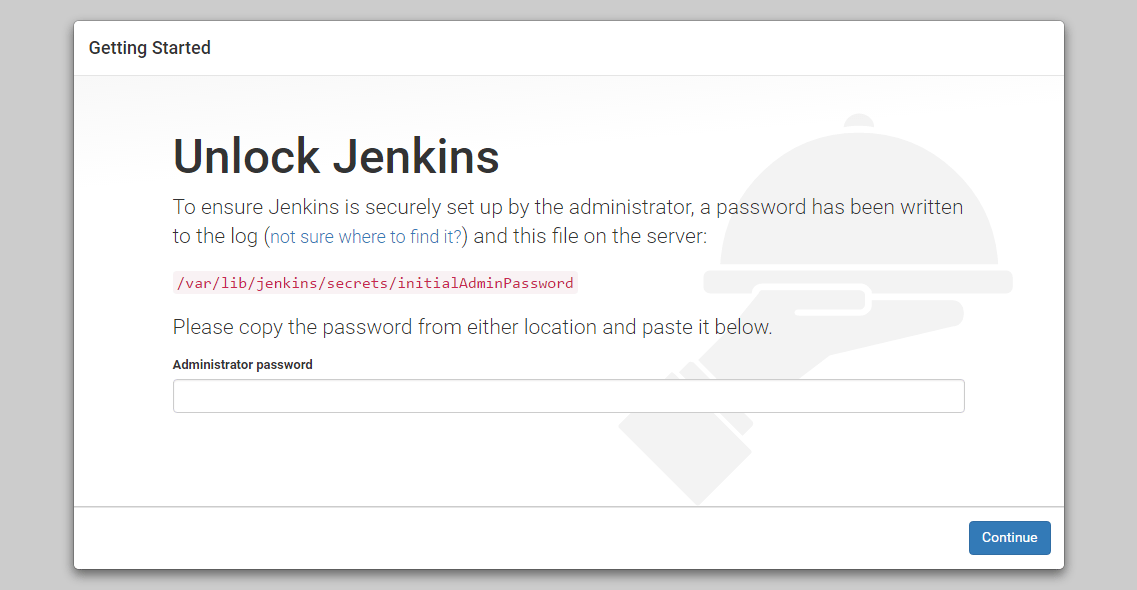
In the terminal window, use the cat command to display the password:
- sudo cat /var/lib/jenkins/secrets/initialAdminPassword
Copy the 32-character alphanumeric password from the terminal and paste it into the Administrator password field, then click Continue.
The next screen presents the option of installing suggested plugins or selecting specific plugins:
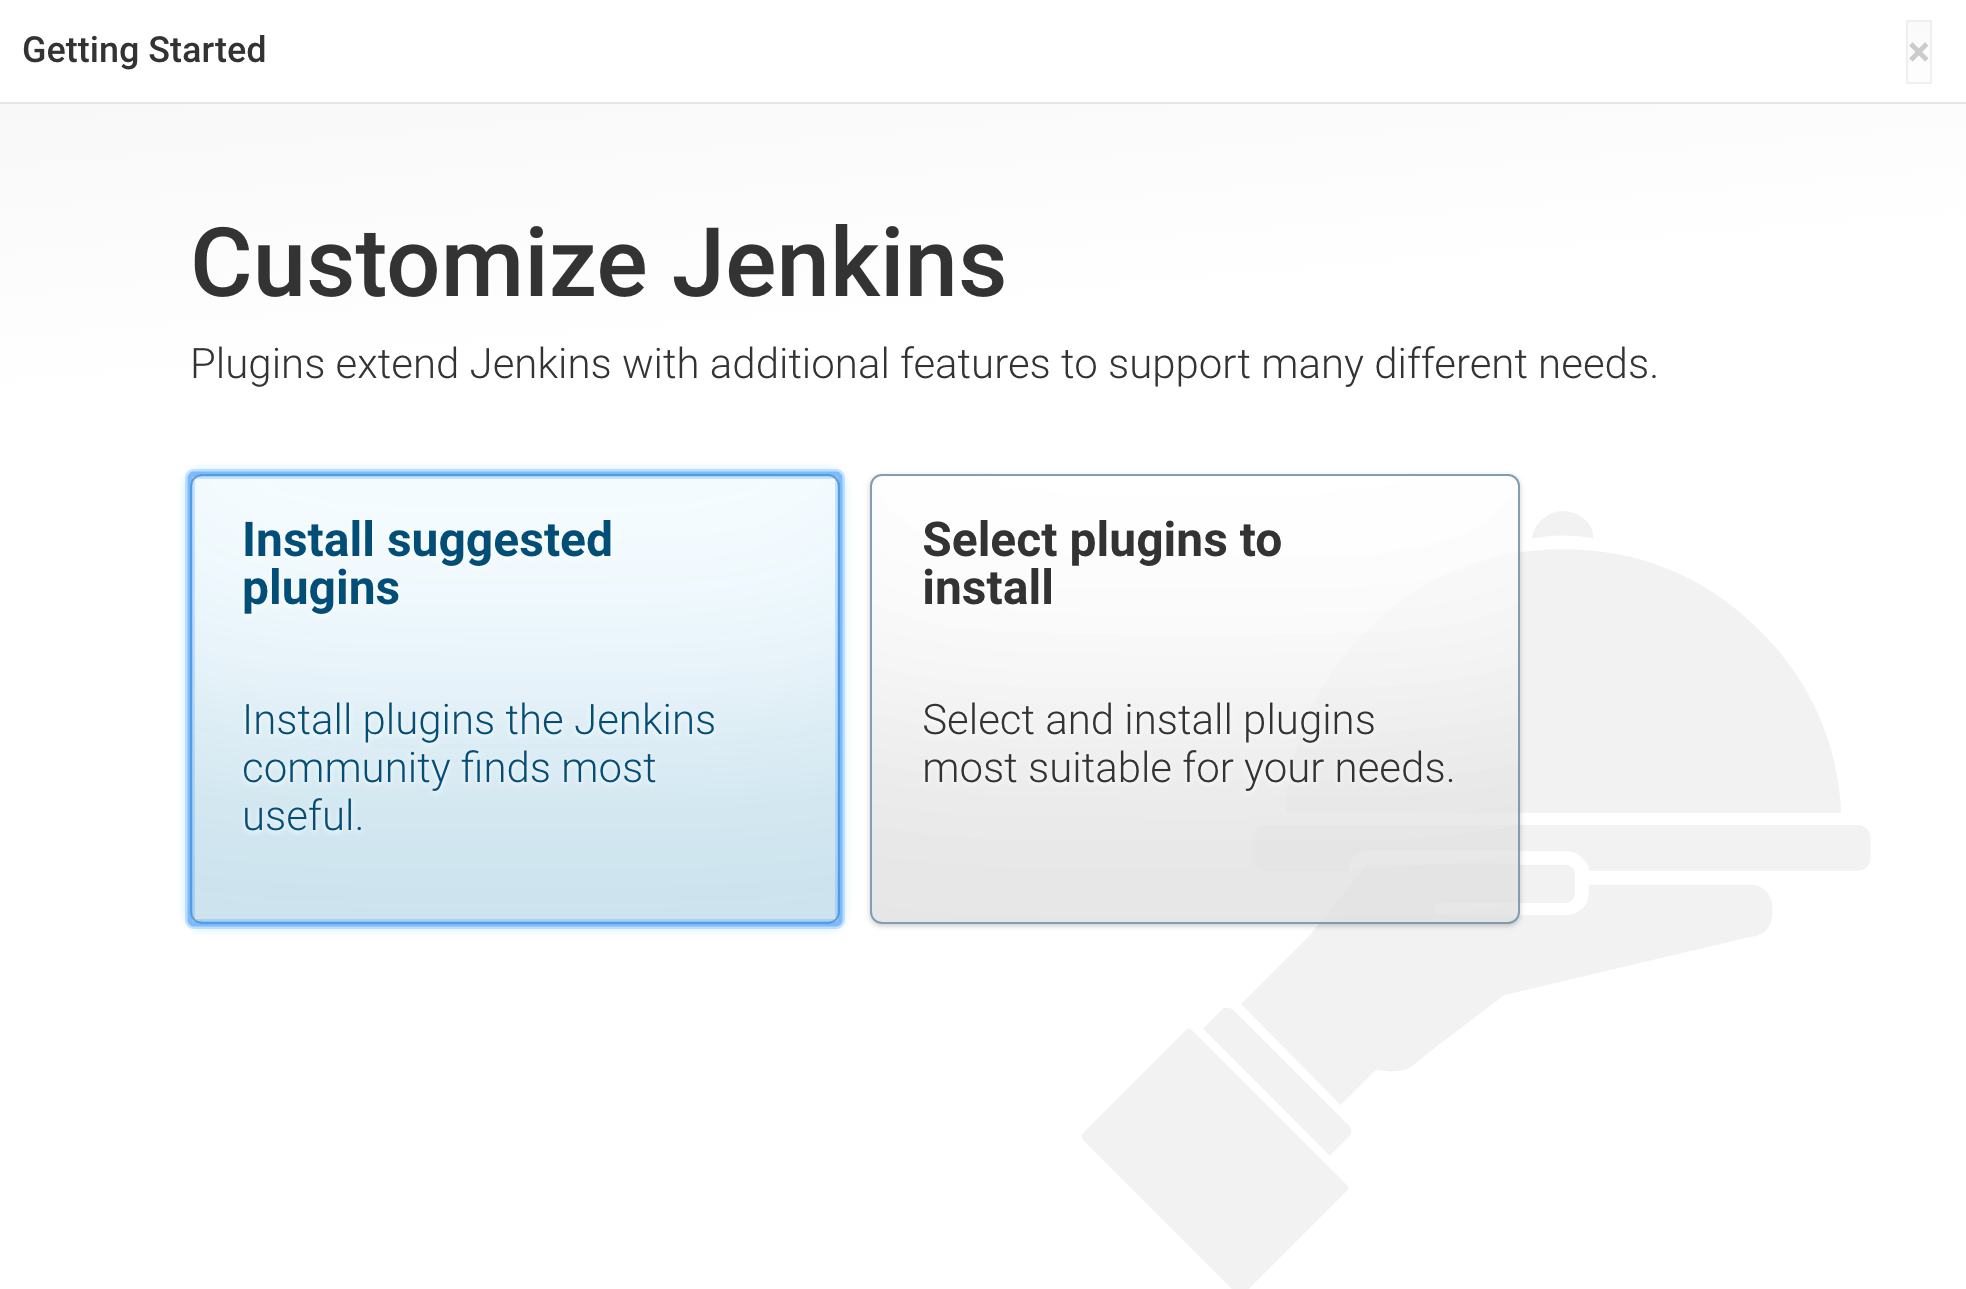
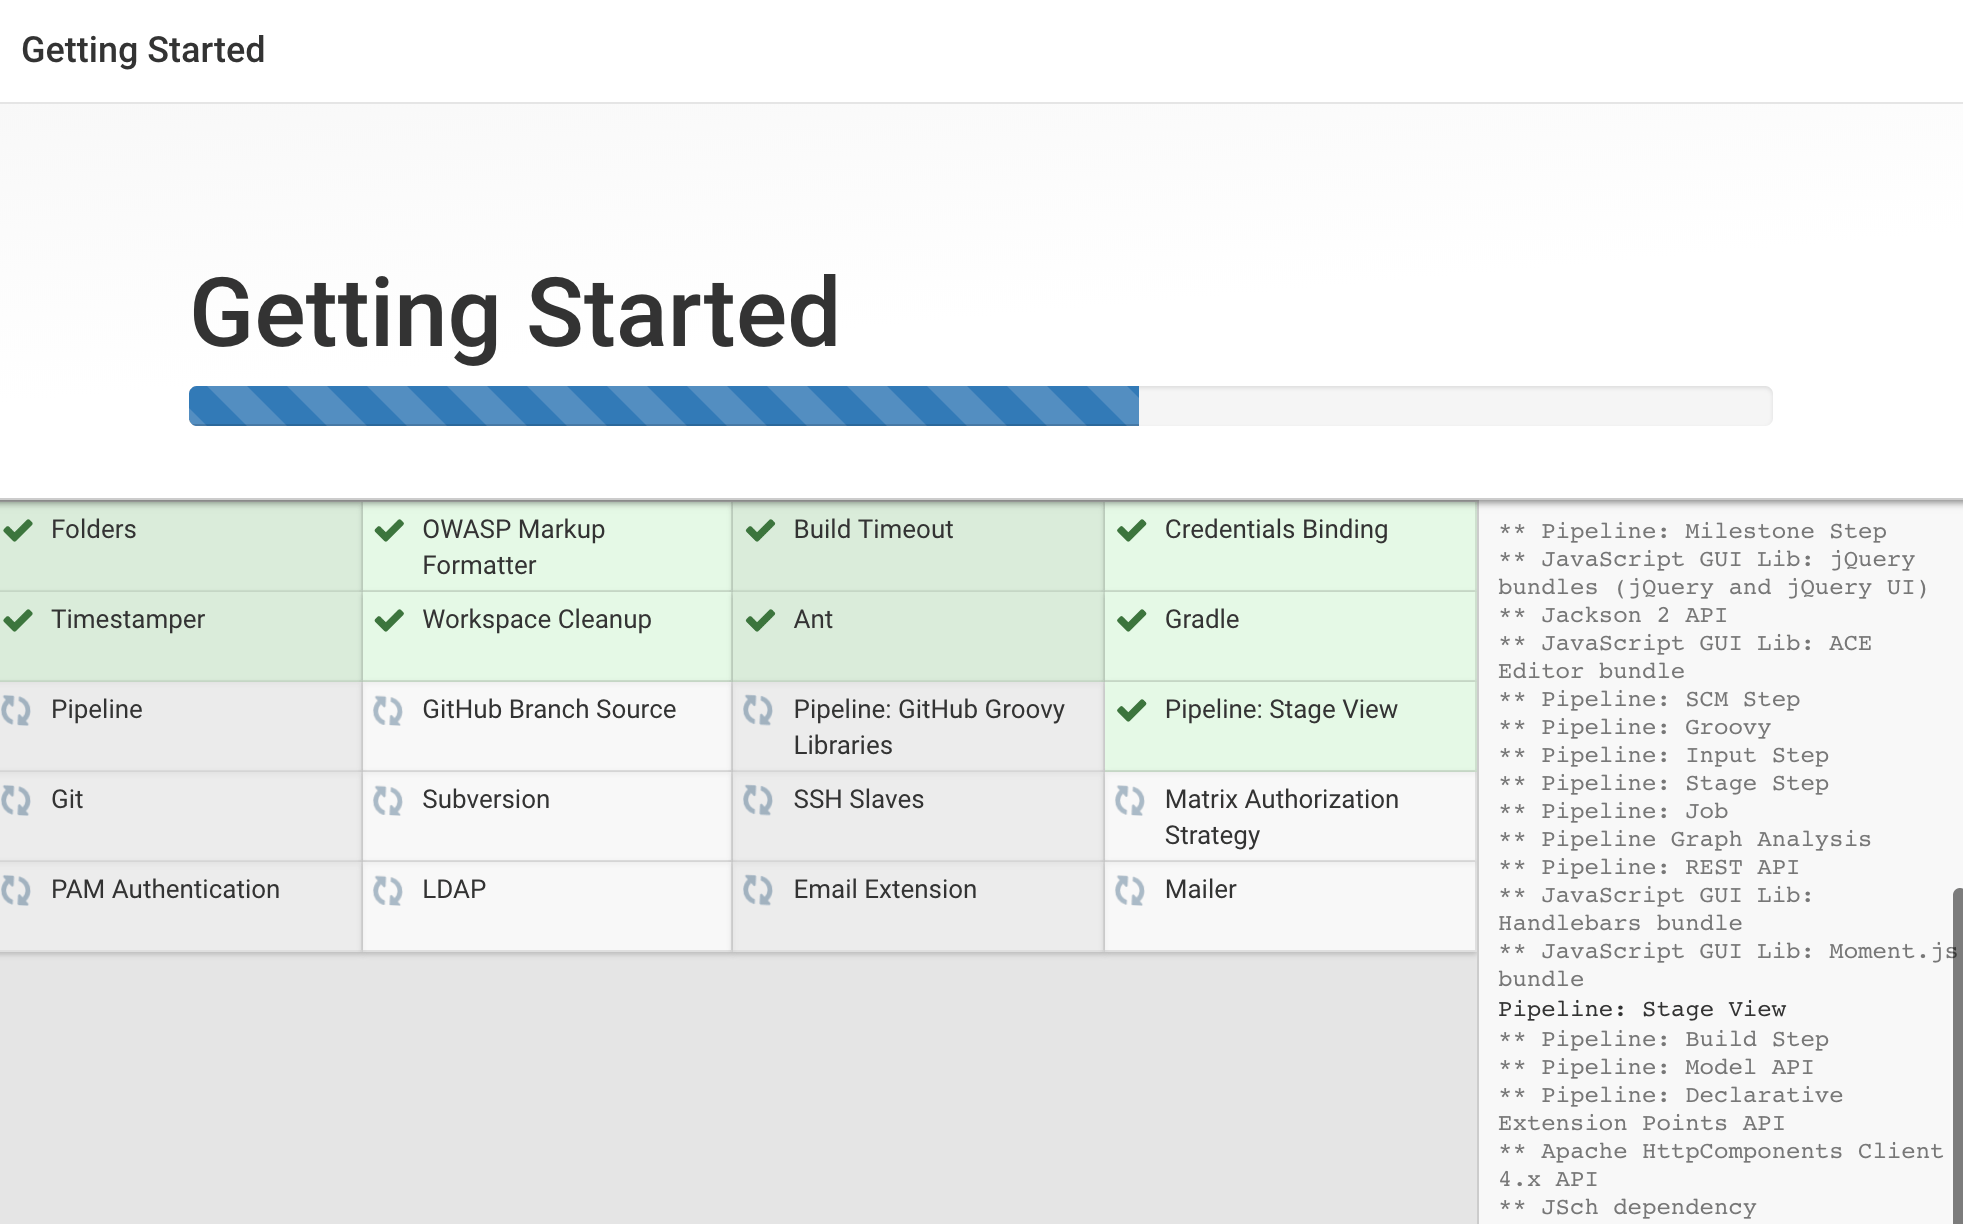
Select the Install suggested plugins option, which will immediately begin the installation process.
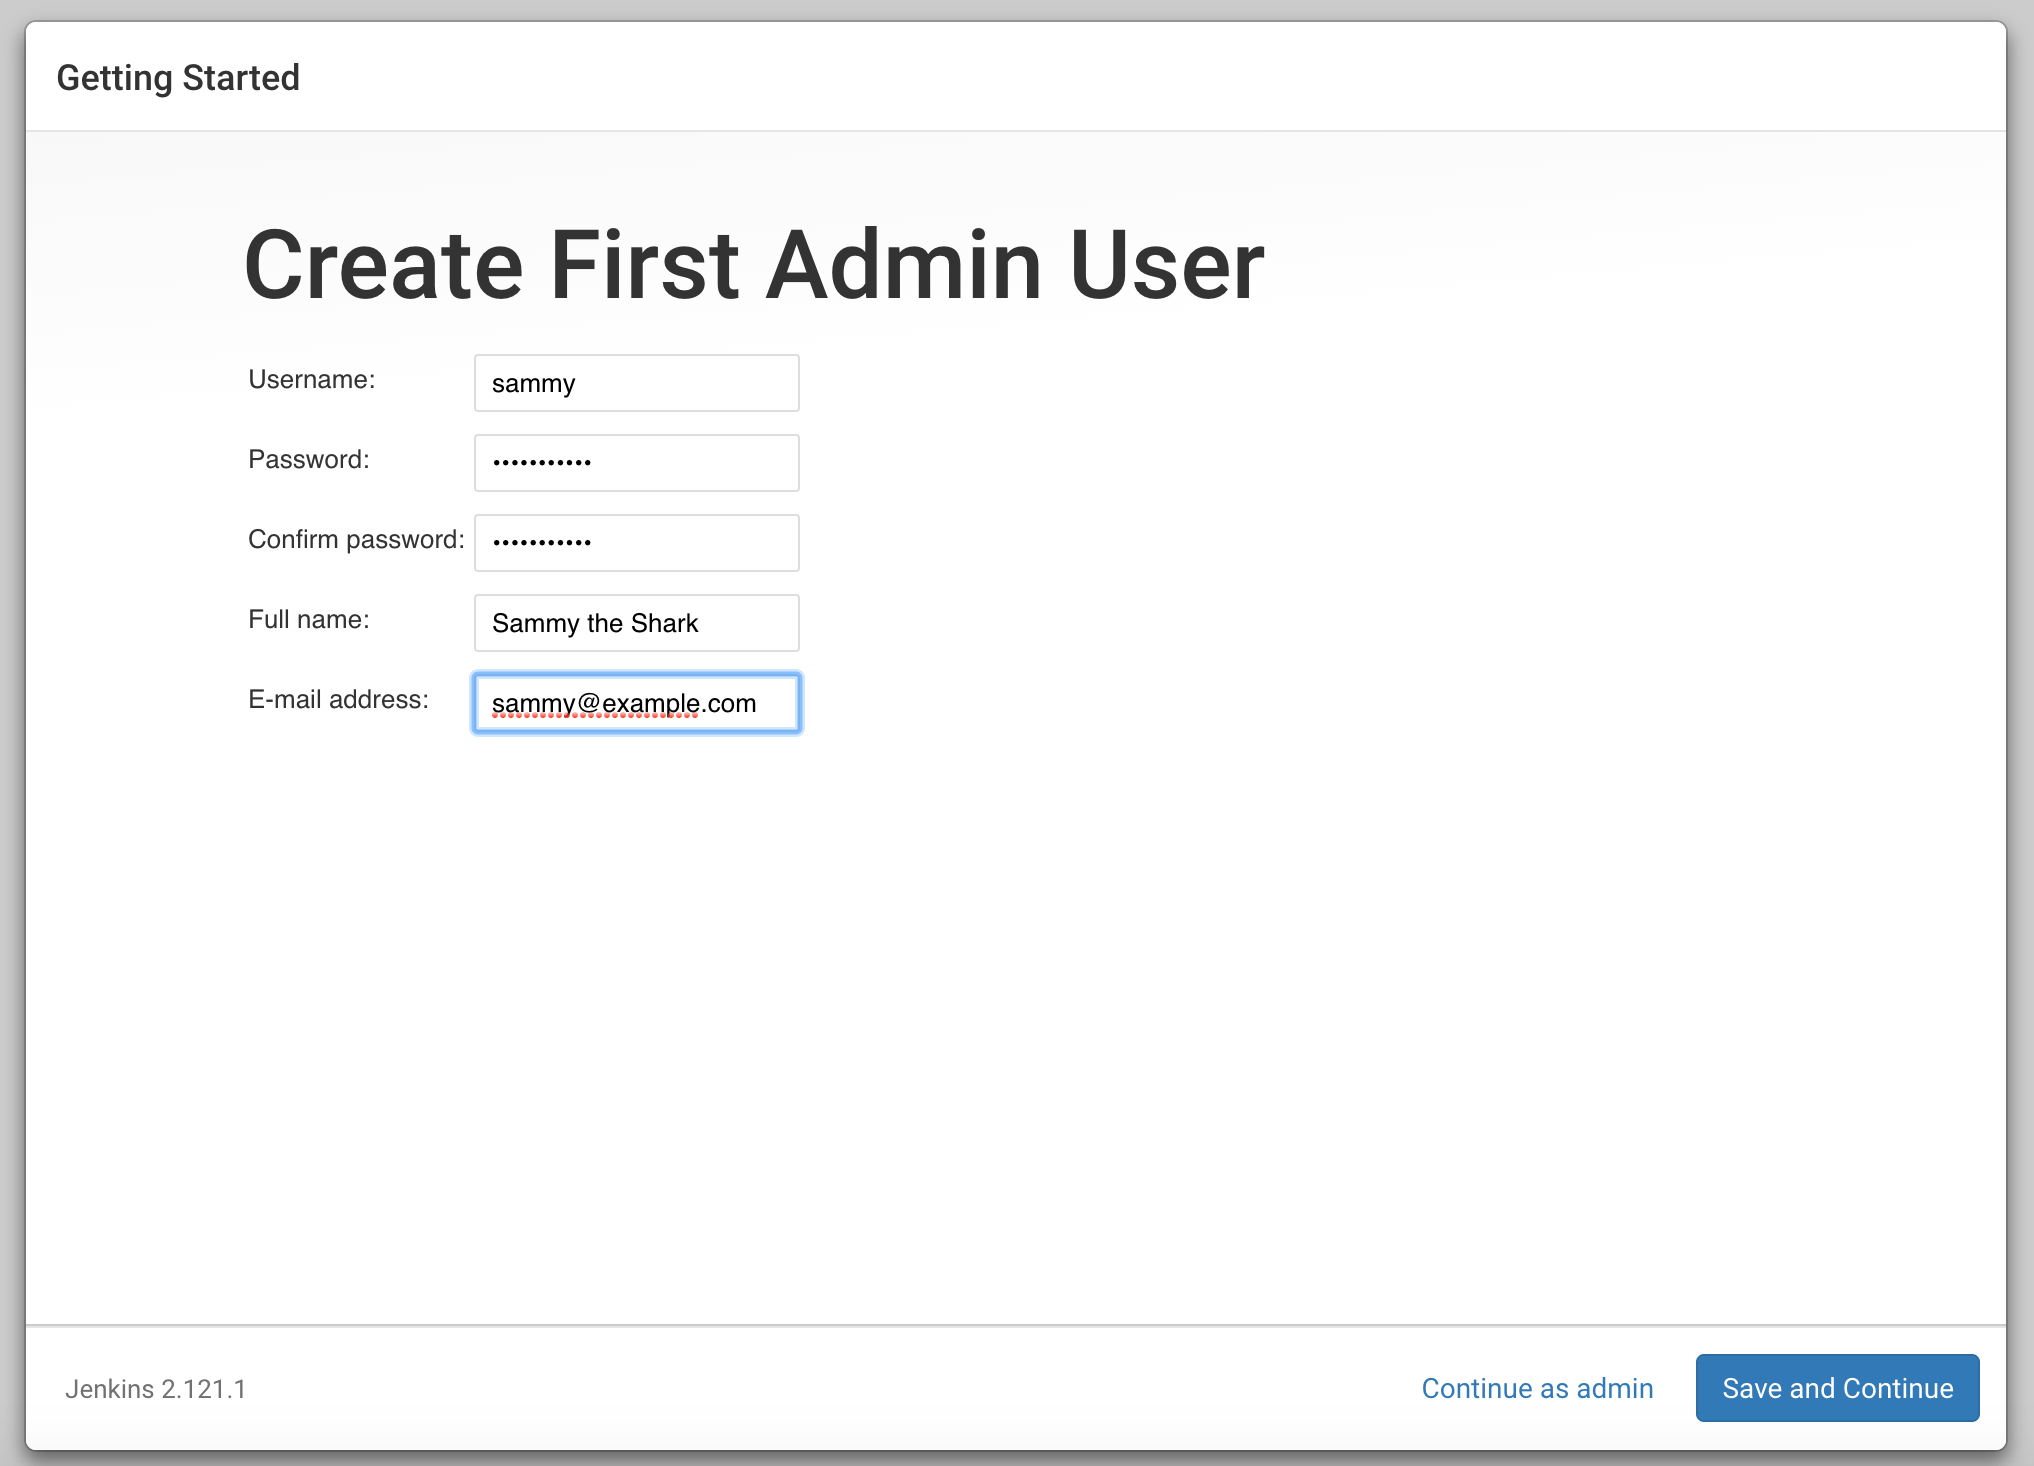
When the installation is complete, you’ll be prompted to set up the first administrative user. It’s possible to skip this step and continue as admin using the initial password from above, but we’ll take a moment to create the user.
Note: The default Jenkins server is NOT encrypted, so the data submitted with this form is not protected. Refer to our article on How to Configure Jenkins with SSL to protect user credentials and information about builds that are transmitted via the web interface.

Enter the name and password for your user:
You’ll receive an Instance Configuration page that will ask you to confirm the preferred URL for your Jenkins instance. Confirm either the domain name for your server or your server’s IP address:
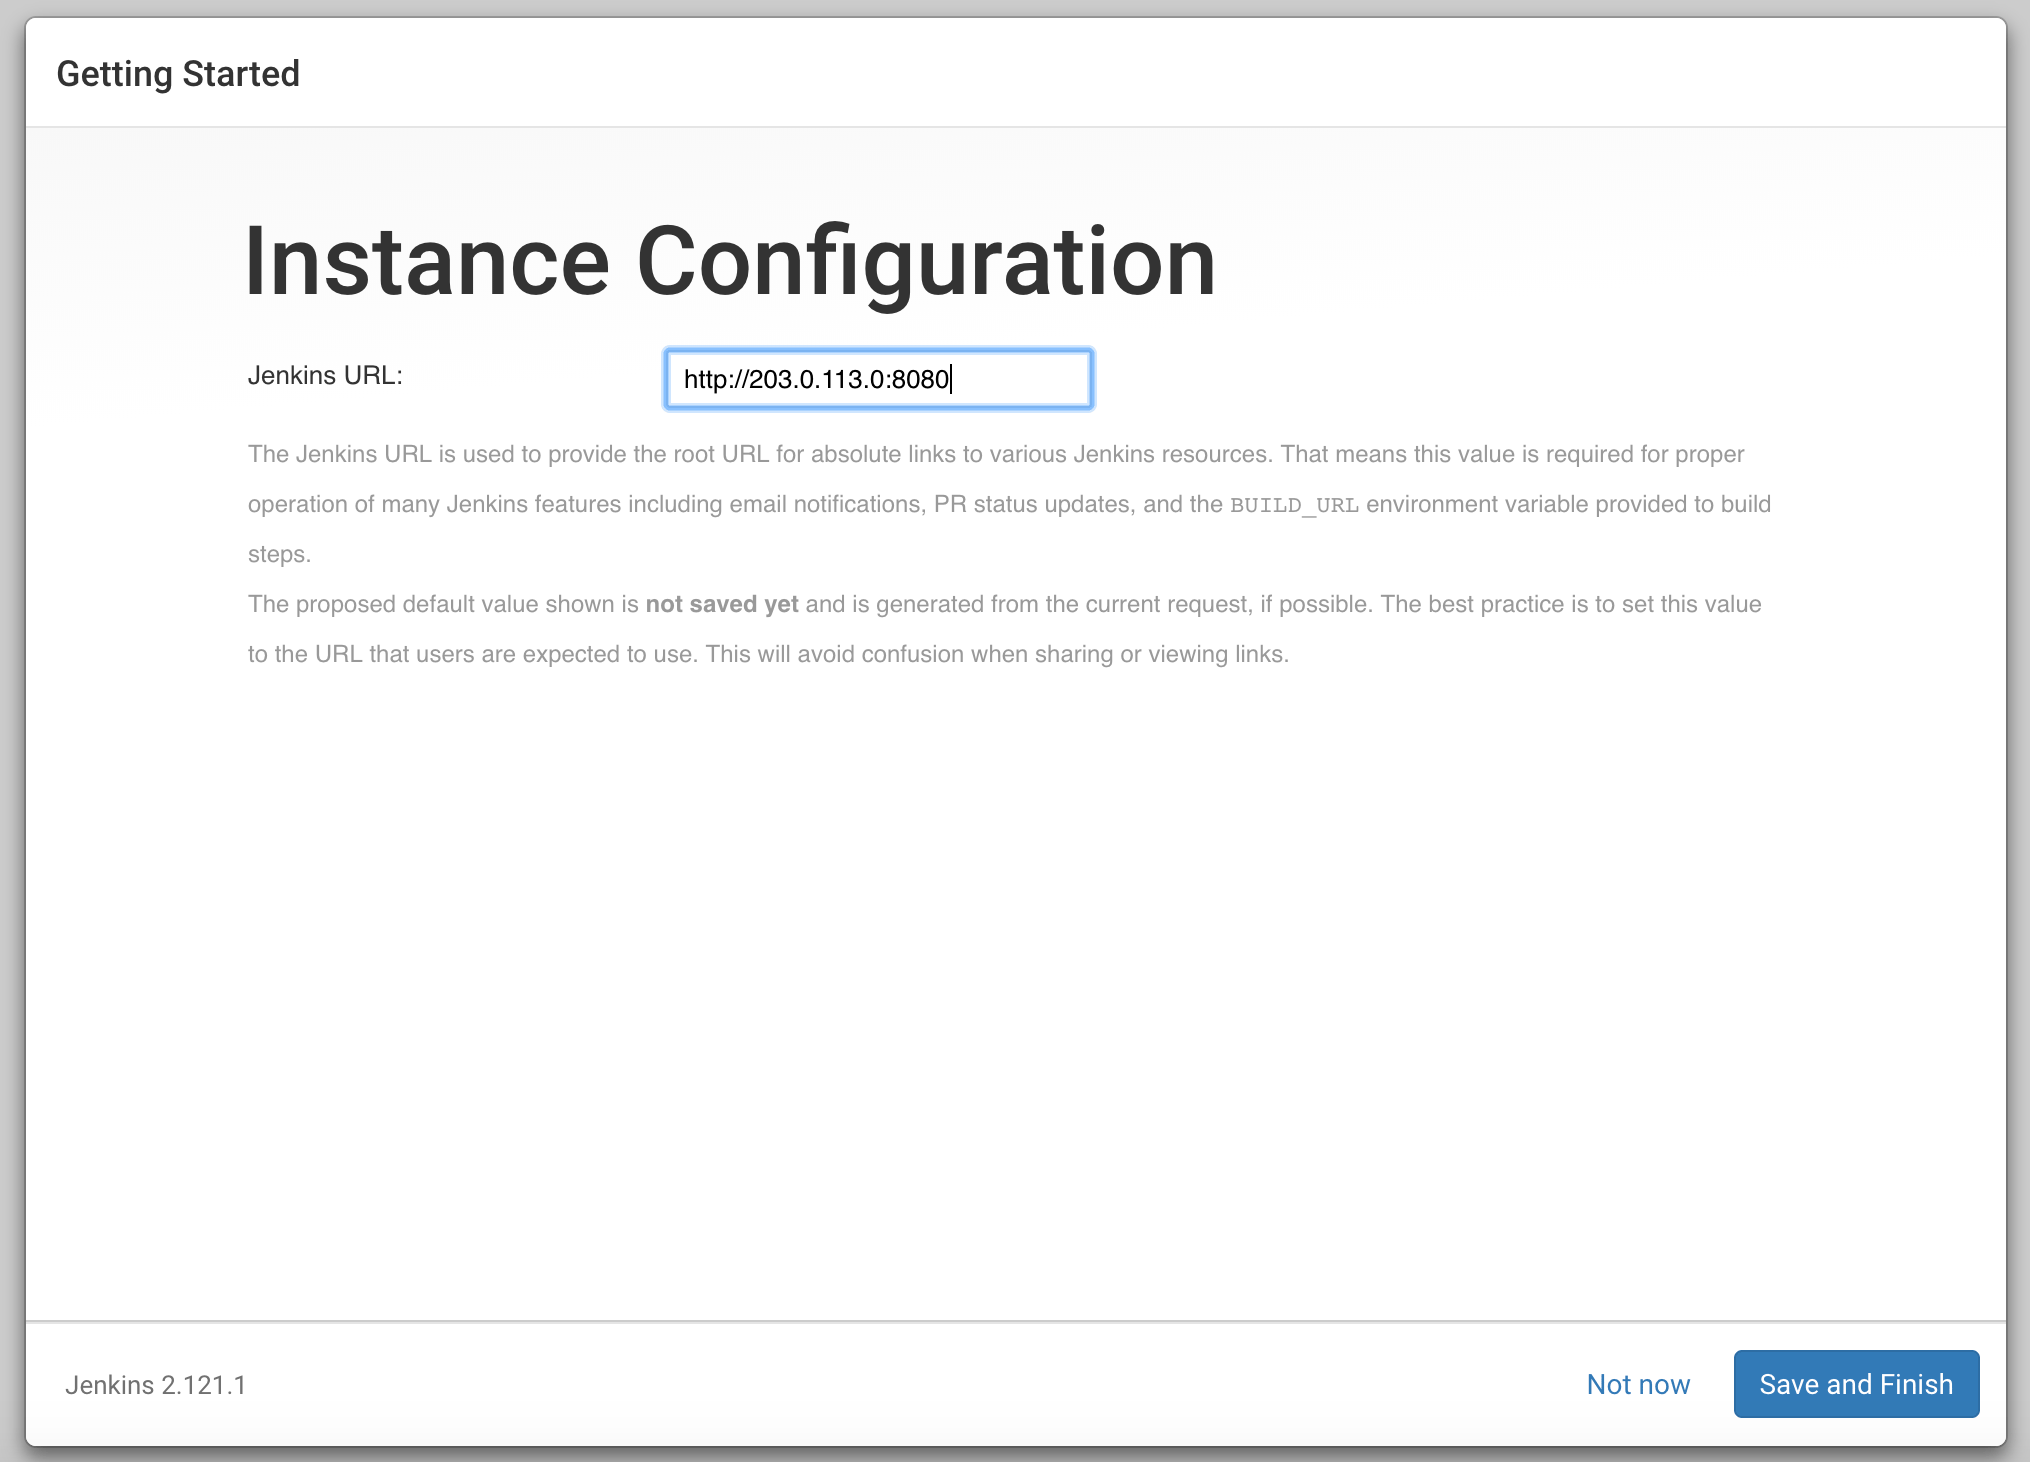
After confirming the appropriate information, click Save and Finish. You’ll receive a confirmation page confirming that “Jenkins is Ready!”:
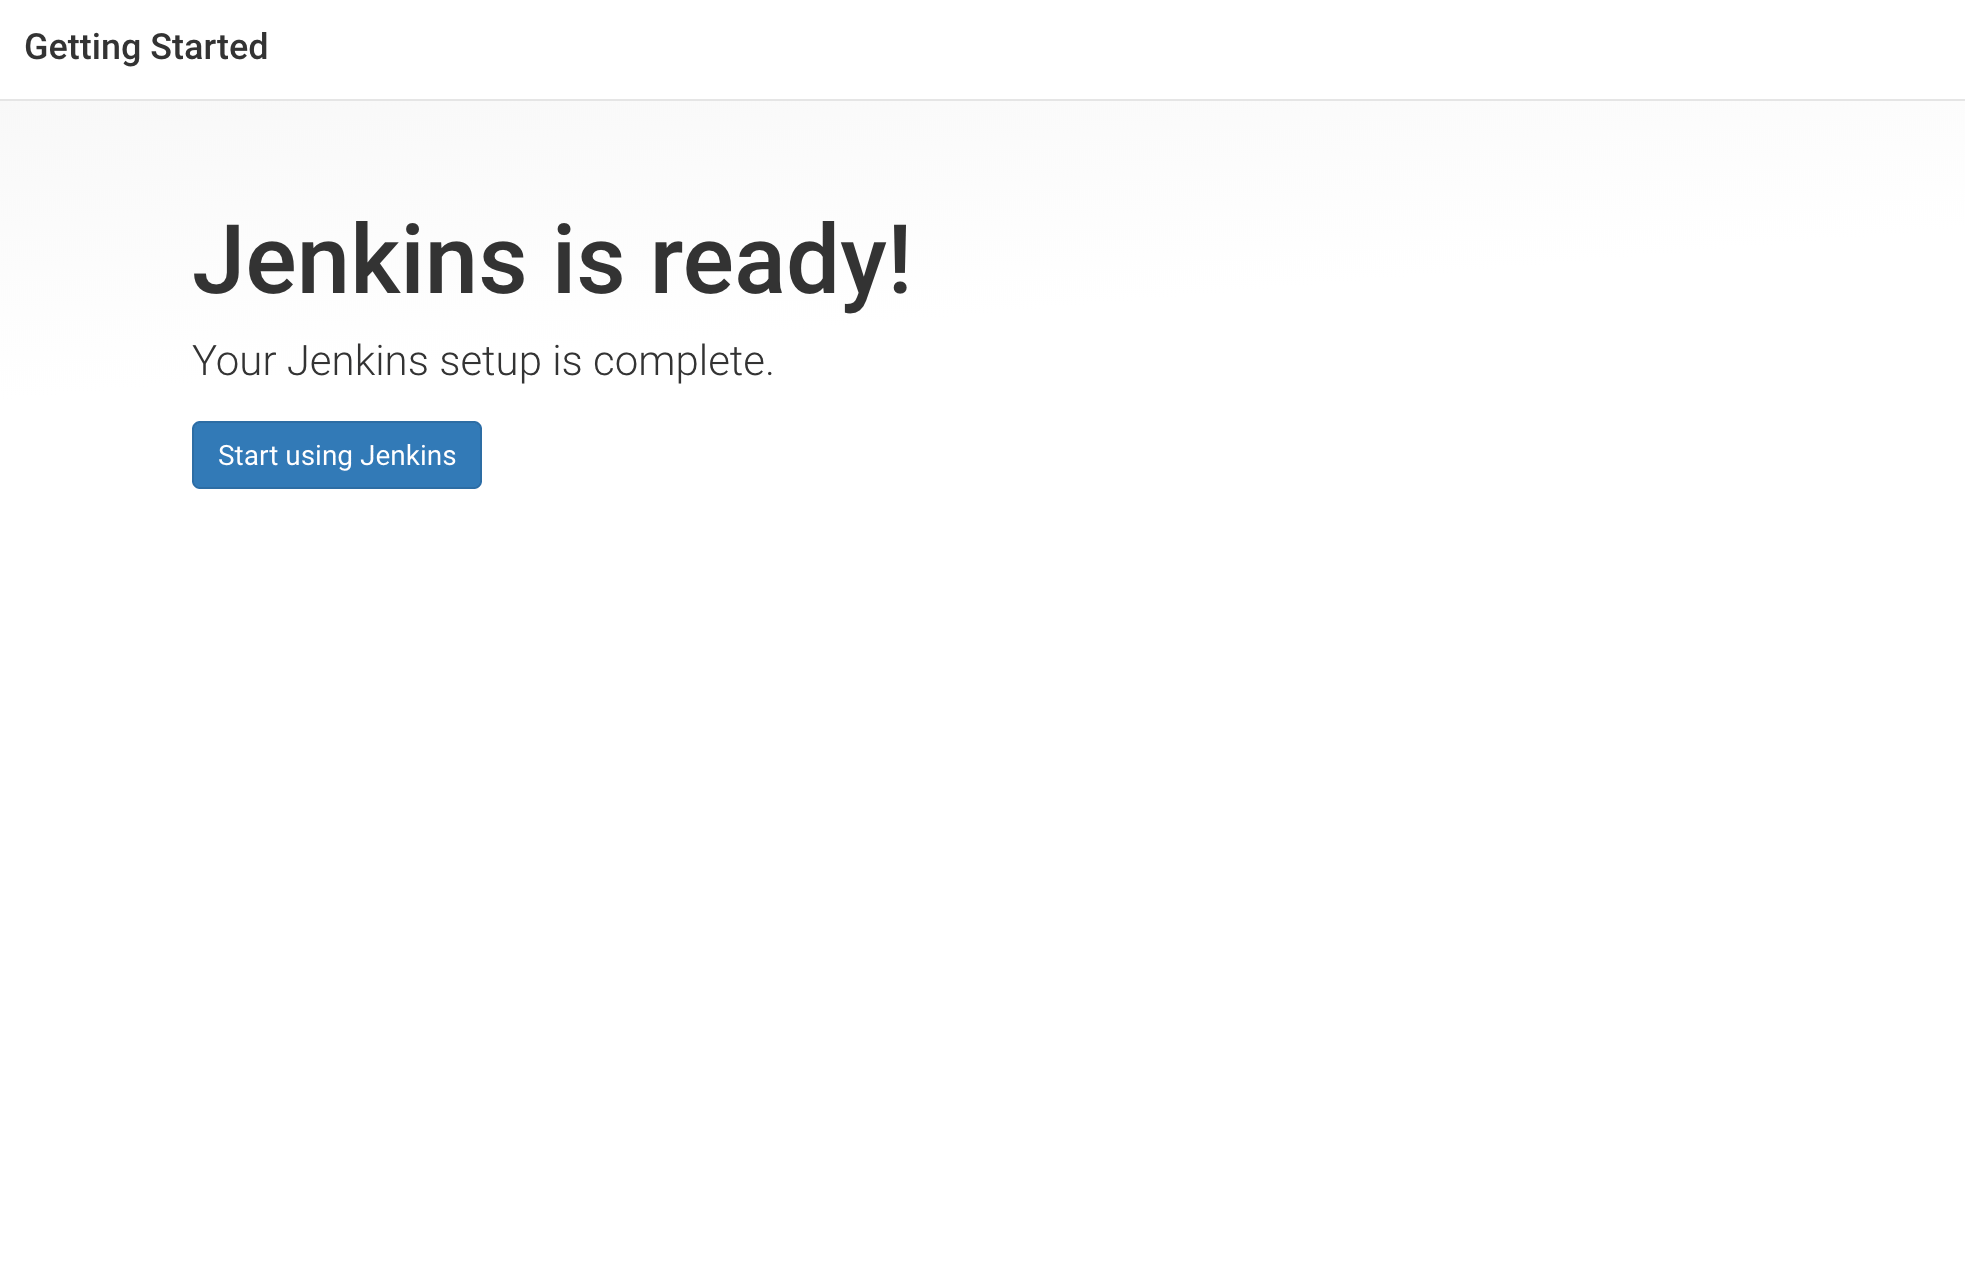
Click Start using Jenkins to visit the main Jenkins dashboard:
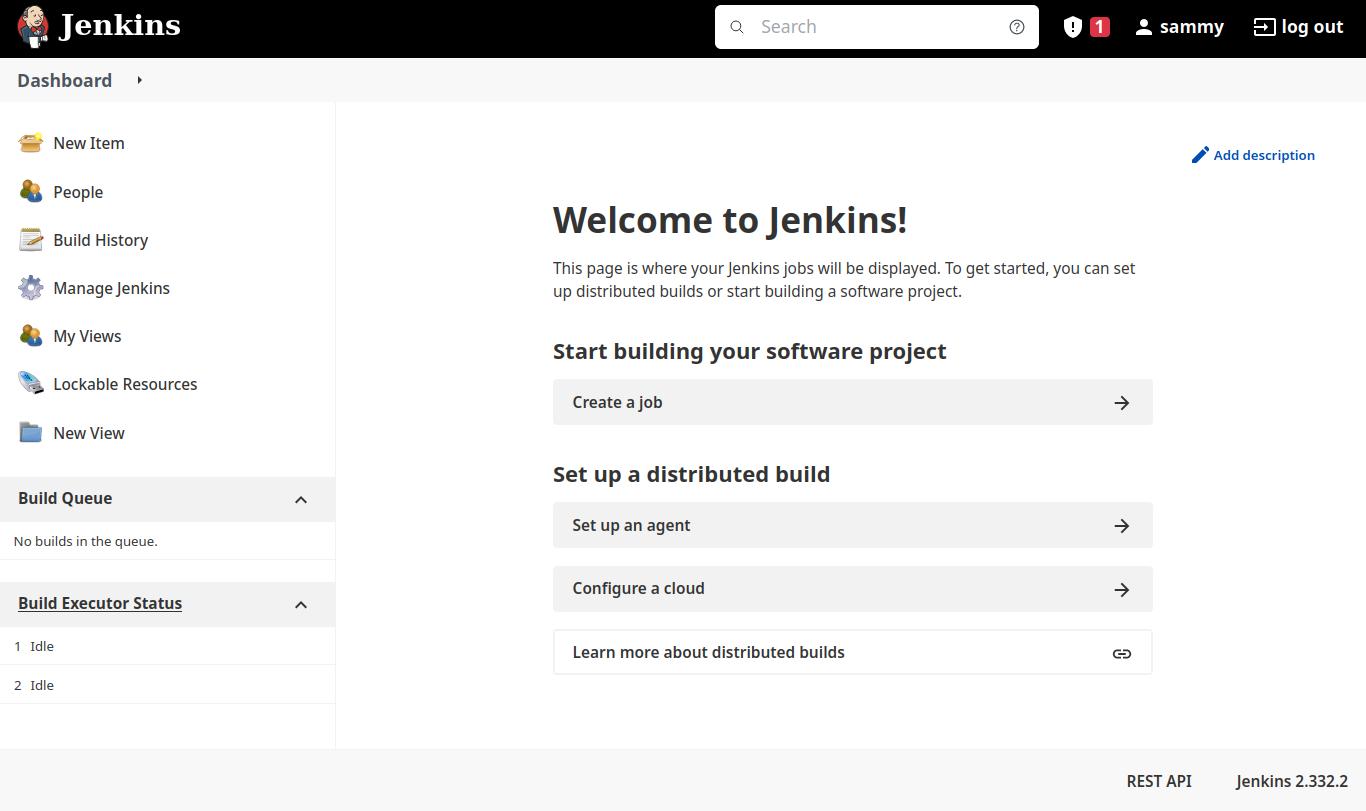
At this point, you have completed a successful installation of Jenkins.
Securing Jenkins
By default, a new Jenkins installation is intended for development and testing and is not hardened for production use. Before using Jenkins for real workloads or exposing it to the internet, you should apply several security measures to protect user credentials, build secrets, and source code.
Enable authentication and authorization
During the initial setup process, Jenkins prompts you to create an administrative user. You should always complete this step and avoid running Jenkins with anonymous access enabled. Authentication ensures that only authorized users can access the Jenkins dashboard and manage jobs.
After completing the setup wizard, you can review and adjust security settings by navigating to Manage Jenkins and then Security. Jenkins should be configured to require users to log in before accessing any functionality.
For most installations:
- Use Jenkins’s built-in user database for small teams.
- Assign the admin role only to trusted users.
- Avoid running Jenkins with unrestricted anonymous access.
Limiting who can log in and what actions they can perform is the foundation of a secure Jenkins environment.
Protect Jenkins with HTTPS
By default, Jenkins serves traffic over plain HTTP, which means credentials and build data are transmitted unencrypted. This is acceptable only for local testing.
For any remote or production use, Jenkins should be accessed over HTTPS. The recommended approach is to place Jenkins behind a reverse proxy such as Nginx or Apache, which handles TLS termination.
Using a reverse proxy allows you to:
- Encrypt traffic using TLS certificates (for example, from Let’s Encrypt)
- Restrict access at the web server level
- Hide Jenkins from direct exposure on port
8080
Once HTTPS is configured, ensure Jenkins is accessed only through the secure URL.
Restrict network access
Jenkins should not be publicly accessible unless absolutely necessary. Network-level restrictions provide an additional layer of security beyond authentication.
At the firewall level:
- Allow access to Jenkins only from trusted IP addresses or internal networks.
- Avoid opening port
8080to the entire internet when possible.
If Jenkins must be exposed publicly, combine firewall restrictions with HTTPS and strong authentication to reduce risk. Limiting network access helps prevent unauthorized users from even reaching the Jenkins login page.
Keep Jenkins and plugins up to date
Security vulnerabilities are frequently discovered and patched in Jenkins core and its plugins. Keeping Jenkins and its plugins up to date is essential to maintaining a secure installation.
To reduce exposure:
- Regularly update Jenkins to the latest supported release.
- Review installed plugins and remove any that are unused.
- Keep plugins updated, as outdated plugins are a common source of security issues.
Updates can be managed from Manage Jenkins -> Plugins.
Secure credentials and secrets
Jenkins often stores sensitive information such as:
- API tokens
- SSH keys
- Cloud provider credentials
Always store secrets using Jenkins’s Credentials system rather than hard-coding them in pipeline scripts or configuration files.
Limit credential scope so that:
- Jobs can access only the credentials they need
- Sensitive secrets are not exposed in build logs
Run Jenkins with least privilege
Jenkins should run as its dedicated jenkins user, not as root. This limits the damage if Jenkins or a plugin is compromised.
Ensure that:
- Jenkins owns its home directory (
/var/lib/jenkins) - File permissions do not allow unnecessary write access by other users
Avoid granting sudo privileges to the Jenkins user unless absolutely required.
Monitor logs and audit activity
Regularly reviewing logs helps detect misconfigurations or suspicious activity.
Useful locations include:
- Jenkins system logs (available from the Jenkins UI)
- System logs via
journalctl -u jenkins
Enable logging and auditing features as your environment grows, especially for production deployments.
Plan for backups and recovery
A secure Jenkins setup also includes recovery planning.
You should regularly back up:
- The Jenkins home directory
- Job configurations
- Credentials and plugin configurations
Backups ensure that you can recover quickly from security incidents, system failures, or accidental misconfigurations.
Securing Jenkins is an ongoing process rather than a one-time task. By enabling authentication, encrypting traffic, restricting access, and keeping Jenkins up to date, you significantly reduce the risk of unauthorized access and data exposure.
Common Installation Issues and Fixes
While installing and setting up Jenkins on Ubuntu is usually straightforward, some common issues can prevent the service from starting correctly or make the web interface inaccessible. Let’s look at how to identify and resolve those problems.
Jenkins fails to start after installation
If Jenkins does not start after installation, the most common cause is an unsupported or missing Java version. Jenkins requires Java 17 or newer, and the service will fail if Java is not available or is too old.
To check the Jenkins service status, run:
- sudo systemctl status jenkins
If the service is in a failed state, inspect the logs for more details:
- sudo journalctl -u jenkins --no-pager
Look for errors related to Java, such as "Unsupported class version" or "java: command not found". Verify the installed Java version with:
- java -version
If Java is missing or outdated, install a supported version and restart Jenkins:
- sudo systemctl restart jenkins
Jenkins is running but the web interface is not accessible
If Jenkins appears to be running but you cannot access it in a browser, first confirm that it is listening on its default port (8080):
- ss -ltnp | grep 8080
If Jenkins is not listening on this port, it may not have started correctly, or it may be configured to use a different port.
Next, check the firewall status:
- sudo ufw status
Ensure that port 8080 is allowed. If it is not, allow traffic on that port:
- sudo ufw allow 8080
You can also test local access directly from the server:
- curl http://localhost:8080
If this works locally but not from your browser, the issue is likely related to firewall rules, network configuration, or the server’s public IP or DNS settings.
Port 8080 is already in use
Jenkins uses port 8080 by default. If another service is already using this port, Jenkins will fail to start.
To check which process is using port 8080, run:
- ss -ltnp | grep 8080
If another service is bound to this port, you can either stop that service or change the port Jenkins uses. To change the Jenkins port, edit the default configuration file:
- sudo nano /etc/default/jenkins
Locate the following line:
HTTP_PORT=8080
Change the port number, save the file, and restart Jenkins:
- sudo systemctl restart jenkins
Jenkins service starts and then stops immediately
If Jenkins starts and then exits shortly afterward, this is often caused by insufficient system resources or configuration errors.
Check the logs to confirm the cause:
- sudo journalctl -u jenkins --no-pager
Common reasons include:
- Not enough available memory on the server
- Java version incompatibility
- File permission issues in
/var/lib/jenkins
Ensure the system meets minimum memory requirements and that Jenkins owns its data directory:
- sudo chown -R jenkins:jenkins /var/lib/jenkins
Restart the service after making any changes.
Initial admin password file not found
During the first-time setup, Jenkins displays a prompt asking for the initial admin password. If the file cannot be found, Jenkins may not have completed its startup process.
Verify that Jenkins is running:
- sudo systemctl status jenkins
Once the service is active, retrieve the password again:
- sudo cat /var/lib/jenkins/secrets/initialAdminPassword
If the file still does not exist, check the logs to ensure Jenkins completed initialization successfully.
FAQs
1. What Java version is required for Jenkins on Ubuntu?
Jenkins requires Java 17 or newer for current releases. Official documentation lists Java 17 and Java 21 as supported runtime versions for the Jenkins controller. Running with an older or unsupported Java will cause Jenkins not to start.
Supported versions for modern Jenkins releases:
- Java 17 (OpenJDK 17): Recommended for maximum stability and plugin compatibility
- Java 21 (OpenJDK 21): Fully supported and the default on Ubuntu 24.04
On Ubuntu 24.04, installing default-jdk gives you OpenJDK 21 by default, which is acceptable for Jenkins. You can verify your Java version with:
- java -version
If Java is older than version 17, Jenkins will fail to start.
2. Can Jenkins run without Java installed?
No. Jenkins is a Java-based application, and a compatible JVM is required to run the Jenkins server process. If Java is not installed before Jenkins, the service will fail to start. Official install guidance explicitly recommends installing Java before Jenkins to avoid startup errors.
3. How do I start and stop the Jenkins service?
Jenkins on Ubuntu uses systemd for service management. You can control the service with standard systemctl commands:
-
Start Jenkins:
- sudo systemctl start jenkins
-
Stop Jenkins:
- sudo systemctl stop jenkins
-
Restart Jenkins:
- sudo systemctl restart jenkins
-
Check the service status:
- sudo systemctl status jenkins
4. What port does Jenkins use by default?
By default, Jenkins listens on TCP port 8080.
You can confirm this with:
- ss -ltnp | grep 8080
If port 8080 is already in use, Jenkins will fail to start unless you change the port in:
/etc/default/jenkins
5. How do I reset the Jenkins admin password?
To reset the initial admin password, retrieve it from the Jenkins secrets directory:
- sudo cat /var/lib/jenkins/secrets/initialAdminPassword
If you’ve already completed setup and lost access:
-
Stop Jenkins
-
Use the Jenkins script console or disable security temporarily by editing:
/var/lib/jenkins/config.xml -
Restart Jenkins and create a new admin user.
Warning: This process grants full access. Always re-enable security immediately after recovery.
6. How do I uninstall Jenkins from Ubuntu?
You can uninstall Jenkins using the following steps:
-
Stop the Jenkins service:
- sudo systemctl stop jenkins
-
Remove the Jenkins package:
- sudo apt remove --purge jenkins
or, equivalently:
- sudo apt-get remove --purge jenkins
(the
--purgeoption removes configuration files too) -
(Optional) Remove Jenkins data: If you want to fully delete Jenkins settings, jobs, plugins, etc.:
- sudo rm -rf /var/lib/jenkins
You may also remove the Jenkins user/group and repository files if desired:
- sudo rm /etc/apt/sources.list.d/jenkins.list
- sudo rm /etc/apt/keyrings/jenkins-keyring.asc
- sudo apt update
This ensures that Jenkins, its configuration files, and stored data are fully removed.
Conclusion
In this tutorial, you installed Jenkins on Ubuntu, started and verified the Jenkins service, configured firewall access, and completed the initial web-based setup. You also learned how to identify and resolve common installation issues related to Java versions, service startup failures, and port conflicts.
At this point, you have a fully functional Jenkins installation for development and testing. Because Jenkins is not secure by default, you should apply additional hardening, such as enabling authentication, configuring HTTPS with a reverse proxy, restricting network access, and keeping Jenkins and plugins up to date before using it in production.
With Jenkins installed and running, you can begin creating jobs, pipelines, and automation workflows to support your CI/CD processes.
To learn more about what you can do using Jenkins, check out other tutorials on the subject:
Thanks for learning with the DigitalOcean Community. Check out our offerings for compute, storage, networking, and managed databases.
About the author(s)
With over 6 years of experience in tech publishing, Mani has edited and published more than 75 books covering a wide range of data science topics. Known for his strong attention to detail and technical knowledge, Mani specializes in creating clear, concise, and easy-to-understand content tailored for developers.
Still looking for an answer?
This textbox defaults to using Markdown to format your answer.
You can type !ref in this text area to quickly search our full set of tutorials, documentation & marketplace offerings and insert the link!
This comment has been deleted
$ sudo apt-get install jenkins
Reading package lists… Done
Building dependency tree… Done
Reading state information… Done
The following additional packages will be installed:
net-tools
The following NEW packages will be installed:
jenkins net-tools
0 upgraded, 2 newly installed, 0 to remove and 0 not upgraded.
Need to get 87.6 MB/87.8 MB of archives.
After this operation, 92.1 MB of additional disk space will be used.
Do you want to continue? [Y/n] Y
Ign:1 https://pkg.jenkins.io/debian-stable binary/ jenkins 2.346.3
Ign:1 https://pkg.jenkins.io/debian-stable binary/ jenkins 2.346.3
Ign:1 https://pkg.jenkins.io/debian-stable binary/ jenkins 2.346.3
Err:1 https://pkg.jenkins.io/debian-stable binary/ jenkins 2.346.3
Cannot initiate the connection to mirrors.tuna.tsinghua.edu.cn:443 (2402:f000:1:400::2). - connect (101: Network is unreachable) Could not connect to mirrors.tuna.tsinghua.edu.cn:443 (101.6.15.130), connection timed out
E: Failed to fetch https://mirrors.tuna.tsinghua.edu.cn/jenkins/debian-stable/jenkins_2.346.3_all.deb Cannot initiate the connection to mirrors.tuna.tsinghua.edu.cn:443 (2402:f000:1:400::2). - connect (101: Network is unreachable) Could not connect to mirrors.tuna.tsinghua.edu.cn:443 (101.6.15.130), connection timed out
E: Unable to fetch some archives, maybe run apt-get update or try with --fix-missing?
Hello team,
I just follow the process to install Jenkins on Ubuntu 22.04 LTS & and i faced an below ERROR:
E: The repository ‘http://pkg.jenkins.io/debian-stable binary/ Release’ is not signed."
For that please update the “repository key” and “sources.list” step into installation process
I have found that Solution on Jenkins official site https://www.jenkins.io/blog/2023/03/27/repository-signing-keys-changing/
Thanks…!!
Hello Team,
I just follow your steps to install jenkins on UBUNTU 22.04 LTS
I have found that I got an ERROR “E: The repository ‘http://pkg.jenkins.io/debian-stable binary/ Release’ is not signed.”
So, have found solution that keys are changes from the official jenkins side
Here I am providing link for that … please refer this and update on this tutorial as well… Thank you …
Link: https://www.jenkins.io/blog/2023/03/27/repository-signing-keys-changing/
Had errors that I’ve been unable to solve while trying to start Jenkins.
$ sudo service jenkins start
Job for jenkins.service failed because the control process exited with error code.
See "systemctl status jenkins.service" and "journalctl -xeu jenkins.service" for details.
Service Status
$ systemctl status jenkins.service
● jenkins.service - Jenkins Continuous Integration Server
     Loaded: loaded (/lib/systemd/system/jenkins.service; enabled; vendor preset: enabled)
     Active: activating (auto-restart) (Result: exit-code) since Tue 2023-09-26 16:43:15 PST; 9ms ago
    Process: 19094 ExecStart=/usr/bin/jenkins (code=exited, status=1/FAILURE)
   Main PID: 19094 (code=exited, status=1/FAILURE)
        CPU: 1.939s
Journal
~
~
~
~
~
~
~
~
~
~
~
~
~
~
~
~
~
~
~
~
~
~
~
-- No entries --
Java Version
$ java --version
openjdk 11.0.20.1 2023-08-24
OpenJDK Runtime Environment (build 11.0.20.1+1-post-Ubuntu-0ubuntu122.04)
OpenJDK 64-Bit Server VM (build 11.0.20.1+1-post-Ubuntu-0ubuntu122.04, mixed mode, sharing)
This is right after sudo apt install jenkins. It simply fails to start and I’m not sure what’s going on.
this is great walk through!
however I stuck for a few hours because I started my droplet on Ubuntu 23 (not 22 as the tutorial states)
and the pgp keys did not match, you need to go for
sudo wget -O /usr/share/keyrings/jenkins-keyring.asc \ [https://pkg.jenkins.io/debian-stable/jenkins.io-2023.key](https://pkg.jenkins.io/debian-stable/jenkins.io-2023.key)
echo deb [signed-by=/usr/share/keyrings/jenkins-keyring.asc] \ https://pkg.jenkins.io/debian-stable binary/ | sudo tee \ /etc/apt/sources.list.d/jenkins.list > /dev/null
For Unbuntu 24
curl -fsSL https://pkg.jenkins.io/debian-stable/jenkins.io-2023.key | sudo tee \
  /usr/share/keyrings/jenkins-keyring.asc > /dev/null
echo deb [signed-by=/usr/share/keyrings/jenkins-keyring.asc] \
  https://pkg.jenkins.io/debian-stable binary/ | sudo tee \
  /etc/apt/sources.list.d/jenkins.list > /dev/null
otherwise - I get
Error: The repository ‘http://pkg.jenkins.io/debian-stable all Release’ does not have a Release file.
https://www.jenkins.io/blog/2023/03/27/repository-signing-keys-changing/
 This work is licensed under a Creative Commons Attribution-NonCommercial- ShareAlike 4.0 International License.
Become a contributor for community
Get paid to write technical tutorials and select a tech-focused charity to receive a matching donation.

DigitalOcean Documentation
Full documentation for every DigitalOcean product.

Resources for startups and AI-native businesses
The Wave has everything you need to know about building a business, from raising funding to marketing your product.
The developer cloud
Scale up as you grow — whether you're running one virtual machine or ten thousand.

Start building today
From GPU-powered inference and Kubernetes to managed databases and storage, get everything you need to build, scale, and deploy intelligent applications.
