By Erika Heidi
Developer Advocate
![How To Install Linux, Nginx, MySQL, PHP (LEMP stack) on Ubuntu 20.04 [Quickstart]](https://www.digitalocean.com/api/static-content/v1/images?src=https%3A%2F%2Fcommunity-cdn-digitalocean-com.global.ssl.fastly.net%2FcRp5Xp2NfekVU4QC9kNPdzTq&width=1920 "How To Install Linux, Nginx, MySQL, PHP (LEMP stack) on Ubuntu 20.04 [Quickstart]")
Introduction
In this quickstart guide, we’ll install a LEMP stack on an Ubuntu 20.04 server.
For a more detailed version of this tutorial, with more explanations of each step, please refer to How To Install Linux, Nginx, MySQL, PHP (LEMP stack) on Ubuntu 20.0
Prerequisites
To follow this guide, you’ll need access to an Ubuntu 20.04 server as a sudo user.
Step 1 — Install Nginx
Update your package manager cache and then install Nginx with:
- sudo apt update
- sudo apt install nginx
Once the installation is finished, you’ll need to adjust your firewall settings to allow HTTP traffic on your server. Run the following command to allow external access on port 80 (HTTP):
- sudo ufw allow in "Nginx"
With the new firewall rule added, you can test if the server is up and running by accessing your server’s public IP address or domain name from your web browser. You’ll see a page like this:
Step 2 — Install MySQL
We’ll now install MySQL, a popular database management system used within PHP environments.
Again, use apt to acquire and install this software:
- sudo apt install mysql-server
When the installation is finished, it’s recommended that you run a security script that comes pre-installed with MySQL. Start the interactive script by running:
- sudo mysql_secure_installation
This will ask if you want to configure the VALIDATE PASSWORD PLUGIN. Answer Y for yes, or anything else to continue without enabling. If you answer “yes”, you’ll be asked to select a level of password validation.
Your server will next ask you to select and confirm a password for the MySQL root user. Even though the default authentication method for the MySQL root user dispenses the use of a password, even when one is set, you should define a strong password here as an additional safety measure.
For the rest of the questions, press Y and hit the ENTER key at each prompt.
Note: At the time of this writing, the native MySQL PHP library mysqlnd doesn’t support caching_sha2_authentication, the default authentication method for MySQL 8. For that reason, when creating database users for PHP applications on MySQL 8, you’ll need to make sure they’re configured to use mysql_native_password instead. Please refer to step 6 of our detailed LEMP on Ubuntu 20.04 guide to learn how to do that.
Step 3 — Install PHP
To install the php-fpm and php-mysql packages, run:
- sudo apt install php-fpm php-mysql
Step 4 — Configure Nginx for PHP
In this guide, we’ll set up a domain called your_domain, but you should replace this with your own domain name.
On Ubuntu 20.04, Nginx has one server block enabled by default and is configured to serve documents out of a directory at /var/www/html. While this works well for a single site, it can become difficult to manage if you are hosting multiple sites. Instead of modifying /var/www/html, we’ll create a directory structure within /var/www for the your_domain website, leaving /var/www/html in place as the default directory to be served if a client request doesn’t match any other sites.
Create the root web directory for your_domain as follows:
- sudo mkdir /var/www/your_domain
Next, assign ownership of the directory with the $USER environment variable, which will reference your current system user:
- sudo chown -R $USER:$USER /var/www/your_domain
Then, open a new configuration file in Nginx’s sites-available directory using your preferred command-line editor. Here, we’ll use nano:
- sudo nano /etc/nginx/sites-available/your_domain
This will create a new blank file. Paste in the following bare-bones configuration:
server {
    listen 80;
    server_name your_domain www.your_domain;
    root /var/www/your_domain;

    index index.html index.htm index.php;

    location / {
        try_files $uri $uri/ =404;
    }

    location ~ \.php$ {
        include snippets/fastcgi-php.conf;
        fastcgi_pass unix:/var/run/php/php7.4-fpm.sock;
     }

    location ~ /\.ht {
        deny all;
    }

}
When you’re done editing, save and close the file. If you’re using nano, you can do so by typing CTRL+X and then y and ENTER to confirm.
Activate your configuration by linking to the config file from Nginx’s sites-enabled directory:
- sudo ln -s /etc/nginx/sites-available/your_domain /etc/nginx/sites-enabled/
This will tell Nginx to use the configuration next time it is reloaded. You can test your configuration for syntax errors by typing:
- sudo nginx -t
If any errors are reported, go back to your configuration file to review its contents before continuing.
When you are ready, reload Nginx to apply the changes:
- sudo systemctl reload nginx
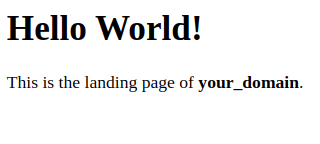
Your new website is now active, but the web root /var/www/your_domain is still empty. Create an index.html file in that location so that we can test that your new server block works as expected:
- nano /var/www/your_domain/index.html
Include the following content in this file:
<html>
  <head>
    <title>your_domain website</title>
  </head>
  <body>
    <h1>Hello World!</h1>

    <p>This is the landing page of <strong>your_domain</strong>.</p>
  </body>
</html>
Now go to your browser and access your server’s domain name or IP address, as listed within the server_name directive in your server block configuration file:
http://server_domain_or_IP
You’ll see a page like this:
Step 5 — Test PHP with Nginx
We’ll now create a PHP test script to confirm that Nginx is able to handle and process requests for PHP files.
Create a new file named info.php inside your custom web root folder:
- nano /var/www/your_domain/info.php
This will open a blank file. Add the following content inside the file:
<?php
phpinfo();
When you are finished, save and close the file.
You can now access this page in your web browser by visiting the domain name or public IP address you’ve set up in your Nginx configuration file, followed by /info.php:
http://server_domain_or_IP/info.php
You will see a web page containing detailed information about your server:
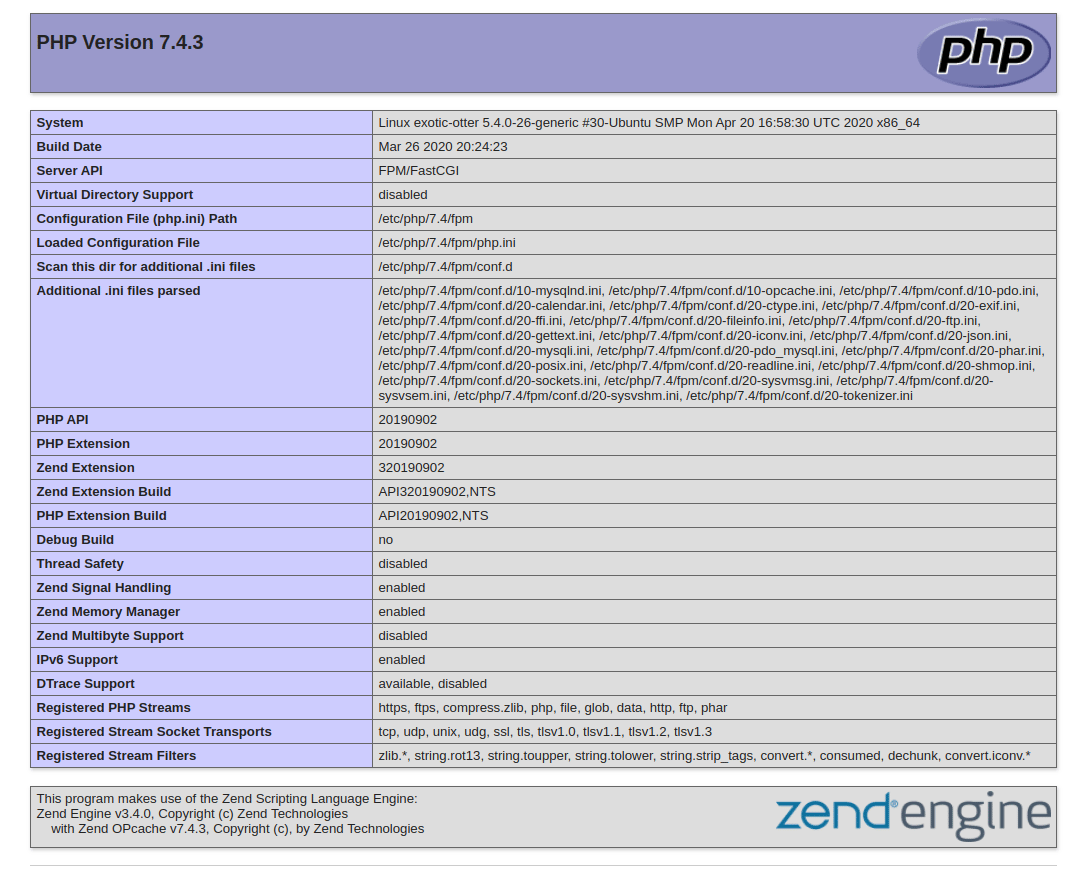
After checking the relevant information about your PHP server through that page, it’s best to remove the file you created as it contains sensitive information about your PHP environment and your Ubuntu server. You can use rm to remove that file:
- sudo rm /var/www/your_domain/info.php
Related Tutorials
Here are links to more detailed guides related to this tutorial:
Thanks for learning with the DigitalOcean Community. Check out our offerings for compute, storage, networking, and managed databases.
About the author
Dev/Ops passionate about open source, PHP, and Linux. Former Senior Technical Writer at DigitalOcean. Areas of expertise include LAMP Stack, Ubuntu, Debian 11, Linux, Ansible, and more.
Still looking for an answer?
This textbox defaults to using Markdown to format your answer.
You can type !ref in this text area to quickly search our full set of tutorials, documentation & marketplace offerings and insert the link!
While I tried doing sudo ufw allow in "Nginx" it gave me error Could not find a profile matching 'Nginx'.
Though I tried ufw allow 80 and ufw allow 443, it worked for me and the server is up and running.
I hope this might help someone.
 This work is licensed under a Creative Commons Attribution-NonCommercial- ShareAlike 4.0 International License.
Become a contributor for community
Get paid to write technical tutorials and select a tech-focused charity to receive a matching donation.

DigitalOcean Documentation
Full documentation for every DigitalOcean product.

Resources for startups and AI-native businesses
The Wave has everything you need to know about building a business, from raising funding to marketing your product.
The developer cloud
Scale up as you grow — whether you're running one virtual machine or ten thousand.

Start building today
From GPU-powered inference and Kubernetes to managed databases and storage, get everything you need to build, scale, and deploy intelligent applications.
