By Jeanelle Horcasitas and Kong Yang

Introduction
Mastodon is free and open-source software that provides instant global communication. It uses a decentralized model referred to as a federation by its creators. Each Mastodon server is completely independent while communicating with other servers to form a social network. It can be deployed by anyone on any server, with each server being its own instance with its own policies and moderation. Mastodon can communicate with any other platform that implements the open web protocol ActivityPub.
This tutorial will guide you through spinning up a DigitalOcean Droplet with Mastodon pre-installed using the DigitalOcean Mastodon 1-Click App. Create a free DigitalOcean account to use the Marketplace App.
Additionally, after creating a Droplet for your Mastodon instance, you’ll create an administrator account and set up your account preferences.
Note: This tutorial details installation using the DigitalOcean Mastodon 1-Click App. You can also consider this alternative Mastodon installation method on a bare metal server:
1-Click Deployment
The Mastodon 1-Click comes pre-installed with the following packages:
| Package | Version |
|---|---|
| Nginx | 1.18.0 |
| Postgres | 15 |
| Certbot | 0.40.0 |
| Redis | 5.0.7 |
As of this writing, these packages are running on an Ubuntu 20.04 server along with Mastodon version 4.0.2.
Prerequisites
To get your Mastodon 1-Click up and running, you need a domain name. You can use the DNS quickstart guide to learn how to set one up using DigitalOcean DNS.
Step 1 — Creating a Mastodon Droplet
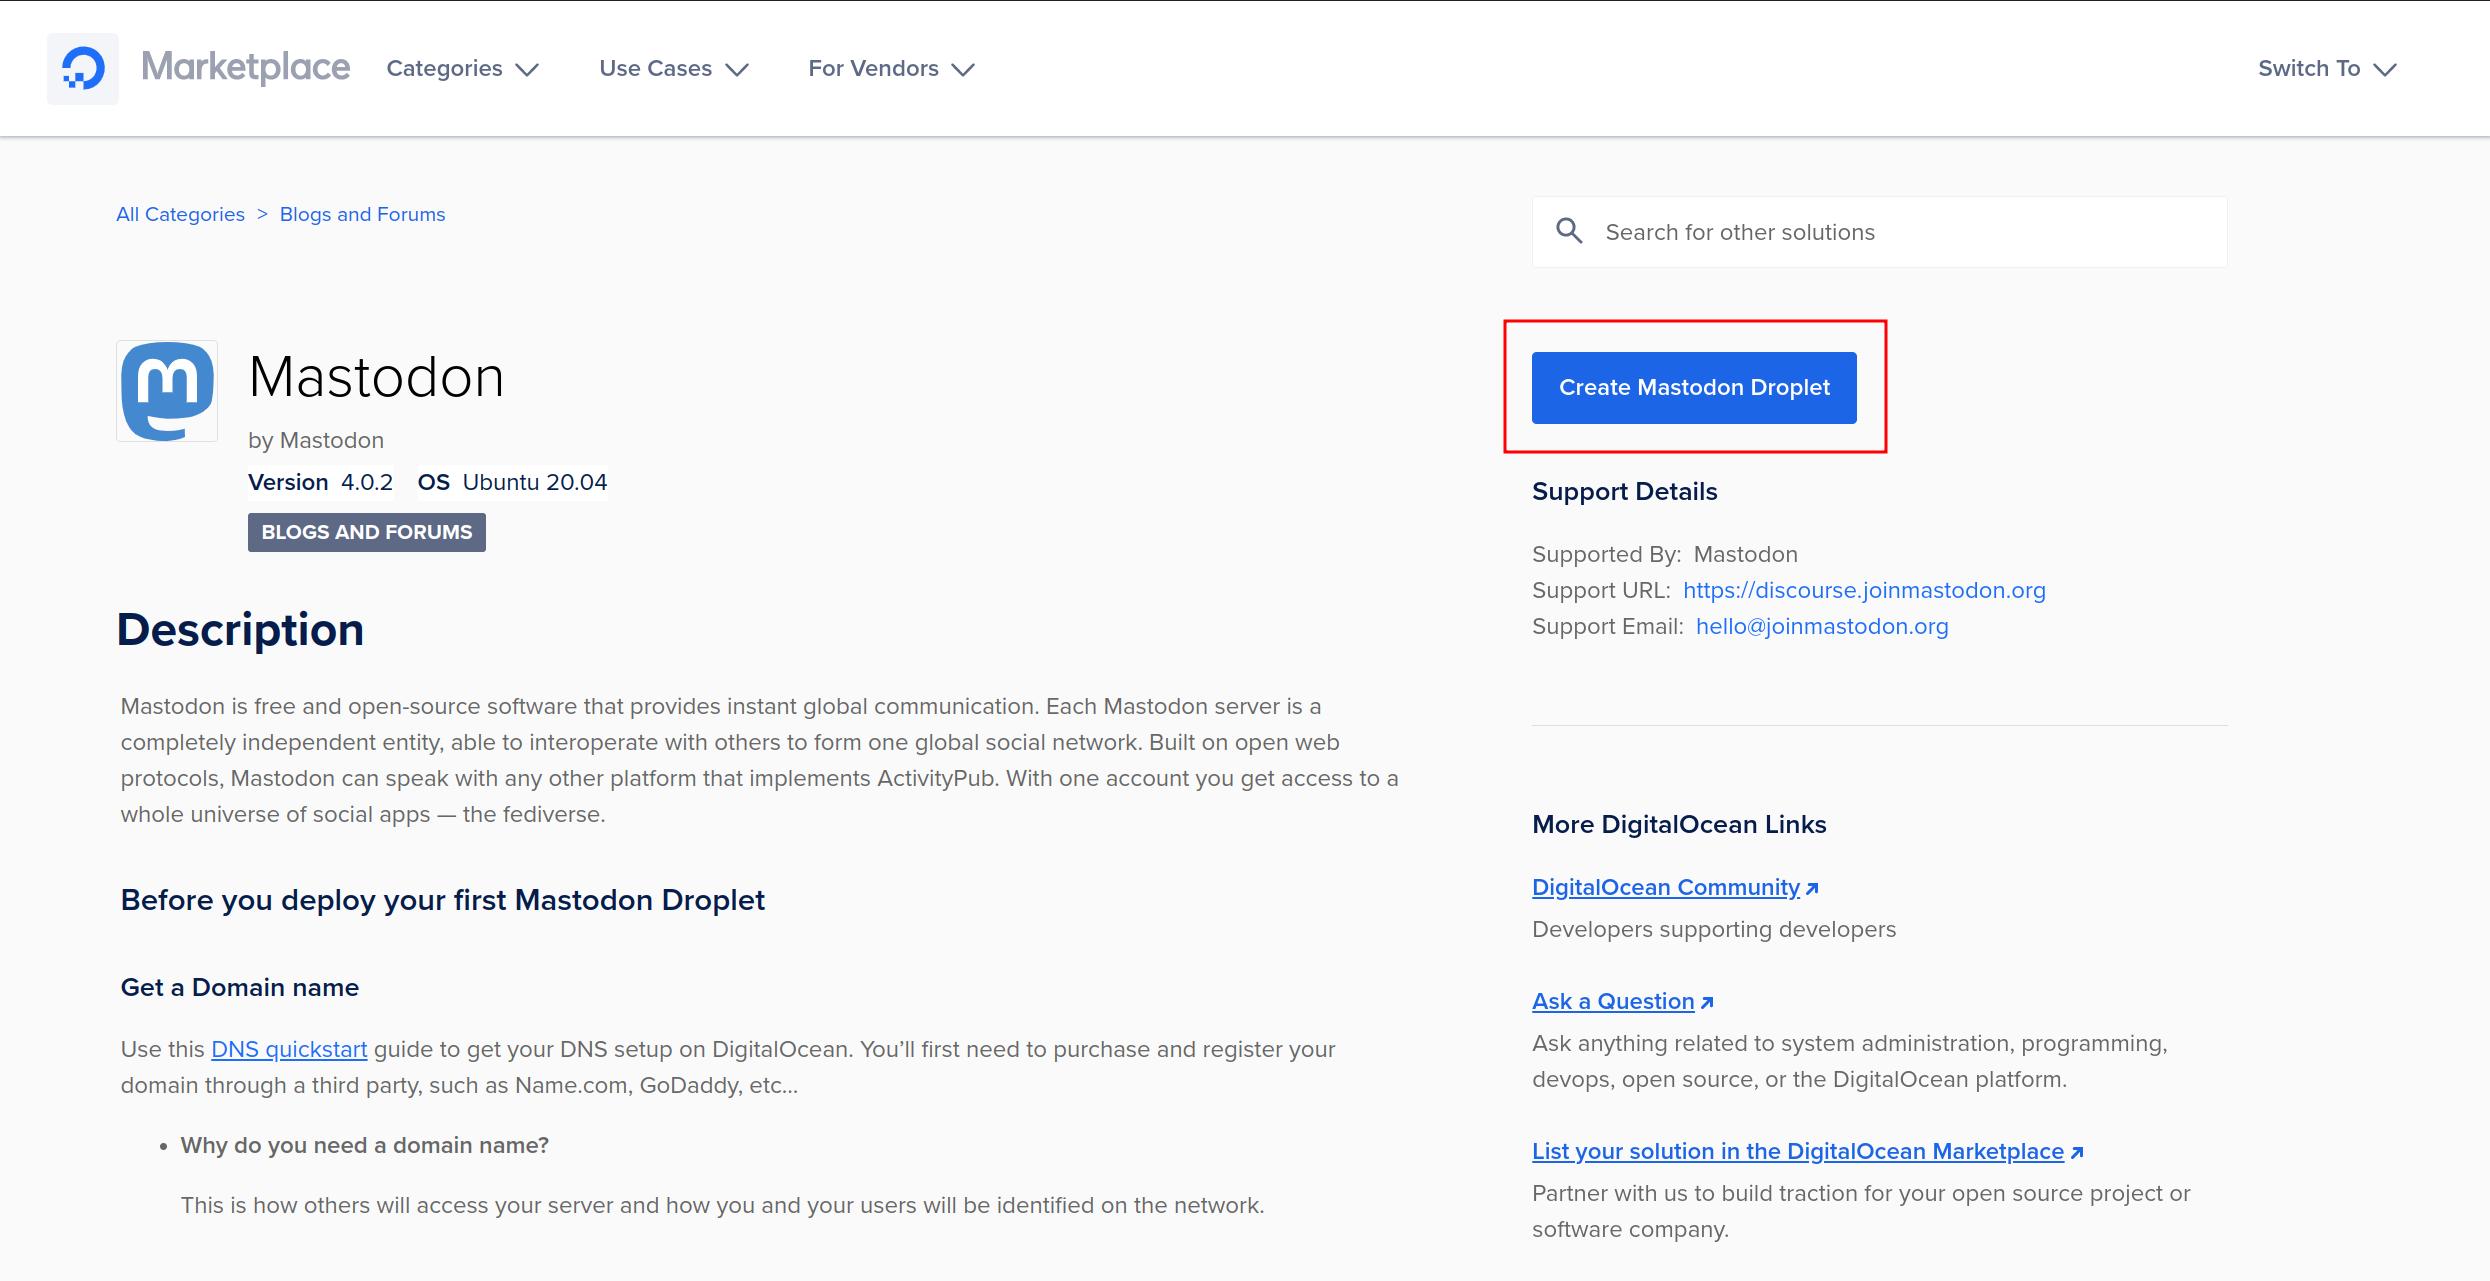
The Mastodon 1-Click Droplet is available on our Marketplace. To begin, select the Create Mastodon Droplet button:
Your DigitalOcean control panel lists the Mastodon 1-Click Droplet as your selection:
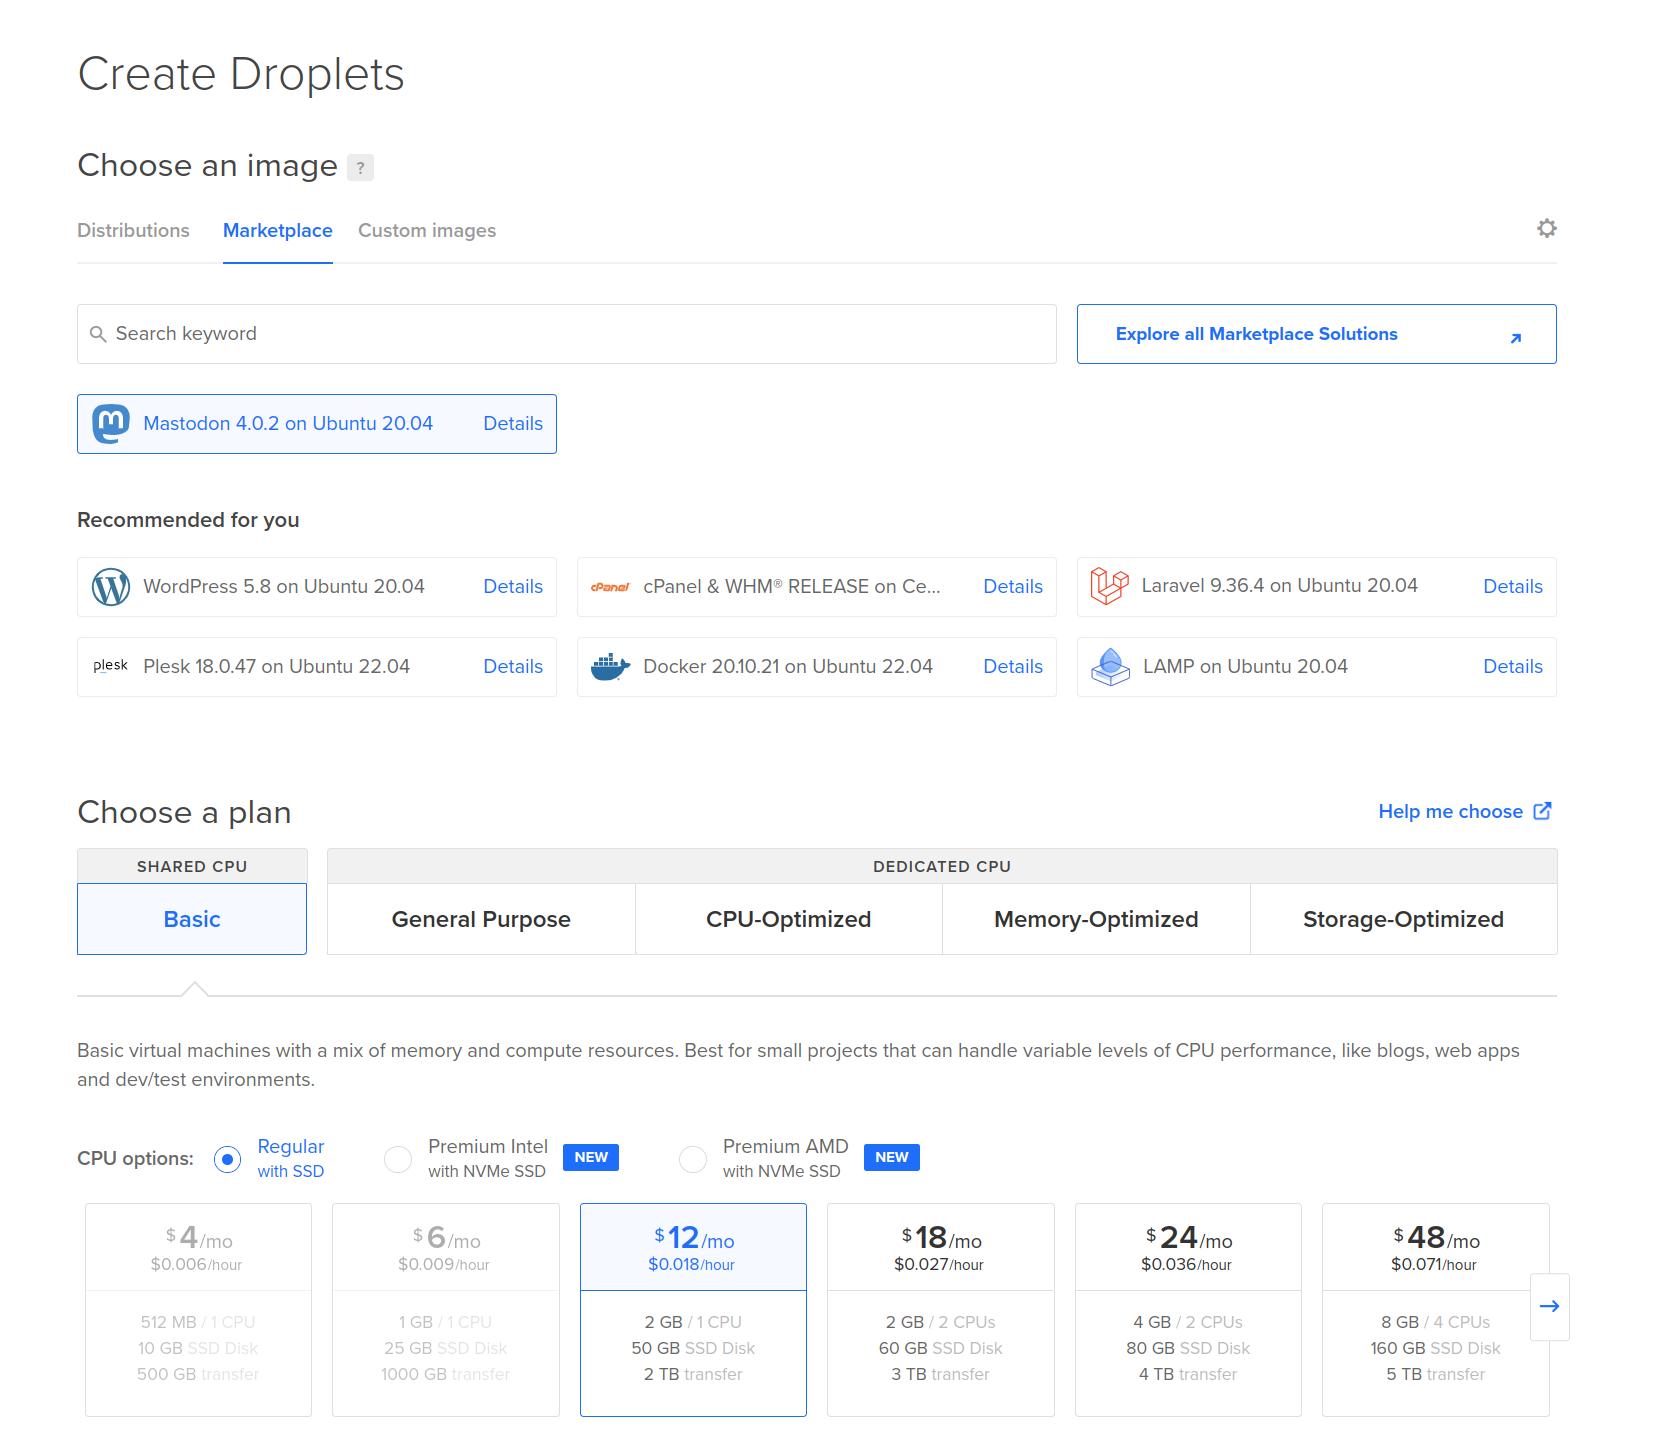
Choosing a Plan
Select a plan that works for you. Bear in mind that you can resize your Droplet depending on your needs.
Choosing a Datacenter
To avoid potential latency, it is recommended that you select a datacenter region closest to your user base. In some regions, we have more than one datacenter. There is no difference between these same region datacenters (e.g., SFO3 and SFO2).
Choosing an Authentication Method
The SSH Key option is recommended, rather than a password for your Droplet. Using SSH Keys for authentication is more secure.
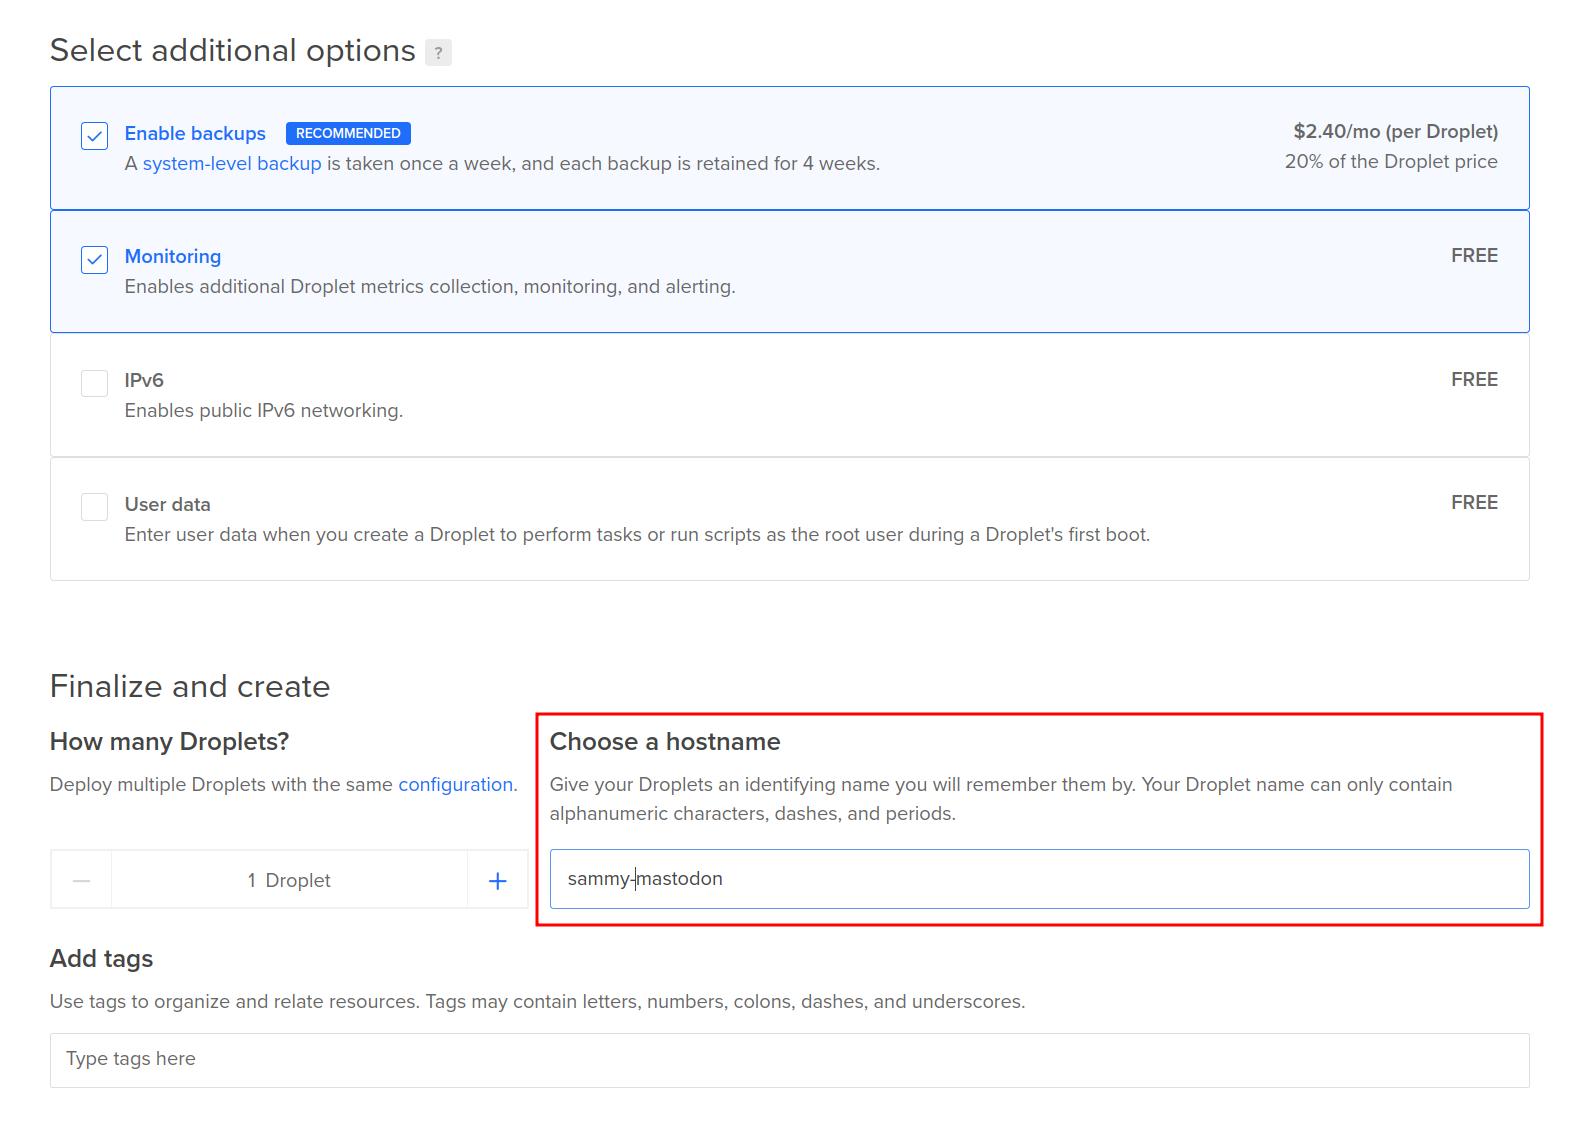
Selecting Additional Options
Adding improved metrics, monitoring, and alerting to your Droplet helps you follow your Droplet resource usage over time. You may also want to consider enabling automated backups. You can return later to enable backup functionality on Droplets you’ve already created.
Choosing a Hostname
Give your Droplet an identifying name:
After entering a name and making your selections, click on the Create Droplet button. Your Droplet will begin the installation process and may take some time to complete. Once it’s finished, you’ll receive an IP address:

1-Click Marketplace applications come with additional resources you can access by clicking Get started. This includes an app overview, further installation settings, and links to relevant tutorials from our Community site. You can also get support by reviewing the official Mastodon documentation.

After making all your selections, you’re now ready to access your new Mastodon Droplet in the terminal to continue the installation process.
Step 2 — Accessing the Droplet via SSH to Enable Configuration
After spinning up your Mastodon Droplet, connect to it via SSH. If you haven’t used a terminal program like SSH or PuTTY before, check out How To Connect To Your Droplet with SSH. When you’re ready, open a terminal on your computer and log into your Droplet as root via SSH with this command, substituting the IP address with your Droplet’s IP address:
- ssh root@your_server_ip
When the terminal prompts you to continue connecting, enter yes. You’re then greeted with the Mastodon set-up wizard:
Output
                        ,----,__    __---''--___
                     ,-'   ,-'\ '--'
            ,       /   O      \
           <_'---__/-       '-_/
             '--___--
                  /   ,
            _   _/  ,''--__-''-_
           / '-'   ;            '-_
           '--__--'                \        ;
                                    ;      /--__
                                    |     ; ;
                                    |     | ;
                                    |     | ;
                                    |     | ;
                                    |     | ;
                                   /ooo___|''

Welcome to Mastodon!

The documentation is available at https://docs.joinmastodon.org

You can restart Mastodon with:

 * sudo systemctl restart mastodon-web
 * sudo systemctl restart mastodon-streaming
 * sudo systemctl restart mastodon-sidekiq

Mastodon is installed under /home/mastodon/live. To browse or change the
files, login to the mastodon system user with:

 * sudo su - mastodon

You can browse error logs with:

 * sudo journalctl -u mastodon-web

Booting Mastodon's first-time setup wizard...
Welcome to the Mastodon first-time setup!
After accessing your Droplet via SSH, Mastodon will begin the installation process. In the next step, you’ll complete the Mastodon setup wizard.
Step 3 — Completing the Mastodon Installation on Your Droplet
After the setup wizard boots, there is a prompt requesting your domain name. Enter your domain name to proceed:
. . .
Booting Mastodon's first-time setup wizard...
Welcome to the Mastodon first-time setup!
Domain name: your_domain
. . .
There’s an additional prompt asking if you want to store user-uploaded files to the cloud:
. . .
Do you want to store user-uploaded files on the cloud? No
. . .
If you do not have a cloud storage solution ready, answer No. Selecting No means that user files are stored on the local database. In this tutorial, you’ll create this Mastodon instance with a local database.
Note: Relying on local storage for user files is not a sustainable long-term solution. If you have a cloud based storage solution, enter Yes for this question, then enter your cloud service account credentials. You can check the official Mastodon documentation to learn how to configure your cloud storage.
To use DigitalOcean Spaces, you can follow the Marketplace guide to attach it to your Mastodon instance.
Mastodon uses SMTP to send verification emails to users signing up on your server. The default email service provider selection is Mailgun, but you can configure any other SMTP server. If you don’t have an SMTP server set up yet, you can set up an account with an email provider and then add your credentials to set this up.
Note: Emails from your Mastodon instance will not be sent until you provide your SMTP credentials. This means that no one will be able to properly sign up to join your Mastodon instance and you won’t be notified about new users or possible security issues. Leaving this section empty is not recommended as a long-term solution.
If you’re using Mailgun as the SMTP provider, you can check their documentation on where to find your credentials.
Fill in the following section with your SMTP credentials:
. . .
SMTP server: smtp.mailgun.org
SMTP port: 587
SMTP username: your_SMTP_username
SMTP password: your_SMTP_password
SMTP authentication: plain
SMTP OpenSSL verify mode: peer
E-mail address to send e-mails "from": Mastodon <notifications@your_domain>
Send a test e-mail with this configuration right now? yes
. . .
Here is a brief overview about each SMTP credential:
SMTP server: This is the SMTP server you’ll be using to hook up to your Mastodon instance.SMTP port: Port587is the default port for TLS connections with an email provider.SMTP username: Your SMTP username.SMTP password: Your SMTP password.SMTP authentication:plainis selected in this example, but other common options supported by email service providers includeplainandlogin.SMTP OpenSSL verify mode:peeris selected because this tightens security.
Please refer to the official documentation of your email service provider on how to interface with their SMTP services securely.
You can leave the Email address to send e-mails “from” as the default, or create a custom email address with your email provider. Sending a test email will ensure that your SMTP configuration is working properly. With proper credentials, you’ll receive an email from your Mastodon instance.
After entering your SMTP credentials, create your administrative account:
Great! Saving this configuration...
Booting up Mastodon...
It is time to create an admin account that you'll be able to use from the browser!
Username: sammy
E-mail: your_email_address
You can login with the password: your_auto_generated_admin_password
The web interface should be momentarily accessible via https://your_domain
. . .
Create a unique username, then enter an email address to associate with your admin account. A strong password is generated for you.
Warning: Keep track of this generated password. You need it to sign in to your Mastodon admin account for the first time. If you lose this password, you won’t be able to sign in and will have to create a new instance.
Next, the Let’s Encrypt utility will obtain an SSL certificate for you. Enter your email address to proceed:
. . .
Launching Let's Encrypt utility to obtain SSL certificate...
Saving debug log to /var/log/letsencrypt/letsencrypt.log
Plugins selected: Authenticator standalone, Installer None
Enter email address (used for urgent renewal and security notices) (Enter 'c' to
cancel): your_email_address
. . .
You can opt in or out of emails from Let’s Encrypt by typing in Yes or No. After your response, Let’s Encrypt will obtain a new certificate:
- - - - - - - - - - - - - - - - - - - - - - - - - - - - - - - - - - - - - - - -
Would you be willing to share your email address with the Electronic Frontier
Foundation, a founding partner of the Let's Encrypt project and the non-profit
organization that develops Certbot? We'd like to send you email about our work
encrypting the web, EFF news, campaigns, and ways to support digital freedom.
- - - - - - - - - - - - - - - - - - - - - - - - - - - - - - - - - - - - - - - -
(Y)es/(N)o: no
Obtaining a new certificate
Performing the following challenges:
http-01 challenge for your_domain
Waiting for verification...
Cleaning up challenges

IMPORTANT NOTES:
 - Congratulations! Your certificate and chain have been saved at:
   /etc/letsencrypt/live/your_domain/fullchain.pem
   Your key file has been saved at:
   /etc/letsencrypt/live/your_domain/privkey.pem
   Your cert will expire on 2023-03-02. To obtain a new or tweaked
   version of this certificate in the future, simply run certbot
   again. To non-interactively renew *all* of your certificates, run
   "certbot renew"
 - Your account credentials have been saved in your Certbot
   configuration directory at /etc/letsencrypt. You should make a
   secure backup of this folder now. This configuration directory will
   also contain certificates and private keys obtained by Certbot so
   making regular backups of this folder is ideal.
 - If you like Certbot, please consider supporting our work by:

   Donating to ISRG / Let's Encrypt:   https://letsencrypt.org/donate
   Donating to EFF:                    https://eff.org/donate-le

Created symlink /etc/systemd/system/multi-user.target.wants/mastodon-web.service → /etc/systemd/system/mastodon-web.service.
Created symlink /etc/systemd/system/multi-user.target.wants/mastodon-streaming.service → /etc/systemd/system/mastodon-streaming.service.
Created symlink /etc/systemd/system/multi-user.target.wants/mastodon-sidekiq.service → /etc/systemd/system/mastodon-sidekiq.service.
Setup is complete! Login at your_domain
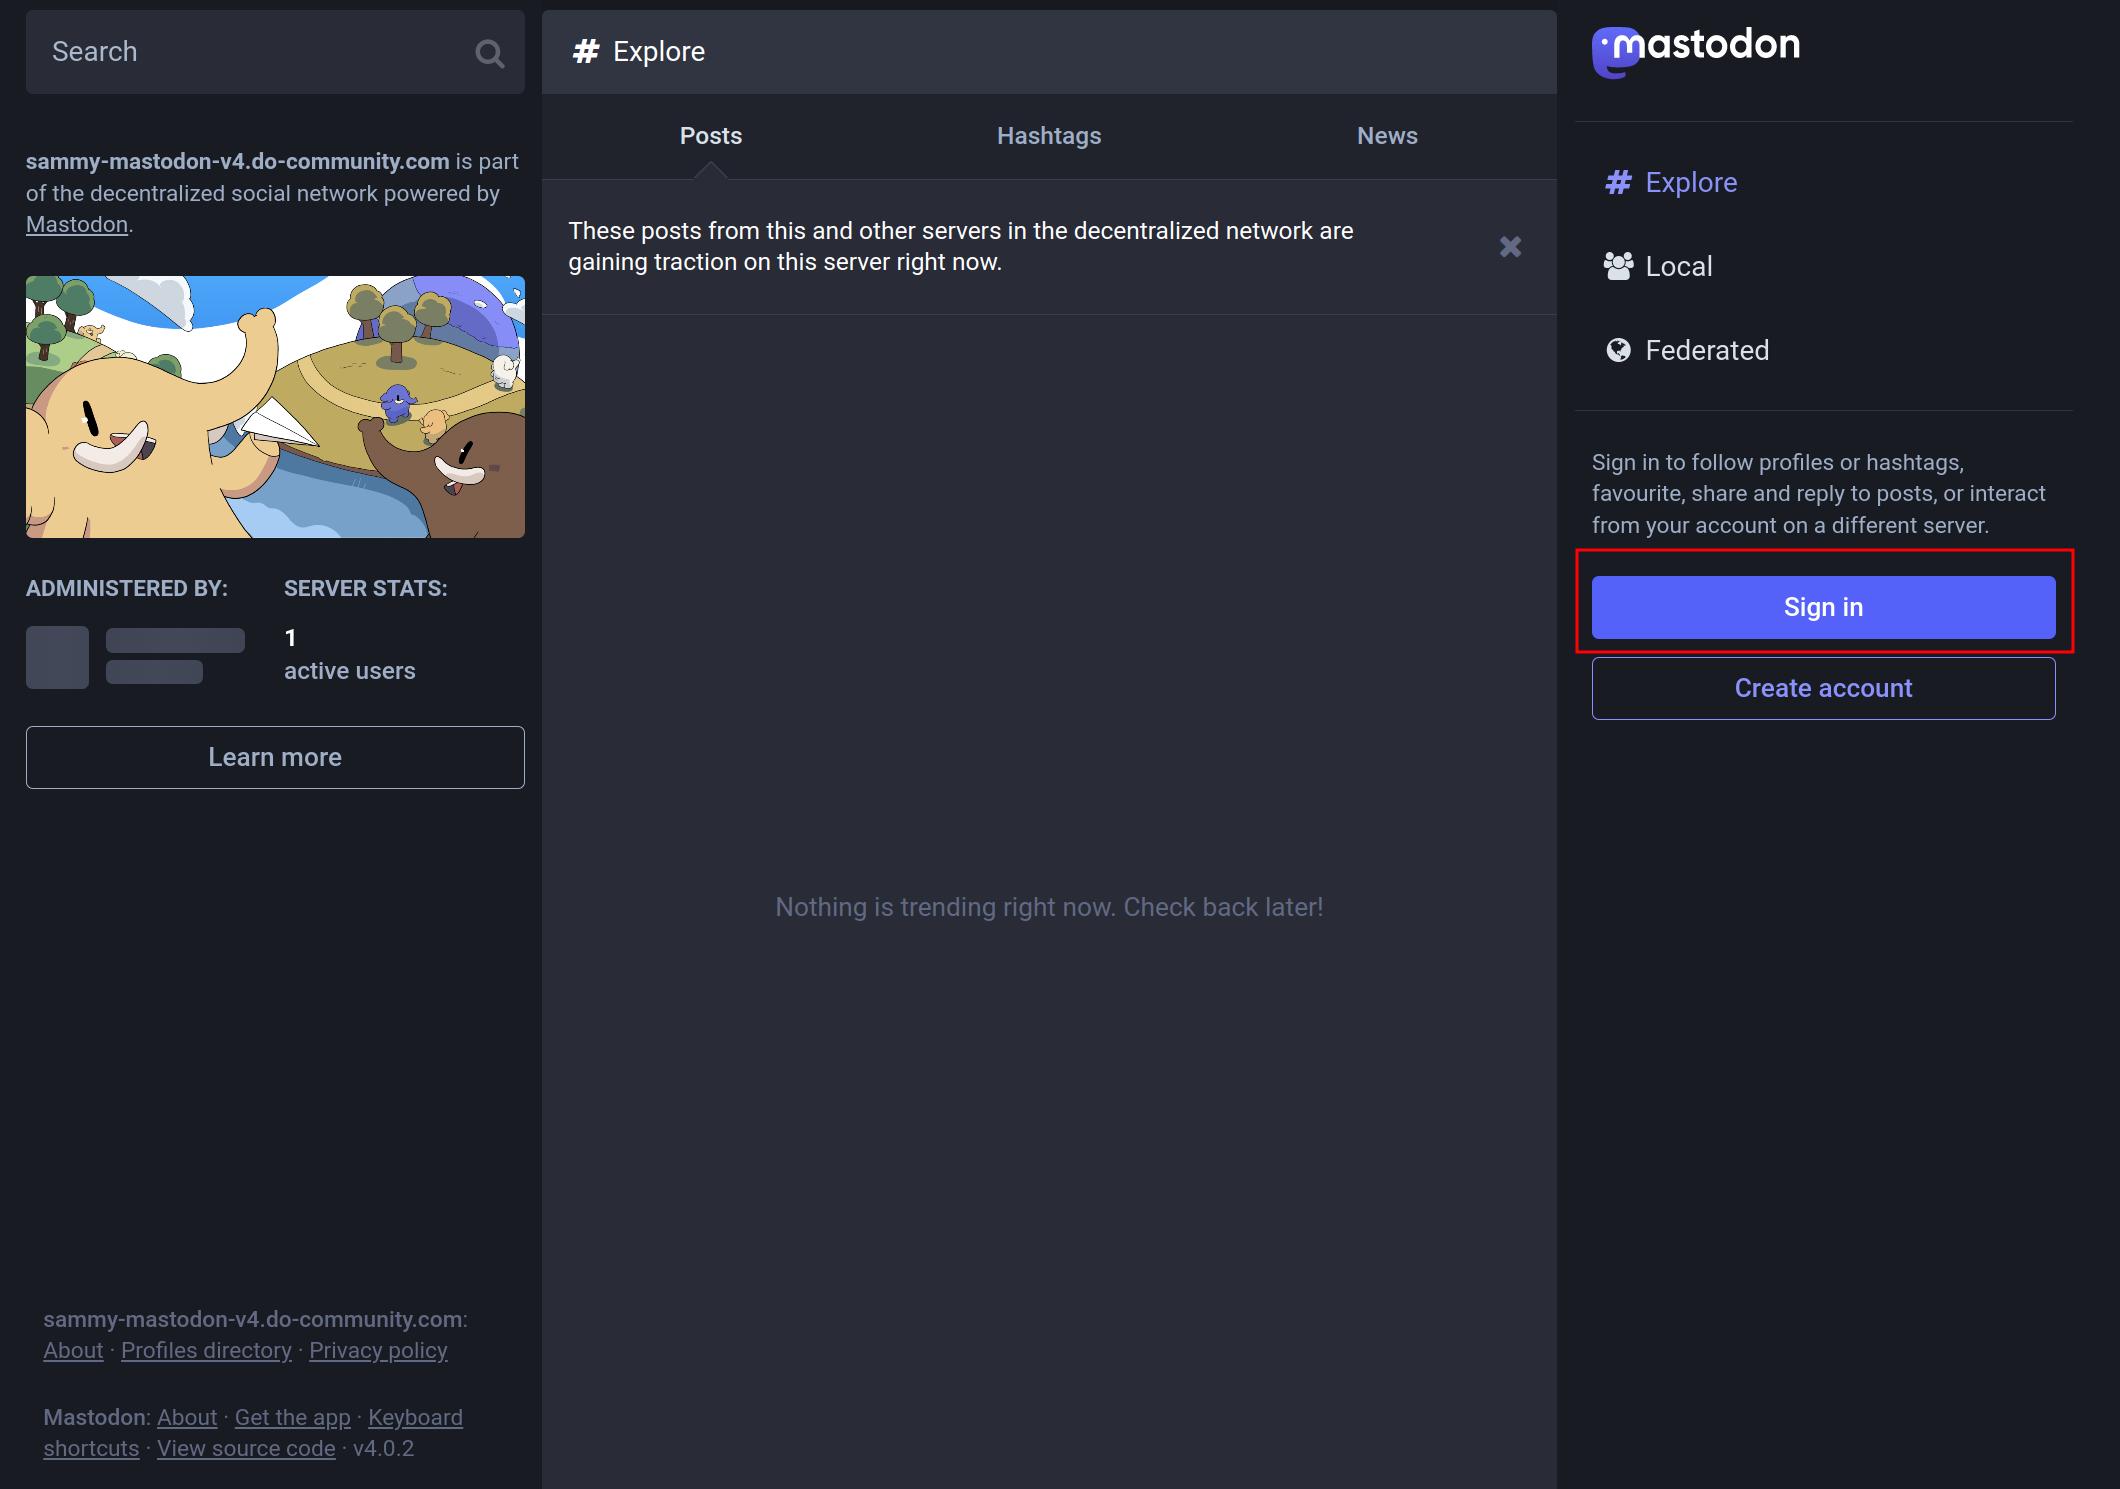
After obtaining your certificate, navigate to https://your_domain to access your Mastodon server. It may take a moment before the landing page of your new instance is generated:
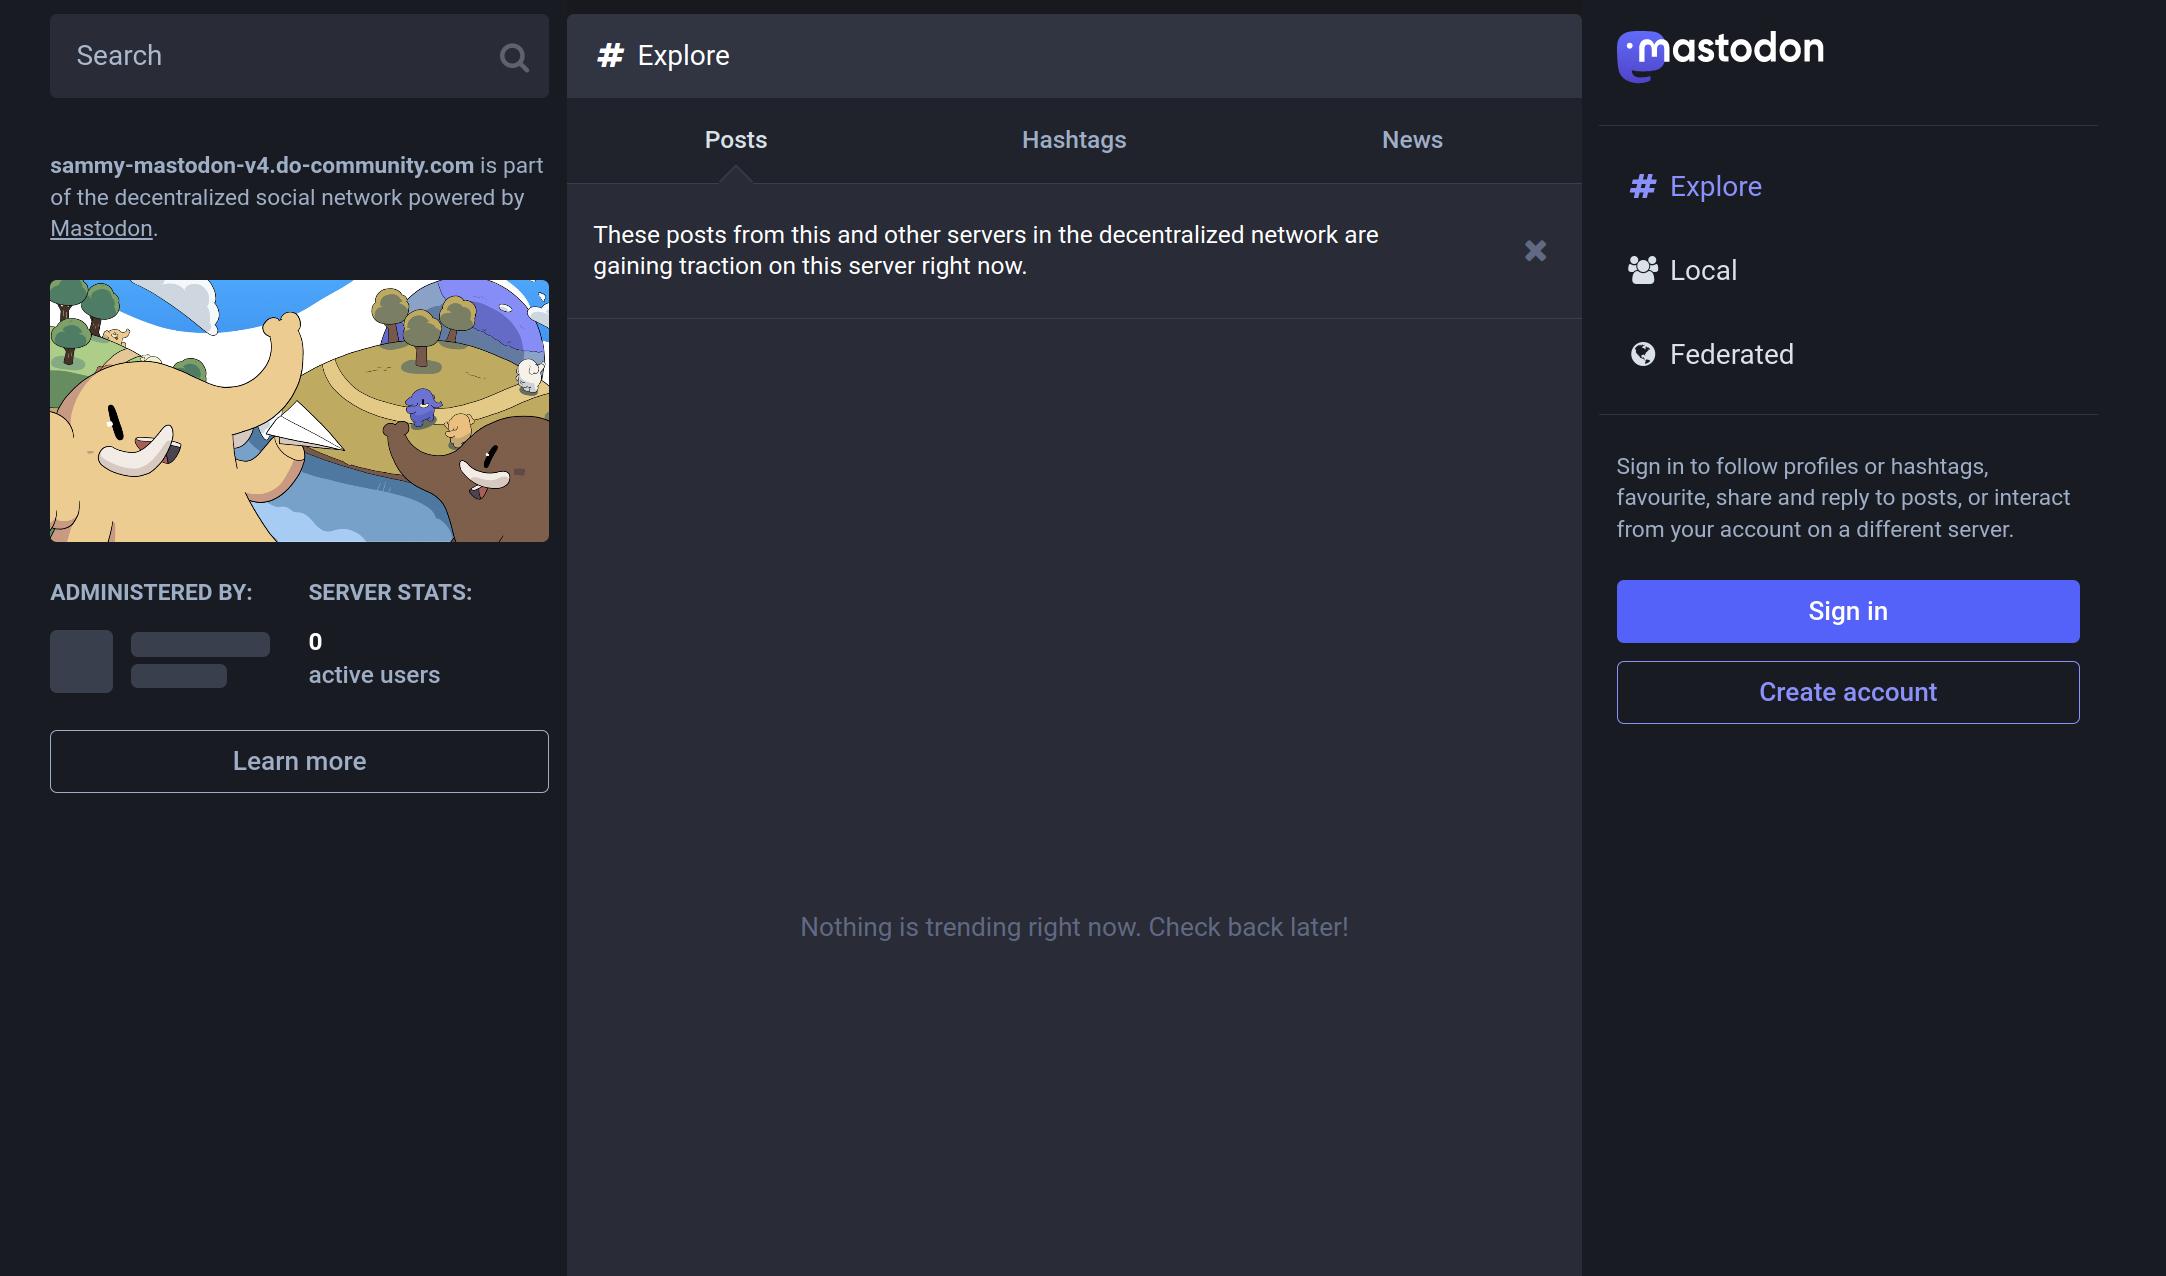
You now have a Mastodon server up and running.
Step 4 — Updating Your Password
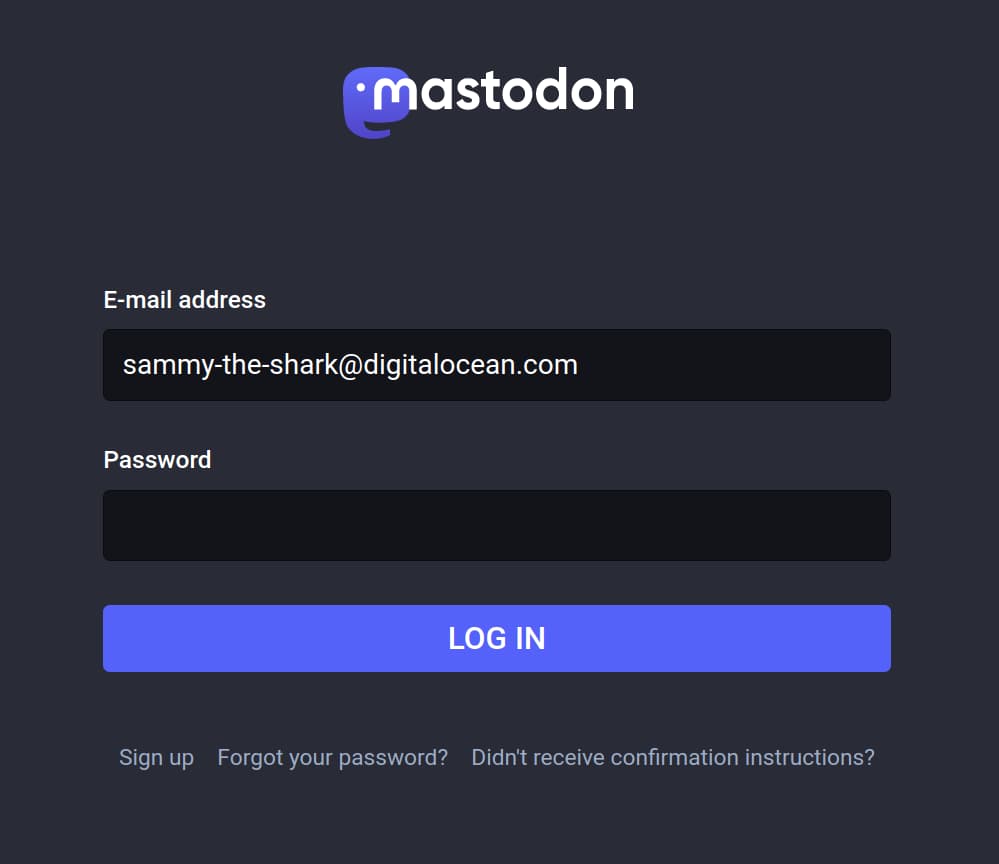
With a Mastodon server up, you can sign in to your administrative account:
Then enter your email address and the generated password from your terminal:
After you sign in, navigate to the panel on the right and select Preferences. Then locate Account on the left panel. Locate the Account Settings option and create a new password:
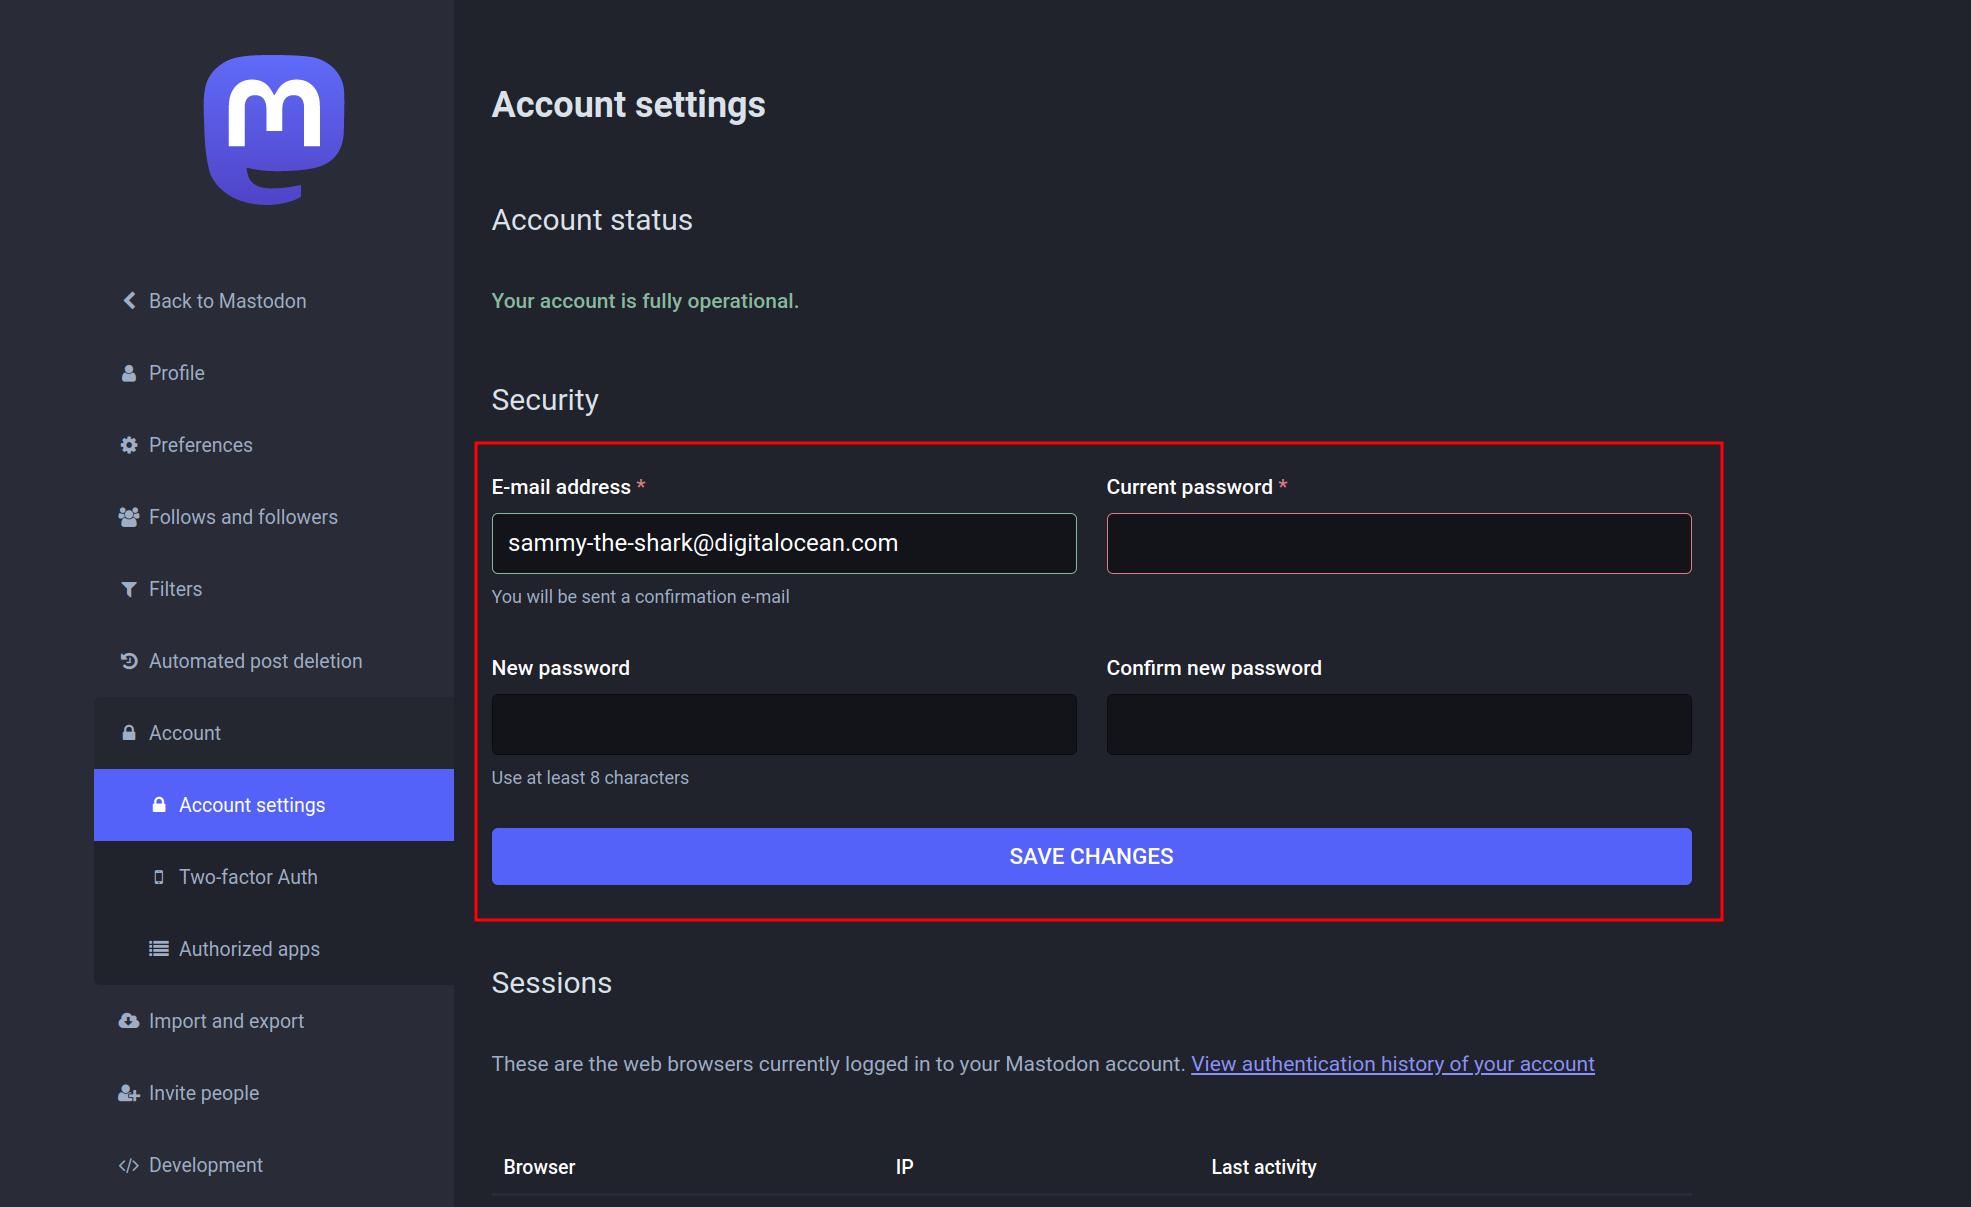
For additional security, you can also set up two-factor authentication.
Step 5 — Updating Server Profile Settings
As a Mastodon administrator, it’s important to customize the settings for both your site and for anyone interested in joining your server. One of the updates you can make as an administrator or user, is to include details about your profile, such as the display name and bio. You can even include a header and avatar image as well.
To get started with customizing your site settings, first navigate to the Profile option on the left panel. From the list, select Appearance and provide the relevant information or upload the images you want to display on your site:
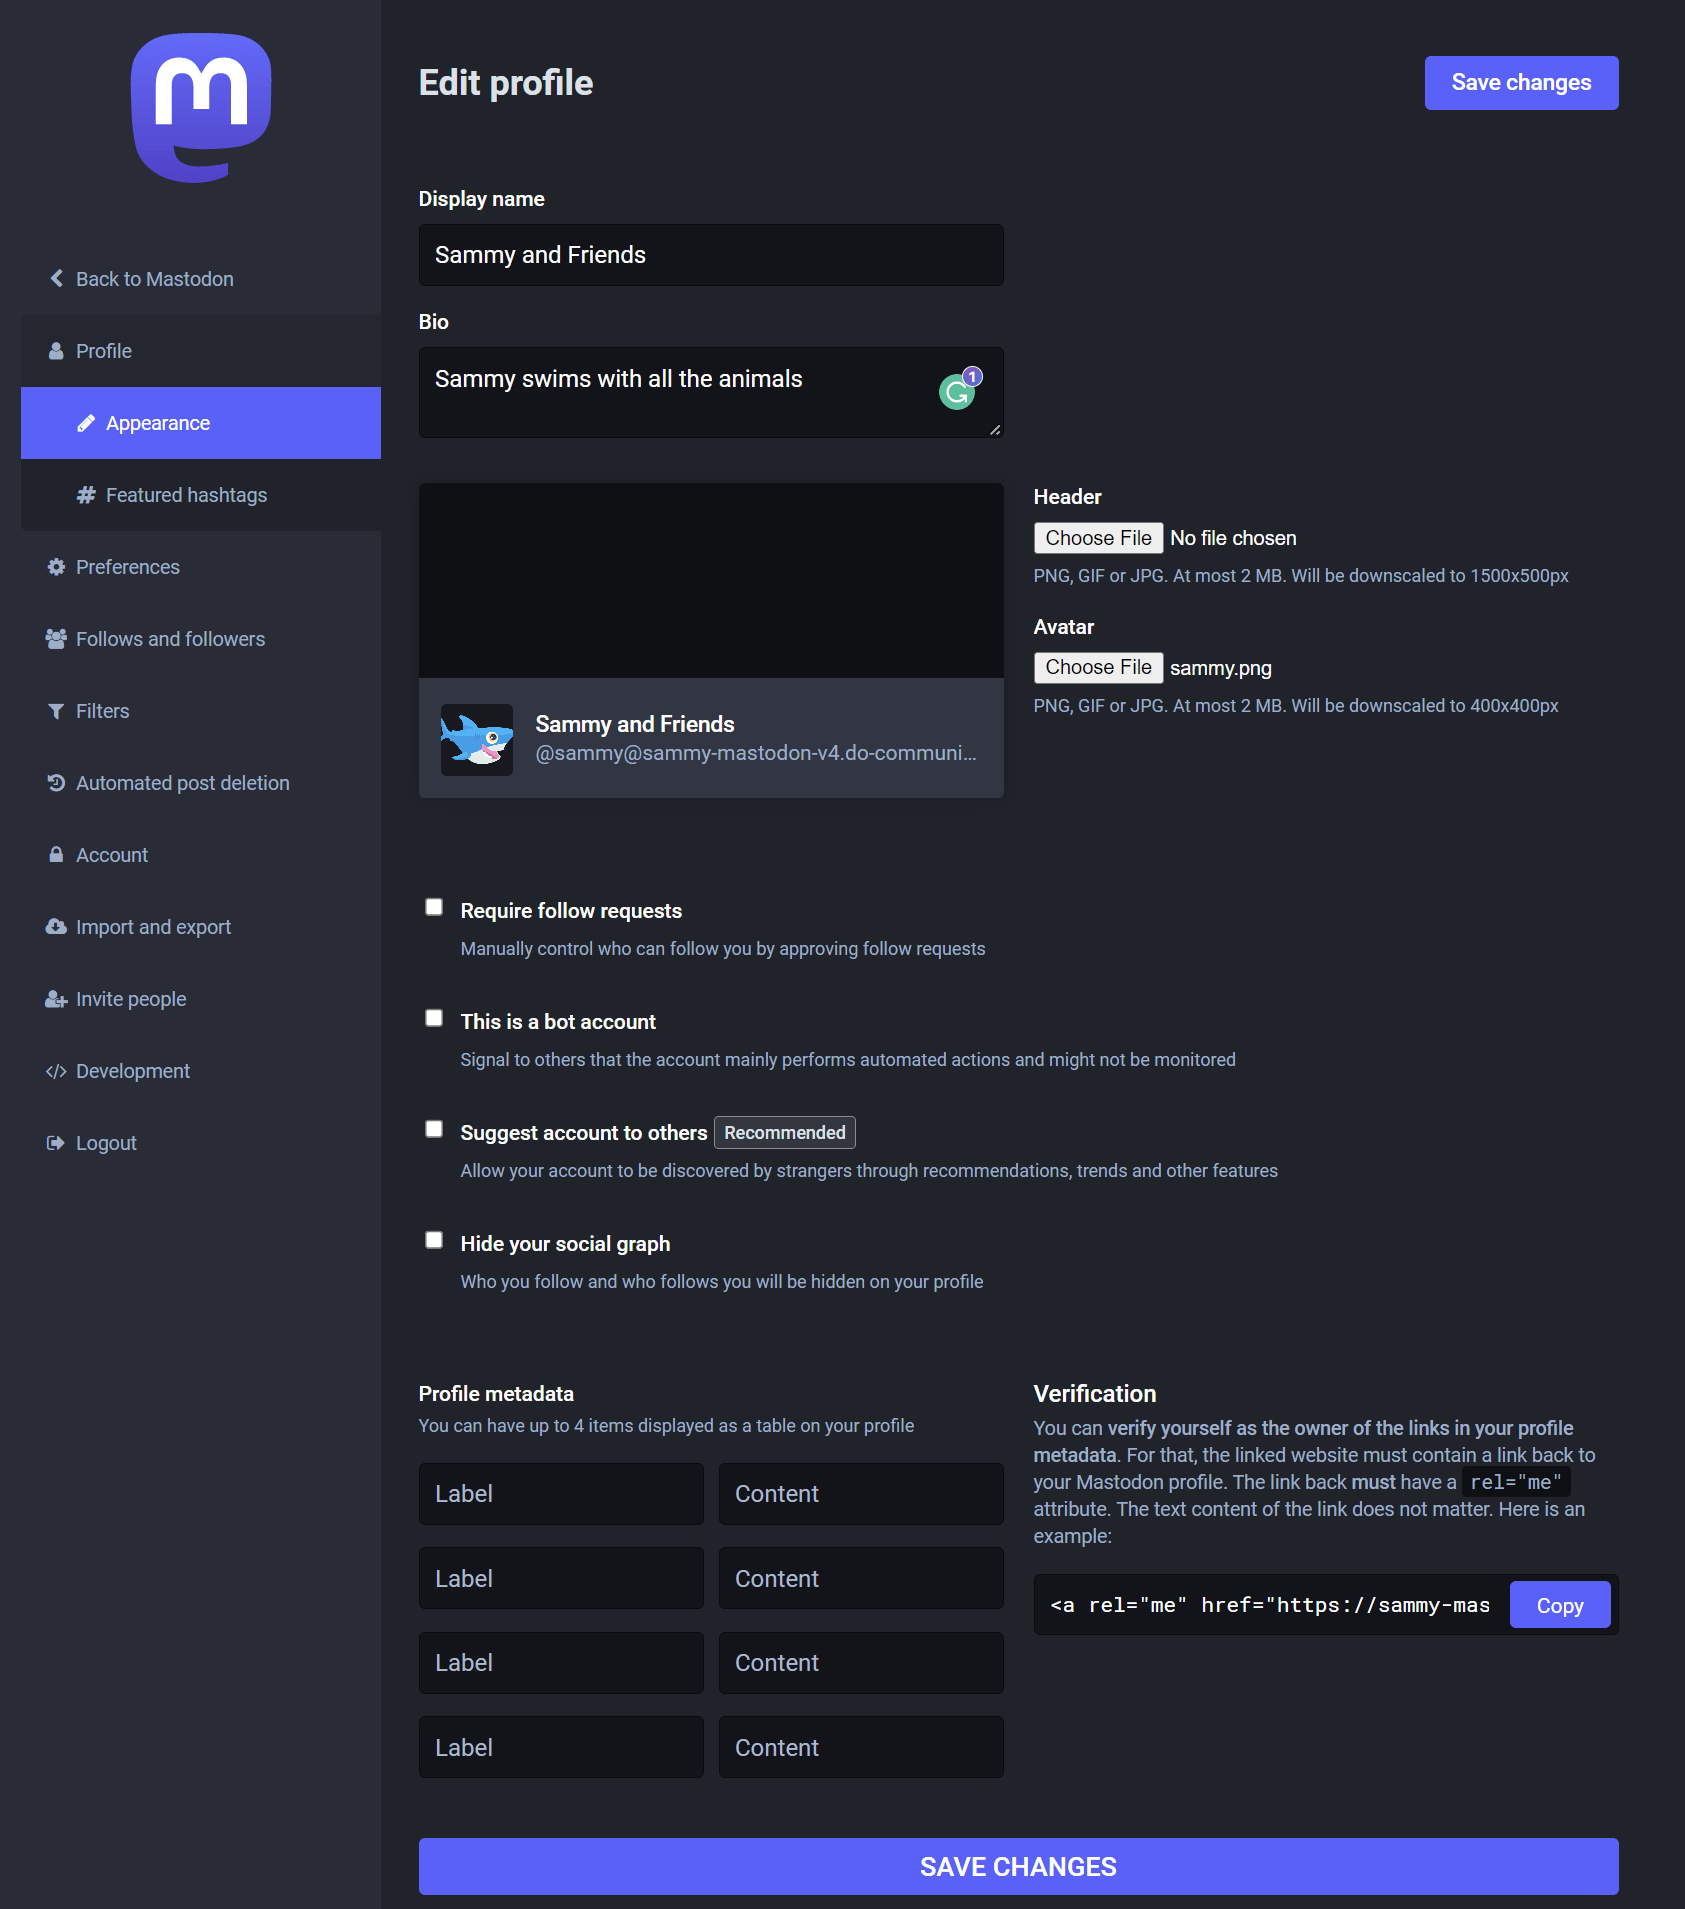
There are other features to note within the Appearance option, such as a formal approval processes for followers’ requests by checking the Require follow requests box. Additionally, if you do not intend to monitor the server, you can operate it on an automated level. You can demonstrate this to others by selecting the This is a bot account box. You also have the option to suggest your account to others so that prospective followers can discover you, or hide who you follow or who follows you from being publicly displayed on your server. Finally, you can include more information such as country, website links, pronouns, and more within the Profile metadata section.
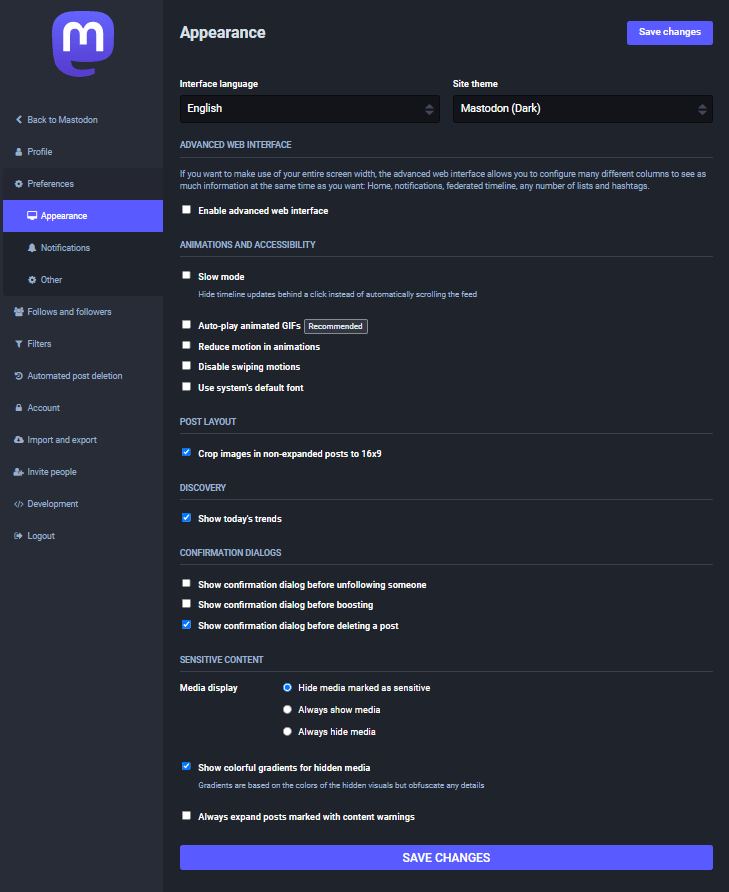
To make changes to your user interface with the site theme option or language, navigate to the Preferences option and select Appearance. On this page, you can select which language you prefer for your server and the site theme, which defaults to the Mastodon (Dark) theme. There are other options you can select regarding animations, accessibility, post layout, discovery for trends, confirmation dialogs that prompt users, and how sensitive content is displayed, hidden, or marked with a warning:
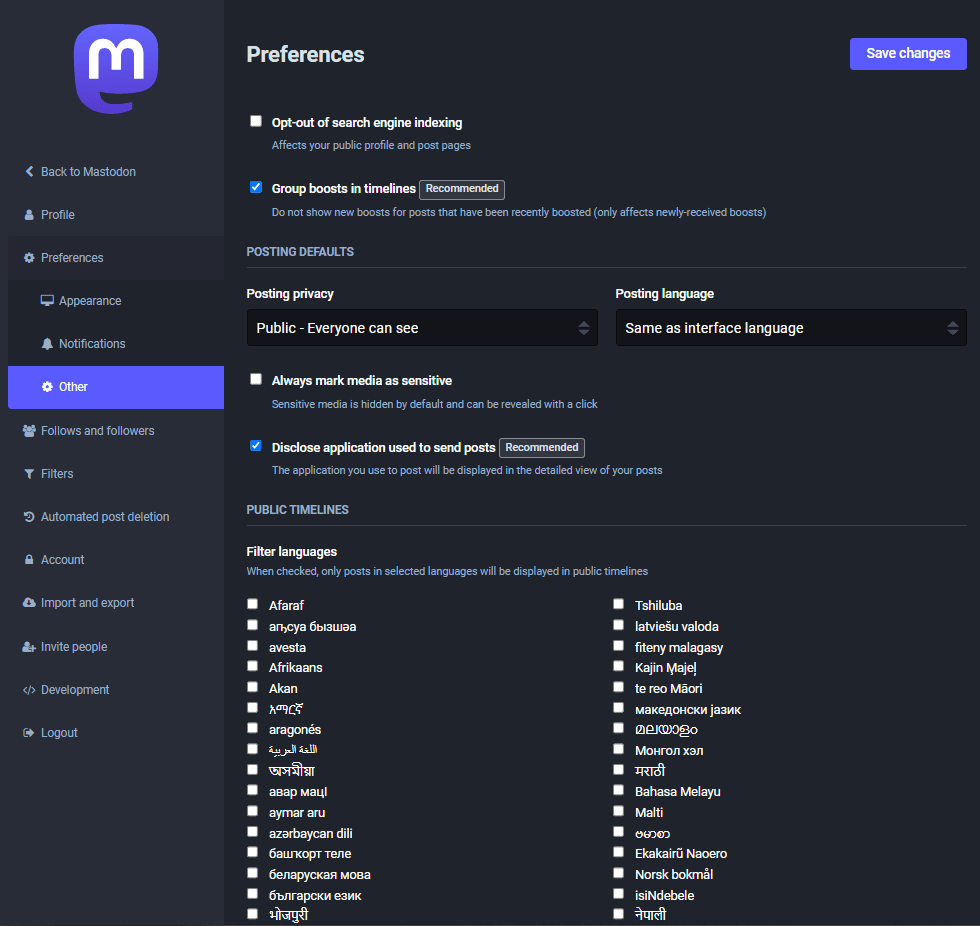
If you navigate to the Other option, you can customize your server regarding features such as search engine indexing if you’d like to decrease the visibility of your server. There are also options for privacy and language for posts, flagging any sensitive media, and disclosing the application you’re using to post (this is already selected by default). You can also select filter languages to curate further what is presented on the server:
As an administrator, you have plenty of options in how you want to customize and present your server to the world.
Step 6 — Managing Accounts on your Server
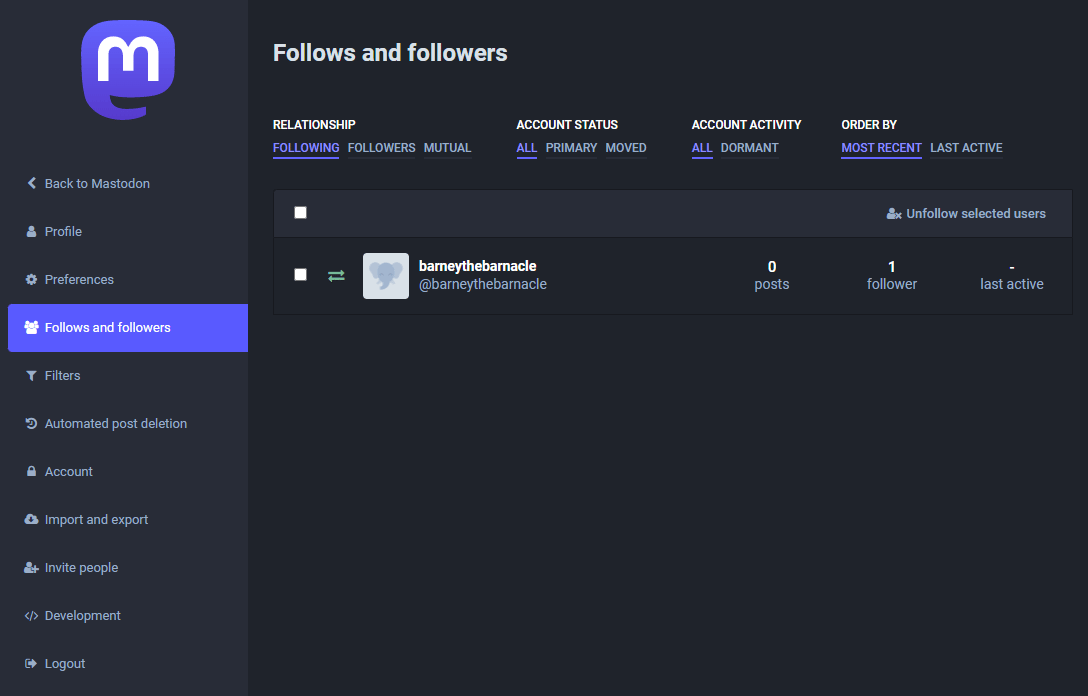
Another valuable feature for Mastodon administrators is follower management. As mentioned previously, Mastodon is comprised of instances that are run on an independent server, typically managed by an administrator. Therefore, if you’re an administrator for your server, you’ll likely have people who have an account set up via your instance. You can view the accounts you follow, and the followers you have on your server by navigating to the Follows and followers option:
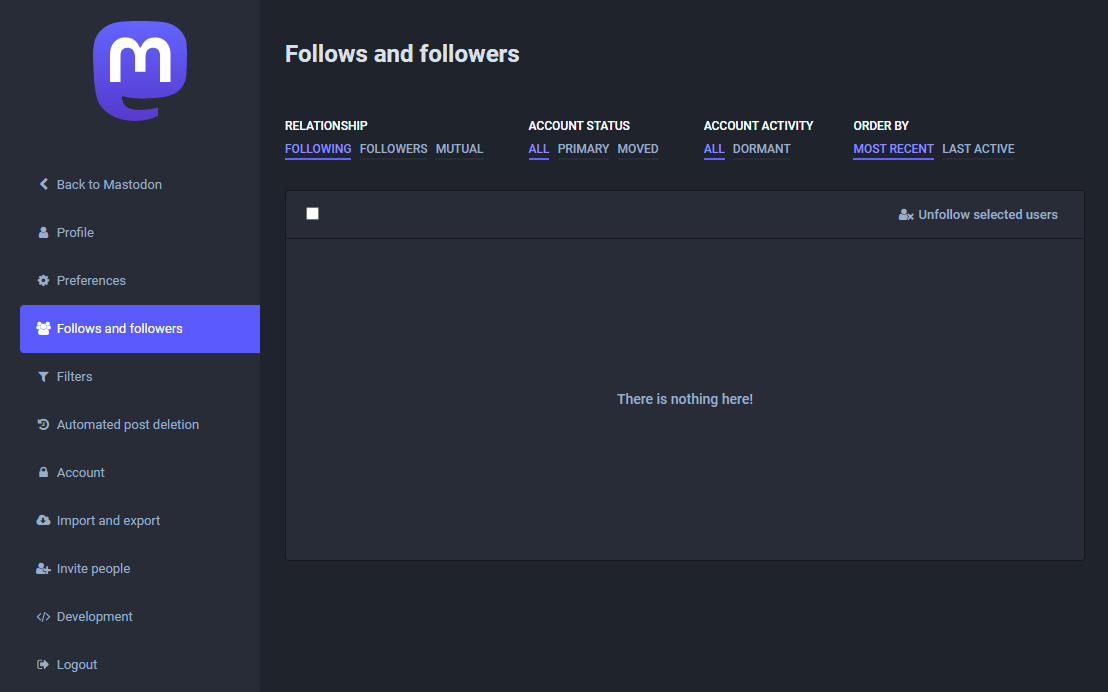
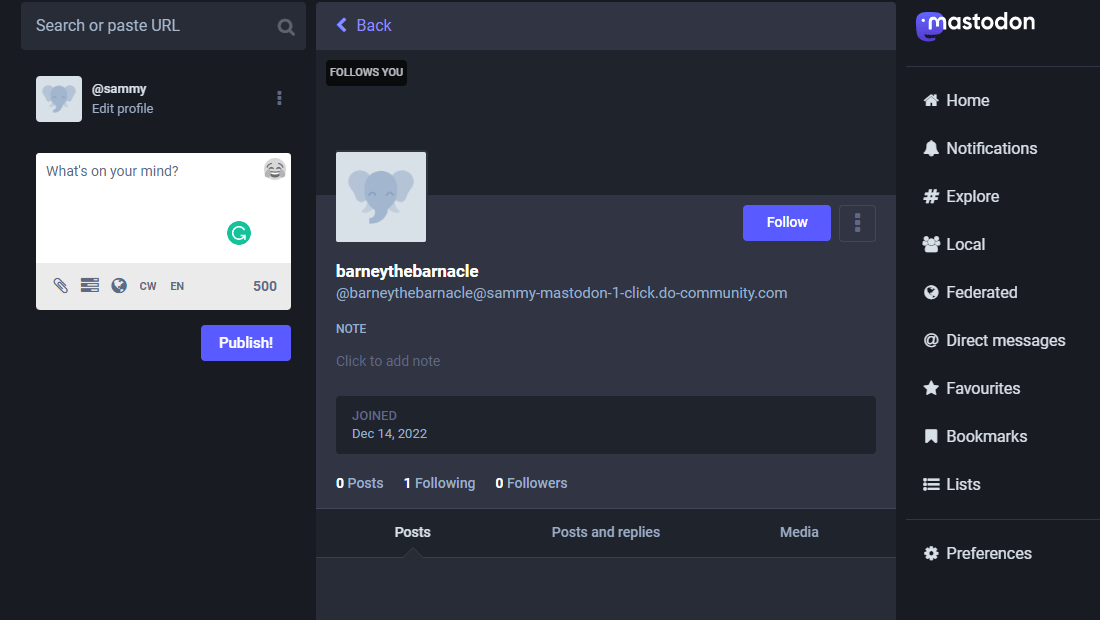
When you navigate to Follows and Followers, there will be several options underlined at the top, including Relationship, Account Status, Account Activity, and Order By. By default, the selection will provide details for the accounts you’re following. If you’re not following anyone, however, your page will appear blank. If you want to check on the accounts following you, select the Followers option. In this example, Sammy has one follower named barneythebarnacle:
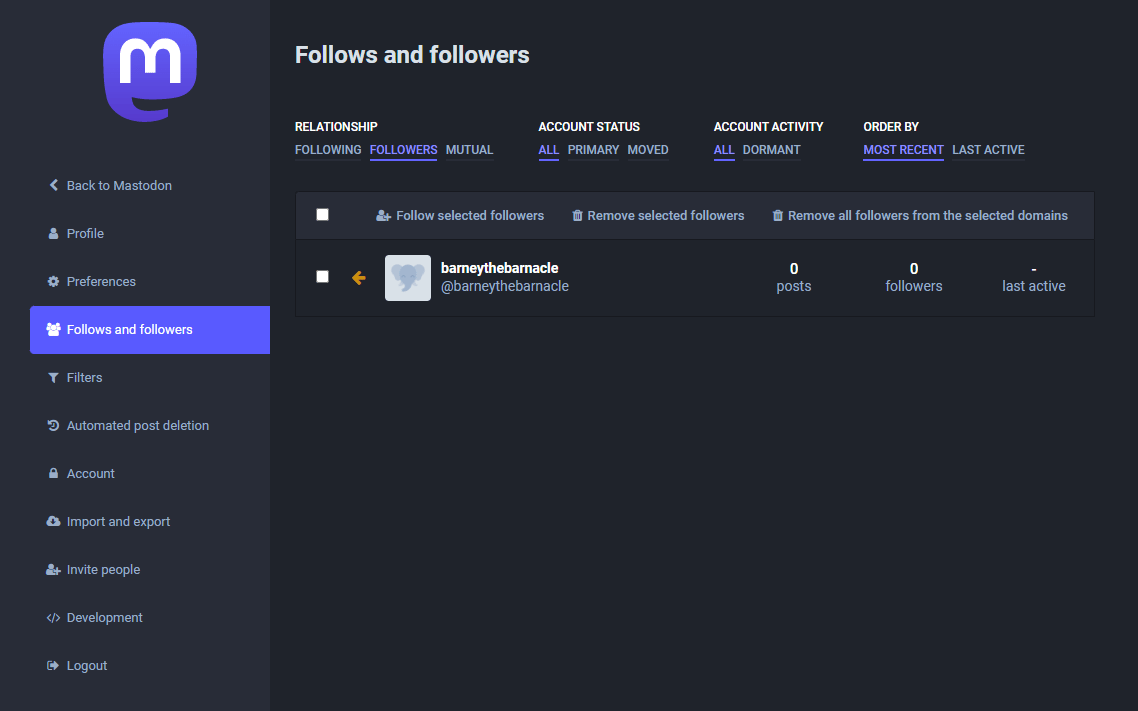
You may notice an arrow pointing to the left, which signifies that this account is following you, but you’re not following them back. If you want to follow an account that’s following you, press on the name, in this example, barneythebarnacle. From there, navigate to this account user’s page, and select the Follow button in the right-hand corner of their profile:
If you return back to your Preferences and the Follows and Followers option, barneythebarnacle is now reflected in the list of accounts you follow. Additionally, there will be two arrows stacked on one another pointing in the opposite direction to signify that you’re following and being followed by the specific account:
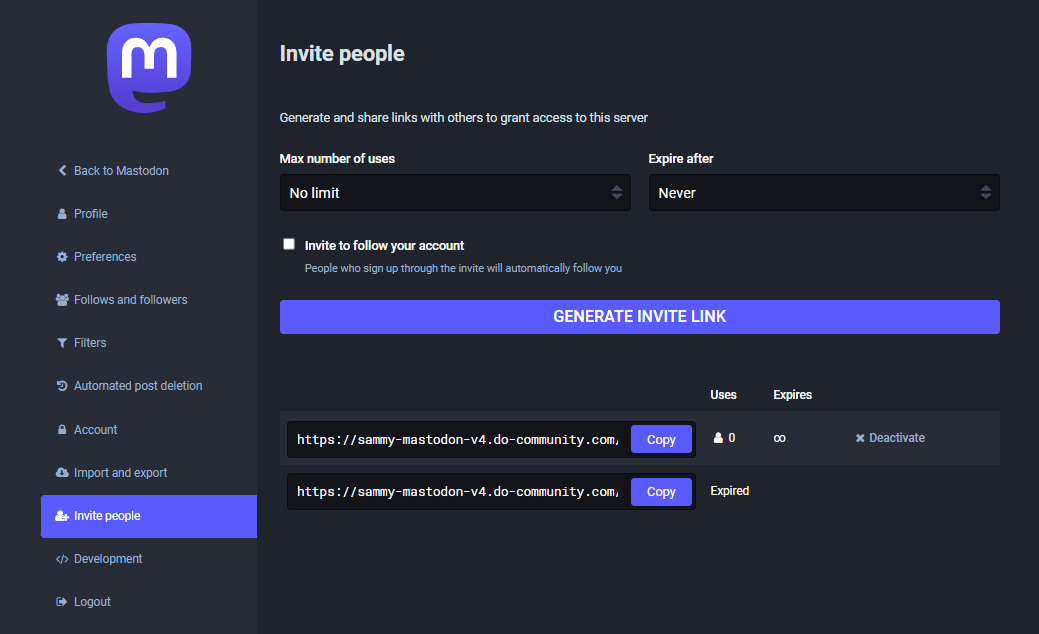
As an administrator, you also have the power to control the type of invites you want to send out to prospective accounts on your server. This can be done by navigating to the Invite People option. Here you can generate and share links that invite others to your server. Since you have these administrative privileges, you can even create a special invite link that will automatically allow accounts to follow you. If you have certain approval processes in place, however, then you may not want to choose this option. You can also limit the number of times this link can be used and even provide an expiration date for it:
As an administrator, you may receive requests by fake or spam accounts, or possibly have issues with existing accounts. In this scenario, you will likely want to implement certain parameters to prevent these types of accounts from gaining access to your server and your other accounts as well. This is very important to maintain the privacy and integrity of your server and those accounts that follow you.
To put some of these measures in place, you can either navigate to the Filters option on the left panel. If there are no current filters, then the page will be blank. If you want to add a filter, press on the button that says Add new filter in the upper-right and input the required information such as title, filter contexts, and the folder action. Filter context can be applied to various aspects of your server, and filter actions are what you want to be performed if this filter is triggered, such as a warning or automatically hiding the content. You can include specific keywords as well if you want to be more granular with the filter:
Overall, having strong account management for your Mastodon server is important to maintain good privacy and security practices to demonstrate that your server is trustworthy to both current and future followers.
Conclusion
Now that you’ve set up your own Mastodon server, you can continue to experiment with it by using the various options to customize your server to your desired appearance and settings. You can also begin boosting engagement by tooting out posts for your followers to read. If you want to learn more about Mastodon, you can check out their official documentation.
Thanks for learning with the DigitalOcean Community. Check out our offerings for compute, storage, networking, and managed databases.
About the author(s)
Educator and writer committed to empowering our community by providing access to the knowledge and tools for making creative ideas into a reality
Associate Technical Writer @ DigitalOcean
Still looking for an answer?
This textbox defaults to using Markdown to format your answer.
You can type !ref in this text area to quickly search our full set of tutorials, documentation & marketplace offerings and insert the link!
The Mastodon 1-Click Droplet is very much NOT available on the DO Marketplace., giving a 404 error instead.
 This work is licensed under a Creative Commons Attribution-NonCommercial- ShareAlike 4.0 International License.
Become a contributor for community
Get paid to write technical tutorials and select a tech-focused charity to receive a matching donation.

DigitalOcean Documentation
Full documentation for every DigitalOcean product.

Resources for startups and AI-native businesses
The Wave has everything you need to know about building a business, from raising funding to marketing your product.
The developer cloud
Scale up as you grow — whether you're running one virtual machine or ten thousand.

Start building today
From GPU-powered inference and Kubernetes to managed databases and storage, get everything you need to build, scale, and deploy intelligent applications.
