By Tamal Chowdhury and Caitlin Postal
Not using Windows 10?
Choose a different version or distribution.
The author selected Code.org to receive a donation as part of the Write for DOnations program.
Introduction
Node.js is a popular JavaScript runtime environment that helps you work with front-end JavaScript libraries such as React, Angular, and Vue. You can also build full-stack applications using Express and Nest frameworks. To build JavaScript applications, you will need a local Node environment.
In this tutorial, you will set up a local Node.js programming environment for your Windows computer.
Prerequisites
You will need a desktop or laptop computer running Windows 10 with administrative access and an internet connection.
Step 1 — Installing Node.js Using Node Version Manager
Node Version Manager or NVM is the preferred method to install Node.js on your computer. NVM lets you maintain multiple versions of Node.js at once, which is helpful if you need to use specific Node versions for different projects. NVM has a Windows version that you will use to install Node.js in this step.
Visit the NVM-windows releases page to acquire the latest version. As of writing this tutorial, the latest NVM version is 1.1.9.
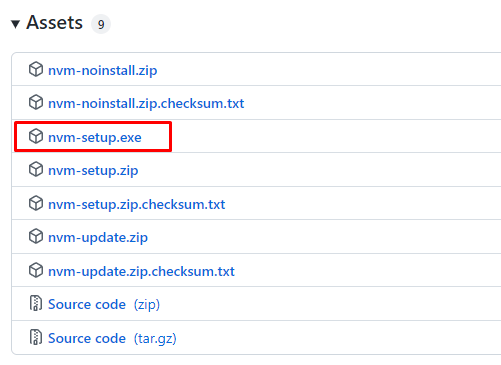
Scroll to the Assets section and click on nvm-setup.exe to download the setup file to your computer’s downloads folder:
After the download finishes, go to your downloads location and double-click the nvm-setup.exe file to start the installation process.
The installation wizard will load and provide options to select, such as the destination folder for the tool:
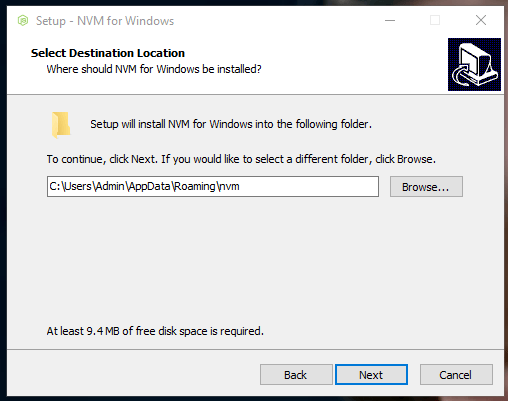
Follow the installation prompts to install NVM on your computer.
Next, open the Terminal, Command Prompt, or PowerShell as Administrator on your computer.
Use this command to verify the NVM installation:
- nvm -v
You will see the following output with the NVM version number:
OutputRunning version 1.1.9.
...
You can view which Node versions are available for you to install with this command:
- nvm list available
You will see a list of Node versions:
Output|   CURRENT    |     LTS      |  OLD STABLE  | OLD UNSTABLE |
|--------------|--------------|--------------|--------------|
|    18.7.0    |   16.16.0    |   0.12.18    |   0.11.16    |
|    18.6.0    |   16.15.1    |   0.12.17    |   0.11.15    |
|    18.5.0    |   16.15.0    |   0.12.16    |   0.11.14    |
|    18.4.0    |   16.14.2    |   0.12.15    |   0.11.13    |
|    18.3.0    |   16.14.1    |   0.12.14    |   0.11.12    |
|    18.2.0    |   16.14.0    |   0.12.13    |   0.11.11    |
|    18.1.0    |   16.13.2    |   0.12.12    |   0.11.10    |
|    18.0.0    |   16.13.1    |   0.12.11    |    0.11.9    |
|    17.9.1    |   16.13.0    |   0.12.10    |    0.11.8    |
|    17.9.0    |   14.20.0    |    0.12.9    |    0.11.7    |
|    17.8.0    |   14.19.3    |    0.12.8    |    0.11.6    |
|    17.7.2    |   14.19.2    |    0.12.7    |    0.11.5    |
|    17.7.1    |   14.19.1    |    0.12.6    |    0.11.4    |
|    17.7.0    |   14.19.0    |    0.12.5    |    0.11.3    |
|    17.6.0    |   14.18.3    |    0.12.4    |    0.11.2    |
|    17.5.0    |   14.18.2    |    0.12.3    |    0.11.1    |
|    17.4.0    |   14.18.1    |    0.12.2    |    0.11.0    |
|    17.3.1    |   14.18.0    |    0.12.1    |    0.9.12    |
|    17.3.0    |   14.17.6    |    0.12.0    |    0.9.11    |
|    17.2.0    |   14.17.5    |   0.10.48    |    0.9.10    |
Node has two major versions: Current and LTS for long-term support. For development purposes, it’s recommended to install the LTS version. You can also read more about which Node version to use.
You will then install the latest LTS version from this list with the following command:
- nvm install 16.16.0
Node.js version 16.16.0 will be installed on your computer:
OutputDownloading node.js version 16.16.0 (64-bit)...
Extracting...
Complete

Installation complete. If you want to use this version, type

nvm use 16.16.0
Review the Node versions installed on your computer:
- nvm list
You will see a list with the available Node versions:
Output    16.16.0
  * 16.15.0 (Currently using 64-bit executable)
    14.16.0
    8.12.0
If you have more than one version installed, you can select a different version from this list with nvm use, specifying the version you would like to use:
- nvm use 16.16.0
You will see an output like this:
OutputNow using node v16.16.0 (64-bit)
Use the following command to verify the Node version:
- node --version
You will see the Node version in the output:
Outputv16.16.0
Node also installs the Node Package Manager (NPM) to install and manage Node packages. Use the following command to verify the NPM version:
- npm --version
You will see the NPM version in the output:
Output8.11.0
In this step, you installed Node. To complete your local development environment setup, you will also need Git Bash on your Windows computer, which you will install in the next step.
Step 2 — Installing Git Bash
In this step, you will install Git Bash on your computer. Git is a popular version control system, while Bash is a popular terminal program for the Linux operating system.
As a Windows user, you can do most tasks with the built-in Windows command prompt or PowerShell. However, Linux-based commands are the standard in modern development workflows. By using and learning Bash commands, you will be able to follow the majority of programming tutorials.
If you are running Windows 11 or have the latest development version of Windows 10, you can install Git using the winget command line utility:
- winget install --id Git.Git -e --source winget
The winget tool is the client interface to the Windows Package Manager service.
The --id flag tells winget to install a package identified by its unique ID. The -e or exact flag requires case sensitivity. The --source flag ensures installation from the given source: in this case, the winget repository.
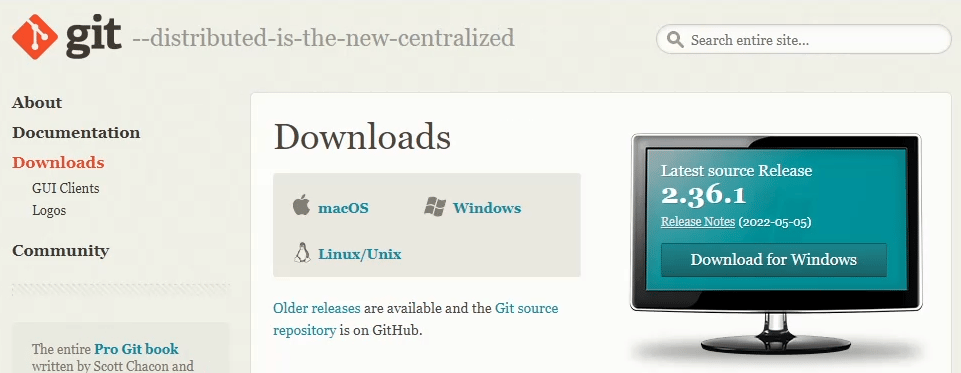
You can also install Git Bash with the installation wizard by visiting Git’s website:
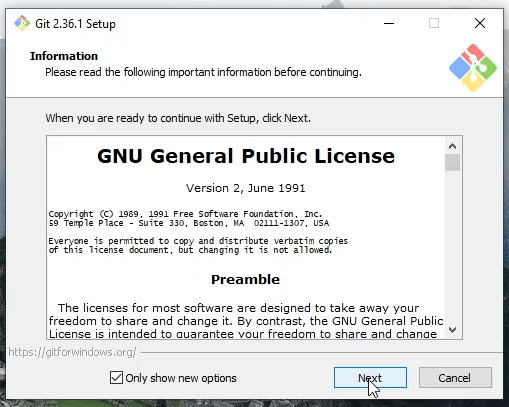
If you choose to use the installation wizard, you can run the installation file with the default settings when it finishes downloading:
To verify your Git installation, run the following command:
- git --version
You will see the version:
Outputgit version 2.30.2.windows.1
With the necessary tools on your computer, you can now create a simple Node.js program to test that everything works as expected.
Step 3 — Creating a Simple Program
In this step, you will create a simple “Hello, World” app to test the Node.js runtime.
Open the Git Bash app you just installed. Then use the following command to create a new file with nano, a command-line text editor:
- nano hello.js
Alternatively, you can open this file in your preferred editor, such as VSCode.
Add the following lines to the hello.js file:
let message = "Hello, World!";
console.log(message);
First, you define the message variable with a string of Hello, World!. Then, console.log will display the contents of the message variable when the file is run.
Save and close the file.
Now run this program with Node:
- node hello.js
The program executes and displays its output to the screen:
OutputHello, World!
Node.js allows you to execute JavaScript code without a browser, which is why you could run the hello.js file.
Conclusion
Node is a robust JavaScript runtime environment. In this tutorial, you created your local Node development environment in Windows 10.
Now that you have your local development environment set up in Windows, you can set up a Node server and start building front-end applications by following our tutorials for React, Angular, and Vue.js. For full-stack development, you can set up projects in Express.
Thanks for learning with the DigitalOcean Community. Check out our offerings for compute, storage, networking, and managed databases.
About the author(s)
Helping you to become a modern web developer
Still looking for an answer?
This textbox defaults to using Markdown to format your answer.
You can type !ref in this text area to quickly search our full set of tutorials, documentation & marketplace offerings and insert the link!
 This work is licensed under a Creative Commons Attribution-NonCommercial- ShareAlike 4.0 International License.
Become a contributor for community
Get paid to write technical tutorials and select a tech-focused charity to receive a matching donation.

DigitalOcean Documentation
Full documentation for every DigitalOcean product.

Resources for startups and AI-native businesses
The Wave has everything you need to know about building a business, from raising funding to marketing your product.
The developer cloud
Scale up as you grow — whether you're running one virtual machine or ten thousand.

Start building today
From GPU-powered inference and Kubernetes to managed databases and storage, get everything you need to build, scale, and deploy intelligent applications.
