Not using CentOS 7?
Choose a different version or distribution.
Introduction
Django is a powerful framework for writing Python web applications. Using a full-featured framework like Django allows you to get your applications and sites up and running quicker without having to worry about the common structural code to tie it together. Frameworks let you focus on the unique portions of your application and let the tools do the heavy lifting.
In this guide, we will demonstrate various methods of installing Django on a CentOS 7 server. After installation, we will briefly show you how to start a project to use as the basis for your site.
Install the EPEL Repository
All of the installation methods that we will discuss below rely on the EPEL repository for CentOS and RedHat-like distributions. The EPEL repository contains extra packages not maintained as part of the core distribution, which is fairly sparse.
Configuring access to the EPEL repository is significantly simpler that it has been in the past. On your server, you can configure yum to use the EPEL repository by typing:
sudo yum install epel-release
You will now have access to all of the applications maintained within the EPEL repository.
Different Methods
There are a number of different ways in which you can install Django depending upon your needs and how you want to configure your development environment. These have different advantages and one method may lend itself better to your specific situation than others.
Some of the different methods are below:
- Global Install from Packages: The EPEL repository contain Django packages that can be installed easily with the conventional
yumpackage manager. This is very simple, but not as flexible as some other methods. Also, the version contained in the repositories may lag behind the official versions available from the project. - Global Install through pip: The
piptool is a package manager for Python packages. If you installpip, you can easily install Django on the system level for use by any user. This should always contain the latest stable release. Even so, global installations are inherently less flexible. - Install through pip in a Virtualenv: The Python
virtualenvpackage allows you to create self-contained environments for various projects. Using this technology, you can install Django in a project directory without affecting the greater system. This allows you to provide per-project customizations and packages easily. Virtual environments add some slight mental and process overhead in comparison to globally accessible installation, but provide the most flexibility. - Development Version Install through git: If you wish to install the latest development version instead of the stable release, you will have to acquire the code from the
gitrepo. This is necessary to get the latest features/fixes and can be done globally or locally. Development versions do not have the same stability guarantees, however.
With the above caveats and qualities in mind, select the installation method that best suites your needs out of the below instructions.
Global Install from Packages
If you wish to install Django using the EPEL repository, the process is very straight forward.
You can simply use the yum package manager to download and install the relevant packages:
sudo yum install python-django
You can test that the installation was successful by typing:
django-admin --version
1.6.10
This means that the software was successfully installed. You may also notice that the Django version is not the latest stable. To learn a bit about how to use the software, skip ahead to learn how to create sample project.
Global Install through pip
If you wish to install the latest version of Django globally, a better option is to use pip, the Python package manager. First, we need to install the pip package manager.
You can install pip from the EPEL repositories by typing:
sudo yum install python-pip
Once you have pip, you can easily install Django globally by typing:
sudo pip install django
You can verify that the installation was successful by typing:
django-admin --version
1.7.5
As you can see, the version available through pip is more up-to-date than the one from the EPEL repository (yours will likely be different from the above).
Install through pip in a Virtualenv
Perhaps the most flexible way to install Django on your system is with the virtualenv tool. This tool allows you to create virtual Python environments where you can install any Python packages you want without affecting the rest of the system. This allows you to select Python packages on a per-project basis regardless of conflicts with other project’s requirements.
We will begin by installing pip from the EPEL repository:
sudo yum install python-pip
Once pip is installed, you can use it to install the virtualenv package by typing:
sudo pip install virtualenv
Now, whenever you start a new project, you can create a virtual environment for it. Start by creating and moving into a new project directory:
mkdir ~/newproject
cd ~/newproject
Now, create a virtual environment within the project directory by typing:
virtualenv newenv
This will install a standalone version of Python, as well as pip, into an isolated directory structure within your project directory. We chose to call our virtual environment newenv, but you should name it something descriptive. A directory will be created with the name you select, which will hold the file hierarchy where your packages will be installed.
To install packages into the isolated environment, you must activate it by typing:
source newenv/bin/activate
Your prompt should change to reflect that you are now in your virtual environment. It will look something like (newenv)username@hostname:~/newproject$.
In your new environment, you can use pip to install Django. Note that you do not need to use sudo since you are installing locally:
pip install django
You can verify the installation by typing:
django-admin --version
1.7.5
To leave your virtual environment, you need to issue the deactivate command from anywhere on the system:
deactivate
Your prompt should revert to the conventional display. When you wish to work on your project again, you should re-activate your virtual environment by moving back into your project directory and activating:
cd ~/newproject
source newenv/bin/activate
Development Version Install through git
If you need a development version of Django, you will have to download and install Django from its git repository.
To do so, you will need to install git on your system with yum. We will also install the pip Python package manager. We will use this to handle the installation of Django after it has been downloaded:
sudo yum install git python-pip
Once you have git, you can clone the Django repository. Between releases, this repository will have more up-to-date features and bug fixes at the possible expense of stability. You can clone the repository to a directory called django-dev within your home directory by typing:
git clone git://github.com/django/django ~/django-dev
Once the repository is cloned, you can install it using pip. We will use the -e option to install in “editable” mode, which is needed when installing from version control:
sudo pip install -e ~/django-dev
You can verify that the installation was successful by typing:
django-admin --version
1.9.dev20150305200340
Note that you can also combine this strategy with the use of virtualenv above if you wish to install a development version of Django in a single environment.
Creating a Sample Project
Now that you have Django installed, we can show you briefly how to get started on a project.
You can use the django-admin command to create a project:
django-admin startproject projectname
cd projectname
This will create a directory called projectname within your current directory. Within this, a management script will be created and another directory called projectname will be created with the actual code.
Note: If you were already in a project directory that you created for use with the virtualenv command, you can tell Django to place the management script and inner directory into the current directory without the extra layer by typing this (notice the ending dot):
django-admin startproject projectname .
To bootstrap the database (this uses SQLite by default) on more recent versions of Django, you can type:
python manage.py migrate
If the migrate command doesn’t work, you likely are using an older version of Django (perhaps instal. Instead, you can type:
python manage.py syncdb
You will be asked to create an administrative user as part of this process. Select a username, email address, and password for the user.
If you used the migrate command above, you’ll need to create the administrative user manually. You can create an administrative user by typing:
python manage.py createsuperuser
You will be prompted for a username, an email address, and a password for the user.
Once you have a user, you can start up the Django development server to see what a fresh Django project looks like. You should only use this for development purposes. Run:
python manage.py runserver 0.0.0.0:8000
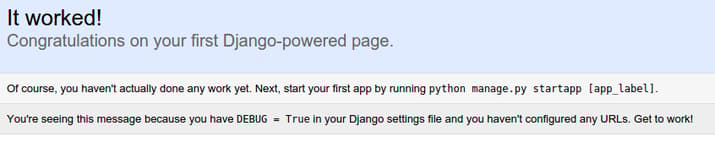
Visit your server’s IP address followed by :8000 in your web browser
server_ip_address:8000
You should see something that looks like this:
Now, append /admin to the end of your URL to get to the admin login page:
server_ip_address:8000/admin
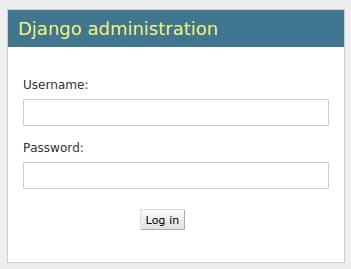
If you enter the admin username and password that you just created, you should be taken to the admin section of the site:
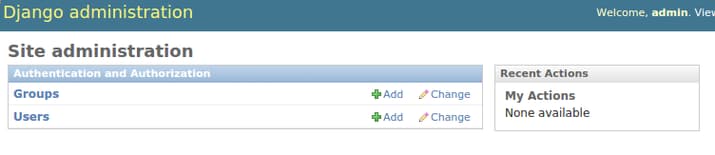
When you are finished looking through the default site, you can stop the development server by typing CTRL-C in your terminal.
The Django project you’ve created provides the structural basis for designing a more complete site. Check out the Django documentation for more information about how to build your applications and customize your site.
Conclusion
You should now have Django installed on your CentOS 7 server, providing the main tools you need to create powerful web applications. You should also know how to start a new project and launch the developer server. Leveraging a complete web framework like Django can help make development faster, allowing you to concentrate only on the unique aspects of your applications.
Thanks for learning with the DigitalOcean Community. Check out our offerings for compute, storage, networking, and managed databases.
About the author
Former Senior Technical Writer at DigitalOcean, specializing in DevOps topics across multiple Linux distributions, including Ubuntu 18.04, 20.04, 22.04, as well as Debian 10 and 11.
Still looking for an answer?
This textbox defaults to using Markdown to format your answer.
You can type !ref in this text area to quickly search our full set of tutorials, documentation & marketplace offerings and insert the link!
I am new to Python and Django and i found this tutorial easy to use so i was following the steps for Install through pip in a Virtualenv as i managed to install pip. it was working fine till i run pip install django command i got this output:
(djenv)[root@blue djProject]# pip install django
/root/djProject/djenv/lib/python2.6/site-packages/pip/_vendor/requests/packages/urllib3/util/ssl_.py:90: InsecurePlatformWarning: A true SSLContext object is not available. This prevents urllib3 from configuring SSL appropriately and may cause certain SSL connections to fail. For more information, see https://urllib3.readthedocs.org/en/latest/security.html#insecureplatformwarning.
  InsecurePlatformWarning
Collecting django
/root/djProject/djenv/lib/python2.6/site-packages/pip/_vendor/requests/packages/urllib3/util/ssl_.py:90: InsecurePlatformWarning: A true SSLContext object is not available. This prevents urllib3 from configuring SSL appropriately and may cause certain SSL connections to fail. For more information, see https://urllib3.readthedocs.org/en/latest/security.html#insecureplatformwarning.
  InsecurePlatformWarning
  Using cached Django-1.8.3-py2.py3-none-any.whl
Installing collected packages: django
Successfully installed django-1.8.3
And after that when i try checking the version using django-admin --version command i got this error which i don’t understand:
(djenv)[root@blue djProject]# clear; django-admin --version

Traceback (most recent call last):
  File "/root/djProject/djenv/bin/django-admin", line 7, in <module>
    from django.core.management import execute_from_command_line
  File "/root/djProject/djenv/lib/python2.6/site-packages/django/__init__.py", line 1, in <module>
    from django.utils.version import get_version
  File "/root/djProject/djenv/lib/python2.6/site-packages/django/utils/version.py", line 7, in <module>
    from django.utils.lru_cache import lru_cache
  File "/root/djProject/djenv/lib/python2.6/site-packages/django/utils/lru_cache.py", line 28
    fasttypes = {int, str, frozenset, type(None)},
                    ^
SyntaxError: invalid syntax
Can anyone please help me with this error please.
Here is a video url How to install pip, virtualenv, django on Centos 7-- Django tutorial series lecture 1 that will help you much more than others because it’s so clear to understand.
 This work is licensed under a Creative Commons Attribution-NonCommercial- ShareAlike 4.0 International License.
Become a contributor for community
Get paid to write technical tutorials and select a tech-focused charity to receive a matching donation.

DigitalOcean Documentation
Full documentation for every DigitalOcean product.

Resources for startups and AI-native businesses
The Wave has everything you need to know about building a business, from raising funding to marketing your product.
The developer cloud
Scale up as you grow — whether you're running one virtual machine or ten thousand.

Start building today
From GPU-powered inference and Kubernetes to managed databases and storage, get everything you need to build, scale, and deploy intelligent applications.
